Running a field survey with EDIT
What it is for
EDIT is the application your field staff install on their tablet or phone. It lets them view plans on the move in order to update the portfolio as described in Stonal.
In the field, your staff create annotations on the plans to report the updates needed: create a piece of equipment missing from the plans, modify one, delete one. Those annotations are then confirmed, and partly processed automatically to update your portfolio.
Before you start
For now, EDIT relies on the plans of your properties. A field survey is not possible on a property without a plan.
Access to EDIT depends on the scope defined by your organisation.
Installing the application
Video tutorial, 1 min 10: placing the shortcut on your phone's home screen.
- Sign in to your organisation's address from the tablet or phone.
- On Android, choose "Add to home screen". On iPhone or iPad, "Add to Home Screen".
A new interface was released on 22 May 2026. If the application was already installed on your phone, you must uninstall it and reinstall it. Before uninstalling the previous version, remember to synchronise your annotations if they were entered offline.
The new address is: https://app.stonal.io/edit/
The previous address was of the form: https://edit.stonal.io/
The screen explained
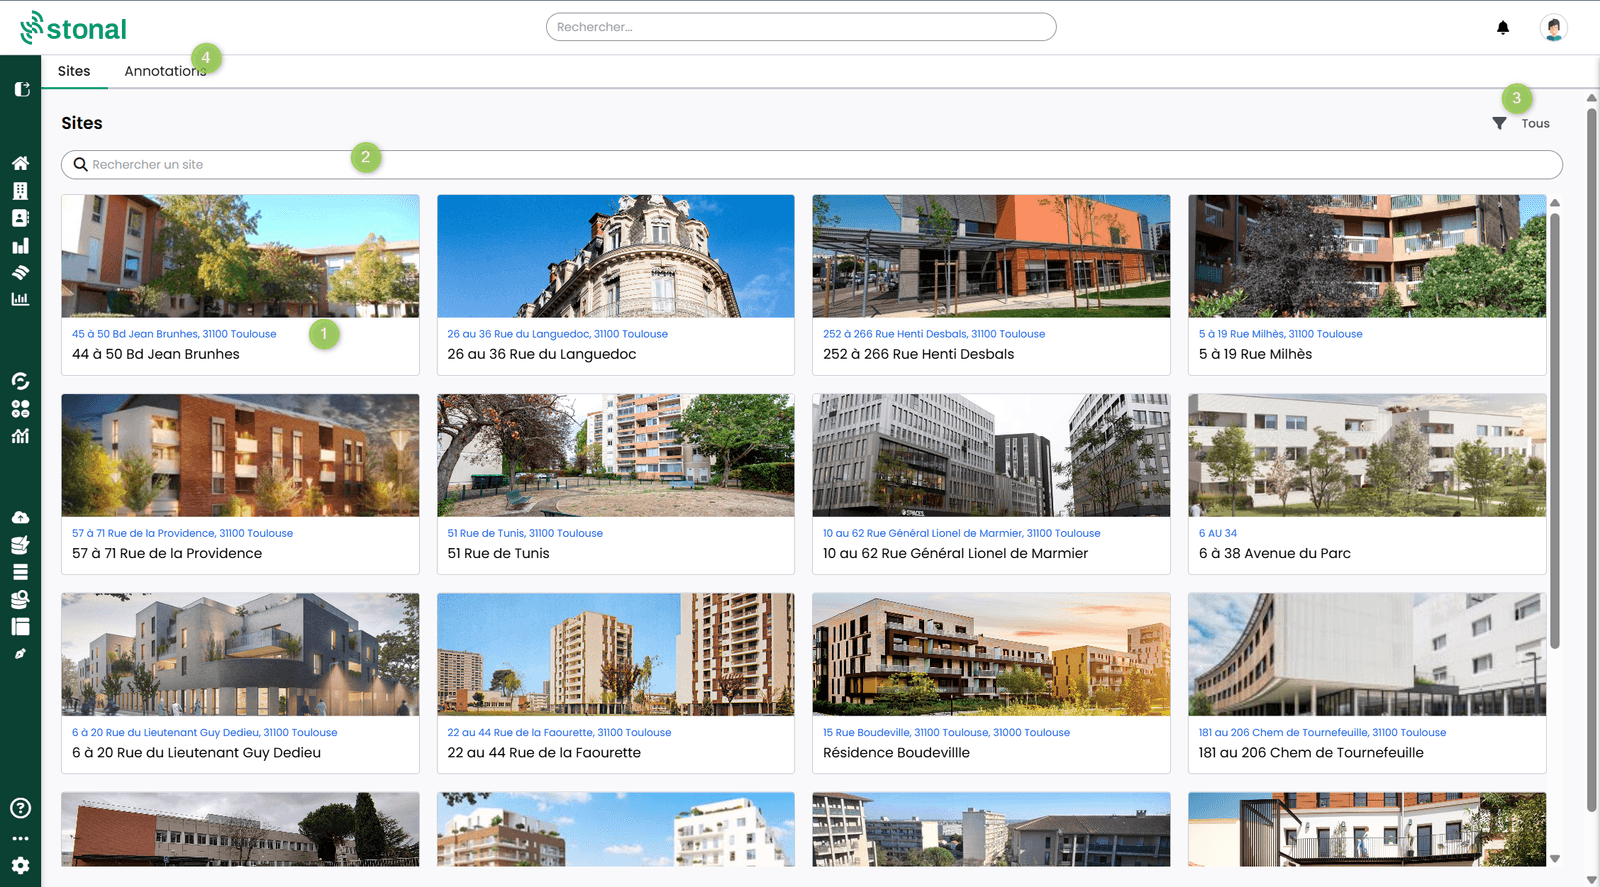
- Property — click a property to open its model.
- Search — find your property.
- Filter — show only properties that carry annotations.
- Annotations — every annotation in the portfolio, with grouped actions.
Finding your property
- Search works on the name and on the code, ignores upper and lower case, and accepts a partial entry.
- Show only properties with a plan, since a survey needs one.
- Filter by portfolio, as on the main platform.
- The address of the building is shown as you move down towards the plans.
Step by step
Place an annotation
Video tutorial, 1 min 37: annotating the plan and updating a component from the field.
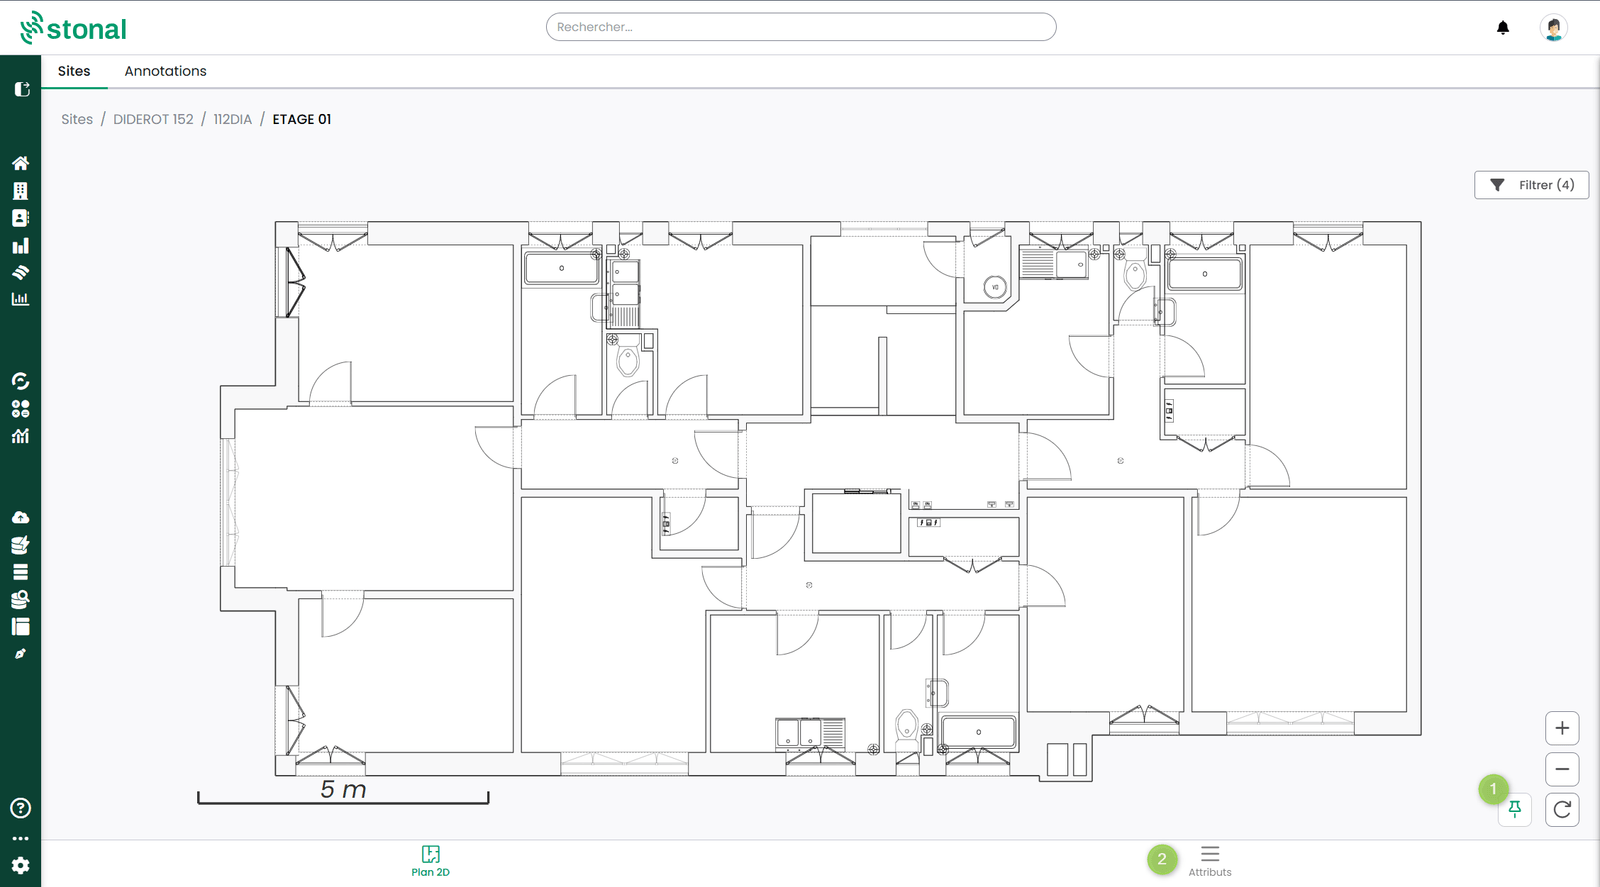
- Annotation — to place a pin on the plan.
- Attributes — to open the properties of the selected component.
The steps themselves:
- Select a site, then a building (or an outdoor space), then a floor.
- Click the Annotation icon. Annotation mode is off when you open a plan, so that the plan loads faster and stays readable. Once you switch it on, the application remembers your choice.
- Click the room or the piece of equipment concerned — on a phone, press and hold.
- Fill in the information and attach one or more files if needed.
The window reminds you of the site, the building and the floor you are annotating, so you can check you are in the right place. When you choose a type of equipment, the list opens straight at the level you are already in, instead of starting again from the top.
If the point you click covers more than one piece of equipment, a "Several pieces of equipment here" window lists them and asks you to pick the one to annotate. This is what lets you reach a piece of equipment hidden underneath another, instead of creating a duplicate.
Moved the pin by mistake, or placed it slightly off? You can drag an existing pin to the right spot. There is no need to delete the annotation and create it again.
The colour code of the pins:
| Colour | Meaning |
|---|---|
| Purple | General information |
| Green | Creating a component |
| Red | Deleting a component |
Three tips for usable annotations
- Create one annotation per piece of equipment or per finish. A single overall annotation covering several changes cannot be acted upon.
- For a replacement or a deletion, place the annotation by clicking the original equipment on the plan.
- For a creation or a replacement, select the type and characteristics of the new equipment.
Find and handle an annotation
Open the Annotations tab, filter on the To handle status, then open the annotation. The View on plan button takes you back to it.
To change the status, open the annotation and change it at the top of the page. You can filter the plan to show only handled annotations.
The "View annotations" button on the main page opens every annotation across your portfolio, with bulk actions.
The same filters are available on the plan and in the annotation list, so there is only one set to learn: by status, by equipment family, and by branch, agency or property. The name of the property is shown on each annotation, which makes it quicker to find the one you are after.
On the plan, the Legend button reminds you what each pin means:
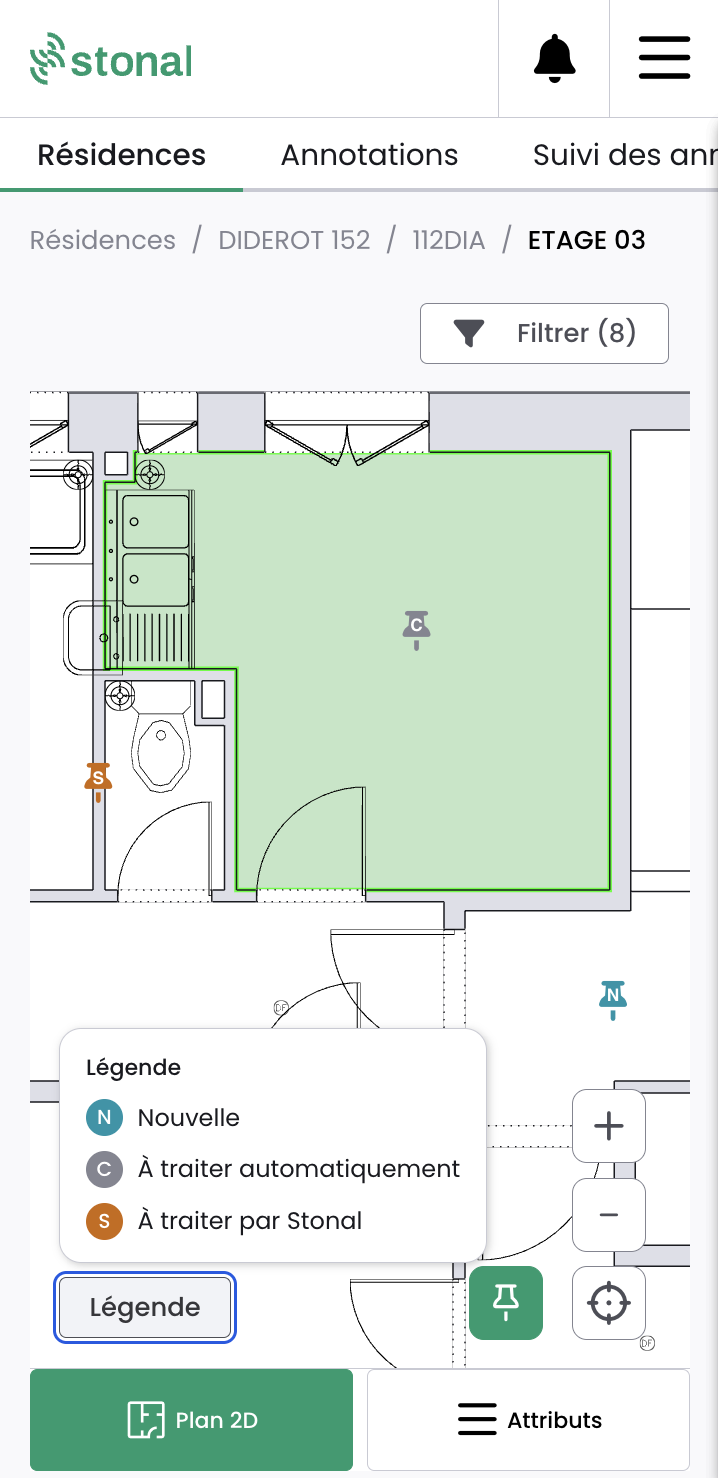
| Pin | Meaning |
|---|---|
| N — New | The annotation has just been created |
| C — To be handled automatically | It will be picked up automatically to update the portfolio |
| S — To be handled by Stonal | It needs our teams to step in |
To delete, open the annotation and click Delete.
Update the attributes of a component
Click the component, then the Attributes button. Change the condition or the survey date.
Two attributes matter particularly: the overall condition and the date of last renewal. They are the ones used to track wear and that feed your Works Plans.
Unlike annotations, a change to an attribute goes through no approval process: it takes effect directly.
An attribute in black type is editable, an attribute in grey type is read-only — this depends on your internal contacts' choices.
Finding your way around the plan
Above the plan, a row of buttons gives you the same reading tools as the Plans tab of the platform. On a tablet or a computer each button opens a drop-down list; on a phone it opens a window.
| Button | What it does |
|---|---|
| Themes | Colour the plan by a criterion, for instance the type of room. A legend appears with the colours used. |
| Labels | Show a label on the elements of the plan: room name, area, dwelling number. |
| Plan display | Show or hide the layers of the plan: drawing lines, dimensions, façade outline, equipment, openings, room names, dwelling numbers. |
| Legend | A reminder of what each annotation pin means. |
Room names, dwelling numbers and dimensions are hidden when you open a plan. Displayed all together they overlap each other and hide the annotation pins. Switch on only the one you need.
A button only offers a layer that the plan actually contains. Dwelling numbers, for instance, require your areas to be linked to coded dwellings.
Two things make the pins easier to read: each pin is coloured according to its status, and pins keep a minimum size when you zoom out, so they stay visible on a large plan.
What happens after your survey
Handling is semi-automatic: it depends on what the annotation asks for.
- Adding, replacing or removing a piece of equipment can be handled automatically, by you, from the annotation list.
- A structural change — reworking a wall, correcting a plan's geometry, changing circulation — needs the Stonal teams to step in.
Launch the automatic processing
1. Check and reclassify. From the annotation list, look at the ones with the "New" status. Check that the type is right — you can reclassify it, turning an Info annotation into a Creation for instance, if the type chosen in the field was not the right one. Then check that the required information is complete: a message tells you.
2. Confirm. Select one or more annotations ready to be processed, then click "Launch auto processing".
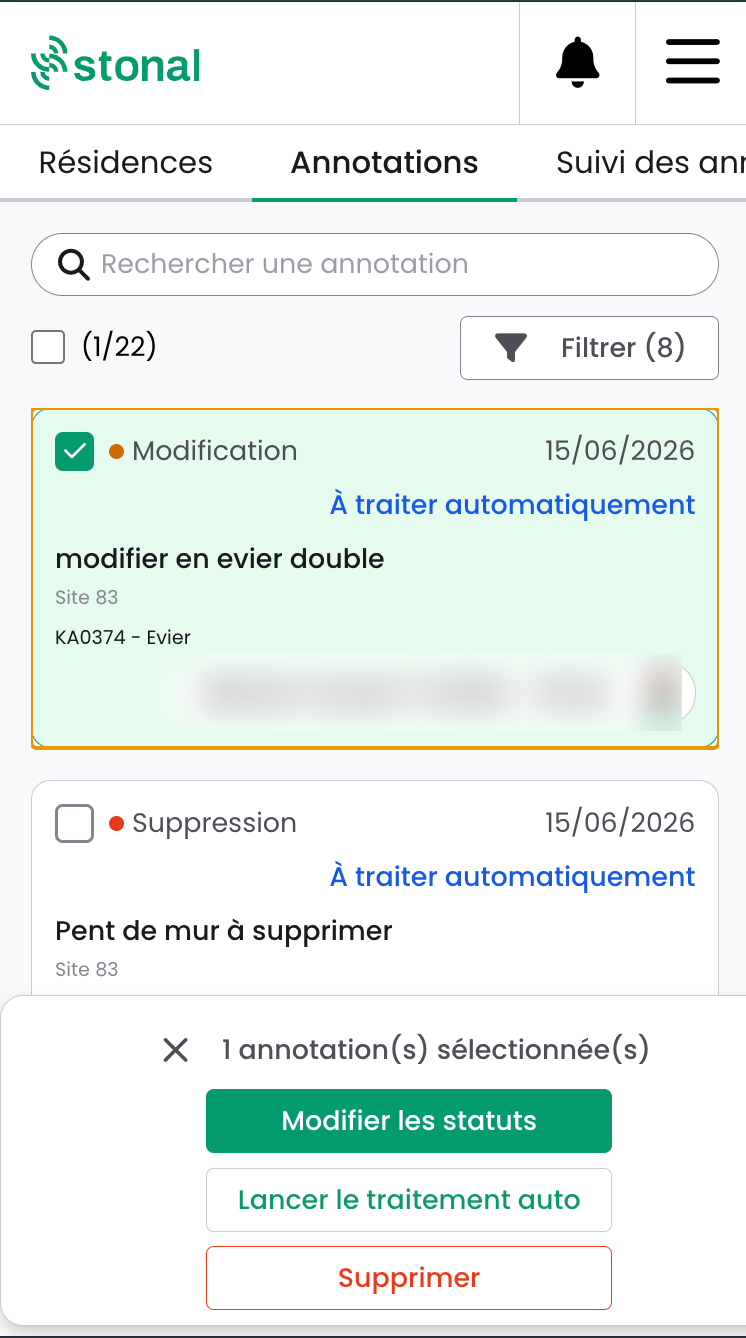
It only becomes active when every condition on the annotation is met. If a required piece of information is missing, a message tells you exactly what to complete.
3. Processing. On confirmation, the change is applied to your portfolio reference data:
| Annotation type | What happens |
|---|---|
| Creation | The equipment is created at the coordinates given |
| Deletion | The equipment is deactivated and given an end-of-life date |
| Modification | The selected equipment is replaced by the new one |
The annotation then takes the "Done – Auto" status ✅.
Creation is currently alphanumeric: the equipment does exist in your data, but it is not yet drawn on the plans.
If processing fails, the annotation takes the "In error" status, with the reason shown. It is then picked up by the Stonal teams.
The cases that go through the Stonal teams
- Info annotations — no automatic processing;
- geometry corrections: reworking a wall, plan anomaly, changed circulation;
- façade annotations, with no room attached.
For these, set the annotation to "For Stonal to handle". Depending on your subscription, it is picked up within the contractual timeframe agreed.
It requires a dedicated permission. If you need it, speak to your usual contact.
Tracking your teams' activity
The "Annotation tracking" tab lets you follow your teams' activity and the status of your annotations. It is refreshed every night. If you do not have access to it and you need it, ask your internal contact to open the permission.
You can filter by organisation, branch, site or building code and label, floor, Stonal identifier, author, object type, annotation type, status and label.
It reads in four blocks:
- Overview — the counters: total annotations, to be decided, to handle, handled.
- Activity by property — the last 10 properties annotated, and the number of annotations per property.
- Breakdown and resolution — by type and by status, with a progress gauge and the request dates.
- Annotation detail — the full list, with location, author, content and status.
The report also tracks the attribute updates made through EDIT: number of attributes changed, trend by month, breakdown by attribute type, and the detail of before and after values.
Working offline
Field surveys often happen where there is no network. EDIT therefore lets you work without an internet connection.
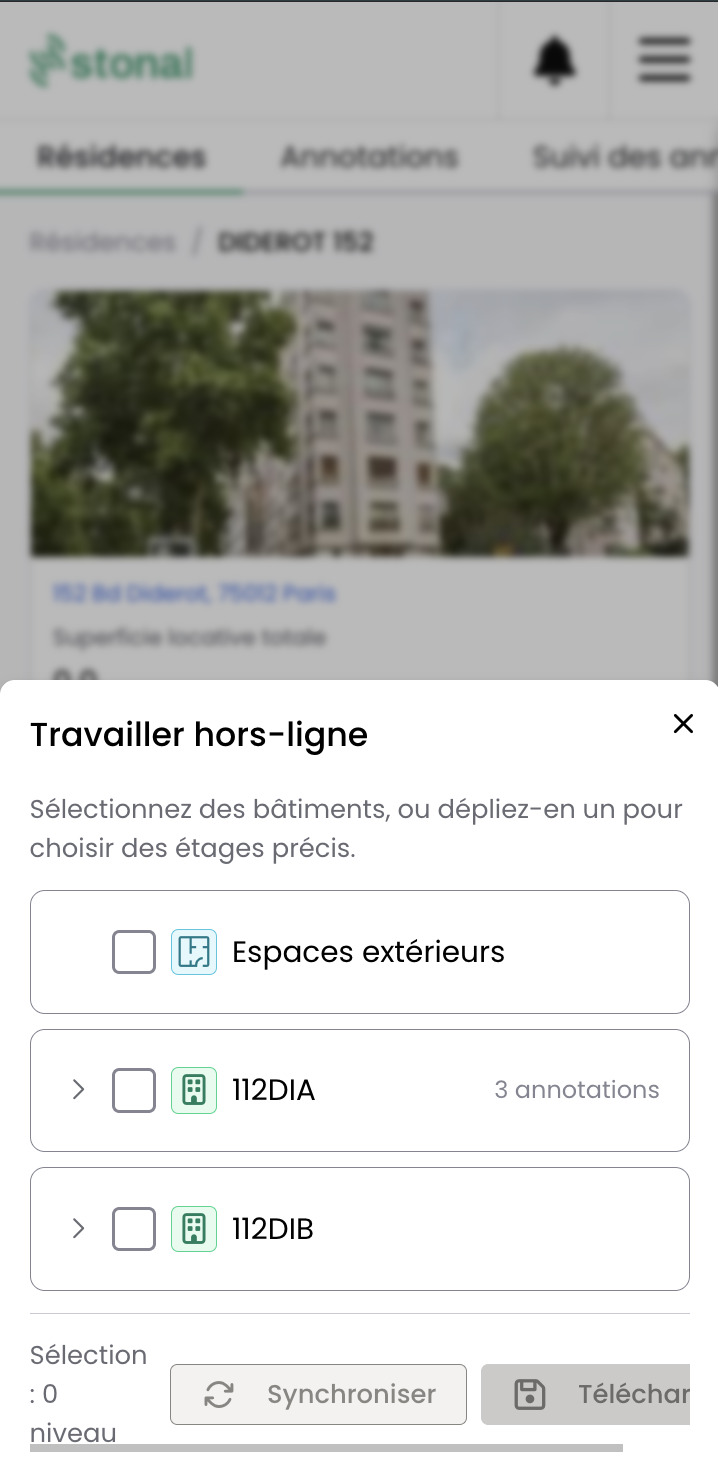
Download your plans before you leave. Downloading works level by level — site, building, floor. You prepare your visit without having to download the whole portfolio: select the buildings concerned, or expand one to pick specific floors, then Download.
The download also brings the themes and labels of the plan, so a plan reads the same offline as online. If you downloaded a site before this was available, the button stays visible but inactive, and invites you to download the site again.
Synchronise when you get back. Annotations created offline are synchronised automatically as soon as you are back on the network.
Remember to synchronise your annotations before signing out of the application. It is the same precaution as before a reinstall.
Do not have access to offline mode and would find it useful? Ask your internal contact.
Good to know
You can attach several files to one annotation, and not only a single photo.
Taking a photo straight from EDIT works on iPhone and iPad, on Android and in Chrome. If your device still does not offer the camera, take the photo with the camera app and attach it to the annotation.
See also
- The plans of a property
- Works Plans — what your surveys feed