The composition of a property or a building
This page concerns organisations equipped with Graphlake.
What it is for
The Composition tab describes how your estate is made up: the outdoor spaces of a property, the plans of its buildings, then, inside a building, its levels and the zones on each level.
This is where that structure is built and maintained, and where zones are connected to your units.
The screen explained
What you see depends on what you opened.
From a property
The tab is called Composition of the property and shows two sections.
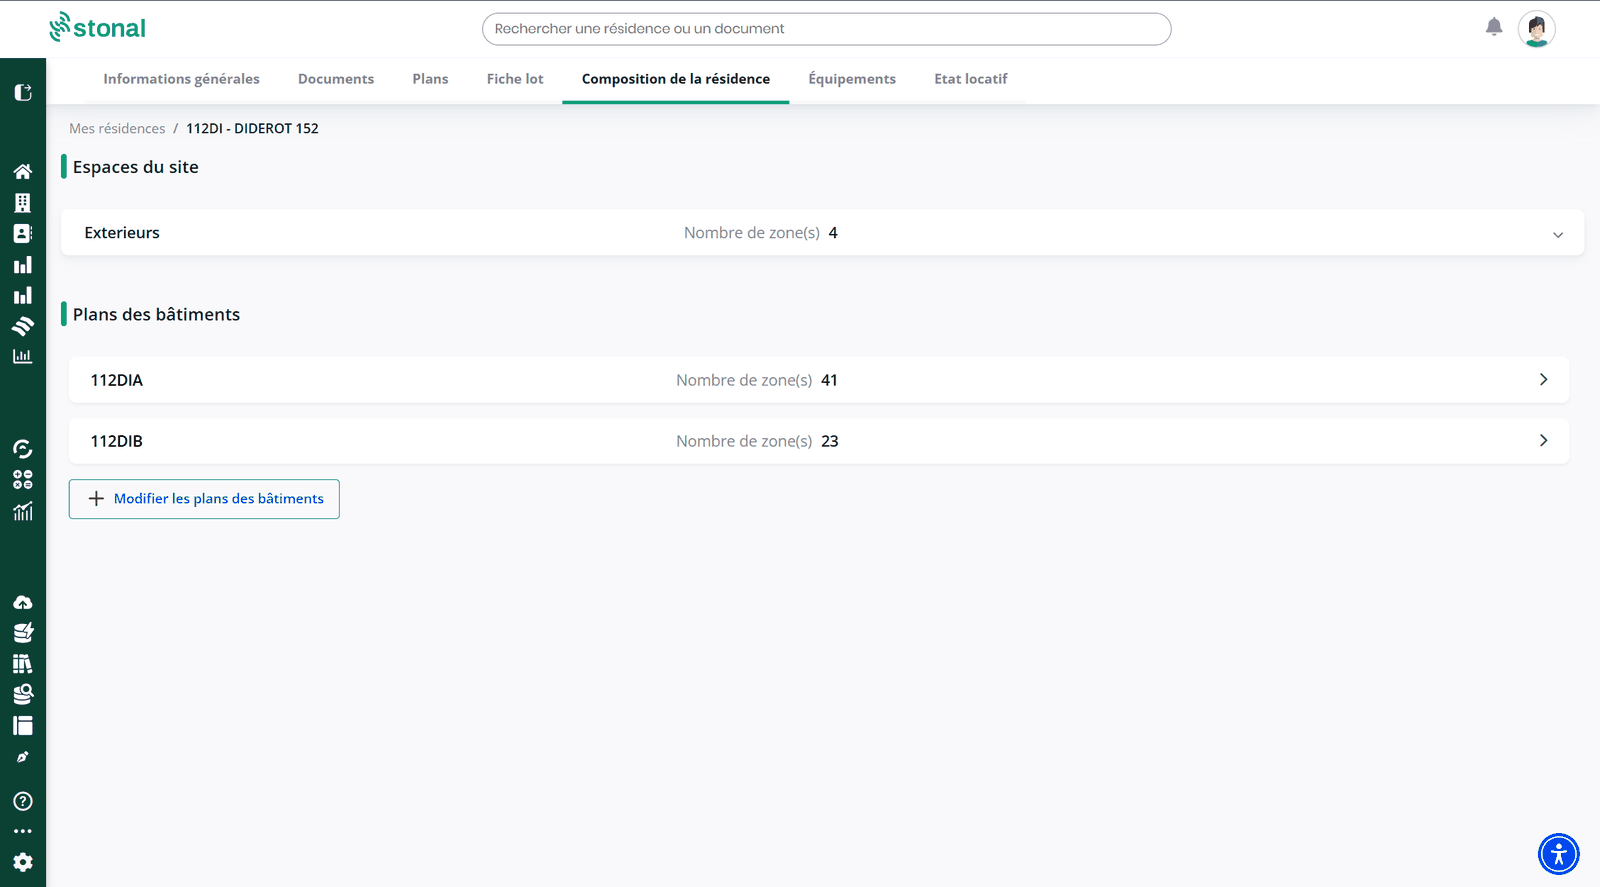
- Site spaces, the outdoor spaces, with their number of zones.
- Building plans, the buildings of the property, each with its number of zones. Click a line to open its composition.
The "Modify the building plans" button lets you add a building plan to the property.
From a building
The tab is called Composition of the building.
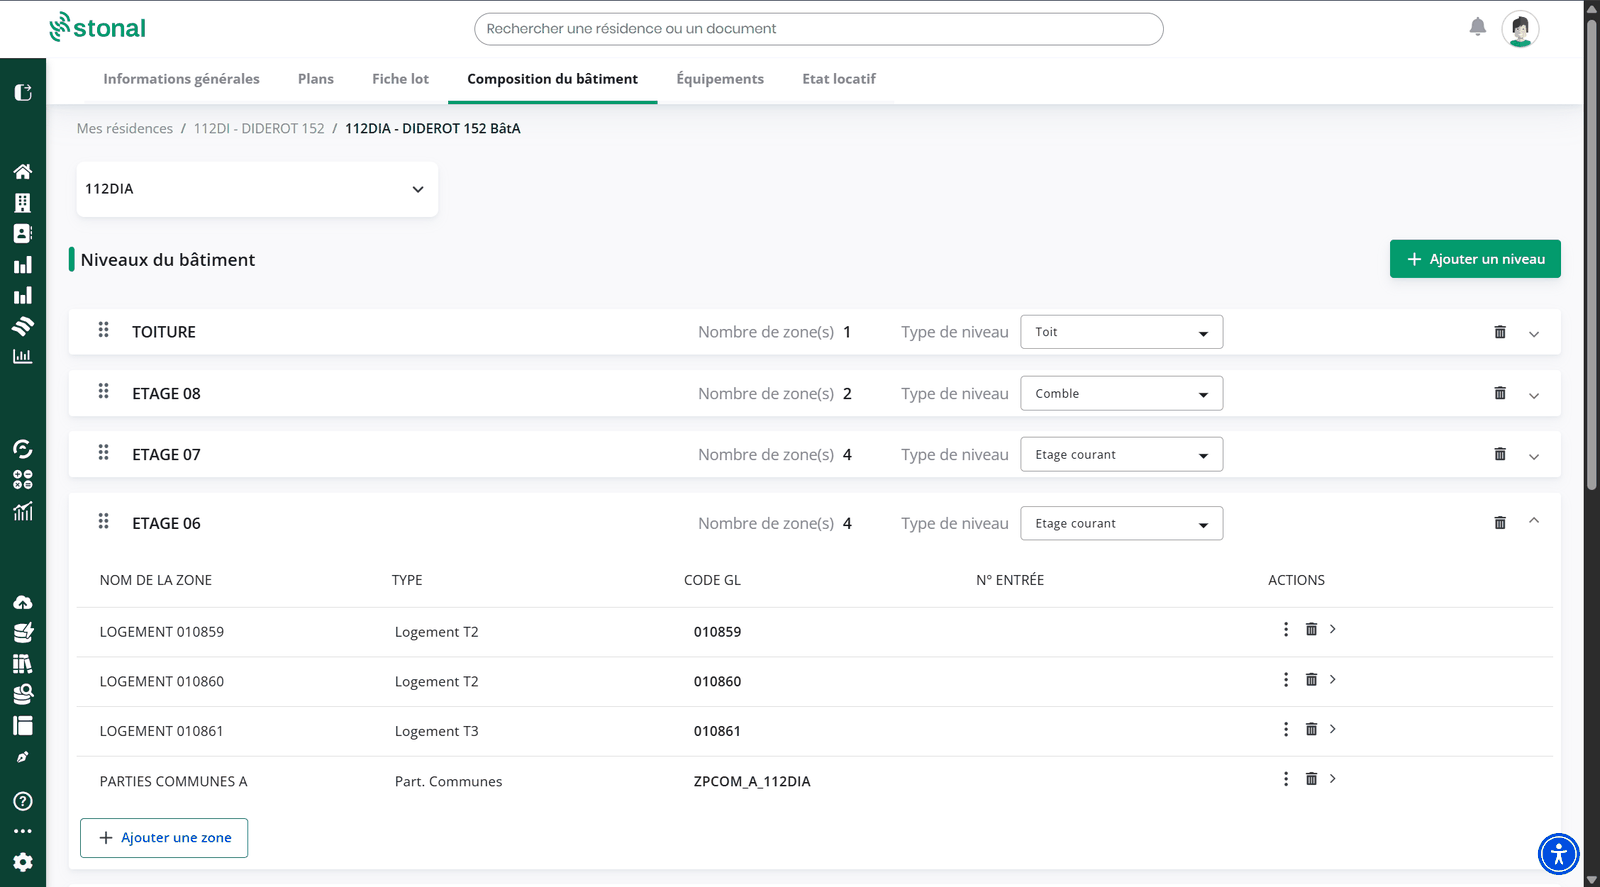
- A plan selector at the top, if the building has more than one.
- Building levels, each with its number of zones and its level type (roof, attic, standard floor…).
- Click a level to unfold its zones: zone name, type, GL code, entrance number and actions.
Step by step
Look at a zone in detail
Click a zone to open its panel on the right.
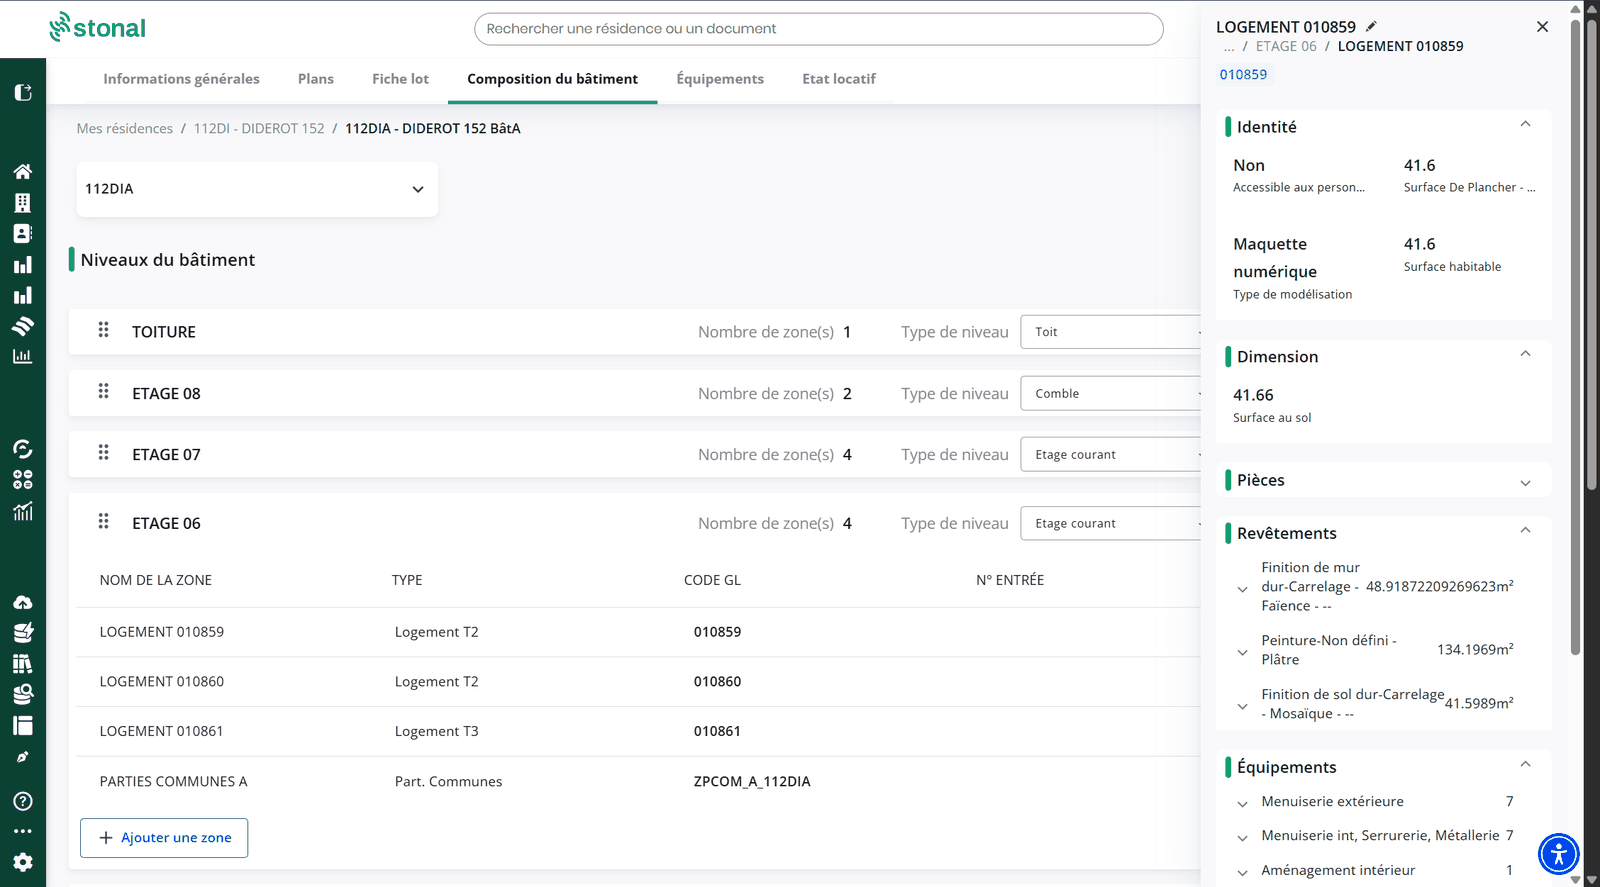
The panel gathers everything known about that zone, section by section:
- Identity: accessibility, floor area, living area, type of modelling.
- Dimension: floor surface.
- Rooms.
- Coverings: wall, floor and ceiling finishes with their surfaces.
- Equipment: what is installed in the zone, counted by family.
The panel opens for everyone, including users without modification rights.
Create and organise the levels
The "Add a level" button creates a level. Once created, you can:
- rename it directly in the list,
- change its level type with the dropdown,
- reorder the levels by dragging them by the handle on the left,
- delete it.
Create and organise the zones
Unfold a level and use "Add a zone". From a zone you can then:
- attach or detach one or more units, by entering their GL code,
- fill in the entrance number, for a zone inside a building,
- fill in the parking GL code where relevant,
- delete the zone.
Duplicate or move a zone
The actions menu at the end of a zone line lets you duplicate it towards one or several levels of the same building, or move it to another level or another plan, the outdoor plan included.
Manage the outdoor spaces
From a property, you can create the outdoor spaces plan, add a level to it, then its zones. Outdoor zones have no entrance number.
Good to know
- Without modification rights, the page stays readable. Buttons and action menus are simply hidden.
- Deleting requires its own right, separate from the right to modify. You may therefore be able to create a zone without being able to delete it.
- A GL code cannot be used twice. If the code you enter is already taken, the platform refuses the entry and tells you so.
- The GL code is the business identifier of the unit in your management software. This is where it is entered and edited, and it is the label the unit record uses as its reference.