# Stonal documentation
> Documentation for Stonal: the user guide for the platform, and the public API reference for asset management, document storage, user management, webhooks, and legacy endpoints.
Base URL: https://docs.stonal.io/fr
---
# User guide
URL: https://docs.stonal.io/fr/guide
# User guide
This guide describes **how to use the Stonal platform**, screen by screen. It is for anyone with
a question about one of our interfaces.
Looking to connect Stonal to your own tools via API? Head to the [API guide](/api).
## Where to start
- **New to the platform** → [Signing in](/guide/demarrer/se-connecter), then
[the menu](/guide/demarrer/le-menu)
- **Looking for information about a building** →
[General information for a property](/guide/vue-densemble/mes-residences/informations-generales)
- **Looking for a document** → [The search bar](/guide/demarrer/barre-de-recherche)
- **Preparing your works programme** → [Works Plans](/guide/workflows/plans-de-travaux)
- **Need to improve your data** → [Querying data](/guide/qualite-donnees/requeter-les-donnees)
## How this guide is organised
The sections follow the categories of the platform menu, so that you find the documentation where
you click:
You may not have access to every interface described here: that depends on the permissions and the
applications that have been opened to you. If you need one of them, ask your internal contact.
| Section | What you will find |
|---|---|
| **[Getting started](/guide/demarrer)** | Signing in, the menu, the search bar |
| **[What's new](/guide/nouveautes)** | What has changed on the platform, month by month |
| **[Portfolio overview](/guide/vue-densemble)** | Home, My properties and its tabs, Contacts & operators, the analysis reports |
| **[Workflows](/guide/workflows)** | Strategy, Works Plans, ESG |
| **[Data quality](/guide/qualite-donnees)** | Checking and querying your data, EDIT |
| **[Settings](/guide/administration)** | Users and permissions, indicators, document settings |
| **[Earlier versions](/guide/versions-anterieures)** | The Plans tab on Abyla, Model, Keep |
At the very bottom of the menu, three sections do not match a platform screen: they help you
get the most out of it and find an answer.
| Section | What you will find |
|---|---|
| **[Recommendations](/guide/recommandations)** | Our advice for getting the most out of the platform, starting with what to ask of your contractors |
| **[FAQ](/guide/faq)** | The questions that come up most, each answered or pointing to the page that covers it |
| **[Contact us](/guide/contact)** | Reaching the Stonal team |
---
# Signing in to Stonal
URL: https://docs.stonal.io/fr/guide/demarrer/se-connecter
# Signing in to Stonal
## What it is for
Accessing the platform from the URL specific to your organisation.
## Before you start
Your account is **created by someone with Administrator permissions** in your organisation:
there is no self sign-up.
Once the account has been created, you receive an email from **no-reply@stonal.com**
containing the link that lets you set your password.
:::tip
Bookmark your Stonal URL in your browser to save time the next time you want to sign in.
:::
## Step by step
### 1. Create your password
Open the link received by email, then choose your password. It has to meet the following rules:
| Rule | Detail |
|---|---|
| **Length** | 16 to 128 characters |
| **Digits** | at least 2 |
| **Lowercase letters** | at least 2 |
| **Uppercase letters** | at least 2 |
| **Special characters** | at least 3 |
| **Spaces** | none |
The accepted special characters are:
```
? _ ' " ! @ # $ % ^ & * ( ) < > [ ] { } | + - = . , /
```
:::warning Your password must not contain your identifier
Neither your email address nor your username may appear in it.
:::
These rules are also shown on screen as you type, and the form tells you as you go whether your
password meets them.
### 2. Sign in
At your organisation's address, enter your **email** and your **password**, then confirm.
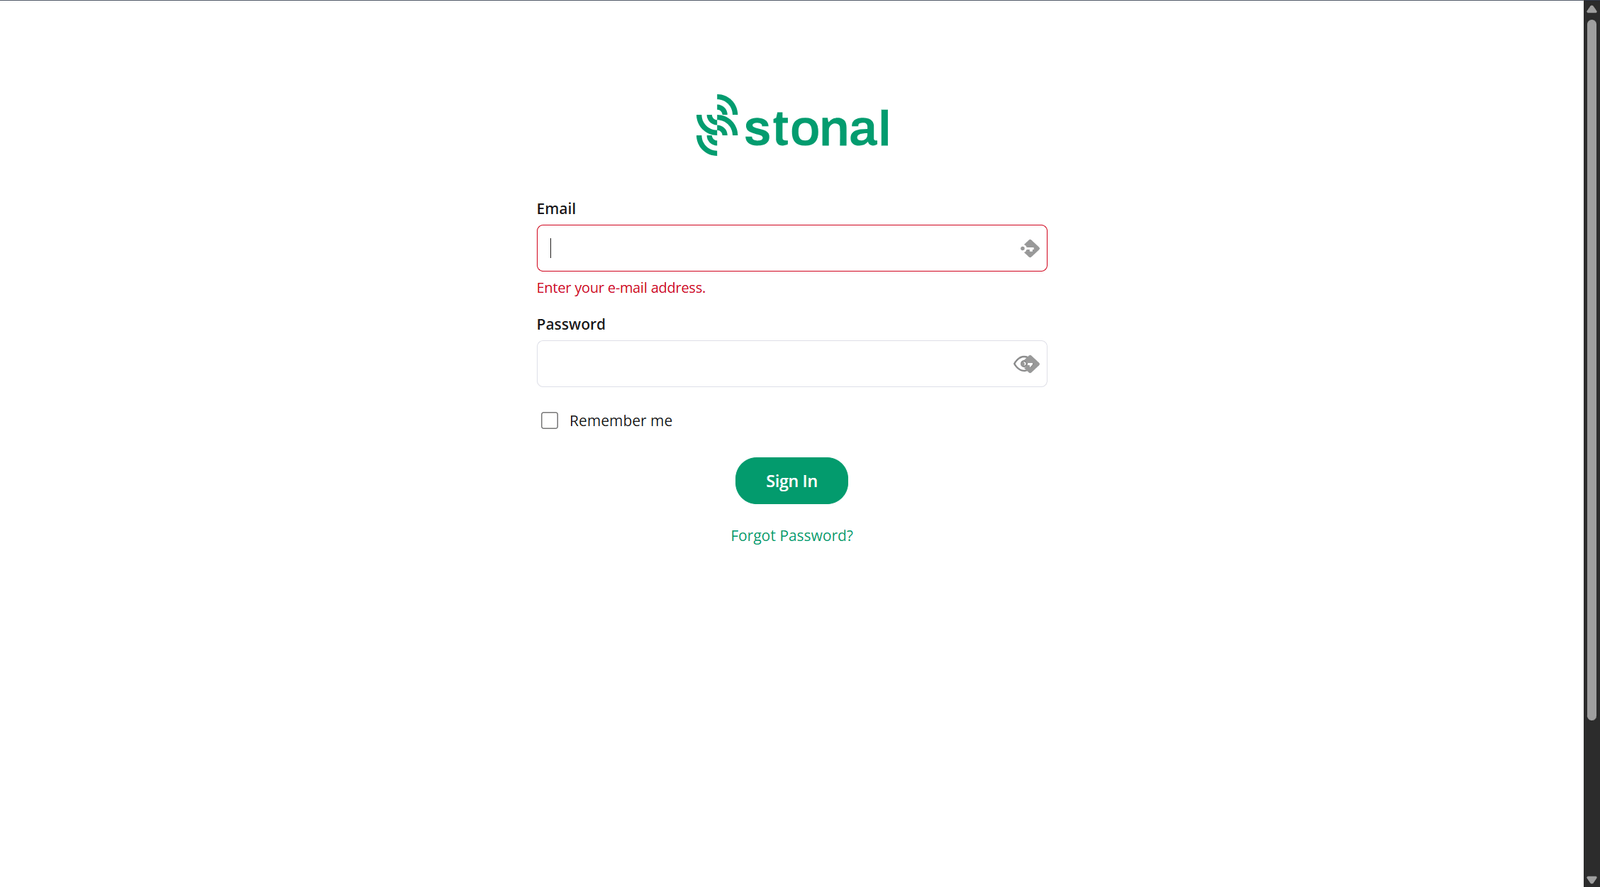
The **"Remember me"** option saves you retyping your email every time. The **"Forgot Password"**
link sits just below the button.
If your organisation also asks for the code from your authenticator app, type it digit by
digit: the cursor moves to the next box on its own, and the login goes through as soon as the
sixth digit is in. To paste a copied code, right-click in the first box, then **Paste**: every
box fills at once.
### 3. If your company uses single sign-on (SSO)
Depending on the setup chosen by your organisation, a button bearing your **company name**
appears on the sign-in form. One click is enough: you access the platform without entering a
password.
## Good to know
- **Forgotten password**: use the "Forgotten password" link on the sign-in form.
- In an organisation configured for single sign-on, the password creation email is not sent:
signing in happens only through your company button.
## See also
- [User management](/guide/administration/gestion-des-utilisateurs) — creating accounts and
managing permissions
- [API guide — Authentication](/api/auth) — to connect Stonal to your tools
---
# The platform menu
URL: https://docs.stonal.io/fr/guide/demarrer/le-menu
# The platform menu
## What it is for
The **left sidebar** is your starting point: it gives access to the platform modules **you can
reach, according to the permissions you have been granted**, grouped by family. You can **collapse**
it to gain screen space, using the small icon at the very top of the menu.
## The modules, by family
### Portfolio overview
| Module | What it does |
|---|---|
| **Home** | The key figures of your portfolio |
| **My properties** | The way into the data, documents and plans of your properties |
| **Contacts & operators** | The contacts attached to your properties and their contracts |
| **Analysis reports** | The dashboards chosen by your organisation |
### Workflows
| Module | What it does |
|---|---|
| **Strategy** | Comparing costed works scenarios across your whole portfolio |
| **Works Plans** | The multi-year programming of your works |
| **ESG** | Assessment campaigns and ESG scores for your buildings |
### Data quality
| Module | What it does |
|---|---|
| **Check data** | Track the loading and reliability of your data |
| **Query data** | Extract and correct your data in bulk |
| **Open Model** | The 2D/3D digital models |
| **EDIT** | The field survey on tablet or smartphone |
A **Settings** module completes the menu for people with advanced permissions.
The menu folds away to leave room on screen: hover over it to expand it, or click the pin to
keep it open. To open a module in a new tab, use **Ctrl + click** (**Cmd + click** on Mac).
## Good to know
:::info Your menu is not your colleague's
What the menu contains depends on the permissions you have been granted and on your organisation's
**subscription**. It is normal to have access to only some modules. If you need a module that does
not appear, ask your internal contact.
:::
## See also
- [The home page](/guide/vue-densemble/accueil)
- [The search bar](/guide/demarrer/barre-de-recherche)
---
# The search bar
URL: https://docs.stonal.io/fr/guide/demarrer/barre-de-recherche
# The search bar
:::info Availability
This page concerns organisations running **Stonal Smartdoc** document management.
:::
## What it is for
The search bar in the header is available **from any page**. It finds your properties, your
buildings and your **documents** across the whole portfolio.
A **results page** gathers everything your search found. That is where you act on **several
documents at once**, without having to open each property one by one.
For documents, the search covers the document name, the property or building where it is filed,
and **any text contained in the document itself**.
:::info The document side requires Stonal Smartdoc document management
Searching documents, and the actions that go with it, only applies to organisations that have
**Stonal Smartdoc document management (GED)** — the one behind the
[Documents](/guide/vue-densemble/mes-residences/documents) tab.
If your organisation still uses **Keep**, the previous document management, the search bar only
covers your properties and buildings: no search inside documents, and no document actions from the
results page.
:::
## Step by step
### Find something quickly
_Video tutorial, 1 min 56: the search, and everything it brings back._
1. Type your keywords: a dropdown shows the first results, organised by type.
2. Click a property or a building to open its page; click a document to open it directly.
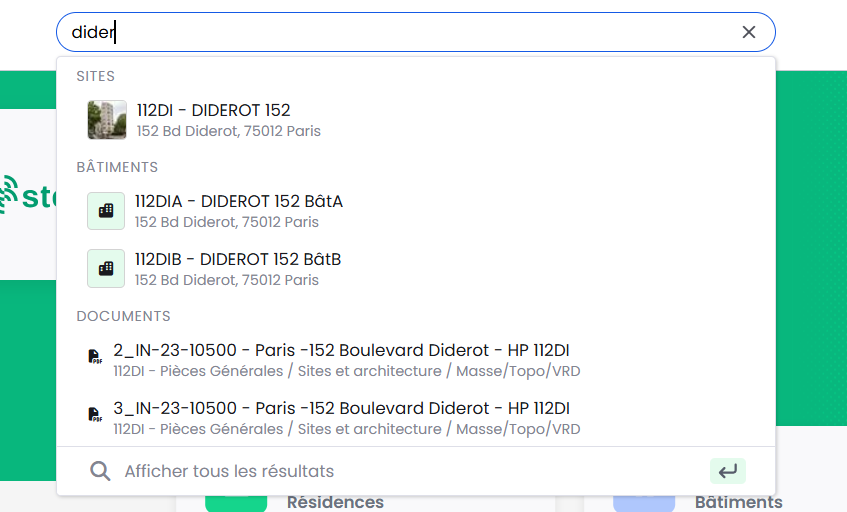
The **"Show all results"** link at the bottom of the dropdown opens the full results page.
### Work from the results page
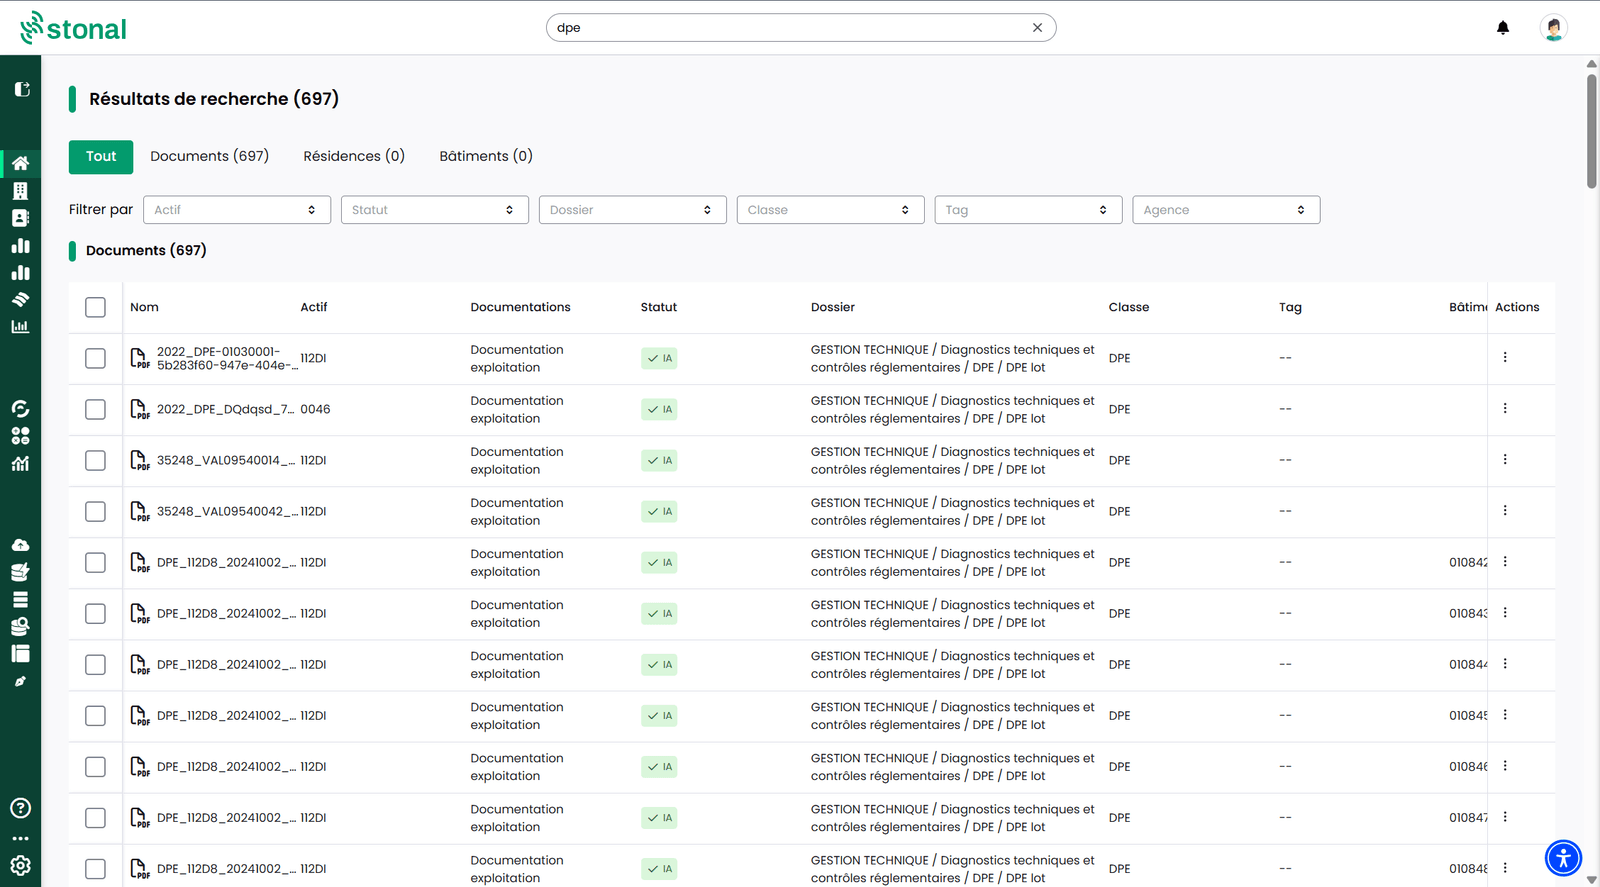
Results are split by type there, with one tab per family — **Documents**, **Properties**,
**Buildings** — and the number of results in each. **Filters** help you narrow the list: asset,
status, folder, class, tag, branch.
On a document you can view, download, rename, manage tags or delete. To correct a value quickly
(folder, class, tag): hover over the cell, click the pencil, then click elsewhere to confirm.
Above all, this page is **very handy for acting on several documents at once** — applying the same
tag to a whole batch, for instance. Tick the documents concerned: an action bar appears. In a single
operation, and **across the whole portfolio**, you can add or change tags, change the class or the
folder, download or delete.
This is the only place where a bulk action spans several properties.
## Tags
Tags are **fully customisable**: you create your own. They organise your documents at the scale of
**your whole organisation** — visible and applicable throughout — including from one property to
another.
- **Add an existing tag**: if it does not yet exist in the documentation of one of the
properties or buildings concerned, it is created there automatically before being applied.
- **Create a tag**: from the tag management window. It is created simultaneously on the
documentation of every property or building concerned by the selected documents.
- **Remove a tag**: on one document or on a selection.
:::warning Deleting a tag permanently
This is not possible from the results page. Permanent deletion happens in the documentation of
each property or building.
:::
## Good to know
Deletion and modification actions depend on the permissions you have been granted, so you may not
have access to them. If you need them, ask your internal contact.
## Keyboard and mouse shortcuts
| Gesture | Effect |
|---|---|
| **↓** / **↑** | Move through the list of results |
| **Enter** | Open the highlighted result |
| **Esc** or **Tab** | Close the list without clearing what you typed |
| Click a row on the results page | Open it in a new tab, so your results stay at hand |
## See also
- [The documents of a property](/guide/vue-densemble/mes-residences/documents)
- [The platform menu](/guide/demarrer/le-menu)
---
# What's new in September 2026
URL: https://docs.stonal.io/fr/guide/nouveautes/09-septembre
# What's new in September 2026
Here is what changed on the platform in September: first the main changes, with what they let
you do, then the other improvements by module, and finally the fixes.
## This month at a glance
### Manage the service provisions of your equipment
:::info Availability
This change applies to organisations equipped with **Graphlake**.
:::
**Why.** On-site teams (caretakers, on-call staff) must be able to tell within seconds which
piece of equipment supplies a unit or a stairwell, for example to report a breakdown to the
right contractor.
**What changes.** A service provision connects a piece of equipment (boiler room, meter, ventilation
unit, riser…) or a technical room to what it supplies: building, stairwell, unit or other
equipment.
- Service provisions are created, edited and deleted from an equipment's information record, from
the plan, or when the equipment is created.
- On the unit record, a "Service provisions" section lists the equipment serving the unit, directly
or through its parents. On hover, the location of the service provision is shown; on click, the plan opens
on the equipment or room.
- The code and name of a service provision are generated from the code of the equipment and that of
the component served.
- When a piece of equipment is deleted, a message warns that its service provisions will be deleted
too.
- Service provisions can also be queried in the query tool.
**Example.** A tenant reports a hot water failure: from the unit record, the property manager
sees in the "Service provisions" section the water heater supplying the unit and knows which
equipment to report.
**Good to know.** Service provision management is turned on for each organisation, in the
[Organisation management](/guide/administration/gestion-de-lorganisation) application, with the
"Display service provisions" option. This option is off by default. Creating, editing or
deleting a service provision depends on the permissions you have been given: if you need them,
contact your referent. The Service provisions section of the General information tab of a property
or building is not available yet.
See also: [The unit record](/guide/vue-densemble/mes-residences/fiche-lot)
### Explore the 3D model: themes, measurements, sections and labels
:::info Availability
This change applies to organisations equipped with **Graphlake**.
:::
**Why.** These features existed in Model's 3D view but not yet on the platform. The section
tool lets you see inside a building, and measuring lets you take a facade height without going
on site.
**What changes.**
- Themes: a theme turned on in 2D also colours the 3D model, and the other way round. For a
theme on rooms, rooms are shown on the floor being viewed; for a theme on equipment, they are
hidden.
- Measure: the tool also works in 3D, two clicks on the model show the distance. Measurements
taken in 2D are kept when you switch to 3D and back to 2D.
- Section: this new tool, available in 3D, slices the model to show its inside.
- Labels: room labels are also shown in 3D.
- PDF export: the 3D view can be downloaded as a PDF (A4 landscape), with the measurements and
the theme shown.
**Example.** For a facade renovation quote, a property manager measures the height of a facade
directly on the model, without going on site.
**Good to know.** The section tool still takes a little practice to master.
See also: [The plans of a property](/guide/vue-densemble/mes-residences/plans)
### Plans tab: a single search that highlights the results
:::info Availability
This change applies to organisations equipped with **Graphlake**.
:::
**Why.** Search results were shown in the side panel without anything appearing on the plan,
and the list of types offered covered the whole reference catalogue, including what does not
exist in the property.
**What changes.** A single search field replaces the separate filter button.
- When you click in the empty field, a menu offers the categories present in the portfolio
shown (equipment, spaces, zones, units). You can tick a whole category or open it to choose
specific types, each with its number of items.
- As you type, suggestions are split into two parts: the matching types, which you can tick,
and the items of the tree.
- Each ticked type becomes a filter shown under the field, with its total. Remove it with one
click, or all at once with "Reset filters". Filters stay active if you clear the text.
- Criteria add up: several types, or a type and a text, show every item that matches at least
one of them. A counter shows the number of results.
- Results are highlighted both on the plan and in the tree. Branches that contain results
expand and show how many they hold. A list view also lets you browse them.
**Example.** A property manager ticks the "Bathroom" and "Shower" types: the 24 matching items
are highlighted on the plan, and the tree shows at a glance which floors and units they are in.
See also: [The plans of a property](/guide/vue-densemble/mes-residences/plans)
### My properties: find upcoming and archived properties on the Stonal platform
**Why.** A property being delivered or leaving the portfolio could not be found on the
platform, which got in the way of uploading documents before a delivery, for example.
**What changes.** Every building and property has a status calculated from its effective and
expiry dates: Upcoming, In operation or Archived. A Status filter is added to "My properties";
the default view remains "In operation". You can thus access upcoming or archived properties.
**Good to know.** The status cannot be changed by hand: if it is wrong, correct the effective
or expiry date.
See also: [My properties](/guide/vue-densemble/mes-residences)
### Switch from one application to another on the same property with "View in"
**Why.** The platform's applications work on the same portfolio. Moving from one to another in
one click, without searching for the property again, makes navigation simpler.
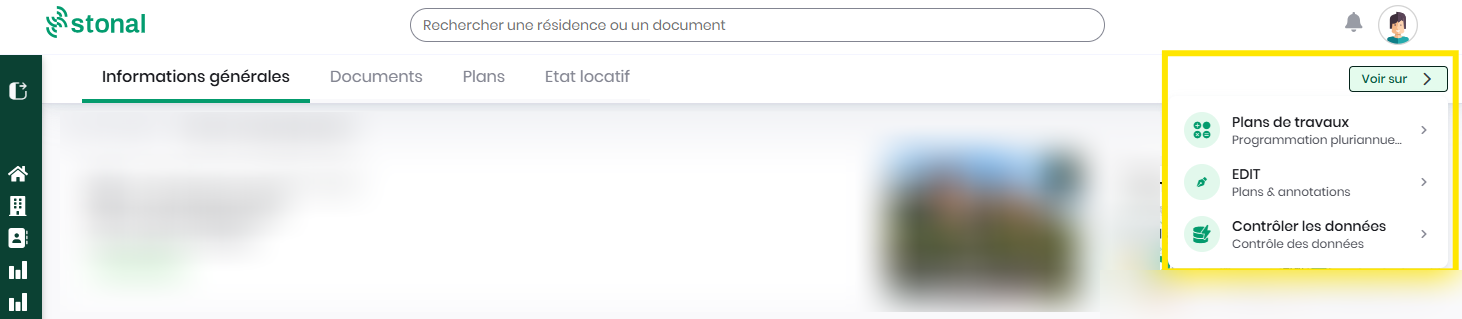
**What changes.** A "View in" button appears at the top of a property's record. It opens the
same property in the platform's other applications: Works Plans, EDIT, Check data.
### Aggregated works plans: track the plan status of each property
**Why.** At the end of a campaign, an asset manager needs to know which properties have already
validated their works plan, to focus decisions on the others. Lines that can no longer be
decided on should not get in the way.
**What changes.**
- A "PPT status" filter offers five statuses that can be combined. It applies to the list, the
detail and the CSV export.
- When you expand a group, each property shows the status of its plan.
- In the detail of a group, lines already validated can no longer be ticked (a tooltip explains
why), and "Select all" only keeps lines that can still be decided on. These lines are greyed
out and placed at the bottom of the group; sorting a column replaces this order.
- The group line shows the property name when there is only one, otherwise their number, with
the shared location.
- The Source column is translated into French, on screen and in the XLSX export.
**Example.** An asset manager filters the plans still "in progress" to follow up with the
property managers concerned. Lines of plans already validated stay visible at the bottom of the
list, with no risk of selecting them by mistake.
See also: [Building a multi-year works plan](/guide/workflows/plans-de-travaux)
### Query tool: change the type of components in bulk by import
:::info Availability
This change applies to organisations equipped with **Graphlake**.
:::
**Why.** Fixing a wrong type, for example equipment imported as "Bathtub" instead of "Shower",
was only possible online, on a query.
**What changes.**
- The CSV import for editing accepts a Type column: you can change the type of one or more
components, in addition to their properties.
- The "Export" button always offers the choice between "Export (CSV)", "Export for
modification (CSV)" and "Export for creation (CSV)".
- The import window explains the procedure more clearly.
- Changes, online or by import, only apply to the portfolio you have permissions on.
**Example.** About a hundred pieces of equipment were imported with the wrong type: you export
the query for editing, correct the Type column, then re-import the file in one go.
See also: [Querying your data](/guide/qualite-donnees/requeter-les-donnees)
## Other improvements
### Plans tab (Graphlake)
- The plan remembers your settings: label type and size, layers shown and the active theme
are saved for each user and restored on every plan. A shared plan link opens with the display
of the person who shared it.
- Label size setting (room name, area, rental management code), with a preview on the plan.
- Plan PDF export: a title block is added to the right of the plan, filled in automatically
(legend of the active theme, site, building, floor or unit exported, scale, date).
- Link-type properties are shown as clickable links in information records.
- A selection window opens when several pieces of equipment overlap at the same spot, as in
EDIT.
- The tree shows the equipment type label rather than the saved name.
- Buildings are coloured when hovering over the site plan.
- The default colours of the "space type", "equipment type" and "zone type" themes are more
logical.
- The plan action bar is aligned with EDIT: the active tool is shown in green, and a marker
shows that a theme, a label type or a layer is applied.
### My properties
- The search bar also covers the address, in addition to the code and name.
- A "Core business" filter is added.
- The core business is also shown when it is entered as free text.
### Property record (Graphlake)
- In the Equipment tab, a grouping level by constituent is added between the unit and the
equipment.
### Unit record (Graphlake)
- Numbers are shown in French format and list values as tags.
### Query tool (Graphlake)
- The list of saved queries shows their author, for queries created from now on.
- The end-of-export message for editing or creation contains a link to the meta-code library.
- The exported file is named after the query.
### Portfolio and data
- The survey date is updated automatically when you change the general condition of a piece of
equipment, as for secondary conditions.
### Works Plans
- The cyclicity of the item appears in a line's detail panel.
- When adding a line, the total amount can be entered directly, without going through the
quantity: the last field entered (unit price or total amount) prevails.
- Programmings can be deleted in bulk from the list of properties, with confirmation, depending
on the permissions you have been given.
- Editing the condition of equipment is open to all organisations.
- Works plan generation, line loading and aggregated plans are faster.
- Programming filters are kept in the page address, so you can find them after a reload or
share them by link.
### Works Plans (Graphlake)
- An icon flags sites digitised without a model in the list of properties and in the
programming header, and a "Digitisation" filter lets you isolate them. The icon and the filter
only appear if the organisation has at least one site of this kind.
- A line's location leads directly to the Equipment tab of the property record.
- Libraries: the price is entered when the item is created. A "Price" step is added between
cyclicity and criteria (Organisation price excl. VAT and VAT, 10% by default), with a summary
of the final price in each derived price library. The "Reference price" column of the item
list is filled in.
- Price libraries: the window for deleting a library lists the sites that use it.
- Completed works: the view by operation becomes a table with its progress (number of lines,
percentage completed, total amount and amount per year), whose lines can be expanded.
- Completed works: after switching to Completed, the status of the portfolio update is shown,
with the list of equipment that could not be updated.
- Completed works: the works handover date is prefilled with the previous day.
- Completed works: the date and reference condition of a line already switched to Completed can
be changed without cancelling it.
- Equipment placed at plan or floor level (lifts, ventilation units, risers) is taken into
account when generating works plans.
- For commercial property, restoration lines from leases use an icon to tell a confirmed notice
from an assumption (end of lease, due date, tacit renewal), and the "Count" source is renamed
"Leases".
### Reports
- A "Survey reliability" tab is added to the Document tracking report: diagnostics not
linked to a unit or building, energy performance certificates whose ADEME number is missing,
malformed or duplicated, with a link to Stonal Smartdoc to correct them.
### Model on Platform plans (Abyla)
- The plan is easier to read and closer to the look of Graphlake plans, especially for the site
plan background.
## Fixes
- Plan PDF export: the scale is calculated on the printed A4 page, the label size chosen on
screen is kept, and printing a site plan is no longer cut off.
- In EDIT, the site plan of Graphlake organisations is shown in colour again.
- Plans tab: the "Openings" category wrongly created in the equipment grouping is gone.
- Equipment tab of the property record: a collapsed constituent line no longer shows the code of
a single piece of equipment as if it were shared by the group.
---
# What's new in August 2026
URL: https://docs.stonal.io/fr/guide/nouveautes/08-aout
# What's new in August 2026
Here is what changed on the platform in August: first the main changes, with what they let you
do, then the other improvements by module, and finally the fixes.
## This month at a glance
### EDIT: a series of improvements from the field
**Why.** These improvements come straight from the feedback of several customers, gathered
during acceptance testing, an on-site visit and from their contractors. The goal: faster surveys
on tablet and fewer steps between two annotations.
**What changes.**
- Taking photos from the device on Android and Chrome, in addition to iPad.
- Moving an annotation by simply dragging it, with its attachment updated automatically.
- Filters by meta-library and by portfolio, on lists and annotations.
- Property name in the Annotations tab, building address in the selection cards.
- Easier-to-read pins on large plans, and a lighter display of floor and wall coverings.
- Type selector that opens directly on the current type, and a toggle between 2D Plan and
Attributes.
- Property search that ignores case and accents, and accepts partial entries.
- Plan colouring by theme, including offline, and a layers panel to show or hide drawing lines,
dimensions and room names.
- Labels (room names, rental management codes) and dimensions displayed on demand, turned off
by default for a clearer plan that loads faster.
**Good to know.** These improvements apply to all organisations and do not require reinstalling
the application.
See also: [Running a field survey with EDIT](/guide/qualite-donnees/edit)
### Completed works: track actual progress and update your equipment
:::info Availability
This change applies to organisations equipped with **Graphlake**.
:::
**Why.** Property managers need to know what has actually been done, so that the portfolio
reflects reality and the next programming starts from up-to-date data, without re-entering
anything in the plans.
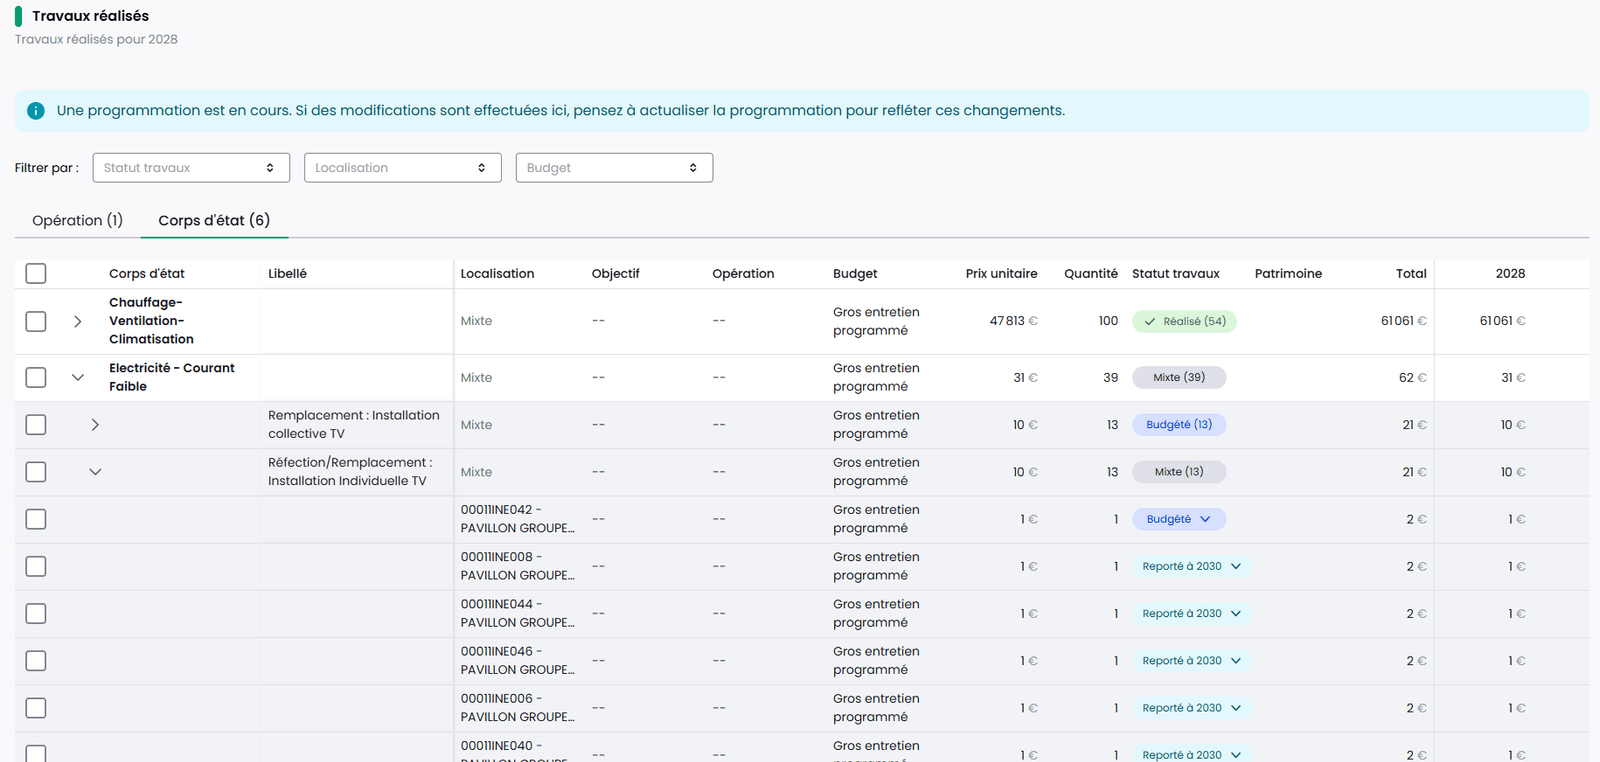
**What changes.** A "Completed works" tab appears in the navigation of a programming as soon as
a first programming has been validated. Each line has a status, Budgeted, Completed, Postponed
or Cancelled, which can be changed one by one or in bulk. Entry is never blocking: it can be
done at any time of the year, including while a new programming is in progress.
Switching to Completed asks for a handover date and a reference condition, shows a summary of
the old and new value for each component, then updates the portfolio. A line switched to
Completed can be reset, restoring the previous data if needed.
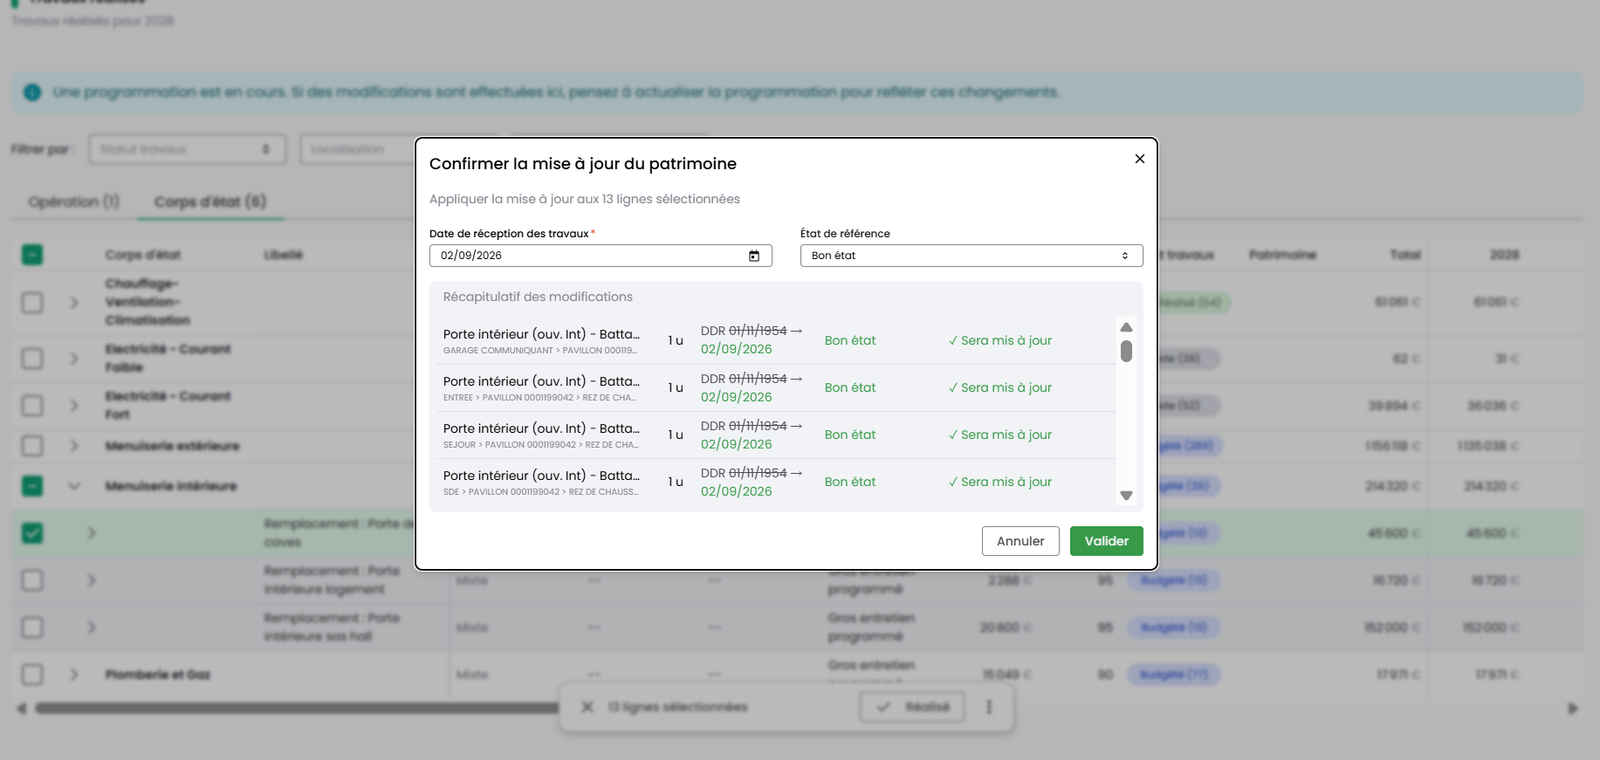
**Example.** A property manager selects in bulk the works lines that were actually carried out
and switches them to Completed in one action, during the year or at the end of a campaign: the
equipment concerned has its date and reference condition updated, without reopening the plans.
**Permissions.** Everyone can view the tab. Validating completed works requires edit rights on
Works Plans.
See also: [Building a multi-year works plan](/guide/workflows/plans-de-travaux)
### Last renewal date filled in automatically
:::info Availability
This change applies to organisations equipped with **Graphlake**.
:::
**Why.** On the portfolios observed, seven last renewal dates out of ten were missing. Yet this
date is essential to the Works Plans calculation.
**What changes.** Any equipment created without a last renewal date, whatever its origin
(Revit model, import, API), receives the construction date of its building, or failing that of
the site. Without any other information, this is the most cautious assumption: equipment never
renewed since construction.
This date remains a default value, to be corrected as soon as a real renewal date is known: it
does not mean the equipment was checked on that date. Any date entered afterwards takes
precedence. Existing equipment has been completed in the same way.
**Good to know.** A construction date entered after the equipment was created does not trigger
this fill-in.
### Your portfolio is enriched automatically with open data
:::info Availability
This change applies only to organisations equipped with **Graphlake**.
:::
**Why.** Some of a building's characteristics already exist in public databases. Retrieving
them saves data entry or a field survey, provided you know where each value comes from.
**What changes.** Fifteen building characteristics are retrieved automatically, with no data
entry:
- type, energy and generator for heating and domestic hot water;
- structure, facade, facade and roof insulation, flat roof;
- type of openings and external shutters;
- ventilation system and presence of balconies.
Retrieval relies on the building's BDNB identifier. It is obtained either from the energy
performance certificates (DPE) stored in the Stonal Smartdoc document management system (ADEME
number, then RNB, then BDNB), or by entering the RNB or BDNB identifier directly. The result can
be viewed in the "Open data" report, which you make available to users through report groups.
In the General information tab, each value concerned is flagged as coming from open data.
**Example.** On a portfolio made up mostly of housing whose energy performance certificates are
already in Stonal Smartdoc, retrieval fills in part of the building characteristics without a
field survey, and the report shows the share actually retrieved.
**Good to know.** To benefit from it, first get in touch with the Stonal teams: an initial
retrieval has to be launched. The amount of information varies widely from one building to
another, and remains low for commercial property.
See also: [General information for a property](/guide/vue-densemble/mes-residences/informations-generales)
### Contacts and contracts: import and export, units in scope, parent company
**Why.** The module did not let you load contacts in bulk, structure individuals and legal
entities, or extend a contract to rented units. Several customers asked for it, to load dozens
of legal entities, make their operators' contact details readable, or manage their leases.
**What changes.**
- Import of a CSV file (which you can fill in with Excel), checked before processing, with errors reported line by line, then
follow-up of the import in a history with a downloadable report.
- Export of contacts and of equipment under contract in CSV format, from a drop-down menu.
- Rented units can be added to the scope of a contract, with search.
- A "Parent company" section on a legal entity's record, and display of the individuals linked
to it.
- New layout for the contact card and the detail panel, which shows the components concerned.
**Example.** You are taking over all the maintenance contracts of a portfolio: you export what
exists, complete the file offline, then re-import it in one go.
See also: [Managing your contacts and operators](/guide/vue-densemble/contacts-exploitants)
### Plans tab: find a unit by its code and measure a distance
:::info Availability
This change applies to organisations equipped with **Graphlake**.
:::
**Why.** Two Model on Platform features were missing on Graphlake: search by rental management
code and the measuring tool.
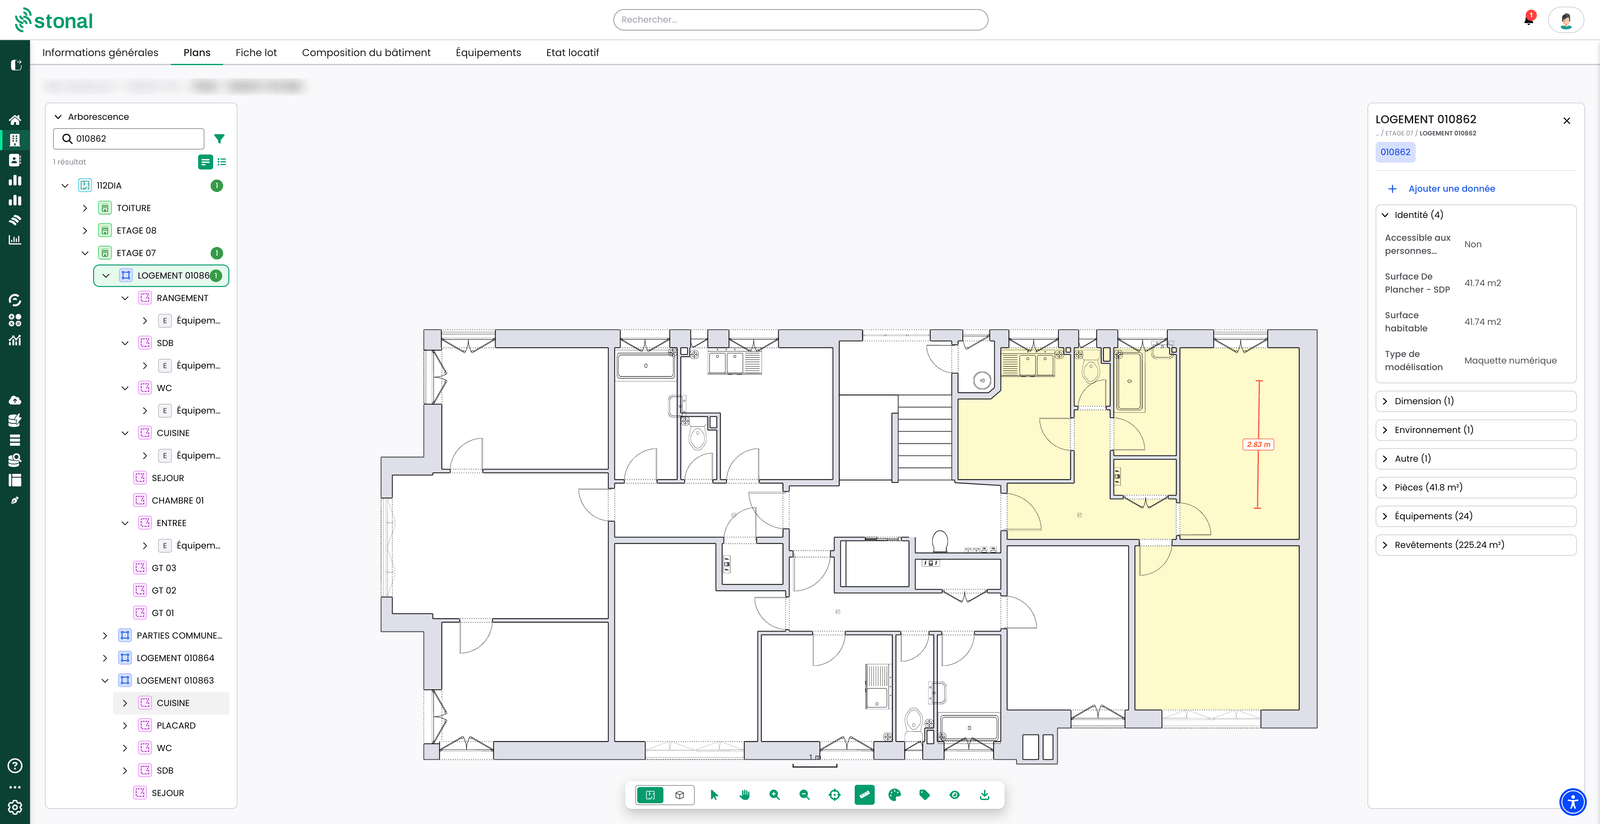
**What changes.** The tree search bar now accepts the rental management code, regardless of
case, and highlights the unit on the plan. A ruler icon turns on measuring mode: one click for
the start, one click for the end, and the distance is shown in metres. Measurements can follow
one another; press Esc to exit.
See also: [The plans of a property](/guide/vue-densemble/mes-residences/plans)
### See the validity period of a value in the query tool
:::info Availability
This change applies to organisations equipped with **Graphlake**.
:::
**Why.** The validity period of a value was stored, but could not be displayed or exported.
**What changes.** On a property, a building or a piece of equipment, the effective date and
expiry date columns can be added like any other. They appear in the preview, in the results
and in exports, and are ignored on re-import. A value with no end date shows the ∞ symbol. When
you filter on these dates yourself, the default "valid today" filter no longer applies on top of
yours.
**Examples.**
- To spot energy performance certificates due for renewal, you add the expiry date column on
the DPE property and read the deadlines directly, without setting a filter.
- To anticipate units leaving the portfolio (units sold, leases ending), you filter on an
upcoming expiry date, for example within three months, to list the units concerned, including
those hidden by default once expired.
**Good to know.** The date filter applies to the component, not yet to a specific property.
See also: [Querying your data](/guide/qualite-donnees/requeter-les-donnees)
### Bulk-delete components from the query tool
:::info Availability
This change applies to organisations equipped with **Graphlake**.
:::
**Why.** Fixing an import or data-entry error (wrong type, duplicates, badly loaded units) used
to require Stonal's help. This is the counterpart of the bulk creation and bulk editing
released this summer.
**What changes.** From the results of a query, you select one or more components. If the
selection mixes several types, you choose the one to delete. A confirmation screen lists the
components concerned and everything that will be deleted with them (sub-equipment, associated
plans). The action cannot be undone.
**Example.** A batch of equipment was created by mistake during an import: you find it with a
query and delete it in one go, rather than one item at a time.
**Permissions.** This action depends on a dedicated permission, "Asset deletion", unticked by
default for every group. It is enabled in user group management, under Assets and data. If you
need it, contact your referent.
See also: [Querying your data](/guide/qualite-donnees/requeter-les-donnees)
## Other improvements
### Plans tab (Graphlake)
- The site plan is always at the top level of the tree and opens automatically.
- Left panel: collapsible sections, and resizable space between the tree and the legend.
- Equipment is grouped in an intermediate drop-down menu of the tree, as on Model on Platform.
- On the site plan, the "room type" theme becomes "area type".
- The export button exports the plan directly as a PDF.
### Query tool (Graphlake)
- Service provision and supplying equipment columns available from the preview.
- List values are displayed as tags.
- Vocabulary harmonised in French, English and German: "object" becomes "component",
"property" becomes "column" on the add button, and the CSV export button has a clearer label.
### Property record (Graphlake)
- Direct access to the plan from a piece of equipment in the Equipment tab, when it is shown on
a plan.
- New layout for the information record: display modes, actions grouped in the header, content
organised in sections.
### Portfolio and data
- Codes and identifiers accept the typographic apostrophe (’).
- When no value is valid on the current date, the last known value is shown rather than no
value.
- Import error messages translated into French.
- Bulk editing actions on documents are prefilled with the values shared by the selection.
### Model on Platform plans (Abyla)
- Label font size setting.
- Buildings are coloured when hovering over the site plan.
- The detail shown on hover is no longer hidden by the tree.
## Fixes
- Highlighting the unit on the floor plan, from the unit record, works again.
- The PDF export of the unit record is no longer limited to one page, and its headers are shown
in the interface language.
- An error message no longer appears wrongly after a very large bulk edit that did complete.
- The number of lines announced on equipment CSV import now matches the one in the history.
---
# The home page
URL: https://docs.stonal.io/fr/guide/vue-densemble/accueil
# The home page
## What it is for
This is the page you land on after signing in. It gives the **key figures** of your portfolio and
serves as your starting point.
_Video tutorial, 1 min 54: what you find on arrival, and where to start._
## The screen explained
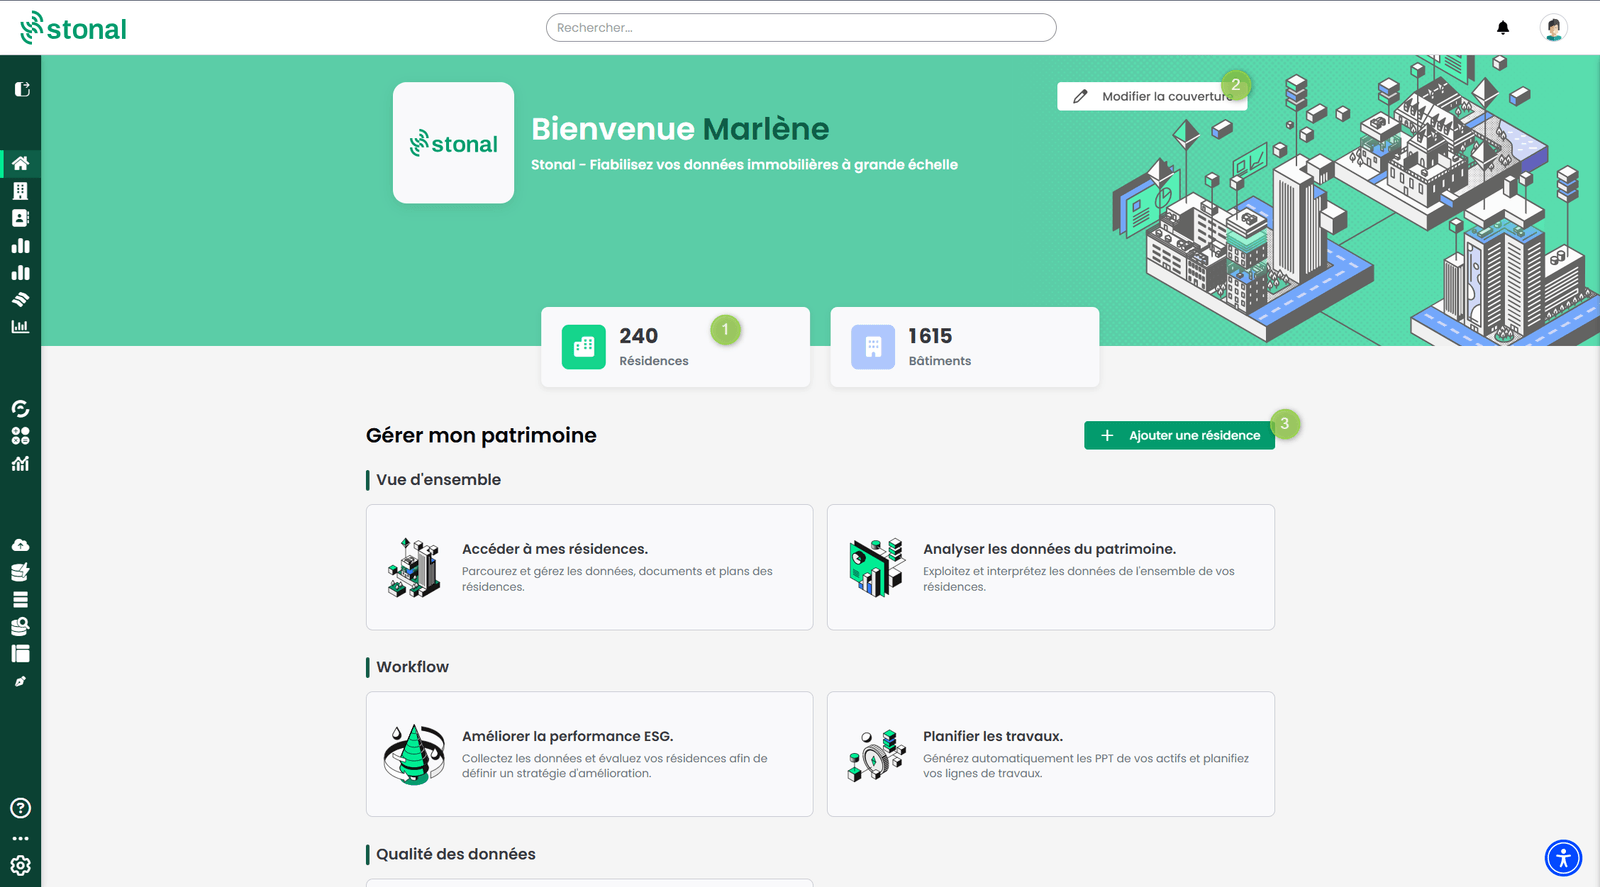
1. **The key figures** of your portfolio — the number of properties, buildings and dwellings.
Clicking a figure opens the **My properties** page, filtered on that type of property.
These figures count what is **recorded in Stonal**, which is not quite the same as your portfolio
at a given moment. Properties and buildings that have **left the portfolio** — sold, demolished —
are excluded, as are those **being acquired** and so not yet officially part of it. A gap with
your own figures usually comes from there.
2. **"Change cover"** — the image at the top of the page is **customisable per organisation**. If
you have the necessary permissions, hover over the image: the button appears and lets you replace
it.
3. **"Add a property"** — to complete your portfolio by hand.
## Step by step
### Add a property
If you want to add a property by hand to the portfolio already described in the platform, click the
**"Add a property"** button, in the centre right of the page.
1. Add the property.
2. Enter the site address.
3. Complete the data of its identity card.
4. Give the number of buildings.
This action depends on the permissions you have been granted, so you may not have access to it.
If you need it, ask your internal contact.
## Good to know
:::warning Portfolio fed automatically
If your portfolio is updated from your management software, adding properties, buildings or data
by hand is **not advised**: it may create inconsistencies.
:::
## See also
- [The platform menu](/guide/demarrer/le-menu)
- [My properties](/guide/vue-densemble/mes-residences)
---
# My properties
URL: https://docs.stonal.io/fr/guide/vue-densemble/mes-residences
# My properties
## What it is for
This page lists all your properties and all your buildings. Select a property or a building to reach
its information, its documents, its plans, its unit records, and the description of the equipment it
is made of.
Depending on your organisation, this module may be called **"My assets"**.
## The screen explained
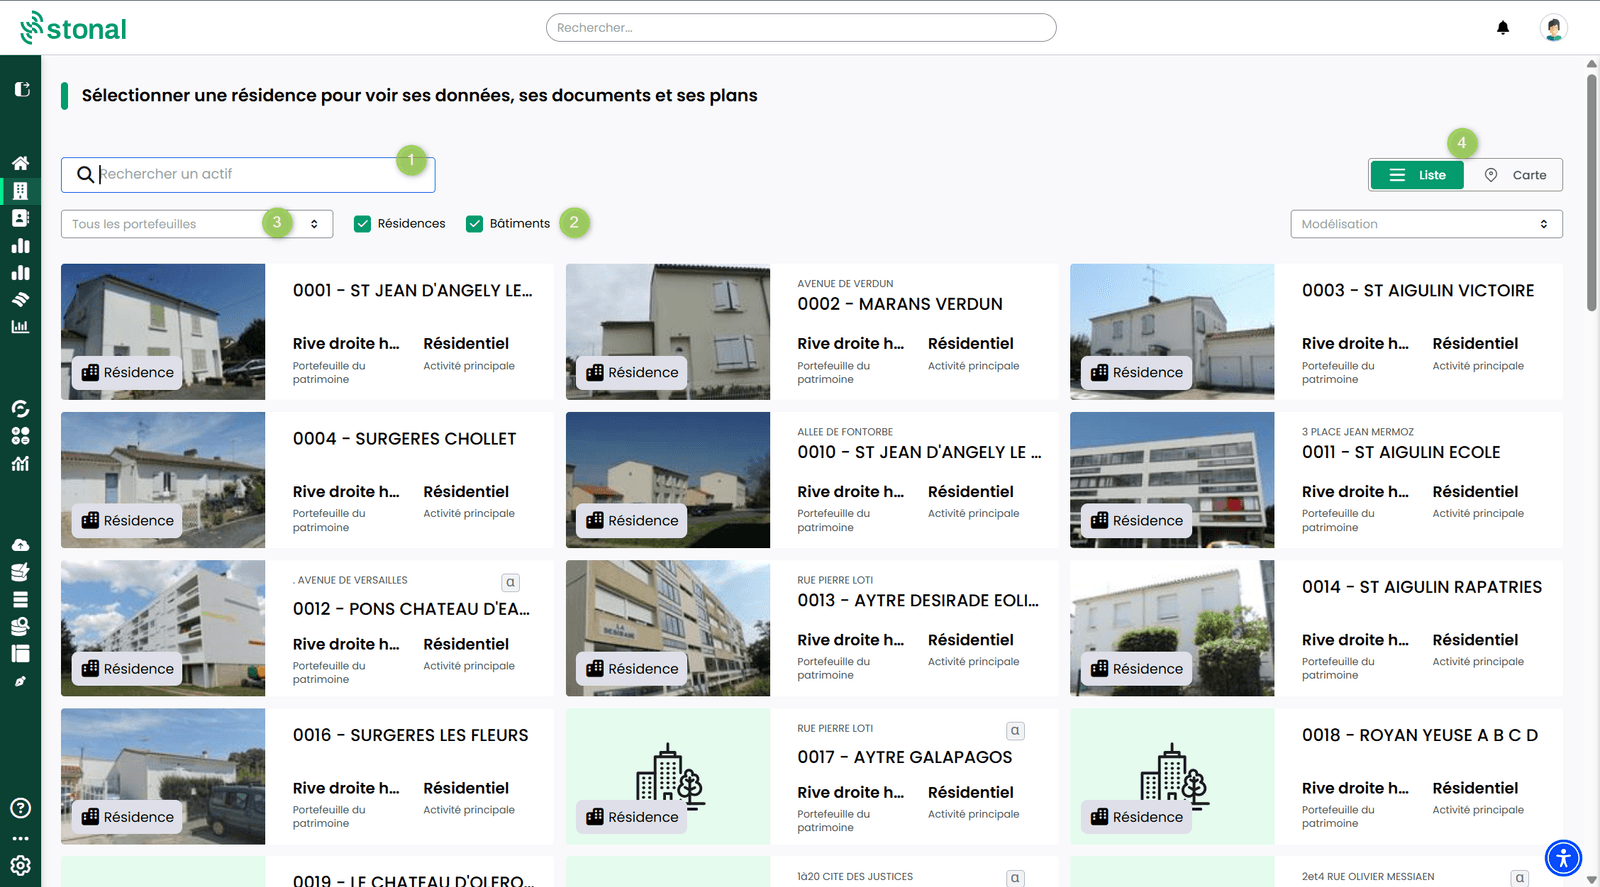
1. **Search bar** — find a property or a building by its code, its name or its
address.
2. **Filter** — restrict the display to **properties** or to **buildings**.
3. **Sub-portfolio** — if your portfolio is segmented (by branch, for instance), tick the branch
to see only its properties.
4. **Display** — switch between the **map** and the **list view**, whichever suits you best. Click a
property or a building directly to open it; **Ctrl + click** (**Cmd + click** on Mac) opens
it in a new tab.
Two more filters complete these markers:
- **Status**: find **Upcoming**, **In operation** or **Archived** properties and buildings. By
default, only those in operation are shown: choose another status to find, for example, a
property being delivered or one that has left the portfolio.
- **Core business**: restrict the display to one activity.
## Good to know
The list you see depends on the access you have been granted. You may not see every property in the
organisation.
The status of a property or a building is calculated from its effective and expiry dates. It cannot
be changed by hand: if it is wrong, correct the effective or expiry date.
## See also
- [General information for a property](/guide/vue-densemble/mes-residences/informations-generales)
- [The search bar](/guide/demarrer/barre-de-recherche) — to search inside documents too
---
# General information for a property
URL: https://docs.stonal.io/fr/guide/vue-densemble/mes-residences/informations-generales
# General information for a property
## What it is for
This is your property's identity card: where it is, what it is made of, and every piece of
data you track about it.
It is the **first tab** of the property page. You get there from **My properties** or from the
search bar.
The same tab exists at **building** level. Two routes lead there: select a building directly from
the previous page, or click a building shown in the **Composition** area.
_Video tutorial, 57 seconds: address, areas and vacancy, gathered in one place._
## Before you start
Consulting the information is available to every user within your scope. **Modifying or adding a
piece of data**, and **adding a building**, however, depend on the permissions you have been
granted, so you may not have access to them. If you need them, ask your internal contact.
## The screen explained
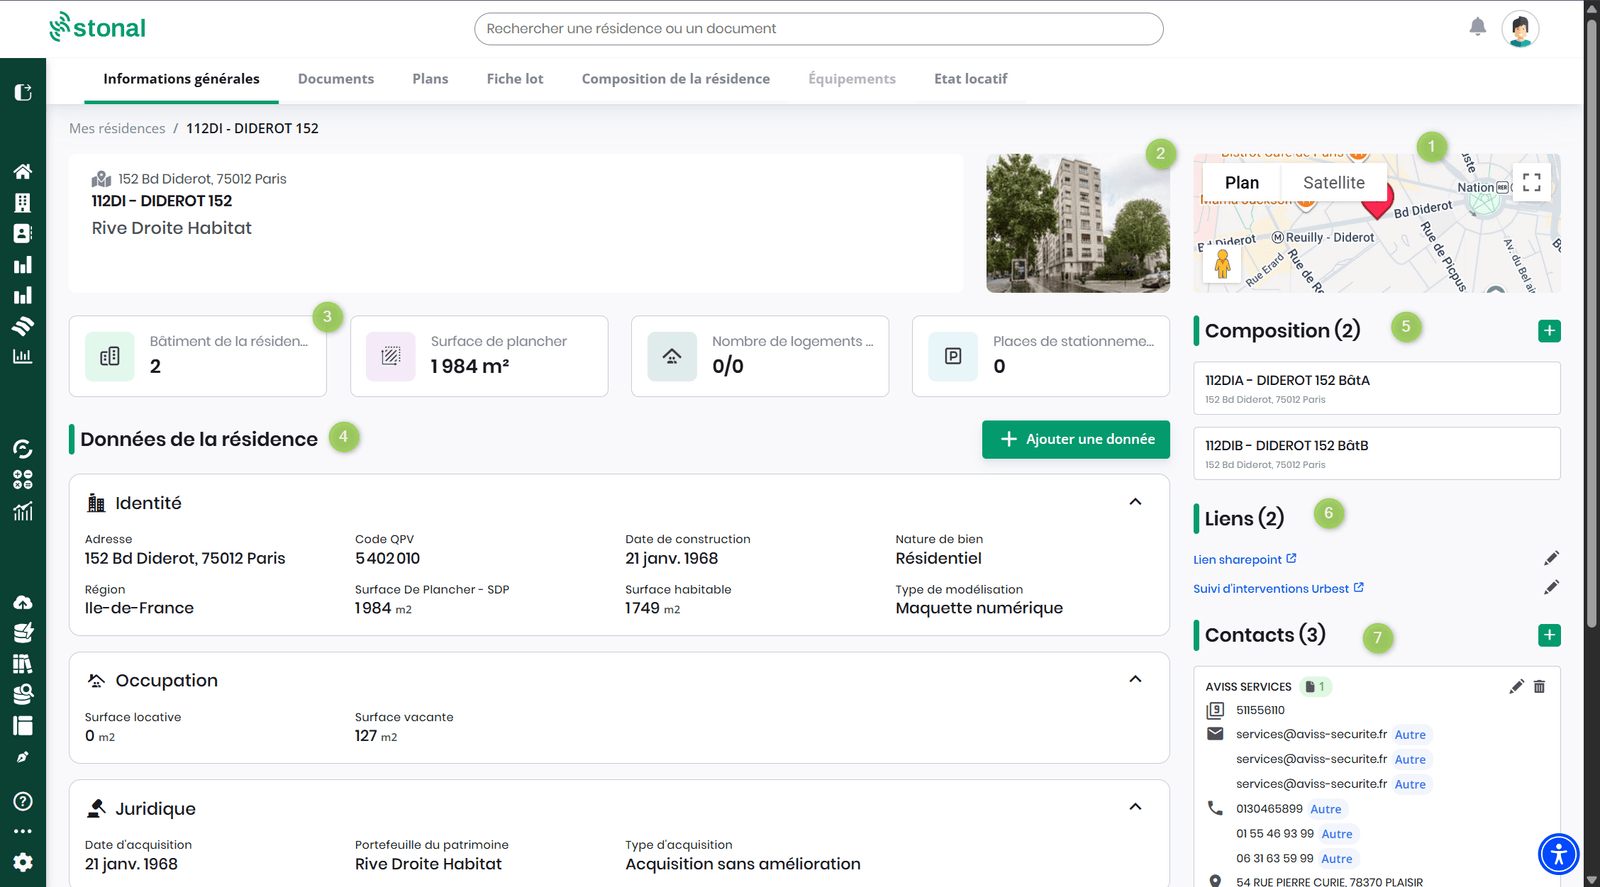
The tab reads in seven areas:
1. **Geolocation** — the position of the property on a map, in map or satellite view.
2. **Photo** — usually the façade of the building.
3. **Key information** — what appears here is **configurable per organisation**. Access to the
configuration page depends on the permissions you have been granted; it sits in the menu, under
**Settings › Organisation management**.
4. **Property data** — all its data, split across six axes: identity, operation, occupancy,
environment, legal, other.
5. **Composition** — the list of buildings in the property.
6. **Links** — shortcuts to your external tools, so you can move from one application to another
without leaving Stonal.
7. **Contacts** — the contacts attached to the property.
A link takes you to the **Documents** tab to consult the documentation for the property or the
building.
### Open the property in another application
The platform's applications work on the same portfolio. At the top of a property's record, the
**"View in"** button opens the same property in the other applications: **Works Plans**, **EDIT**
or **Check data**. You move from one to another in one click, without searching for the property
again.

### Data from open data
:::info Availability
This feature only concerns organisations running **Graphlake**.
:::
Some of a building's characteristics already exist in public databases. Stonal can retrieve
them to save you data entry or a field survey. Fifteen characteristics are concerned:
- type, energy and generator for heating and domestic hot water;
- structure, facade, facade and roof insulation, flat roof;
- type of openings and external shutters;
- ventilation system and presence of balconies.
In this tab, each value retrieved this way is **flagged as coming from open data**: you know
where it comes from.
Retrieval relies on the building's BDNB identifier. It is obtained either from the energy
performance certificates (DPE) stored in the Stonal Smartdoc document management system (ADEME
number, then RNB, then BDNB), or by entering the RNB or BDNB identifier directly. The **"Open
data"** report shows the result of the retrieval. Access to it depends on your organisation's
report groups.
To benefit from it, first get in touch with the Stonal teams: an initial retrieval has to be
launched. The amount of information varies widely from one building to another, and remains low
for commercial property.
## Step by step
### Add a piece of data
1. Click **"Add data"**.
2. Choose the data type from the list — it contains the data retained by your organisation.
3. Enter the value, then confirm. For a decimal number, use a **dot** as the separator (12.5):
the comma is not accepted.
### Modify an existing piece of data
1. Click the data you want to correct.
2. Enter the new value, then confirm. **Data is kept in history**: the previous value is not lost.
### Add a building
1. From the relevant property, click **"Add a building"**.
2. Enter the data for its identity card, then confirm.
### Change the photo
1. From the data page of the property or the building, **click the photo**.
2. Drop in the image you want. Accepted formats are **PNG** and **JPEG**.
### Add a link to an external tool
Links are shortcuts you create yourself: they save you looking up another tool's address every
time.
One step comes first: the property that will carry the link must **exist in your property
reference data**, with the **"link"** type. Once that property has been created, all that remains
is to enter the address of the tool you want to point to.
### Add a contact
Two routes lead to the same result:
- **from this page**, using the **+** button in the Contacts area;
- **from the [Contacts & operators](/guide/vue-densemble/contacts-exploitants) module**, by creating
the contact and then giving it its scope.
The first route is quickest when you are already on the property. The second is preferable when
you are creating a contact who works across several properties.
## Good to know
:::warning Portfolio fed automatically
If your portfolio data is updated automatically from your management software, avoid the **"Add
data"** and **"Add a building"** buttons: it may create inconsistencies. Speak to your internal
contact.
:::
- The list of available data depends on your organisation's configuration.
- To consult the change history of a piece of data, go through the **Checking data** application if
you have access to it. If not, ask your internal contact for access.
## See also
- [My properties](/guide/vue-densemble/mes-residences) — finding a property in the list
- [Organisation management](/guide/administration/gestion-de-lorganisation) — choosing the key
information shown
- [Contacts & operators](/guide/vue-densemble/contacts-exploitants)
---
# The documents of a property
URL: https://docs.stonal.io/fr/guide/vue-densemble/mes-residences/documents
# The documents of a property
:::info Availability
This page concerns organisations running **Stonal Smartdoc** document management.
If your organisation is still on **Keep**, your screens are described in
[Keep](/guide/versions-anterieures/keep).
:::
## What it is for
This tab lets you **reach the documents** of the selected property or building, **manage** them and
**import** more.
When you import a document, Stonal's artificial intelligence recognises the **document type** —
what we call its **class** — and files it automatically in the right folder. You keep full
visibility on that filing, and the ability to correct it.
Depending on the document type, it also **extracts information** from it, to save you reading
through. That extracted information, which we call **metadata**, appears **on the right** once the
document is open in the interface.
_Video tutorial, 1 min 17: the documents of a property and their shared filing structure._
## Before you start
What you can do depends on the permissions you have been granted: viewing and downloading are open
to everyone, importing and filing require a modify permission, and creating or changing the folders
of a document template a document administration permission. If you need them, ask your internal
contact.
The tab only appears if a **document template** has been created beforehand.
## The screen explained
The tab has two sub-tabs: **Filed documents**, shown by default, and **Document management**.
:::info A new version of the tab
Since 15 October 2026, the Documents tab is shown in a new version. Your features stay the same,
in the same place. Need time to adjust? The **Previous version** button, at the top right of the
tab, shows the previous version, and a button there brings you back here.
:::
### The Filed documents sub-tab
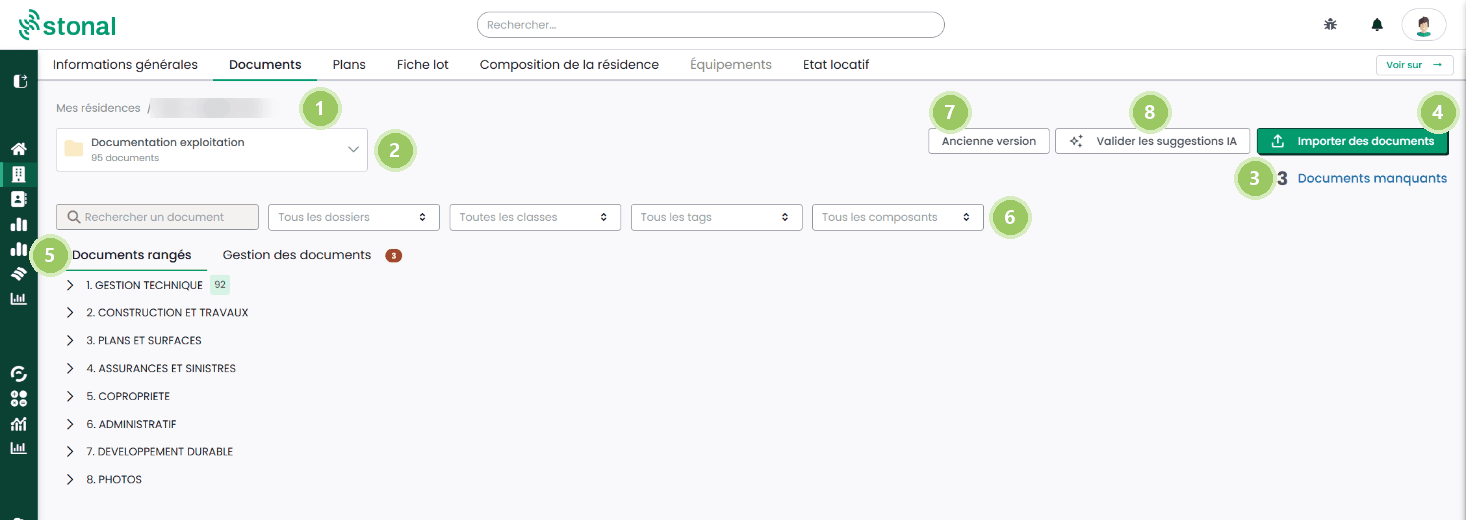
1. **Breadcrumb**: where you are, and the way back up a level.
2. **Documentation**: the name of the selected **document template** and how many documents it
holds.
3. **Missing documents**: the number of mandatory documents unavailable. Click to open the detail.
Each organisation defines **its own list** of the documents it treats as mandatory. So this
counter tells you, for the property on screen, whether any of them are missing — and which. The
list is configured in ⚙️ **Settings › Document templates**:
[define the mandatory documents](/guide/administration/gestion-documentaire/modeles-documentaires#define-the-mandatory-documents).
4. **Import documents**: the upload button.
5. **Filed documents**: the sub-tab you are on, next to *Document management*. The red badge on
*Document management* shows how many documents are waiting for your input (**Action required**
status).
6. **Filters**: show only some folders, classes, tags or components. They apply to both sub-tabs;
searching by name is done from *Document management*. As soon as a filter is set, the number of
documents found is shown, with **Reset filters** to clear them all.
7. **Previous version**: shows the previous version of the tab.
8. **Validate AI suggestions**: accept the filings proposed by the artificial intelligence in one
go (see [Correct a filing](#correct-a-filing)).
**A document template is a grouping of folders.** Each one carries its own, and the folder you are
looking at always belongs to the template selected here — which is why the tree changes when you
switch it.
Our clients usually distinguish two: an **operations documentation** and a **DOE documentation**,
for as-built files. To review that configuration, speak to your internal contact.
:::info The folders are the same everywhere
For a given document template, the folders are shared across **all your properties**: your documents
are therefore filed the same way from one end of the portfolio to the other.
:::
Expanding the tree takes you down to the document:
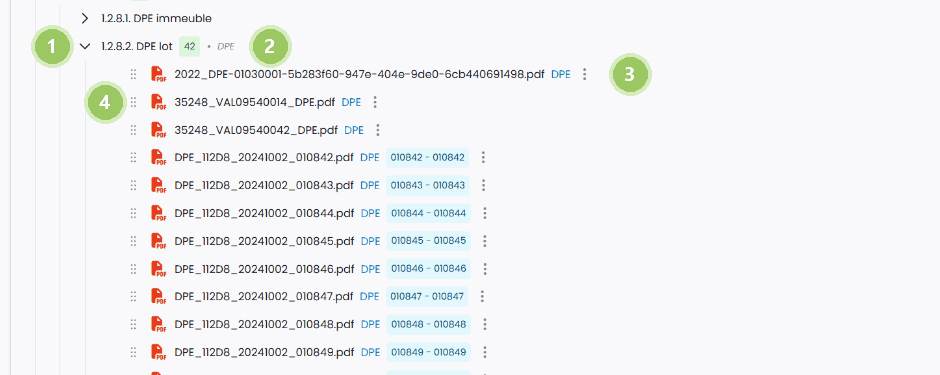
1. **Sub-folder**: the tree expands across several levels.
2. **Number of documents**: how many the folder holds.
3. **The document**: its label is followed by its **class** (EPC, asbestos survey, lease…) and by
the **unit** concerned when the document relates to one unit in particular.
4. **Handle**: to drag the document to another folder.
When you hover over a folder, a download icon lets you get all its content as a single ZIP file.
### The Document management sub-tab
This is the full list of your documents.
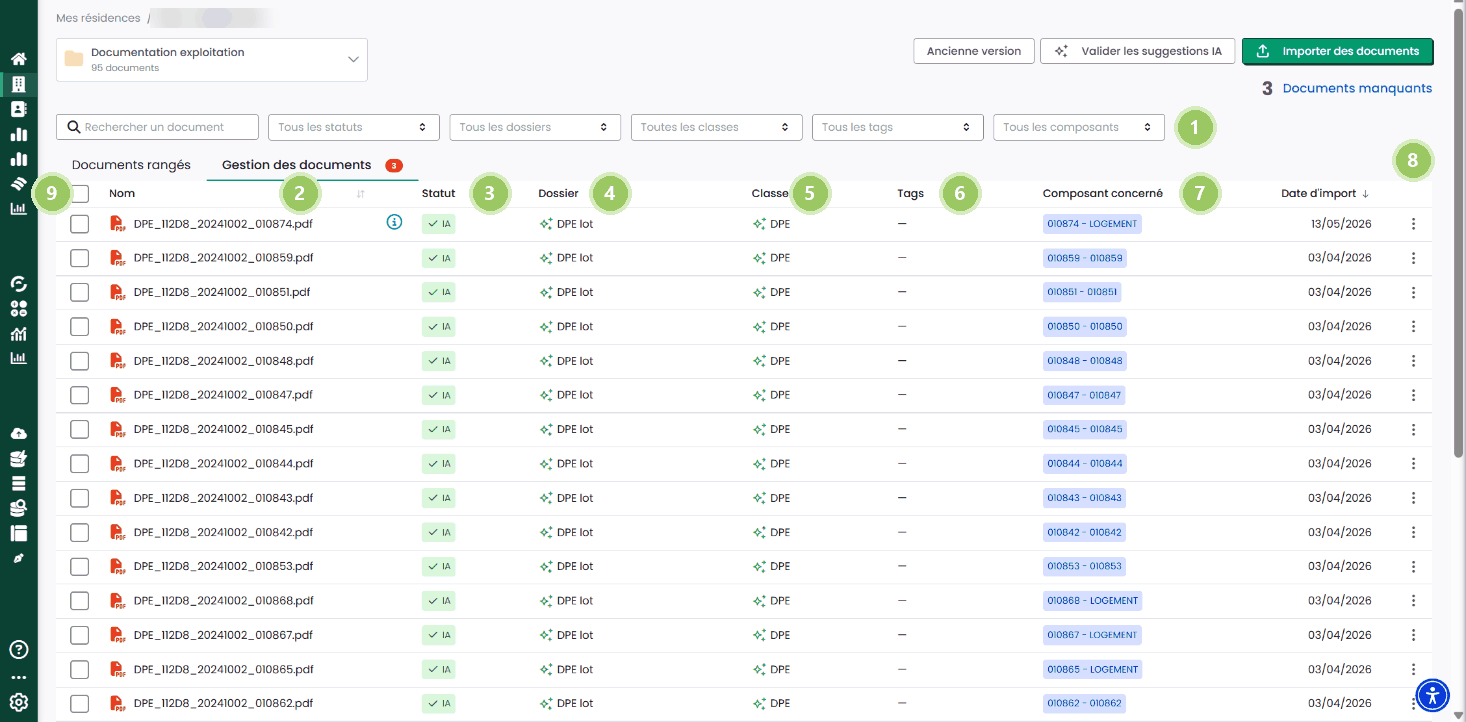
1. **Filters**: the same as on *Filed documents*, plus the search by name and a **status** filter.
2. **Name**: the document label. An ⓘ icon next to the name means it has
[duplicates](#spot-duplicates).
3. **Status**: **AI** when the document was filed by the artificial intelligence, **Manual** when a
user confirmed the folder and the class themselves, **Action required** when the artificial
intelligence is unsure of what it proposes. Click the folder or the class to confirm or correct.
4. **Folder**: the folder it is filed in.
5. **Class**: the class assigned to it (optional).
6. **Tags**: your tags, fully customisable (optional).
7. **Linked assets**: the buildings and units it relates to (optional).
8. **Options**: rename, download, copy the document link, delete.
9. **Tick box**: to act on several documents at once.
**Tags** are customisable and specific to your organisation. You can use them to identify the
documents of a specific refurbishment, or the companies working on a site, for instance.
## Step by step
### Import documents
_Video tutorial, 1 min 20: the import, the duplicate check and the automatic reading._
Three gestures work:
- click **"Import documents"** and choose one or more files;
- **drag and drop** your documents anywhere on the interface;
- **drop them onto a folder** of the tree: they are filed there straight away, with the class
that folder imposes.
The artificial intelligence then takes over: it recognises the document class, proposes a filing
folder based on that class, and **extracts the metadata specific to the class** — for an EPC: visit
date, validity, energy rating, area; for a lease: tenants and dates.
The document goes through the **Classification** then **Extraction** statuses during that processing,
then comes out either
filed with an **AI** status, or flagged as needing your input with an **Action required** status.
Processing takes a few seconds.
If you would rather **choose the location yourself**, drop the document straight into the folder you
want, then complete the missing information from *Document management*: the document class, and the
unit concerned if it is a unit document.
If the document is **already present**, a message asks you whether you really want to upload it
again. Only documents of the same property and the same documentation count: a copy filed on
another property does not trigger this message.
To work out the class, Stonal compares your document with those **already held in your Stonal
Smartdoc document management**: it keeps the ones that resemble it most and reuses their class. If
the proposed class is not the right one, correct it by clicking on it — the next documents of the
same kind will be recognised better.
### Import a whole folder tree at once
The drop zone accepts files, not folders. To bring in a whole tree in one go, compress it and
drop the archive.
1. On your computer, compress the folder into a **ZIP** file (7z files also work).
2. Drop that archive in Smartdoc, like any other document.
3. From the document row, choose **"Extract file"**, then confirm.
**Your folders come back as tags.** Every folder level of the path inside the archive becomes a
tag on the document. A file stored in `Safety/Lifts/2025/report.pdf` arrives as `report.pdf`
carrying three tags: `Safety`, `Lifts` and `2025`. Tags that do not exist yet are created for you.
Folders themselves are not recreated. Every extracted document lands in the same folder as the
archive, and your original organisation lives on through the tags.
The archive itself is **kept** by default. Tick **"Delete the ZIP file after extraction"** in the
dialog if you would rather it disappear once its content is in.
Extraction runs in the background. A progress bar follows it on the document row, and the list
refreshes on its own when it is done.
:::note Good to know
- Documents coming out of an archive are **not analysed by the artificial intelligence**: no class
is proposed and no metadata is extracted. Complete them from *Document management*.
- A file whose format is not supported is skipped on its own, without blocking the rest of the
archive. You get a summary of what was left out.
- Two identical files inside the same archive are imported once.
- An archive can hold up to 5,000 files.
:::
### View a document
_Video tutorial, 1 min 55: looking for a document, downloading it, sharing its link._
Click the name of the document to open it; with the keyboard, **Enter** or **Space** on its name.
PDFs and images (JPEG, PNG) open in the viewer, in a panel to the right of the list; other files
download straight away. The **Close** button or **Esc** closes the panel.
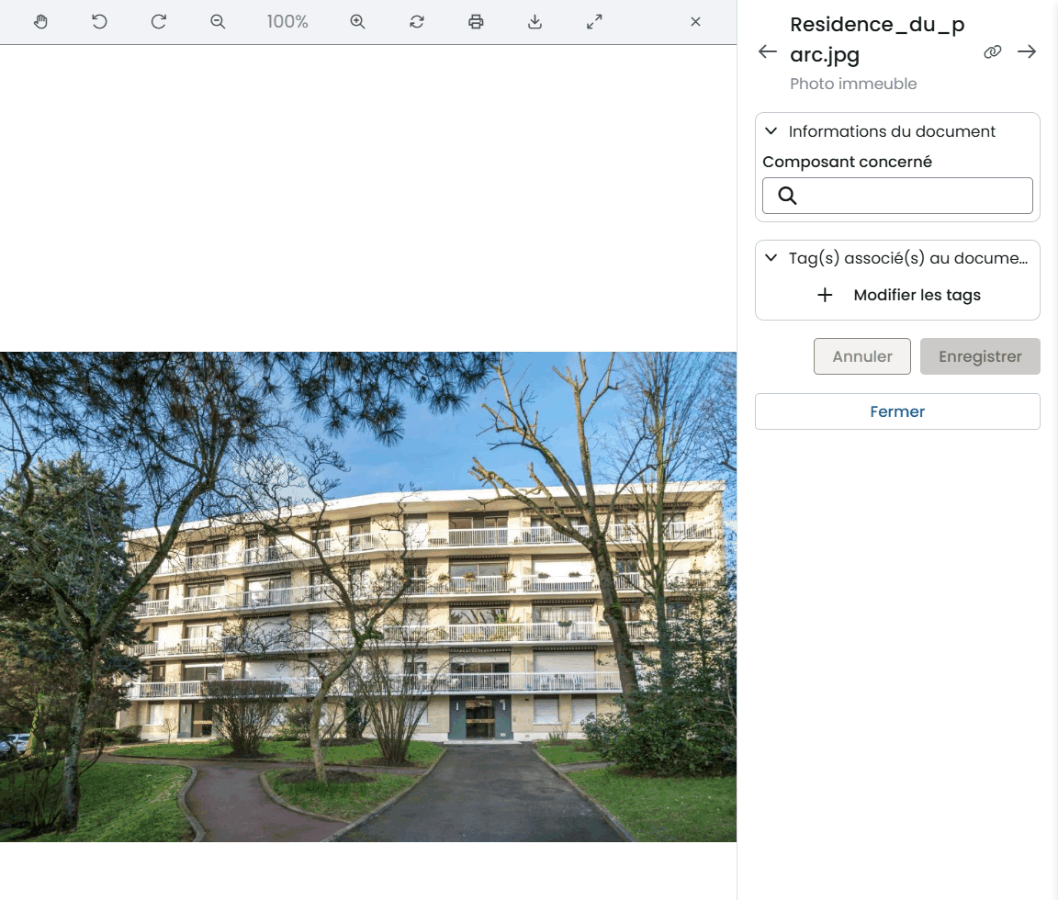
The viewer toolbar lets you **zoom**, **rotate** a photo, **move around** the document with the
hand tool, **print** it and **download** it. The expand button shows it across the whole window. On
a PDF, once you have clicked in the document, **←** and **→** change page, **+** and **-** zoom and
**0** goes back to the initial zoom.
Opened from **Document management**, a document can be browsed with the **Previous document** and
**Next document** arrows, at the top of the right-hand panel, without closing the viewer.
The **metadata** of the document appears in the right-hand panel.
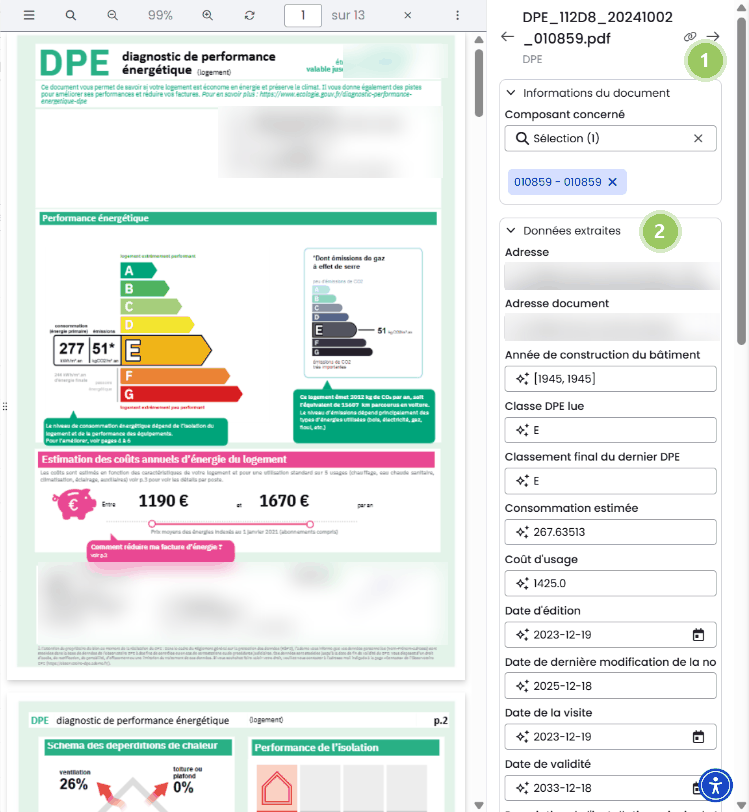
1. **Document label**.
2. **Extracted data**: the metadata, **preceded by a star**, was extracted by the artificial
intelligence. You can correct or complete it by clicking straight into the field, then confirm at
the bottom of the page.
### Share the link to a document
To point a colleague to a document, open the **action menu** at the end of its row and choose
**"Copy document link"**. The link goes to your clipboard, ready to be pasted into an email or a
message.
Opening it leads straight to the document in Stonal. The person still needs to be signed in and to
have access to that document, so sharing the link does not widen who can see what.
### Make the same document available from several properties
A document sometimes concerns several properties: one survey covering two buildings, one contract
signed for a whole neighbourhood. Rather than importing it once per property, file it in a single
place, then name the other properties concerned. It will show up in all of them.
From the **Filed documents** sub-tab, open the **action menu** of the document and choose **"Add
access to the document via other assets"**. Pick the properties concerned, then **Create
shortcut(s)**. The documentation and the folder stay those of the source document.
The document is **not duplicated**: what you create are shortcuts, all pointing to the same
document. Any change made to it (a new label, a corrected class, a tag, completed metadata) is
therefore reflected everywhere at once, whichever property you went through to open it.
:::note Rights needed
This action requires the right to modify documents. If it does not appear in your menu, speak to
your internal contact.
:::
### Correct a filing
On the **Folder** and **Class** columns, an icon shows the estimated **reliability** of the filing
done by the artificial intelligence, from **green** (high reliability) to **orange** (low).

Click the icon to open the detail: Stonal tells you the **reliability** of the proposed class and,
when it has them, the documents it relied on. You can then correct the class and the folder, or
accept the proposal with **Validate IA classification**.
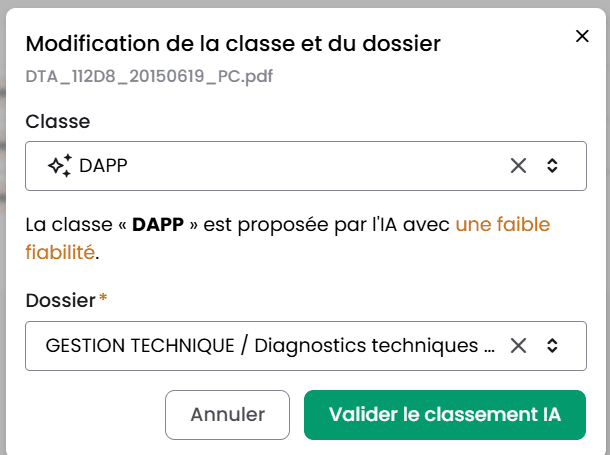
To accept several proposals at once, click **Validate AI suggestions**, at the top of the tab. The
window lists the documents whose proposed class and folder are still waiting for your validation,
all ticked: untick the ones you would rather review one by one, then validate. The proposals are
accepted as they are; to change one, go through its row. The button is greyed out when there is
nothing to validate.
You can also **drag a document** onto another folder of the tree.
To quickly correct the folder, the class or the tags from the list: hover over the value, edit it
with the **pen** 🖋️, then click anywhere to confirm.
To rename a document, choose **Rename document** in its action menu: **Enter** or a click elsewhere
saves the new name, **Esc** cancels. The file extension cannot be changed.
Two rules worth knowing: a class is attached to at least one folder, and a folder has at most one
class.
### Spot duplicates
A document uploaded more than once by mistake is flagged in the list by an ⓘ icon next to its name.
Two duplicates are two documents whose **content is exactly identical**: two files sharing a name
but holding different content are not duplicates.

### Act on several documents
Tick the documents concerned in **Document management** to download, delete or modify them in a
single operation: their class, their folder, their tags or the components they relate to.
## Good to know
:::warning Accepted files
Allowed file types are an exhaustive list, with size limits per type. An unknown extension is refused on
import. If you need to upload a format that is not handled, speak to your internal contact: this
list can change.
:::
- **A component that is no longer part of the portfolio** (a unit that was sold, for instance)
stays linked to the documents that concerned it. Its label then shows in italics, with a
calendar icon, and the tooltip says since when it has expired. The link is not removed
automatically: it is up to you to decide whether to keep it.
- **A document filed in no folder does not appear** in the *Filed documents* tab. To reach it, go to
the *Document management* tab, then file it by clicking its **Folder** cell.
- A **corrupted PDF**, or one that text recognition cannot read, is marked as unable to be
processed, with no alert at import. You will find it in the
[Document tracking](/guide/administration/gestion-documentaire/suivi-documentaire) report.
:::tip Are your surveys arriving in the right format?
How well filing and extraction work depends a great deal on how your contractors produce their
documents. We have gathered what to ask of them:
[what to ask of your surveyors](/guide/recommandations/diagnostics).
:::
## See also
- [The Document tracking report](/guide/administration/gestion-documentaire/suivi-documentaire) — the quality and
completeness of your documents across the portfolio
- [The search bar](/guide/demarrer/barre-de-recherche) — search a document across the portfolio and
act in bulk
- [Document templates](/guide/administration/gestion-documentaire/modeles-documentaires) — how the folder structure is
defined
- [API guide — Document storage](/api/reference/documents/document-storage-api-public-endpoints)
---
# The plans of a property
URL: https://docs.stonal.io/fr/guide/vue-densemble/mes-residences/plans
# The plans of a property
:::info Availability
This page concerns organisations running **Graphlake**.
If your organisation is still on **Abyla**, your screens are described in
[Platform - Plans tab (Model)](/guide/versions-anterieures/plateforme-onglet-plans-model) and
[Model](/guide/versions-anterieures/model).
:::
## What it is for
The **Plans** tab lets you view the digital models of your property: this is the **Graphlake**
interface.
It also works for **properties that have not been modelled** — the screen then adjusts to what is
available.
The interface reads in **two or three parts**, depending on whether a digital model exists:
| Part | What you find there |
|---|---|
| **On the left** — the tree | The whole physical composition of your property |
| **In the middle** — the plan | Only present if you have a digital model |
| **On the right** — the information panel | The characteristics of the selected element, whether picked in the tree or on the plan |
_Video tutorial, 1 min 43: opening a plan and reading the data it carries._
## The screen explained
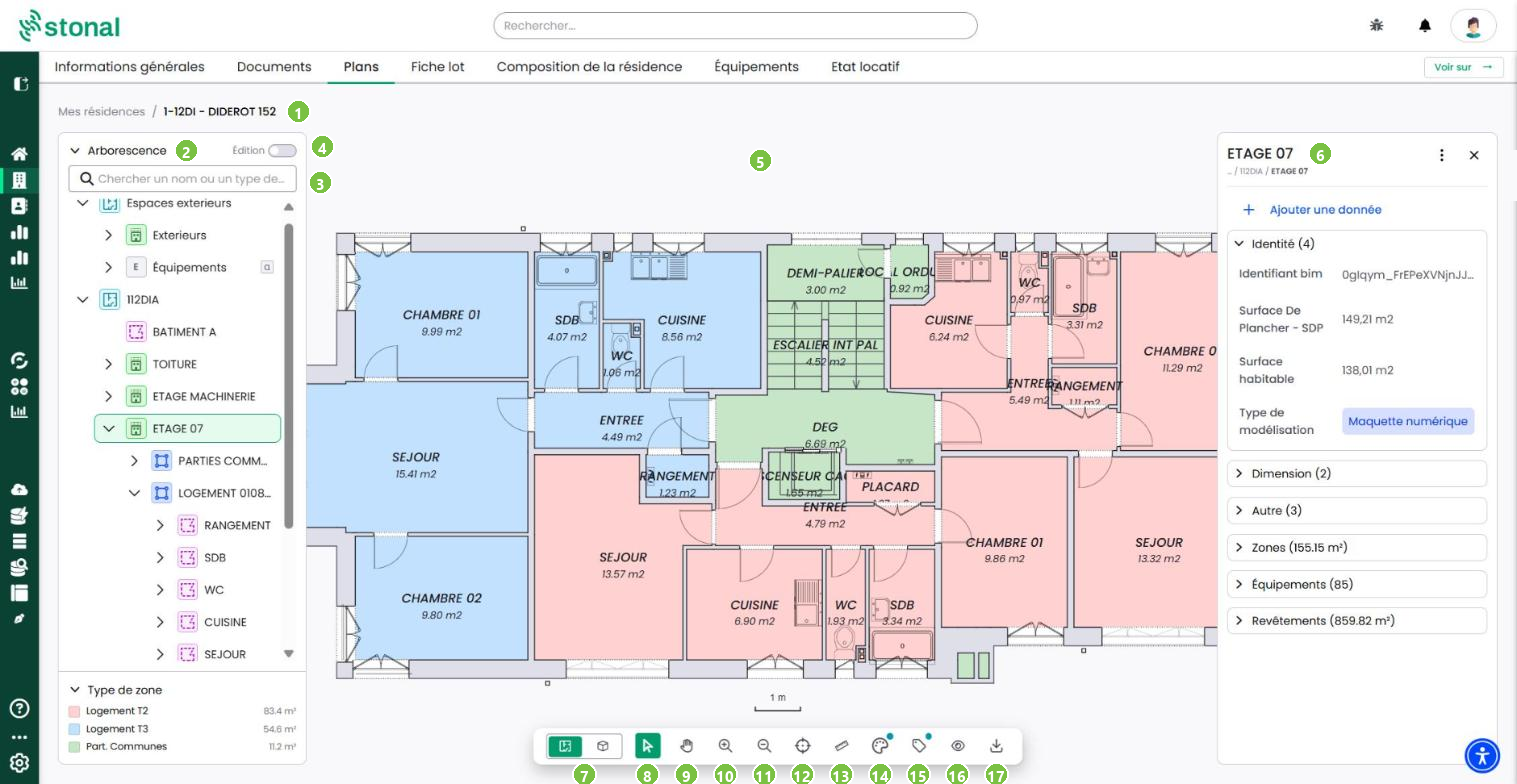
The screen has six areas:
1. **Breadcrumb** — locate the property or building, and move up a level.
2. **Tree** — the breakdown of the property. Expand and select an item to zoom onto it.
3. **Search** — find an item (site, building, floor, zone, room, equipment) by type, name or code.
4. **"Edit" switch** — turns on the tree's Edit mode: see
[Keep a building's structure up to date](#keep-a-buildings-structure-up-to-date).
5. **Plan** — the viewing area.
6. **Information panel** — all the information of the selected item: renewal date, brand, equipment
type…
The toolbar, at the bottom of the plan, follows the numbering on the capture:
| Marker | Tool | Use |
|---|---|---|
| 7 | **View mode** | Switch between 2D and 3D, when the 3D model is available |
| 8 | **Select** | Choose what you select: equipment, rooms… |
| 9 | **Pan** | Move the plan without selecting an element by mistake |
| 10 | **Zoom in** | The scroll wheel zooms too, no key to hold |
| 11 | **Zoom out** | |
| 12 | **Reset zoom** | Go back to the default zoom |
| 13 | **Measure** | Measure a distance on the plan: see [Measure a distance on the plan](#measure-a-distance-on-the-plan) |
| 14 | **Themes** | Colour the plan by a criterion |
| 15 | **Labels** | Show the name and area of spaces on the plan, and set the label size with a preview |
| 16 | **Display** | Show or hide certain elements: plots, networks, areas… |
| 17 | **Export as PDF** | Get the plan as a PDF |
The active tool is shown in green. A marker on the button tells you that a theme, a label type or
a layer is applied.
_Video tutorial, 2 min 39: moving around, zooming, recentring, finding an element._
### Switching to 3D
Button **7** switches the view to three dimensions. It is only active on properties whose 3D model
is available.
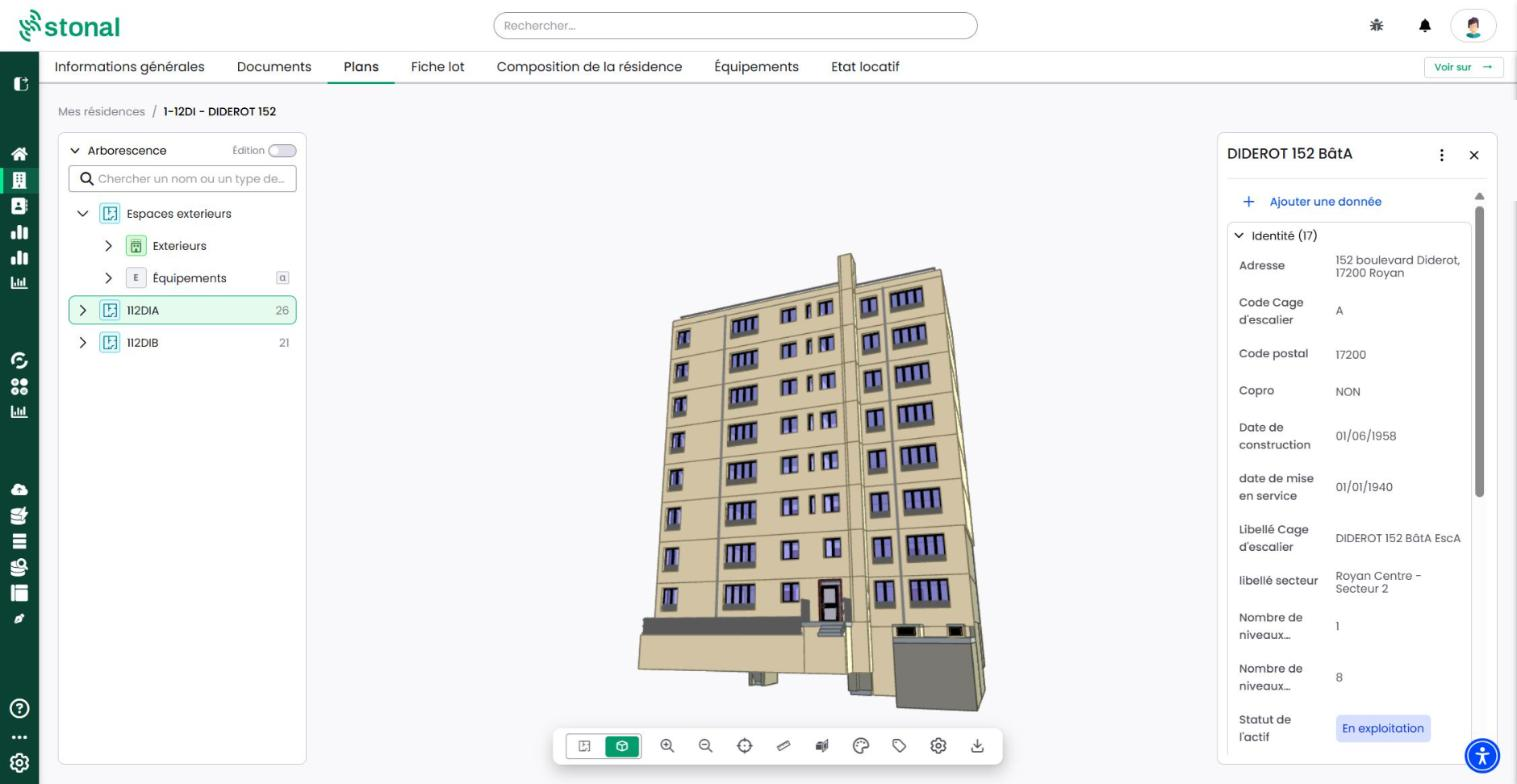
The 3D view is handled with the mouse: left-click to rotate the model, scroll wheel to zoom. The
orientation cube, at the bottom right, tells you which side you are looking from and lets you return
to a specific face. The toolbar there is reduced to the functions that make sense in 3D. **Select**, **Pan**,
**Reset zoom** and **Display** disappear; **Zoom in** and **Zoom out** remain, and three
3D-only tools appear: **Section plane**, **Buildings** and **Parameters**.
- **Themes**: a theme turned on in 2D also colours the model in 3D, and the other way round. For
a theme on rooms, the rooms are shown on the floor you are viewing; for a theme on equipment,
they are hidden.
- **Measure**: two clicks on the model display the distance. Measurements taken in 2D are kept
when you switch to 3D and back to 2D.
- **Section plane**: this tool slices through the model to show its inside. It takes a little
practice to master.
- **Labels**: room labels are also shown in 3D.
- **Buildings**: on the plan of a site with several buildings in 3D, choose which ones are
shown, or tick **Select all**.
- **Parameters**: show or hide the coverings and rooms of the model.
- **Export as PDF**: the 3D view can be downloaded as a PDF (A4 landscape), with the measurements
and the theme on display.
## Step by step
### Open the plans of a property
1. Open **My properties** in the left-hand menu.
2. Find the property or building you want.
3. Click the **Plans** tab.
The digital model is displayed directly in the platform. The **site plan**, always at the top
level of the tree, opens automatically.
### Colour a plan by theme
1. Choose the level in the tree.
2. In the toolbar, click **Themes**.
3. Choose the theme and apply it.
The plan is coloured and a **legend** appears — you can move it, or zoom in on it. For example:
vacant dwellings, or dwelling types.
:::info Some themes depend on the level
Site areas, for instance, only appear if you have selected the **site**.
:::
:::info Your theme follows you from one plan to another
When you change level, or switch between 2D and 3D, the theme you chose stays applied. If it has no data on the new plan, the plan is shown without colouring and a message tells you that the theme is not available on this plan. It applies again as soon as you return to a plan where it exists.
:::
### Create your own theme
Beyond the themes supplied as standard, you can build **your own**, based on any property of
your components.
1. In the toolbar, click **Themes**.
2. Click the **+** button.
3. Give your theme a **name**.
4. Choose the **component** it applies to: dwelling, room, equipment…
5. Choose the **property** the colouring is based on.
6. Click **Save**.
Each value of that property is then given a colour automatically. Choosing the colours
yourself is not possible yet.
To **modify** a theme you have created, click the pencil next to its name. To **delete** it,
click the bin.
:::info A permission is required
Creating and modifying custom themes requires the **Plan settings** permission. If you cannot
see the **+** button, contact your referent.
:::
### View the information of a component
Choose the level, then click the component. Expand the property groups: condition, dimensions,
renewal date… Link-type properties are clickable.
If several pieces of equipment overlap where you click, a **"Several equipment here"**
window opens: choose the one you want to view, then click **Confirm**.
If your organisation uses **service provisions**, the information panel of a piece of equipment
also shows what it serves. Service provisions are created, edited and deleted from this panel or
from the plan, depending on the rights you have been given: see
[Service provisions of a unit](/guide/vue-densemble/mes-residences/fiche-lot#service-provisions-of-a-unit).
### Correct a piece of information
From the information panel, **click a value** to change it. To record a value that is not there
yet, use the **"Add data"** button.
Previous values — entered by other users, or brought in by another system — **are not deleted**.
They are simply no longer displayed directly.
These actions depend on a **data modification permission**, so you may not have access to them. If
you need it, speak to your usual contact.
### Keep a building's structure up to date
:::info Depending on your permissions
These actions depend on the permissions you have been granted, so the **"Edit"** switch or
some actions may not appear, or may be greyed out. If you need them, speak to your usual
contact.
:::
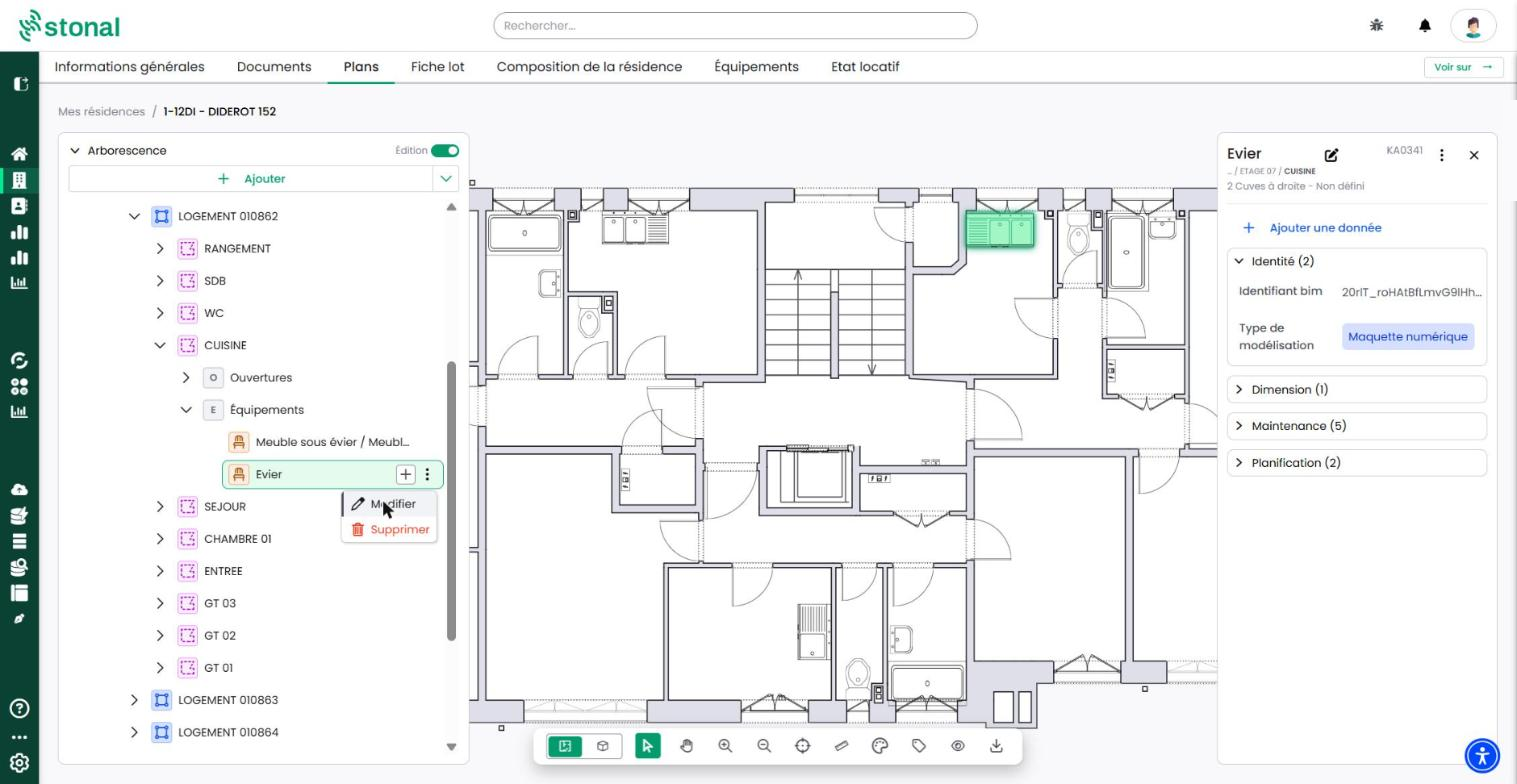
A piece of equipment is missing, or is no longer the right one: you can correct it directly in
the platform, without leaving the Plans tab. That is the main purpose of the tree's **Edit**
mode: **adding missing equipment** and **editing existing equipment**. For equipment (except
wall equipment, such as windows), the building's graphical representation, in 2D and in 3D, is
updated automatically.
This mode also lets you **create or edit a building's structure** (the building, its levels,
zones and spaces), including before it is modelled: you can work on a building even before it
has a graphical representation in 2D or 3D.
:::warning Apart from equipment, the graphical representation does not change
Creating or editing a level, a zone or a space does not change the building's graphical
representation in 2D and 3D, if there is one. Only equipment is updated in it automatically.
Merging two homes, adding a floor or editing wall equipment: for the graphical representation
to reflect it, the digital model must be updated in Revit. If you have a need of this kind,
pass it on to your internal contact.
:::
#### Add or edit equipment
1. At the top of the **Tree** panel, turn on the **"Edit"** switch.
2. To add equipment, hover over the row of the building, floor or zone where it is located,
click **+**, then **Add equipment**. Choose it from the list, sorted by trade, or search for
it by name.
3. To edit equipment, hover over its row, open the **⋮** menu, then click **Edit**.
4. Turn the **"Edit"** switch off to return to viewing.
#### Change the rest of the structure
Still in **Edit** mode:
- to create a building, use the **"+ Add"** button, then choose **a building**;
- to add an element inside another one, hover over its row, then click **+**:
- on a building: **Add a level**;
- on a floor: **Add a zone**, **Add a space** or **Add a level at the same level**;
- on a zone (a home, for example): **Add a space** or **Add a zone at the same level**;
- to rename or duplicate an element, open the **⋮** menu on its row;
- to change the order of the floors, drag a level by its handle (⠿).
When you create a zone, you can create **several at once** (they are numbered automatically) and
link them to a **letting management code**: pick an existing unit or create a code. That code is
what links the zone to the unit in your letting management. You will find it again in the **"Edit
zone"** window, together with the effective and expiry dates.
### Search for an element on the plan
Two routes lead to a piece of equipment, depending on what you already know about it:
- **the tree**, if you know where it sits: expand down to it;
- **the search field**, by typing its **name**, its **code** or its **type**: the most direct
route when you do not know where it is.
The search field also works as a filter:
1. Click in the empty field: a menu offers the categories present in the portfolio on display
(equipment, spaces, zones, units). Tick a whole category, or open it to choose specific types,
each with its number of items.
2. Or start typing: the suggestions are split between matching **types**, to tick, and **tree
elements**.
3. Each ticked type becomes a filter shown under the field, with its total. Remove it with one
click, or all of them at once with **"Reset filters"**. The filters stay active if you clear
the text.
Criteria add up: several types, or a type and a text, show every item that matches at least one
of them. A counter shows the number of results.
Results are highlighted both on the plan and in the tree. Branches that contain results expand
and show how many they hold. The **List view** also lets you browse them.
For example, tick the "Bathroom" and "Shower" types: the matching items are highlighted on the
plan, and the tree shows which floors and dwellings they are in.
The search field also accepts the **rental management code** of a unit, regardless of upper or
lower case. The unit found is highlighted on the plan.

### Measure a distance on the plan
1. In the toolbar, click the **Measure** icon, shaped like a ruler.
2. Click the starting point, then the end point.
The distance is displayed in metres. You can take several measurements in a row. Press the
**Esc** key to leave measuring mode.
The tool also works in 3D, and measurements taken in 2D are kept from one view to the other.
### Export the plan as a PDF
In the toolbar, click **Export as PDF**: the file downloads straight away.
A title block, filled in automatically, is shown to the right of the plan: the legend of the
active theme, the site, the building, the floor or unit exported, the scale and the date.
_Video tutorial, 1 min 33: producing the plan of a dwelling or a floor, to scale._
## Automatically calculated areas
_Video tutorial, 1 min 07: living area, rooms and outbuildings, read from the plan._
Stonal calculates three areas at each level, by adding up those of the spaces (the rooms) it
contains: on one side up to the floor, the building and the property, on the other up to the zone
(a home, for example) and the unit.
| Area | What it measures |
|---|---|
| **Floor area** | The raw geometric area, with no usage rule |
| **SHAB** — habitable area | Habitable spaces at least 1.80 m high; excludes conservatories, porches and cellars (Boutin law reference) |
| **SDP** — gross floor area | Enclosed, covered spaces at least 1.80 m high; excludes plant rooms, technical areas and covered outdoor spaces (planning code reference) |
:::warning These calculations are indicative
They do not replace an official measurement by a certified professional (surveyor, chartered
surveyor) and have **no legal value**.
Known limits: the 10% deduction for multi-dwelling buildings is not applied, so gross floor area may
be overstated by around 10%. Heated conservatories and porches, and converted cellars, remain
excluded. Plant rooms are excluded even in a single-family house.
:::
## Good to know
- **The plan remembers your settings.** The label type and size, the layers on display and the
active theme are saved for you, and found again the next time you open a plan, whichever it
is. A shared plan link takes priority: it opens with the display chosen by the person who
shared it, which then becomes your settings.
- To **report an anomaly** on a plan or **request that a plan be added**, go through your internal
contact.
- To add or edit equipment, the most direct route is the tree's
[Edit mode](#keep-a-buildings-structure-up-to-date), without leaving the Plans tab.
- To update your portfolio in bulk, we recommend two routes: going through the
[Query tool](/guide/qualite-donnees/requeter-les-donnees) (via a CSV import, for instance) or
scheduling a field survey with our mobile app
[EDIT](/guide/qualite-donnees/edit).
## Keyboard and mouse shortcuts
On the 2D plan:
| Gesture | Effect |
|---|---|
| **Scroll wheel** | Zoom in or out around the pointer |
| Drag the plan | Move it, whichever tool is selected |
| **Space + drag**, or drag with the middle button | Move the plan |
| Click a selected element | Deselect it |
| **Esc** | Leave the measuring tool |
In the 3D view, with the pointer over the model:
| Gesture | Effect |
|---|---|
| Drag with the left button | Rotate the model |
| **Shift + drag**, or drag with the middle button | Move the model |
| **Scroll wheel** | Zoom towards the pointer |
| **Arrow keys** | Rotate and tilt the view |
| Right-click a component | Isolate, hide, show or zoom on that component |
## See also
- [General information for a property](/guide/vue-densemble/mes-residences/informations-generales)
- [Works Plans](/guide/workflows/plans-de-travaux) — plans feed the calculation
---
# The unit record
URL: https://docs.stonal.io/fr/guide/vue-densemble/mes-residences/fiche-lot
# The unit record
:::info Availability
This page concerns organisations running **Graphlake**.
:::
## What it is for
The **Unit record** tab lists the units attached to a property or a building, gives access to the
detailed record of each one, and lets you **download it as a PDF**.
:::info This tab requires Graphlake
It is only available to organisations running **Graphlake**. Organisations using **Abyla** do not
see it.
:::
## Step by step
### Find a unit
1. Open a property or a building from your portfolio list.
2. Click **Unit record** in the navigation menu.
3. The list shows, for each unit, its **code**, its **type** and its **floor area**.
4. Sort by clicking a column header, or search for a specific unit in the search bar.
5. Click a row to open the detailed record; **Ctrl + click** (**Cmd + click** on Mac) opens it
in a new tab.
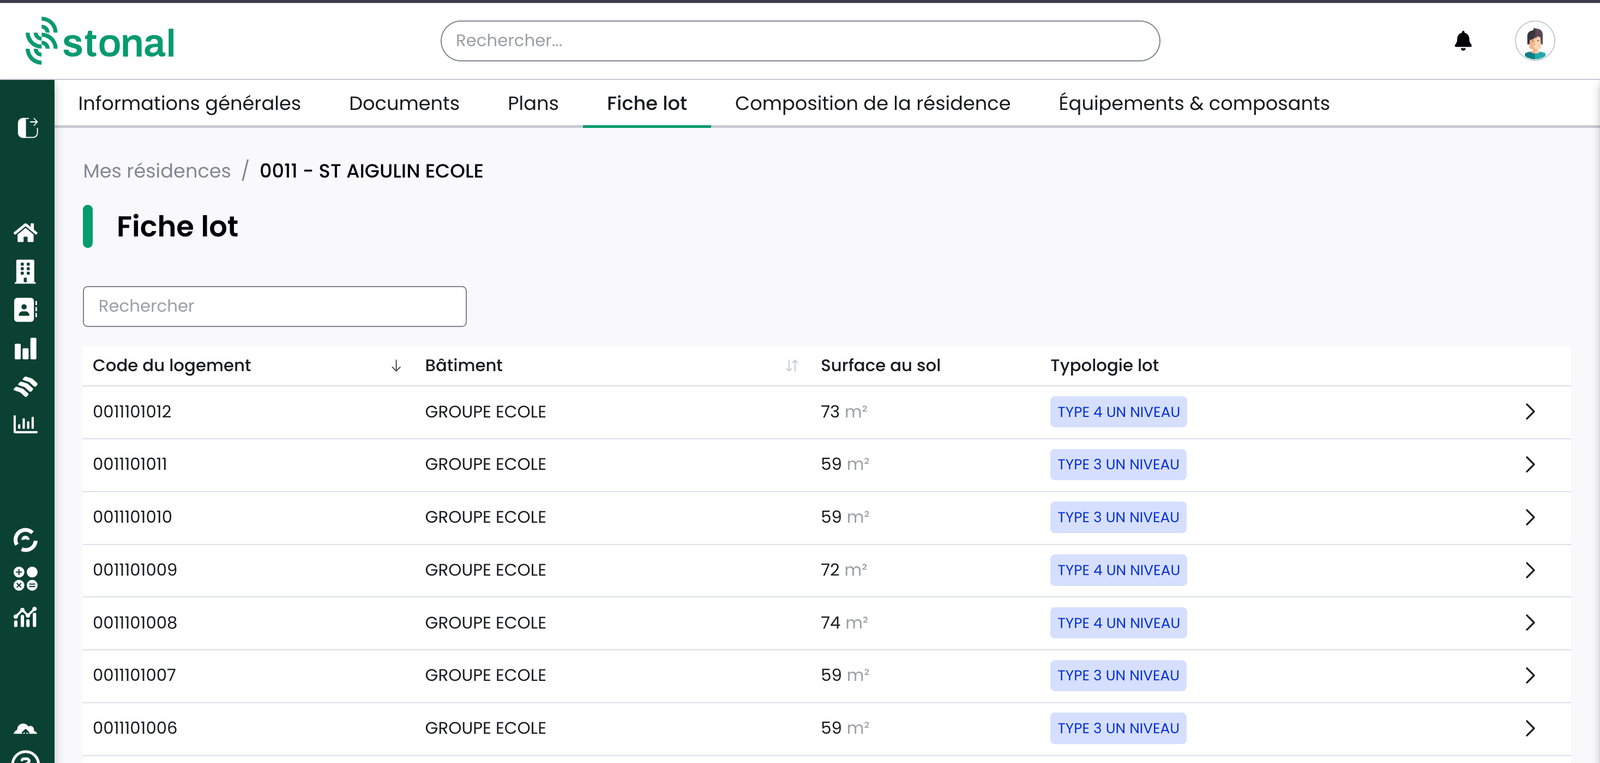
### Read the record of a unit
The record has three blocks:
- **Dwelling data** — the properties of the *Identity* axis: areas, use of the unit, address.
- **Technical data** — every property from the other axes available for this unit.
- **EPC** — energy performance. For now the **rating** only; consumption and greenhouse gas
emissions are coming.
A navigation tip: click the unit name in the **breadcrumb** to open the list and move straight to
another unit, without going back to the full list.
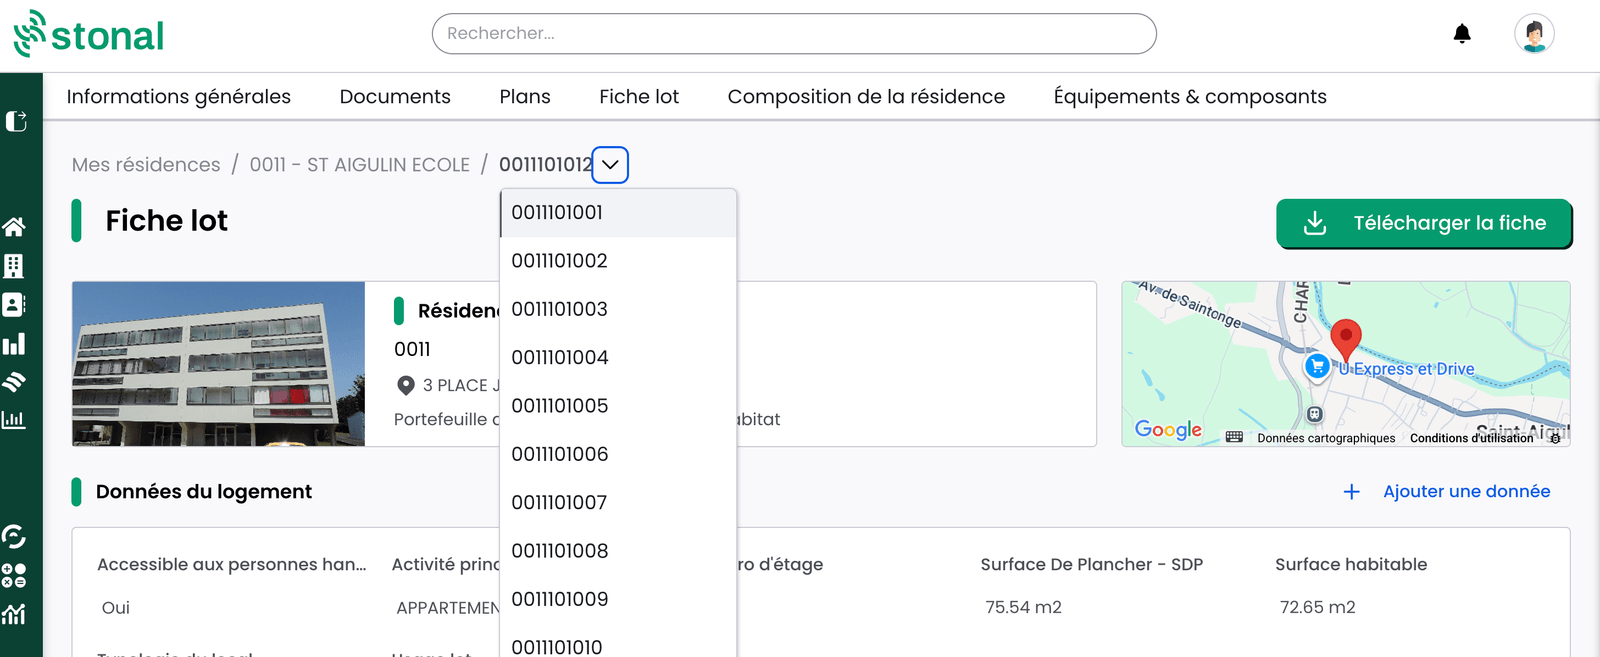
### Download the record
The **"Download record"** button generates the PDF on your machine.

### Service provisions of a unit
A service provision links a piece of equipment (boiler room, meter, ventilation unit, rising
main…) or a plant room to what it supplies. It tells you in a few seconds which equipment supplies
a dwelling, for example to report a breakdown to the right contractor.
On the record of a unit, the **"Service provisions"** section lists the equipment that serves the
unit:
- **Service provisions linked to the rented unit**: the equipment that serves this unit directly;
- **Service provisions linked to the parents**: the equipment that serves an element the unit
belongs to, for example its stairwell or its building.
Hover over a service provision to see its location. Click it to open the plan on the equipment or
room concerned.
Service provisions are created, edited and deleted from the information panel of a piece of
equipment, from the plan, or when a piece of equipment is created. Their code and name are
generated from the code of the equipment and that of the component served. When a piece of
equipment is deleted, a message warns you that its service provisions will be deleted too.
:::info Service provisions are turned on per organisation
The section only appears if the **Display service provisions** option is turned on in
[your organisation settings](/guide/administration/gestion-de-lorganisation). It is off by
default.
Creating, editing or deleting a service provision depends on the rights you have been given, so
you may not have access. If you need it, speak to your referent.
:::
### Complete or correct the data
If you have the permission, you can add or correct data **unit by unit** from its record, using the
**"Add data"** button, or **in bulk** through the
[Query tool](/guide/qualite-donnees/requeter-les-donnees).
On the record, you can also click an editable value directly: **Enter** or a click elsewhere
saves, **Esc** cancels.
## Good to know
- **Only properties that hold a value are shown.** A missing property means no data exists for that
unit — it is not a display problem.
- The **GL code** is the unit's business identifier in your management system. It is used as the
reference label in the record, and is changed from the composition tab.
- **Roofs or plant rooms in the list?** They have been attached to a unit code in your source data.
That is a data configuration matter, not a malfunction.
## See also
- [General information for a property](/guide/vue-densemble/mes-residences/informations-generales)
- [Querying data](/guide/qualite-donnees/requeter-les-donnees) — correcting in bulk
---
# The composition of a property or a building
URL: https://docs.stonal.io/fr/guide/vue-densemble/mes-residences/composition
# The composition of a property or a building
:::info Availability
This page concerns organisations equipped with **Graphlake**.
:::
## What it is for
The **Composition** tab describes how your estate is made up: the outdoor spaces of a property, the
plans of its buildings, then, inside a building, its **levels** and the **zones** on each level.
This is where that structure is built and maintained, and where zones are connected to your
**units**.
## The screen explained
What you see depends on what you opened.
### From a property
The tab is called **Composition of the property** and shows two sections.
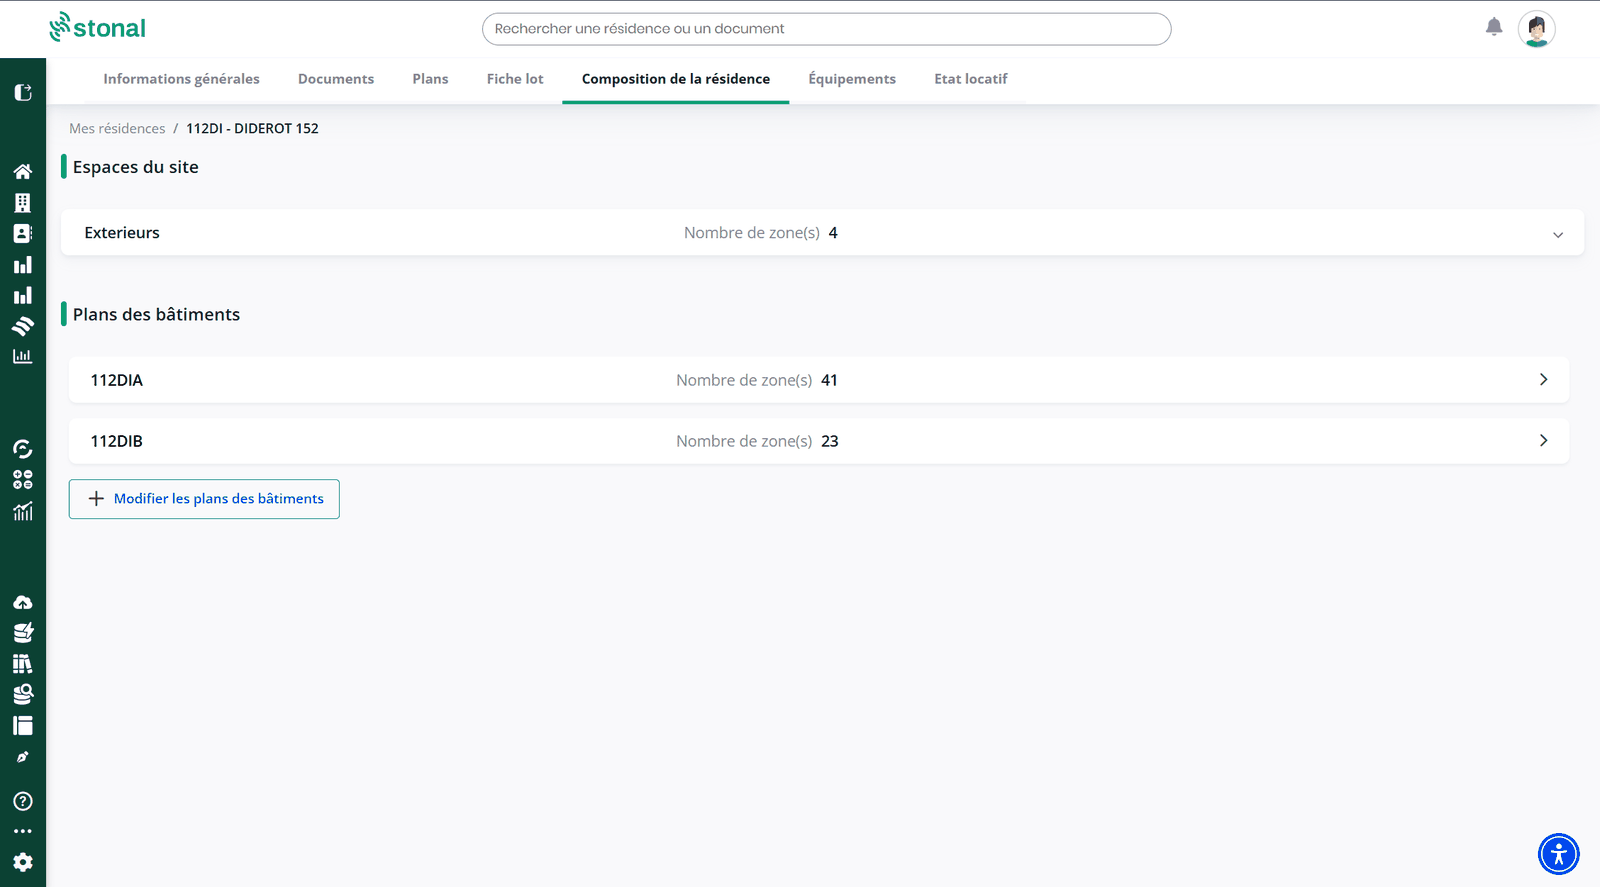
- **Site spaces**, the outdoor spaces, with their number of zones.
- **Building plans**, the buildings of the property, each with its number of zones. Click a line to
open its composition.
The **"Modify the building plans"** button lets you add a building plan to the property.
### From a building
The tab is called **Composition of the building**.
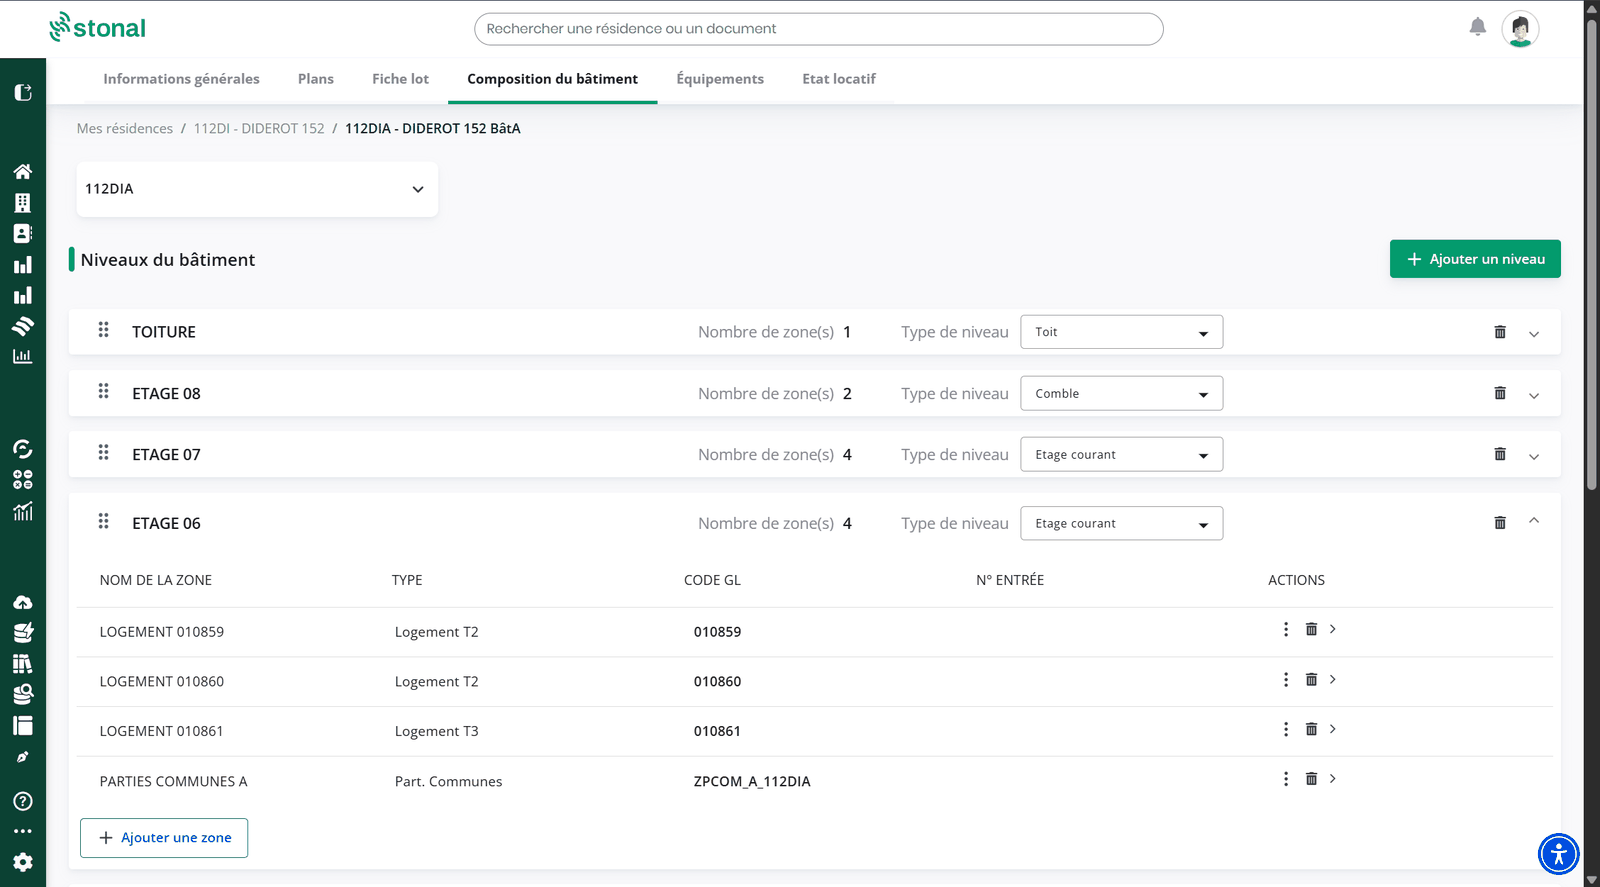
- A **plan selector** at the top, if the building has more than one.
- **Building levels**, each with its number of zones and its **level type** (roof, attic, standard
floor…).
- Click a level to unfold **its zones**: zone name, type, GL code, entrance number and actions.
## Step by step
### Look at a zone in detail
Click a zone to open its panel on the right.
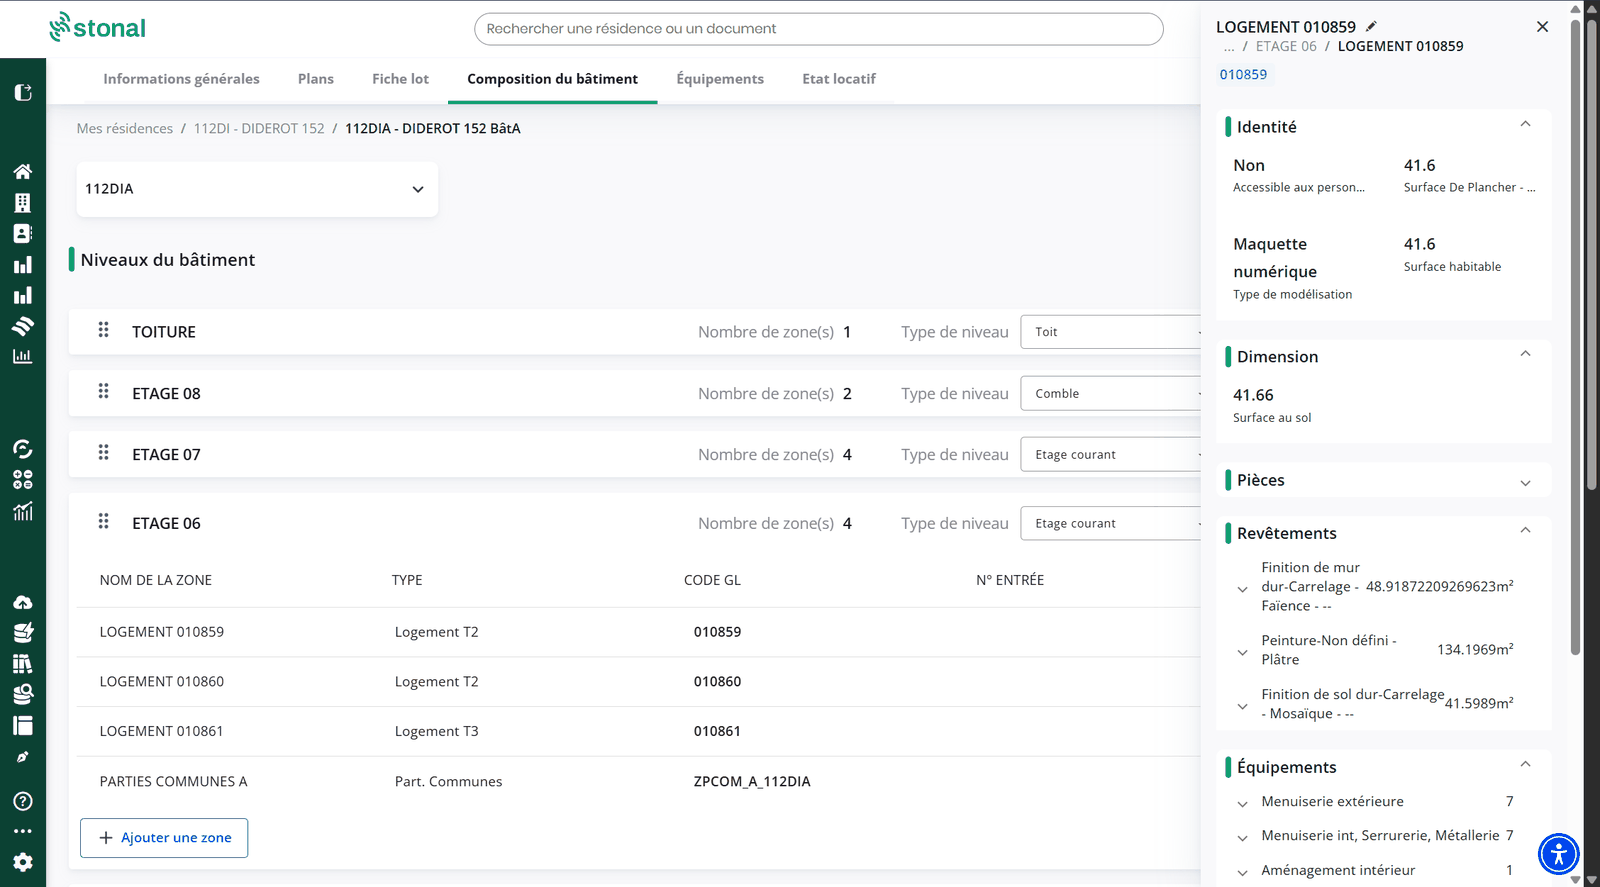
The panel gathers everything known about that zone, section by section:
- **Identity**: accessibility, floor area, living area, type of modelling.
- **Dimension**: floor surface.
- **Rooms**.
- **Coverings**: wall, floor and ceiling finishes with their surfaces.
- **Equipment**: what is installed in the zone, counted by family.
The panel opens for everyone, including users without modification rights.
### Create and organise the levels
The **"Add a level"** button creates a level. Once created, you can:
- rename it directly in the list: **Enter** saves the new name, **Esc** or a click elsewhere
cancels it,
- change its **level type** with the dropdown,
- reorder the levels by **dragging** them by the handle on the left,
- delete it.
:::warning Deleting a level deletes its zones
:::
### Create and organise the zones
Unfold a level and use **"Add a zone"**. From a zone you can then:
- attach or detach one or more **units**, by entering their GL code,
- fill in the **entrance number**, for a zone inside a building,
- fill in the parking GL code where relevant,
- delete the zone.
### Duplicate or move a zone
The actions menu at the end of a zone line lets you **duplicate** it towards one or several levels of
the same building, or **move** it to another level or another plan, the outdoor plan included.
### Manage the outdoor spaces
From a property, you can create the **outdoor spaces plan**, add a level to it, then its zones.
Outdoor zones have no entrance number.
## Good to know
- **Without modification rights, the page stays readable.** Buttons and action menus are simply
hidden.
- **Deleting requires its own right**, separate from the right to modify. You may therefore be able
to create a zone without being able to delete it.
- **A GL code cannot be used twice.** If the code you enter is already taken, the platform refuses
the entry and tells you so.
- The **GL code** is the business identifier of the unit in your management software. This is where
it is entered and edited, and it is the label the unit record uses as its reference.
## See also
- [The record of a unit](/guide/vue-densemble/mes-residences/fiche-lot)
- [The equipment of a building](/guide/vue-densemble/mes-residences/equipements)
- [Plans](/guide/vue-densemble/mes-residences/plans)
---
# The equipment of a building
URL: https://docs.stonal.io/fr/guide/vue-densemble/mes-residences/equipements
# The equipment of a building
:::info Availability
This page concerns organisations equipped with **Graphlake**.
:::
## What it is for
The **Equipment** tab lists everything installed in a building: what it is, where it is, what
condition it is in and when it was last renewed.
It is the reference view for knowing what a building contains, and in what state.
## The screen explained
Equipment is grouped by **trade**: building envelope, architectural trades, technical trades,
outdoor, and other.
Each trade holds sub-categories, for instance Plumbing and gas, Heating and ventilation, or
Low-voltage electrics. The number of items is shown in brackets next to each one.
Unfold a sub-category: its equipment is grouped by **component** (bath, water meter,
shower…). Unfold a component to see its equipment. Each line carries:
| Column | Content |
|---|---|
| **SSCC code** | The reference of the item in the component library. Sortable |
| **Component** | What the item is: bath, water meter, shower… Sortable |
| **Characteristic** | Its defining features, for instance the material or the number of bowls |
| **Location** | Where it is. A counter appears when the line groups several locations |
| **Condition** | Good, average, poor, dangerous or undefined. A counter appears when the occurrences do not share the same condition |
| **LRD** | Last renewal date |
| **Nb.** | Number of occurrences |
| **Actions** | Edit, duplicate, move, delete |
## Step by step
### See the detail of an item
A single item often exists in several places. The chevron on the left of the line unfolds it,
location by location, each occurrence with its own path and its own condition.
### See an item on the plan
When an item of equipment is shown on a plan, its **location** becomes a link. Click it to open
the **Plans** tab with the item selected.
On a row that groups several occurrences, the link does not appear: expand the row first.
### Filter the list
Three filters sit at the top of the page and can be combined:
- **Location**, by text search,
- **Renewal date**, by period,
- **Condition**: good, average, poor, dangerous, undefined.
### Add an item
The **"Add equipment"** button asks for the type of equipment, the general condition, the last
renewal date and an optional comment.
If your organisation uses **service provisions**, you can also state there what the item serves:
building, stairwell, dwelling or another piece of equipment. The code and name of each service
provision are generated automatically. See
[Service provisions of a unit](/guide/vue-densemble/mes-residences/fiche-lot#service-provisions-of-a-unit).
### Edit, duplicate, move or delete
The actions menu at the end of a line offers four operations on the item, on a single occurrence or
on the whole group.
To act on several items, tick them: **Shift + click** on a box ticks every row between the last one ticked and this one. In an item's panel, click a value to edit
it: **Enter** or a click elsewhere saves, **Esc** cancels.
When you delete an item that serves other elements, a message warns you that its service
provisions will be deleted too.
## Good to know
- The tab used to be called **"Components & equipment"**. It was renamed to keep the interface
simple, but its content has not changed.
- **Condition and last renewal date feed your work plans.** Keeping them up to date directly
improves the quality of your projections.
- Long lists are paginated. The page size selector sits at the bottom of each sub-category.
## See also
- [The composition of a property or a building](/guide/vue-densemble/mes-residences/composition)
- [Component type reference](/guide/administration/referentiel-types-de-composant)
- [Work plans](/guide/workflows/plans-de-travaux)
---
# The rental status of your properties
URL: https://docs.stonal.io/fr/guide/vue-densemble/mes-residences/etat-locatif
# The rental status of your properties
## What it is for
The **Rental status** tab gives you the picture of your **rental occupancy as it stands today**:
the leases in progress, the units and parking spaces let or vacant, the rents, the areas, the
upcoming break dates, and the operating costs.
It is the reference view for answering three questions: what is let, to whom, and what falls due
next.
## Before you start
:::info Requires access to the "Rental status" analysis report
This tab only appears if the **"Rental status" analysis report** has been granted to you, in the same
way as the other analysis reports such as
[Document tracking](/guide/administration/gestion-documentaire/suivi-documentaire). Access depends on
the report group your account belongs to, so the tab may be visible to some of your colleagues and
not to you. If you need it, ask your internal contact.
:::
## How to get there
From **My properties**, open a property or a building, then click **Rental status** in the navigation
menu.
What the report shows follows what you opened: the property, or the single building.
## Filters
Six filters sit at the top of the page. They are drop-down lists and they **cascade**: what you pick
first narrows down the values offered afterwards.
| Filter | What it does |
|---|---|
| **Organisation** | Fixed to your organisation |
| **Site / building code** | One or several codes |
| **Site / building name** | One or several names |
| **Type (Unit vs Parking)** | Units, parking spaces, or both |
| **Tenant** | One or several tenants |
| **Stonal identifier** | Fixed to the scope of the portfolio you may see |
:::tip Filter by clicking
Click a tenant, in the **Tenant** column of a table or on a bar of the "Area by floor by tenant"
chart, and the whole report narrows down to that tenant.
:::
## What the report contains
### Leases
A table with **one line per lease**, gathering all the units the lease covers: lease reference,
tenant, use, area, indexed rent, rent per m², start and end dates, and the **rental risk**.
**Rental risk** is the date of the **next three-year break**: the start of the lease plus the next
multiple of three years still to come, minus one day. It stays empty when the lease ends before that
date, or when the start date is unknown.
Alongside the table, the counters give you: the total number of units and parking spaces, the total
rent, the number of tenants, the occupancy rates, and the let and vacant areas. Four charts complete
the picture: area by floor by tenant, area by use, occupancy of units by type, and occupancy of
parking spaces by floor.
### Occupancy
- **Three-year breaks by month**, over the **next 36 months**: how many units, and how much area,
reach a break date.
- **Units and parking spaces let**, line by line, with the lease they belong to.
- **Units and parking spaces vacant**, with the **last tenant** and the **end date of their lease**,
reconstructed from the last contract recorded on the unit.
### Operating and capital expenditure
Operating costs (**OPEX**, day-to-day running charges) and value-enhancing spend (**CAPEX**,
investment), for the **latest year recorded**, shown as a total, as a share of the annual rent, and
per square metre. A chart gives every year recorded, not just the last one.
## Good to know
- **The data is refreshed once a day, overnight.** The report tells you so at the bottom of the page.
- **The two occupancy rates are not comparable.** The rate for units is calculated on **areas**, the
rate for parking spaces on the **number of spaces**.
- **"Total rent" only counts occupied units.** It is the rent carried by what is let today, not a
rental potential.
- **"Rental area" includes parking spaces**, whereas most of the charts cover units only. The gap
between the two is normal.
- **The leases table leaves out parking spaces** and leases with no start date, so its area total is
lower than the one shown by the counters.
- **A shorter report is not a fault.** The three-year breaks disappear when your organisation does
not record the use of its units, and the expenditure section disappears when no cost has been
recorded.
## See also
- [Analysis reports](/guide/vue-densemble/rapports) — the steps common to every report
- [Contacts & operators](/guide/vue-densemble/contacts-exploitants) — where leases and tenants are
maintained
- [The unit record](/guide/vue-densemble/mes-residences/fiche-lot)
---
# Managing your contacts and operators
URL: https://docs.stonal.io/fr/guide/vue-densemble/contacts-exploitants
# Managing your contacts and operators
## What it is for
The **Contacts & operators** module gathers the contacts associated with your contracts and your
scopes: **individuals** (technician, caretaker, site manager…) and **organisations** (company,
provider, operator).
Every contact is attached to a **contract**, which lets you find who works on what, and under which
arrangement.
## Before you start
Viewing contacts is available to **every user with access to this application**. **Creating,
modifying or deleting** a contact or a contract, however, depends on the permissions granted to each
user, so you may not have access to it. If you need it, ask your internal contact.
## The screen explained
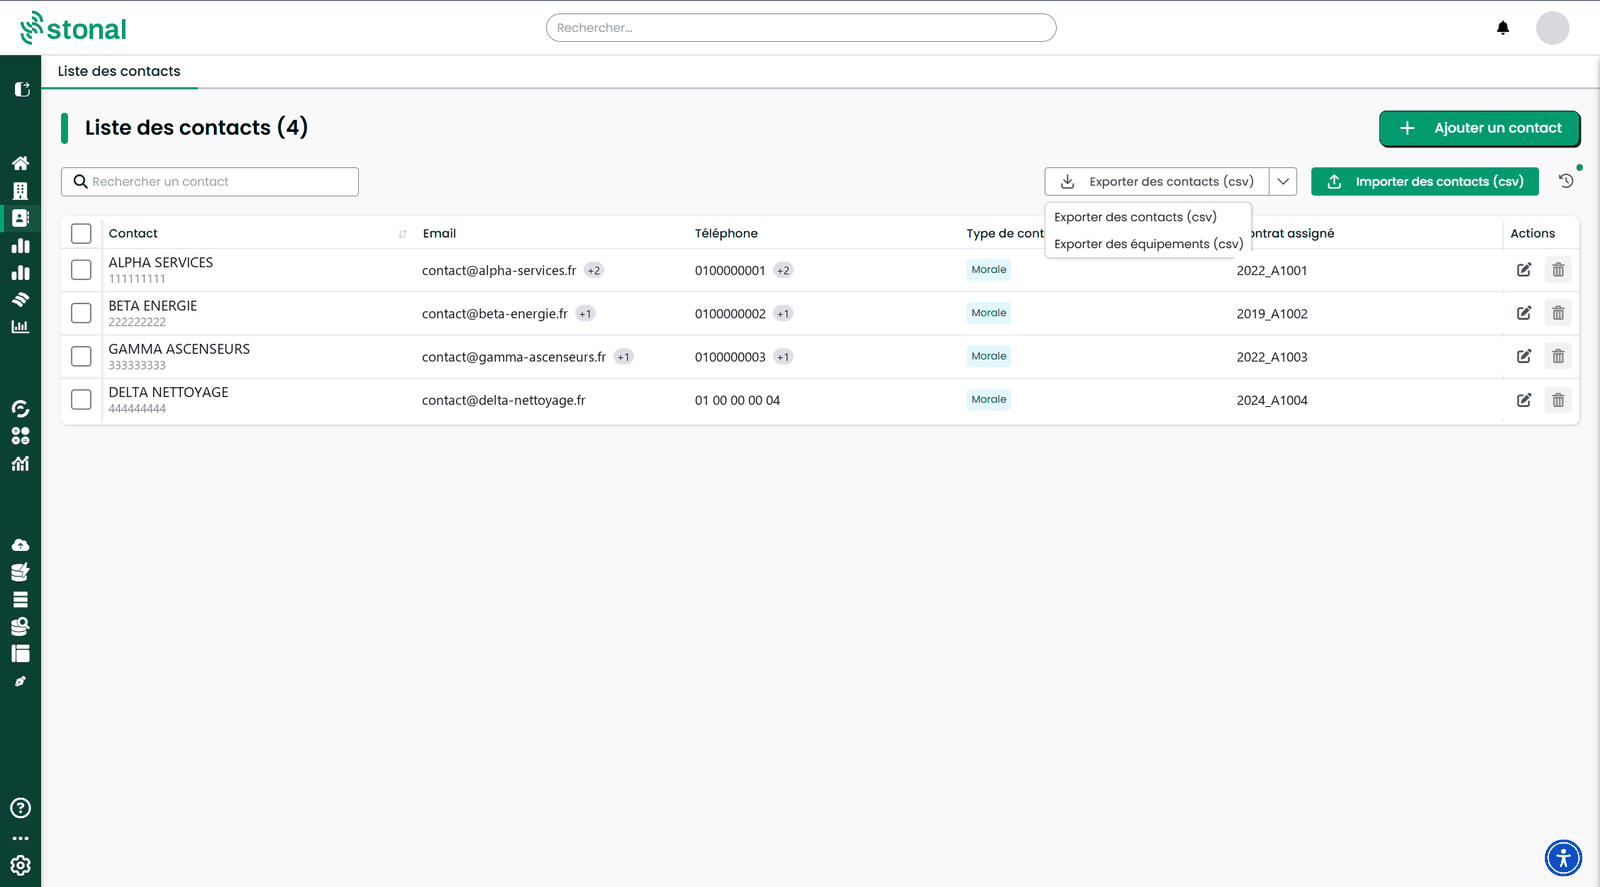
The list shows all your contacts, with a **search bar** (name, email…) and alphabetical sorting.
Two buttons at the top right handle bulk work:
- **"Export contacts (csv)"**, whose dropdown also offers **"Export equipment (csv)"** to get every
piece of equipment currently under contract.
- **"Import contacts (csv)"**, to create and update several contacts and contracts in one go.
| Column | Content |
|---|---|
| **Contact** | Last name, first name and role for an individual; name and company number for an organisation |
| **Email** | |
| **Phone** | A tooltip appears if there are several numbers |
| **Contact type** | Individual or Organisation |
| **Assigned contracts** | |
| **Actions** | Modify, delete, depending on your permissions |
## Step by step
### Create a contact
Click **"Add a contact"**. Creation happens in **two steps**, shown at the top of the screen:
**Contact** then **Contract**.
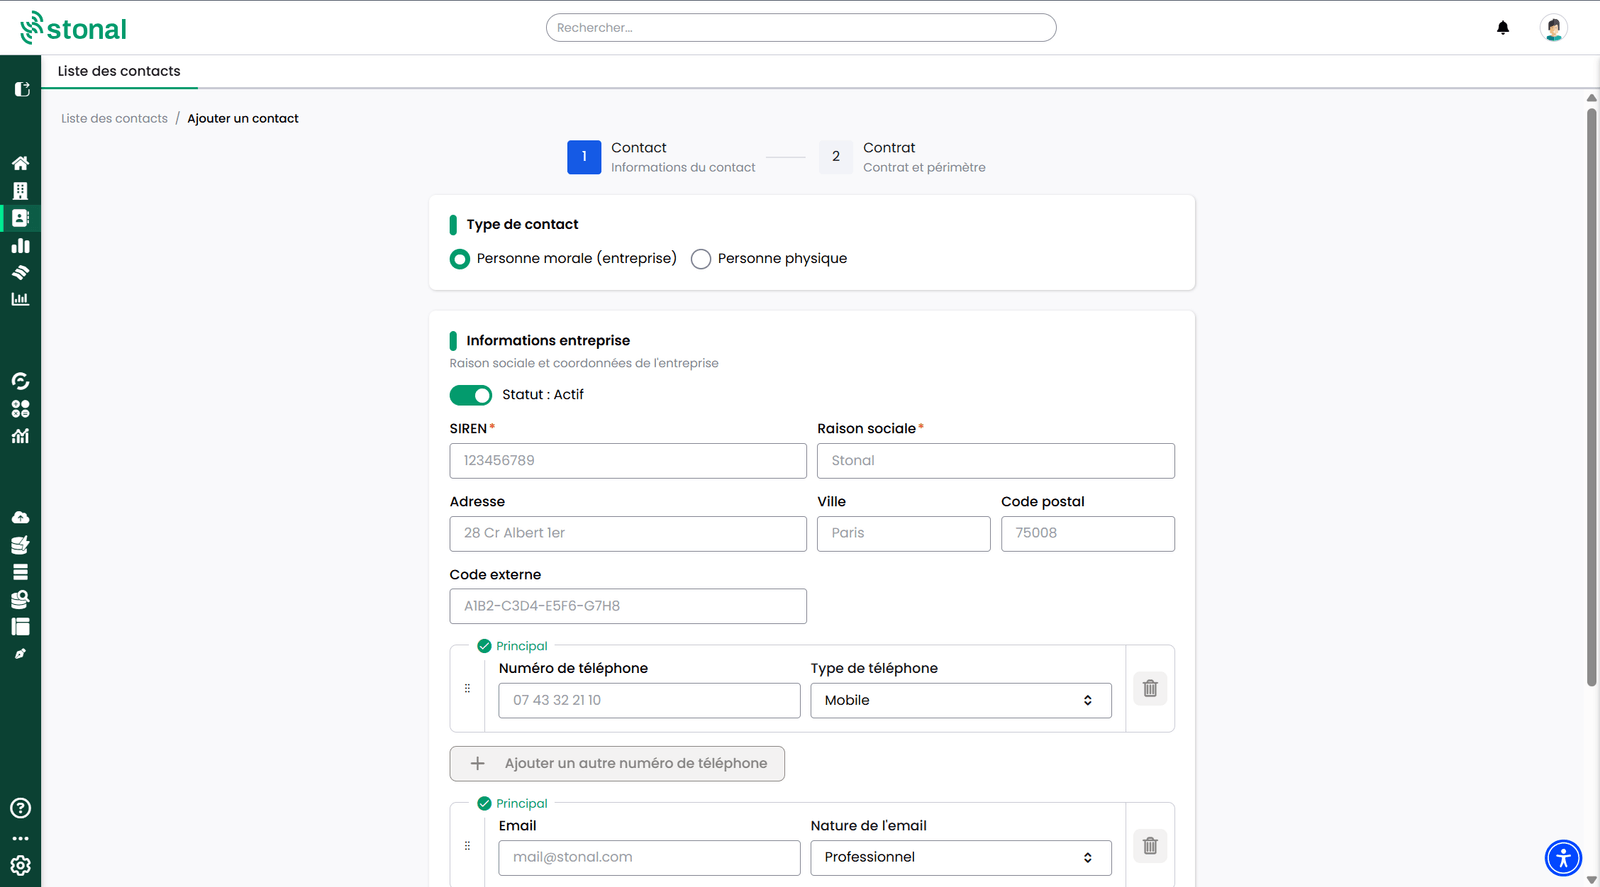
**1. Choose the type**: **Organisation (company)** or **Individual**. This choice determines the
fields you will be asked for.
**2. Enter the contact**
For an **organisation**, two fields are required, marked with an asterisk: the **company number** and
the **registered name**. You can complete with the **address**, the **town**, the **postcode**, and an
**external code** if you want to find this contact from another of your tools.
You can also enter its **parent company**, chosen among the companies already recorded, by
searching for its company number or name. A parent company can have several subsidiaries.
A **Status: Active** toggle lets you deactivate a contact without deleting it.
:::info Two entities of the same group can share a company number
An organisation is identified by its **company number together with its registered name**. You can
therefore create side by side two entities of the same group that share the same company number, for
instance one for lifts and one for parking doors.
:::
You can record **several phone numbers and several email addresses** for the same contact. Each one
carries its own qualifier, so that everybody knows what they are looking at: mobile, landline or fax
for phone numbers, professional or other for emails. One of them is marked **Primary**.
For an **individual**, three fields are required: **first name**, **last name** and **email address**.
Role and phone number are optional.
You can also **attach an individual to an organisation** already recorded in the platform. This is
useful when several people work for the same provider: you then know straight away who belongs to
which company. One organisation can have several individuals attached to it, and its record lists
them. This link passes on neither contracts nor scope: each individual has their own.
:::info An individual's email is unique
Two individuals cannot share the same email address in the platform.
:::
**3. Enter the contract**, which is required.
:::warning A contact must always be attached to a contract
:::
The **contract type** is required, and you pick it from a list: **Co-ownership**, **Insurance**,
**Lease**, **Maintenance**, **Management mandate**, **Managing agent**, **Operational contact**,
**Other**, **Service**.
A contract must **identify its scope of work at the very least**: which properties it covers. Add
them, branches, properties, buildings or units, with the **"Add a scope"** button. **At least one
item is required** before you can confirm.
If the contract only concerns **a few units**, name at least those rather than the whole property.
A search helps you find the units to add.
**Say what the contract actually covers.** Click **"Add a component"**, then choose the kind of item:
- **Equipment**: lifts, booster pumps, roofing…
- **Zone**
- **Space**: green space, playground…
Then pick the precise type from the list. For instance, if the contract covers the upkeep of green
spaces, choose "Space" then "Green space". The list is hierarchical and has a search. This is only
possible for **organisation** contacts.
### Modify or delete a contact
Both operations sit in the **Actions** column, at the end of each row of the list. They only
appear if your permissions allow them: modifying and deleting are two separate permissions.
**Modify** reopens the contact record. You find the same fields as at creation and can correct
the details, the phone numbers and email addresses, the contract and its scope.
**Delete** removes the contact from your list.
To delete several at once, tick them in the list: **Shift + click** on a box ticks every
contact between the last one ticked and this one.
:::tip Deactivate rather than delete
The **Status: Active** toggle on the contact record lets you set aside a contact you no longer
work with, without removing anything. It is the option to prefer: the history of the contracts
is kept, and you can reactivate the contact if the relationship starts again.
:::
### Import and export your contacts
Files are in **CSV** format, which you can open and complete in Excel.
**Exporting.** From the contact list, you can export your contacts, your contracts, their scopes and
the components they cover. A second export is available from the same dropdown: every piece of
equipment currently under contract. This second file is prepared in the background, then made
available in the export and import history.
**Importing.** The import lets you create and update your contacts and contracts in bulk, instead of
entering them one by one.
Before anything is processed, **the file is checked**, which limits data entry mistakes. If anything
looks wrong, it is shown to you **row by row**: you can then correct your file and import it again.
Once the import is finished, **a summary appears in the interface** and tells you what was really
created, modified or skipped.
**Following your imports.** The **Export and import history** button on the contact list records
every import: who started it, its status, and the number of rows imported and in error. If some rows
could not be imported, you can **download the error report** to correct them.
### View a contact
A contact is shown as a **card**: its name or registered name, with its primary phone number and
email. Clicking the card opens a **detail panel** that brings together all its information, its
contracts (reference, type, dates) and the **components it covers**, each with an icon showing
whether it is a piece of equipment, a zone or a space.
You can then tell straight away whom to call, for instance for a lift breakdown or for the upkeep of
green spaces.
### Track a lease
To follow a lease, create a contract of type **Lease** and attach it to the **units** it covers.
A contact attached to a Lease contract is automatically identified as a **tenant**. You will then
find that tenant and their lease in the **Rental status** tab of the platform.
## Good to know
Your contacts can also be managed **via API**, an approach chosen by some organisations that
synchronise from their own information system. The steps are described in the
[API guide — Stakeholders](/api/stakeholders).
## See also
- [User management](/guide/administration/gestion-des-utilisateurs), configuring access to the module
- [API guide — Stakeholders](/api/stakeholders)
---
# Analysis reports
URL: https://docs.stonal.io/fr/guide/vue-densemble/rapports
# Analysis reports
## What it is for
Analysis reports are the dashboards that read your portfolio: its regulatory compliance, its key
figures, the data held in your plans.
They all work the same way. **The steps described on this page apply to any of them** — whatever is
specific to one report is described on its own page.
## Step by step
### Move between reports
1. Choose the report type in the menu.
2. Select the level of your portfolio you want to read the data on.
### Adjust the scope
**Filters** narrow the report down to what interests you:
1. Expand the filter.
2. Choose the value you want — the report updates.
3. Click the **eraser** to clear it.
### Make the report interactive
**Click a value** in the report: everything updates around it. Clicking the same value again clears
the selection. The **Agency** filter works the same way, and the **eraser** clears the selection.
### Export a table as CSV
1. Click the **three dots** at the top right of the table.
2. Click **"Export data"**.
3. Choose the format you want.
4. The file lands in your downloads.
## Good to know
Which reports you can reach depends on what was chosen for your organisation. If one of them does
not appear and would be useful to you, speak to your usual contact.
Every dashboard can be **downloaded as a PDF**, and the tables **exported as CSV**.
## See also
- [The Portfolio summary report](/guide/vue-densemble/rapports/synthese-patrimoine) — the key
figures, at three levels
- [The Compliance report](/guide/vue-densemble/rapports/conformite) — the survey detail
- [The Query report](/guide/vue-densemble/rapports/requete) — the data held in your plans
- [FAQ — Analysis reports](/guide/faq/rapports) — creating a report, missing tabs
---
# The Portfolio summary report
URL: https://docs.stonal.io/fr/guide/vue-densemble/rapports/synthese-patrimoine
# The Portfolio summary report
## What it is for
This report brings together the **key figures of your portfolio**: its technical characteristics, its
composition, the summary of its surveys.
It reads at **three levels**, from the broadest to the finest, each in its own tab:
| Level | What you find there |
|---|---|
| **Portfolio** | The whole of your portfolio, with filters to adjust the scope |
| **Property** | All the summary information for one property: its technical characteristics, its composition, the summary of its EPCs |
| **Dwelling** | The finest level: the information for one specific dwelling |
_Video tutorial, 1 min 36: the report at the scale of a branch, a property, a building._
## Step by step
### Go down to the property, then the dwelling
Open the tab for the level you want, then **choose your property — or your dwelling — in the filter**.
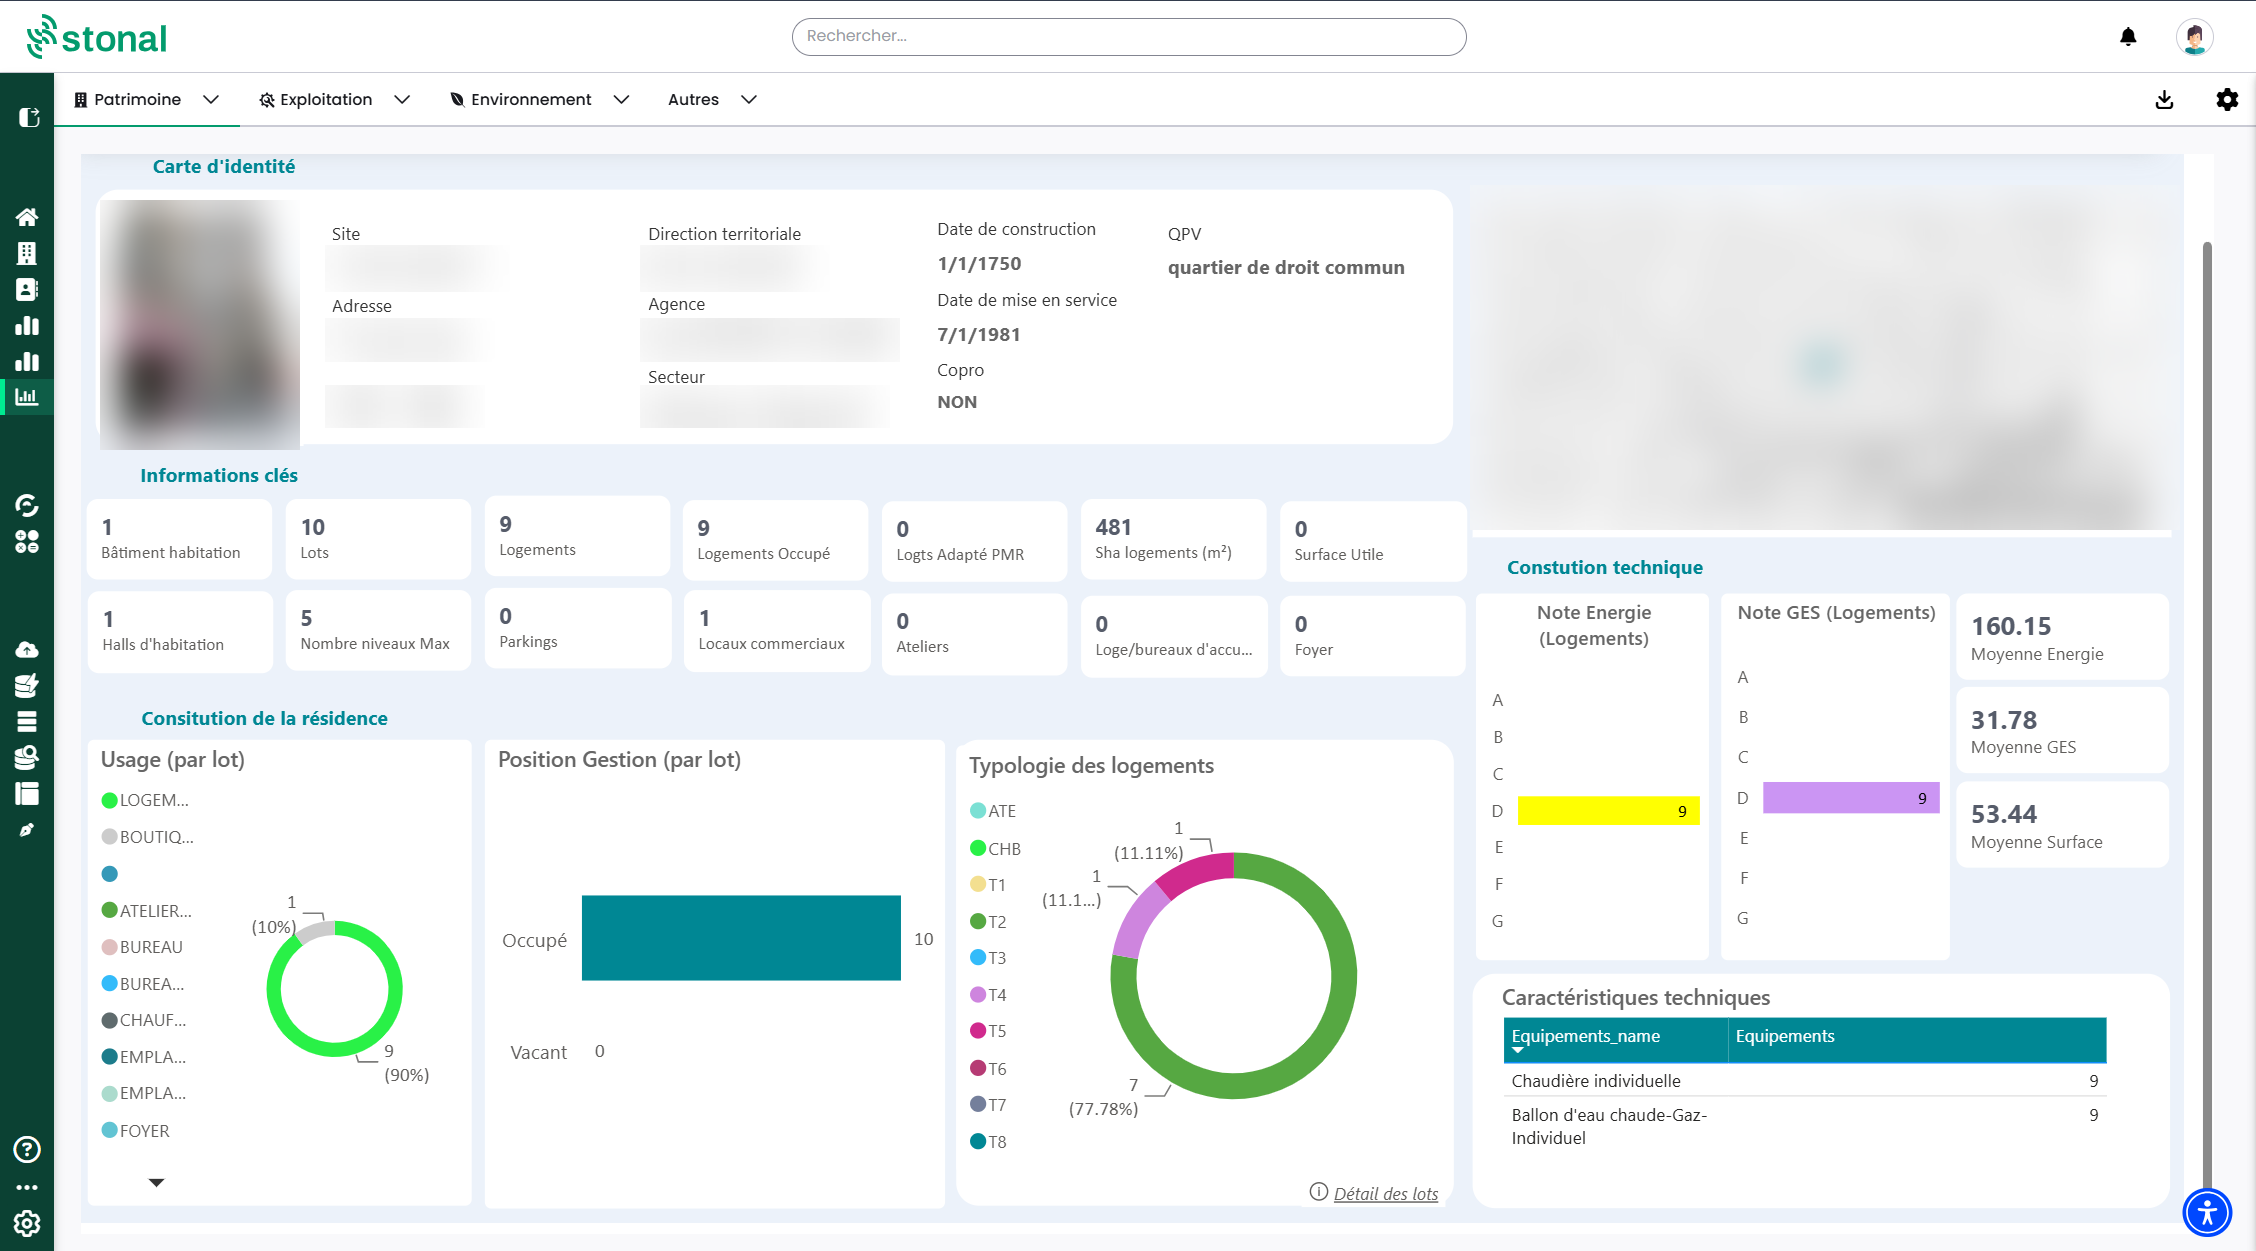
Moving between reports, adjusting the scope, making the report interactive and exporting a table
work the same way on every report:
[analysis reports](/guide/vue-densemble/rapports).
## The dwelling record, to pass on to your tenant
_Video tutorial, 1 min 16: photo, rooms, energy performance certificate, heating._
:::info Availability
This tab only exists in this report for organisations still on **Abyla**. If yours runs
**Graphlake**, the record is built into the platform itself:
[The unit record](/guide/vue-densemble/mes-residences/fiche-lot).
:::
At **Dwelling** level you have all the information for a given dwelling — enough to prepare a letting,
for instance.
The **"Download"** button produces that record as a PDF: it is made to be **passed straight to your
tenant**.
## Good to know
Which reports you can reach depends on what was chosen for your organisation. If this one does not
appear and would be useful to you, speak to your usual contact.
## See also
- [Analysis reports](/guide/vue-densemble/rapports) — the steps common to every report
- [The Compliance report](/guide/vue-densemble/rapports/conformite) — the survey detail
- [General information for a property](/guide/vue-densemble/mes-residences/informations-generales)
- [FAQ — Analysis reports](/guide/faq/rapports) — creating a report, missing tabs
---
# The Compliance report
URL: https://docs.stonal.io/fr/guide/vue-densemble/rapports/conformite
# The Compliance report
## What it is for
This report tracks the compliance of your mandatory surveys by **five families**: EPC, asbestos,
lead, gas and electricity.
It answers three questions: **where do I stand**, **where are my risks**, **what must I plan**.
## The screen explained
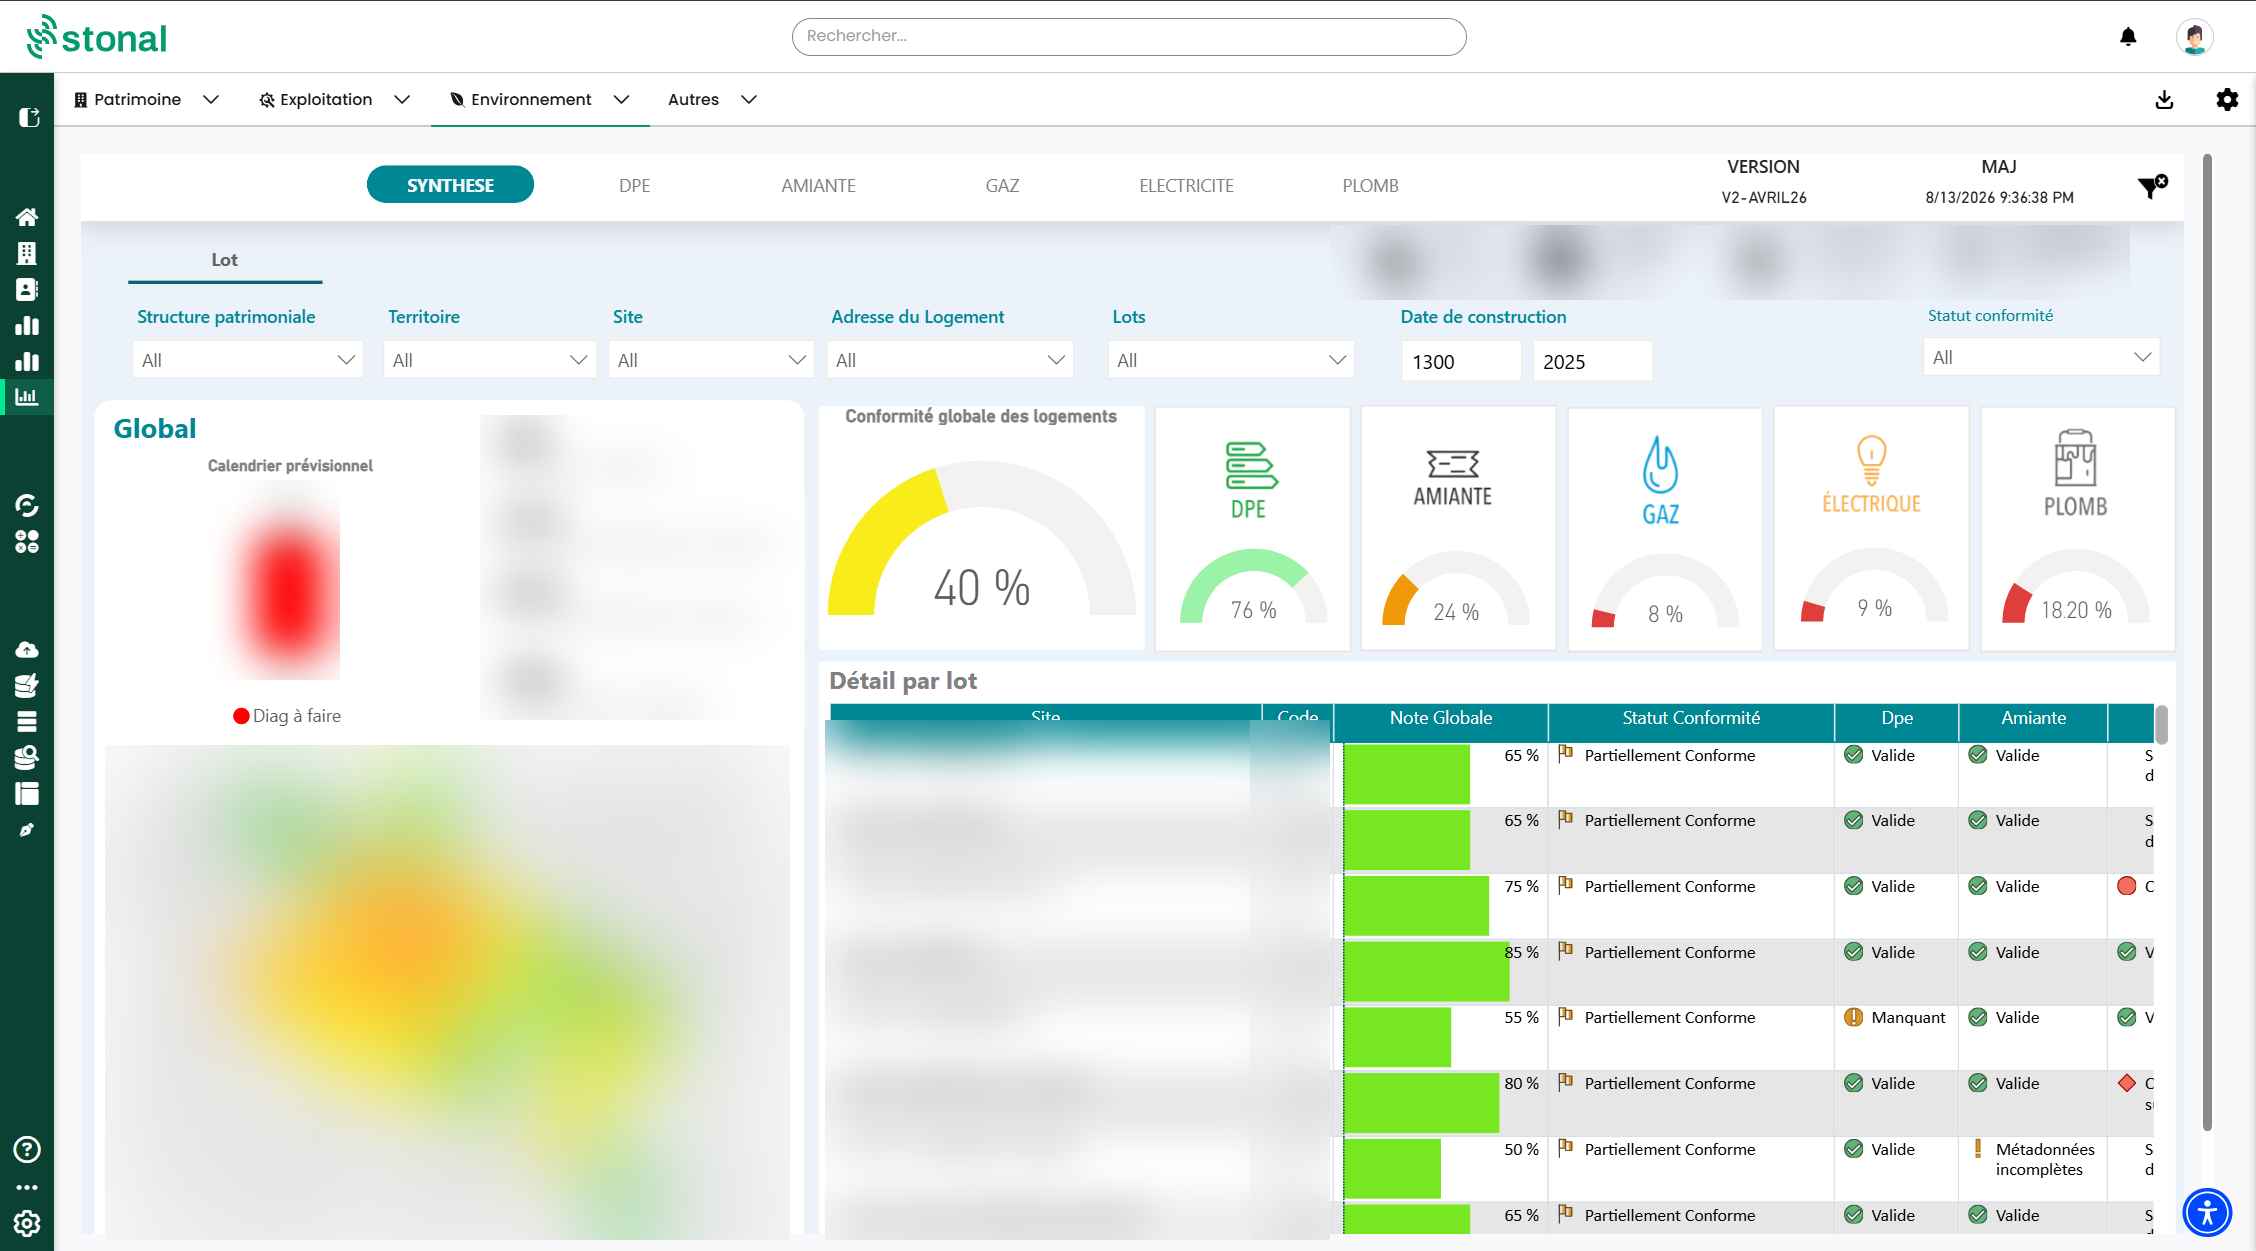
The tabs are reachable from the top of the **Summary** page: Summary, EPC, Asbestos, Gas, Electricity,
Lead. Each survey tab has an **"Unassigned survey"** sub-tab.
A **fixed banner** appears on every page: branches, estates or properties, dwellings, habitable area,
and the report's **last update date**. An icon lets you clear all filters at once.
The banner figures cover **your whole portfolio active on the current date**:
- **Sites**: all your estates;
- **Branches**: the branches that hold property;
- **Dwellings**: all your dwellings.
They are therefore not limited to buildings holding at least one residential dwelling, and so stay
consistent with the cover page.
:::tip Open a document in one click
In the tables, click the **"Valid"** or **"Incomplete metadata"** status of a survey to open the
document directly in Stonal.
:::
:::tip Hover over the "i"
Each indicator has a tooltip that recalls its calculation rule.
:::
### The filters
- **Branches**
- **Territory**: a hierarchical filter. By default it offers the department then the town, but its
levels can match other territorial divisions specific to your organisation.
- **Estate or site**
- **Dwelling address**
- **Units**: code and name
- **Construction date**
- **Nature** of the unit: residential is ticked by default; you can add other natures (hostels,
shops…)
- **Compliance status**: on the Summary only
The filters appear in the same order on every tab.
A **"Portfolio structure"** filter also exists. Its levels follow the way your portfolio is
organised: subsidiary, entity, branch…
## How compliance is calculated
The report uses **two calculation methods**, depending on the tab.
### On the Summary tab: one score per dwelling
Each survey scores either **100%** or **0%** according to its status:
| Survey status | Score |
|---|---|
| Valid | 100% |
| Not applicable | 100% |
| Expiring this year | 100% |
| Expired | 0% |
| Incomplete metadata | 0% |
| Missing | 0% |
A dwelling's **overall score** is the average of its five survey scores.
The **compliance status** follows from it:
| Overall score | Status |
|---|---|
| 100% | **Compliant** |
| Above 50% | **Partially compliant** |
| 50% or below | **Weakly compliant** |
| 0% | **Non-compliant** |
### On the EPC, Asbestos, Gas, Electricity and Lead tabs: a simple rate
A tab's compliance rate answers a single question: **what share of the dwellings concerned has a
valid survey?**
| Dwelling's situation | How it counts |
|---|---|
| Valid survey, including "expiring this year" | Counts as compliant |
| Not applicable | **Left out of the calculation** |
| Expired, incomplete metadata, missing | Counts as non-compliant |
A recent portfolio therefore does not inflate a tab's rate.
### When the validity date is missing
The report needs only **one** date to work out a survey's status. If the validity date could not
be read on the document, it is deduced from the survey date and its regulatory duration (for
instance 10 years for an EPC). The **"Incomplete metadata"** status therefore only remains when
**no** date could be read on the document: often a poor-quality scan or an unusual format.
The validity period is calculated from the survey's **issue date**, except for electricity, which
stays on the inspection date.
## Why some dwellings are "not applicable" {#non-concernes}
The regulations do not apply to your whole portfolio. The report works out what is required
from the **construction date**:
| Survey | Not applicable when |
|---|---|
| **Asbestos** | The building was built **after 1997** |
| **Lead** | The building was built **after 1949** |
| **Gas** and **electricity** | The dwelling is **less than 15 years old** |
A recent portfolio therefore shows a lot of "not applicable", and that is normal: those
dwellings carry no regulatory risk.
:::info "Not applicable" does not count the same way everywhere
On the Summary, "not applicable" counts as 100%, which pulls the overall score up on a recent
portfolio. On the survey tabs, it is left out of the calculation. It is therefore normal for a
tab's rate to differ from the rate of the same survey on the Summary. To decide what to do, rely
on the counters — dwellings with no survey, expired surveys — and on the detailed table.
:::
:::note Gas: age, not yet the installation
For gas, the report currently relies on the dwelling's age only, not on whether gas is actually
present. An all-electric dwelling over 15 years old may therefore come up as "concerned".
:::
## The forecast schedule
The report tells you when to act:
| Situation | What is planned |
|---|---|
| Survey missing | *Survey to carry out*, in the current year |
| Survey expired | *Survey to redo*, in the current year |
| Expiring this year | Current year + 1 |
| Valid | At its validity date |
## The Summary tab
You will find:
- the overall compliance of your dwellings;
- compliance by survey type;
- the forecast schedule;
- a **map** where your estates are coloured by status;
- an exportable **"Detail by unit"** table.
Properties without valid GPS coordinates are not placed on the map.
## What to know for each survey
### EPC
- Two levels: **by dwelling**, the default view, and **by building**.
- The rating shown, A to G, is the **least favourable** of the energy rating and the climate
rating (greenhouse gases). A dwelling rated C on energy but E on greenhouse gases appears
as E.
- The overall rating, the energy rating and the climate rating are read **separately** on each
EPC.
- The detailed table contains:
- the **document held in Stonal**;
- an **"ADEME certificate link"** column, which opens the official certificate on the ADEME
observatory from the ADEME number, even if the certificate was not filed in Stonal;
- the **recalculated** ratings and consumption. The values **read** on the EPC are also
available in the **Document tracking** report: you can extract them there to compare them
with the recalculated values;
- the **surveyor's name**.
- Individual houses are followed in the dwelling view and **left out of the building view**, so
that they are not counted twice. For this to be accurate, your portfolio must record each
building's occupation type (individual or collective).
### Asbestos
Several documents are tracked, and they do not have the same grain:
| Document | What it covers | Grain |
|---|---|---|
| **DAPP** | The private areas of a dwelling | Dwelling |
| **RAAT/DAAT** | A survey carried out before works, in a dwelling | Dwelling |
| **Common-area RAAT** | A pre-works survey of the common areas | Building (dedicated page) |
| **DTA** | The building's asbestos technical file | Building |
- **Common-area RAATs** have their own page. To appear there, the document must be identified as
a common-area RAAT in your document management.
- RAATs have **no regulatory validity date**, so they never expire. The report only says whether
they are there, and whether asbestos was found.
- For RAATs and DTAs, the table shows the **names of the rooms inspected**, as written in the
survey.
- Where asbestos is found in a DAPP or a DTA, a **three-year** control date is calculated
automatically.
:::info A DTA covering several buildings
It has to be attached to **each** of them in your document management, otherwise the buildings
left out come up as missing.
:::
### Gas
- Concerns dwellings over 15 years old.
- The same tab tracks both the **gas surveys** and the **conformity certificates** issued after
works.
- Where an anomaly is found, a **six-year** control date is calculated.
### Electricity
Electricity concerns dwellings over 15 years old. For such a dwelling, the report looks, in this
order, for:
1. **A Consuel certificate less than six years old**: it counts as compliant and removes the need
for a survey. The status is "Valid", with no end date.
2. **Otherwise, an electrical survey**: it is valid for **six years**. The result, compliant or
non-compliant, is the one stated in the survey.
3. **Neither Consuel nor survey**: the status is "Missing".
For a dwelling less than 15 years old, the status is "Not applicable". If a Consuel exists, the
link to the document is still shown.
### Lead
- Concerns buildings built before 1949.
- The document tracked is the **CREP**. Where lead is found, a **six-year** control date is
calculated; where none is found, the report stays valid with no time limit.
- CREPs covering common areas are attached to the building, so they do not appear in the
dwelling table.
## Unassigned surveys: the tab to watch {#diagnostics-non-affectes}
:::warning Now use the Document tracking report, "Survey reliability" tab
It is the recommended tool to check and correct how your surveys are attached. It will
**fully replace**, in time, the "Unassigned survey" pages of the Compliance report. Get into the
habit of working in that tab now.
:::
An unassigned survey is a document present in Stonal that could not be attached to a specific
dwelling or building — an ambiguous file name, a code that could not be found.
Why it matters: an unassigned survey shows up as **Missing** everywhere else in the Compliance
report, even though the document exists.
:::tip A reflex worth taking
Review the **Survey reliability** tab of the Document tracking report regularly and have the
filing corrected. Your compliance rate improves without a single new survey being carried out.
:::
Until they are withdrawn, the "Unassigned survey" pages remain available in each survey tab of
the Compliance report. A **"Folder"** column and filter show where the document sits in your
folders (for instance EPC unit or EPC building).
## Good to know
:::warning The scope covers residential dwellings
The report pages only keep residential dwellings, and only buildings or sites holding at least one
are taken into account. The top banner is the exception: see "The screen explained".
:::
:::note Exports are limited to 150,000 rows
Beyond that, filter (by branch or territory, for instance) and export in several goes.
:::
## Changes to the report {#evolutions}
Changes are listed by month of release. New versions are not rolled out to every organisation at
the same time, so **a few weeks** may pass between a change being released and you seeing it in
your report.
### September – October 2026
- **Summary score**: each survey now counts for either 100% (valid, not applicable, expiring
this year) or 0% (expired, incomplete metadata, missing). The intermediate scores (75%, 50%,
25%) are gone.
- **Open a document in one click**: in the tables, the "Valid" status (and "Incomplete metadata")
opens the document directly in Stonal.
- **"Nature" filter** for the unit, with residential ticked by default. The order of the filters
is the same on every tab.
- **EPC**: the overall rating, the energy rating and the climate rating are now read separately on
each document. Ratings and their labels are therefore accurate, including for recent EPCs.
- **Compliance status**: the labels are put back in logical order. Above 50%, a dwelling is
"Partially compliant"; at 50% or below, it is "Weakly compliant".
- **EPC**: figures now show on the short bars of the "Overall rating" chart.
- **Asbestos**: the "RAAT" label becomes "RAAT/DAAT".
- **Map**: properties without valid coordinates are no longer shown.
- **Attaching surveys**: the new **Survey reliability** tab of the Document tracking report
becomes the recommended tool. It will in time replace the "Unassigned survey" pages, which
meanwhile get a "Folder" column and filter.
### July – August 2026
- **Filters**: the "Town" filter is replaced by the hierarchical "Territory" filter (by default
department then town).
- **Calculation**: the compliance rate of the survey tabs is simplified. "Not applicable"
dwellings are left out, and a survey expiring this year stays compliant. The Summary is
unchanged.
- **Tooltips**: all tooltips have been reviewed, particularly on the EPC tab.
- **Asbestos**: the names of the rooms inspected are shown for RAATs and DTAs.
### May – June 2026
- **Asbestos**: RAATs no longer expire. Only the presence of the document and whether asbestos
was found count.
- **Gas**: conformity certificates and gas surveys are brought together in the same tab.
### April 2026
- **Banner**: the portfolio indicators cover the whole active portfolio, so they stay consistent
with the cover page.
- **EPC**: new "ADEME certificate link" column, and the surveyor's name in the table.
- **Dates**: validity is calculated from the survey's issue date, except for electricity.
- **Asbestos**: dedicated page for common-area RAATs.
- **Electricity**: new rule, where a Consuel less than six years old removes the need for a
survey. Otherwise, the electrical survey is valid for six years.
### March 2026
- **EPC**: the dwelling view opens by default.
- **EPC by building**: individual houses are left out, as they are already counted in the
dwelling view.
- **Survey status**: a single date is now enough. Validity is deduced from the survey date when
it is missing. As a result, fewer "Incomplete metadata".
### Coming up
:::info In progress, not available today
- **Gas**: gas will be detected from the dwelling's installations or from the EPC, and no
longer from age alone.
- **"Owner" filter**, for organisations with several entities.
- **Consistent labels** (missing, absent, no survey) and colours across the charts.
:::
## See also
- [The documents of a property](/guide/vue-densemble/mes-residences/documents) — where to file your surveys
- [The Document tracking report](/guide/administration/gestion-documentaire/suivi-documentaire) — in particular the Survey reliability tab
---
# The Query report
URL: https://docs.stonal.io/fr/guide/vue-densemble/rapports/requete
# The Query report
:::info Availability
This page concerns organisations still on **Abyla** (the Model interface).
:::
## What it is for
This report lets you **analyse and extract the data held in your plans**: floor areas, zones, rooms,
equipment counts.
:::info This report belongs to earlier versions
It is meant for organisations using **Abyla** and the **Model** interface. If your organisation has
moved to **Graphlake**, this report does not concern you:
[Querying your data](/guide/qualite-donnees/requeter-les-donnees) plays that part instead, with freer
settings.
:::
_Video tutorial, 1 min 25: the areas of the whole portfolio, extracted from the plans._
## The screen explained
| Marker | What it gives you |
|---|---|
| **Levels** | One tab per portfolio level — site, zone, room, equipment |
| **Filters** | Filter on the property, the building or the building type |
| **Quantity** | The quantitative results of your filter: floor areas for zones and rooms, counts for equipment |
| **Attributes** | The attributes of the components concerned |
| **Data table** | The results of your search |
| **Breakdown** | The portfolio level the search applies to |
| **Export** | Retrieve the data as CSV |
## Step by step
Choose the tab for the **level** you are interested in, apply your **filters**, then read the
quantities and the attributes of the components found.
### Extract a list of equipment
_Video tutorial, 1 min 28: the list of equipment and its condition, at every scale._
:::tip Example
*I want the list of every lift in my portfolio, with all their information.*
:::
1. Choose the **Equipment** tab.
2. Apply the filter on the equipment you want — here, lifts.
3. Read the **count** of lifts across the whole portfolio.
4. Go to the **Attributes** tab to see their data.
5. Export the result as CSV.
## See also
- [Querying your data](/guide/qualite-donnees/requeter-les-donnees) — the equivalent on the latest version
- [Model](/guide/versions-anterieures/model) — the earlier version's plan interface
- [Analysis reports](/guide/vue-densemble/rapports) — filtering, exporting and moving between
reports
---
# Building your works strategy
URL: https://docs.stonal.io/fr/guide/workflows/strategie
# Building your works strategy
## What it is for
The **Strategy** module helps you decide which works to carry out, on which properties and
for what budget. It answers questions such as:
- which works, for how much and on which properties, to bring my portfolio out of the F and
G energy labels?
- with the budget I have, what is the best possible result?
- can I get a slightly lower but perfectly acceptable result while spending much less?
It works on five axes at once:
| Axis | What is measured |
|---|---|
| **Energy renovation** | The energy performance (DPE) label, consumption and greenhouse gas emissions |
| **Summer comfort** | How exposed residents are to heat, in degree-hours above 26 °C |
| **Climate risk: clay** | The risk linked to clay shrinkage and swelling (RGA) |
| **Climate risk: flooding** | The flood risk and how well the building is protected |
| **Accessibility** | The gap between your homes adapted for people with reduced mobility and the accessibility target quotas |
For each property, the module suggests costed **works packages** suited to the building.
Across the whole portfolio, it then computes **scenarios**: the best combination of packages
for your budget or your target, which you can compare side by side.
The **PSP** module completes this view by rating each property on its attractiveness, its
technical condition and its market: see
[Rating your portfolio (PSP)](/guide/workflows/strategie/psp).
## Prerequisites
The module starts from the properties in your portfolio. To be analysed, a property must be
linked to a building of the French national building database (BDNB or RNB identifier). From
there, the module fetches the useful public data on its own: building characteristics,
energy performance certificates, Géorisques data, INSEE data for the municipality.
A property whose data is loaded has the **Ready** status. Only ready properties go into a
scenario.
## The screen at a glance
The module is organised in four pages:
| Page | What you do there |
|---|---|
| **Dashboard** | See how your portfolio spreads across each axis and spot missing data |
| **Property portfolio** | Search and filter your properties, open their record |
| **Scenarios** | Create, read, compare and export your scenarios |
| **Customisation** | Adapt works packages and prices to your own practice |
### The dashboard
It shows how your portfolio spreads by class on each axis: energy labels, summer comfort,
clay, flooding, accessibility. It also shows the split of heating energies and of insulation
(external walls, ground floor, ceiling).
For accessibility, a table compares the adapted homes expected under the accessibility target quotas (**Target quota**)
with the ones you have declared (**Observed**). The **Score scope** selector lets you include
or leave out homes built from 2018 onwards.
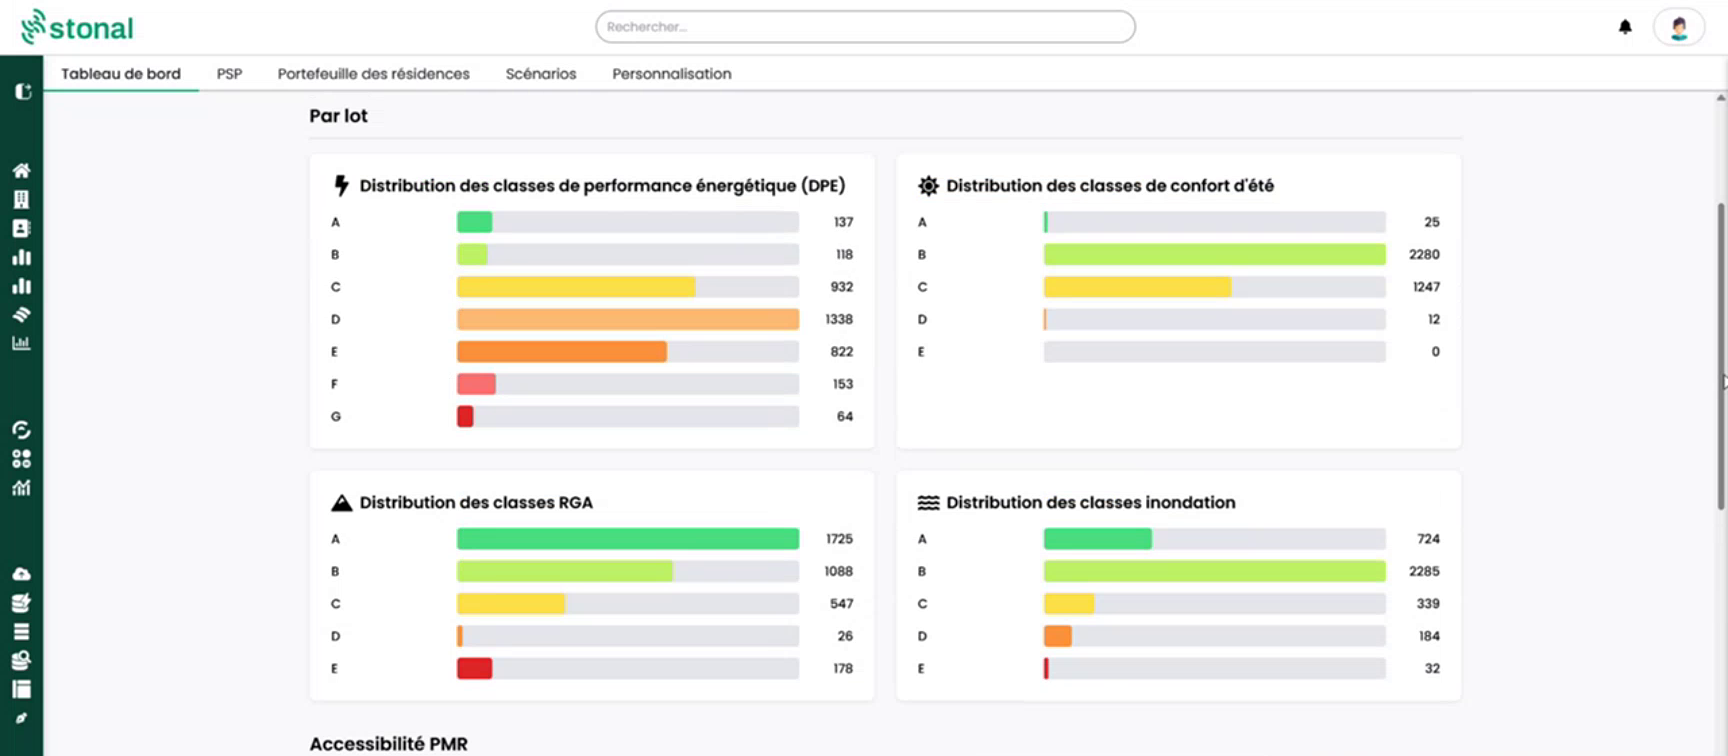
### A property's record
From the **Property portfolio**, open a property. Its record has one tab per axis. Each tab
shows:
- the data used by the axis;
- the list of **active works packages**, with their cost, cost per home, new estimated class
and expected gain;
- the list of **inactive works packages**, which the module will not use.
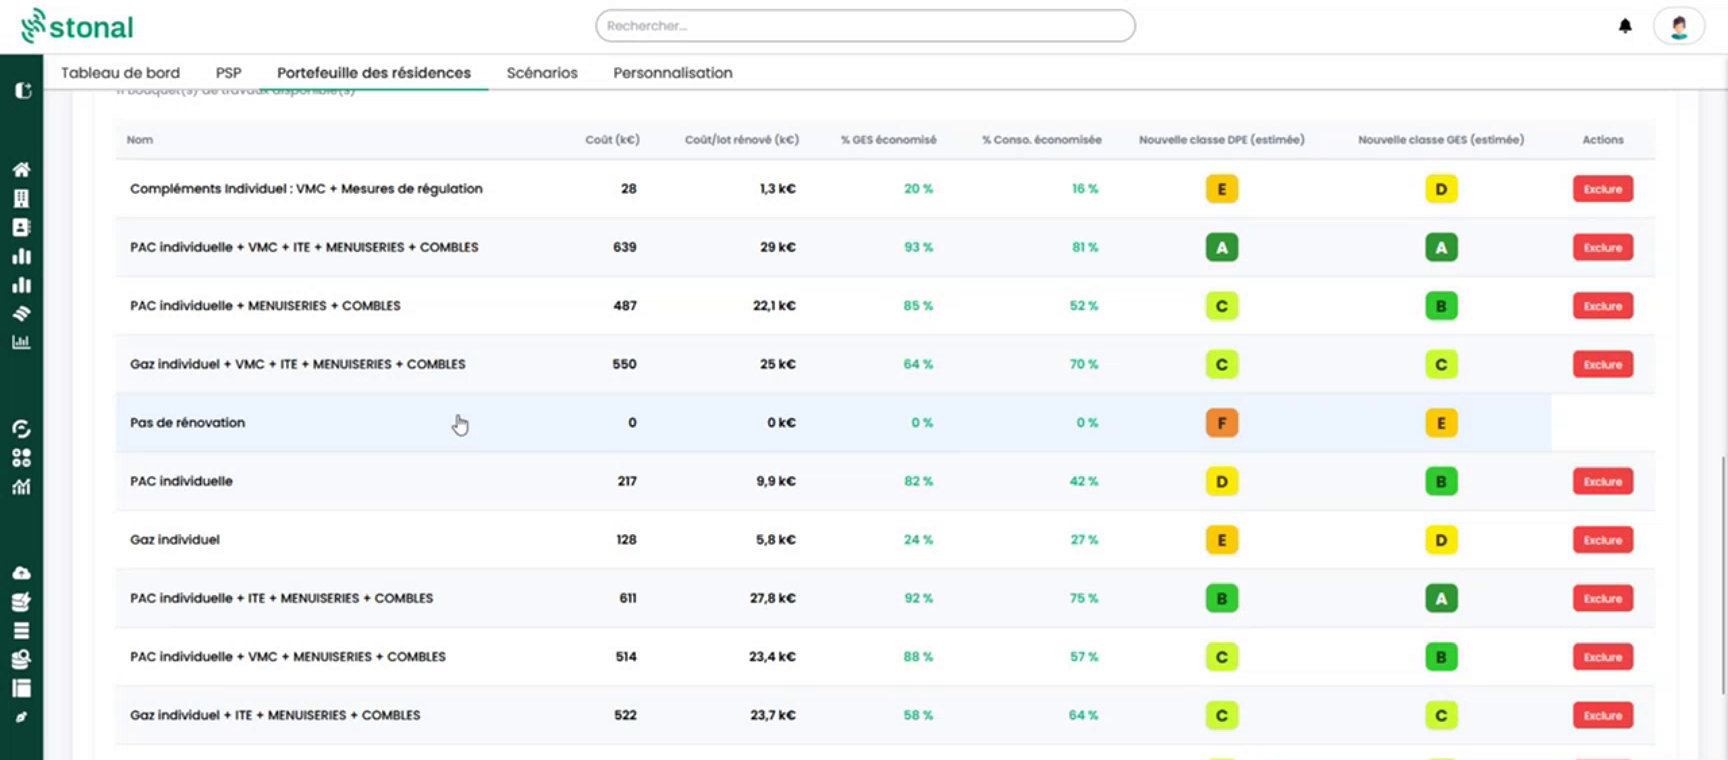
Click a package to see the detail of its works, with quantities and costs. For energy
renovation, you also find the energy savings, the payback time and the cost per tonne of CO2
avoided.
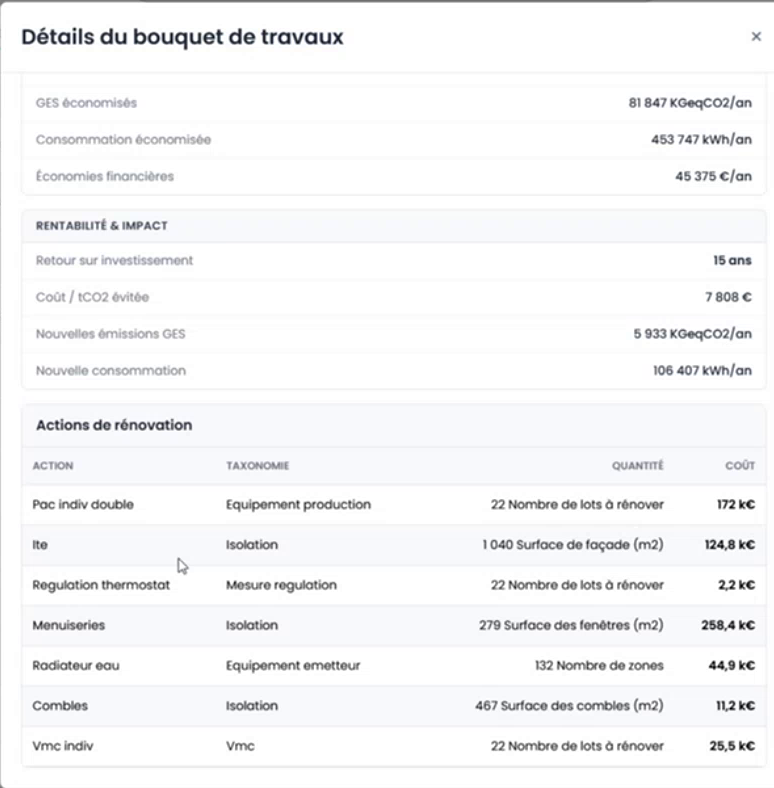
The **Site description** page gathers every characteristic fetched for the property.
## Step by step
### 1. Complete the data only you know
Some information does not exist in public data. Entering it in the **Site description**
makes the results more accurate. For example:
- **accessibility**: the number of homes already adapted, per level;
- **summer comfort**: whether there are ceiling fans, the type of surroundings, and the
share of residents aged 60-74, 75-89 and 90 and over (otherwise, the module uses the age
pyramid of the municipality);
- **clay**: the type of foundations, the cracks observed, the works already done;
- **flooding**: where the boiler room is, whether there are non-return valves, lifting pumps
or flood barriers.
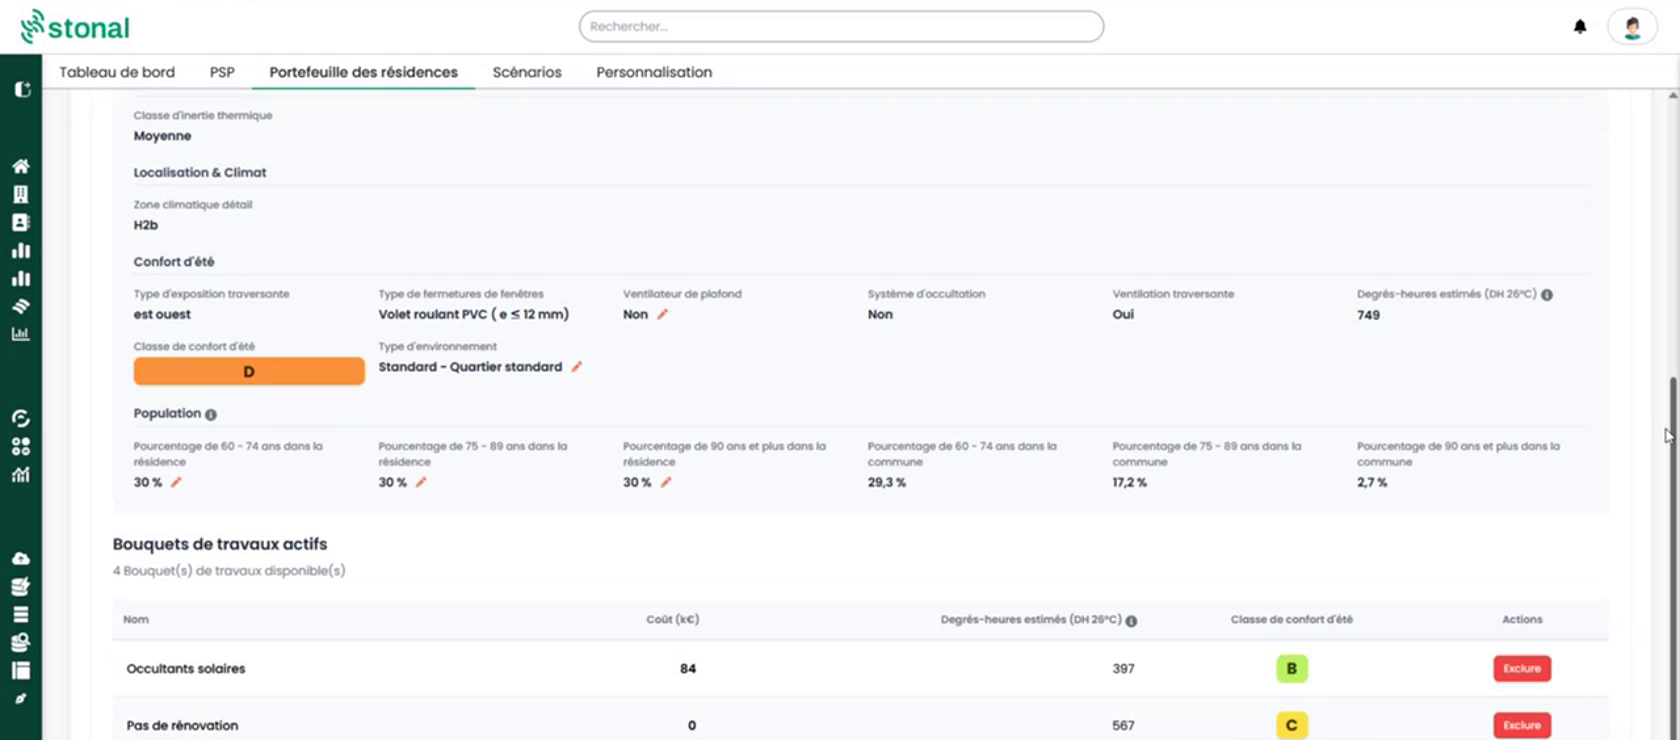
A change immediately recomputes the score of the axis. The packages concerned are
recomputed right after.
:::tip Residents' age changes summer comfort
Regulations assume a home is empty during the day, whoever lives there. The module takes the
residents' age into account to get closer to reality. A property with many elderly residents
sees its heat exposure rise, and becomes a priority in scenarios.
:::
### 2. Set aside the packages that do not suit you
On a property's record, the **Exclude** button removes a package for that property,
**Reactivate** brings it back. To remove a package from all your properties, use the
**Customisation** page.
### 3. Create a scenario
On the **Scenarios** page, click **New scenario**. The wizard takes you through seven steps:
the scenario name, one step per axis, then a summary. You can skip an axis with **Skip**,
but at least one must be configured.
For each axis, first choose an **Optimisation goal**:
- **Best performance for a budget**: the module looks for the best result within your
budget;
- **Reach a minimum class at the lowest cost**: for example, the whole portfolio in class C
at least. A property that cannot reach the target class gets the package that comes
closest. This option does not exist for accessibility.
Then set the parameters:
| Parameter | Effect |
|---|---|
| **Max budget** | Optional, in k€. Without a budget, you get the best possible solution and its cost |
| **Performance/budget trade-off** | Towards "Performance", the module spends up to the budget for the best result. Towards "Cost", it looks for the best gain per euro spent |
| **Indicator to optimise** | Energy renovation only: favour greenhouse gas emissions, consumption, or a mix of both |
| **Works distribution strategy** | Accessibility only: **Balanced coverage of the portfolio** spreads adapted homes across your whole territory; **Concentration / pooling of works** groups them in large properties |
| **Select properties** | Limit the scenario to part of the portfolio, with the same filters as the portfolio page |
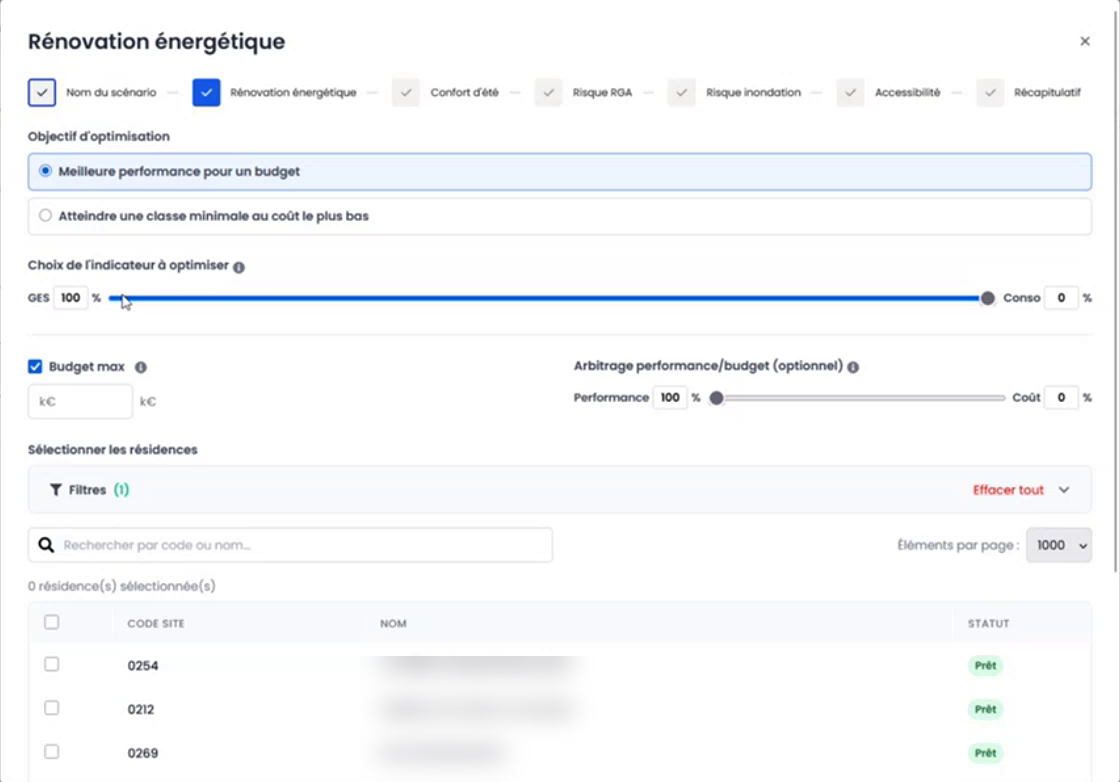
:::tip Start without constraints
A first scenario without a budget gives you the cost of the best possible solution. It then
serves as a benchmark to set a realistic budget.
:::
Each axis is computed with its own budget: the axes do not share a common envelope.
### 4. Read the result
A ready scenario shows:
- **global metrics**: properties, homes and areas to renovate, total cost;
- one tab per axis: total cost, cost per home and per m², share of homes renovated, class
distribution before and after works;
- for energy, in addition: emissions and consumption saved, financial savings, cost per
energy class gained, payback time;
- **Aggregated actions**: how many of each type of works across the portfolio (hot water
tanks, ceiling fans, flood barriers…), and their cost;
- **View by site**: the package chosen for each property, with a link to its record.
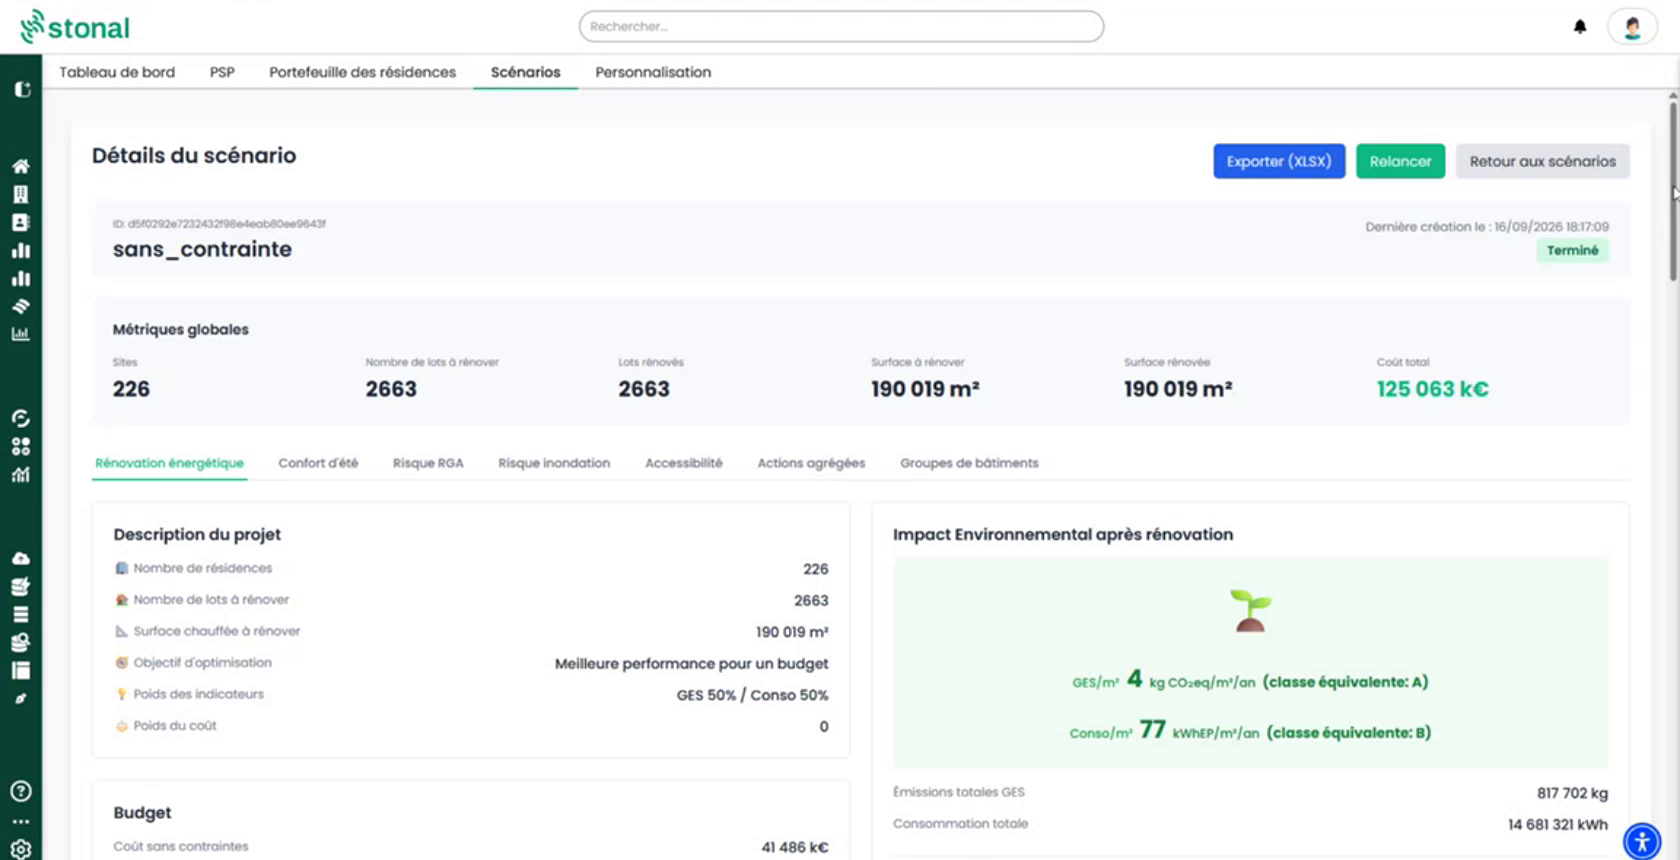
The **Export (XLSX)** button produces an Excel file with four sheets: summary, results by
group, works, works by property. **Rerun** reopens the wizard with the same settings, for
example after your data has been updated.
### 5. Compare two scenarios
On the **Scenarios** page, tick exactly two scenarios and click **Compare**. Both results
are shown side by side, with the same tabs.
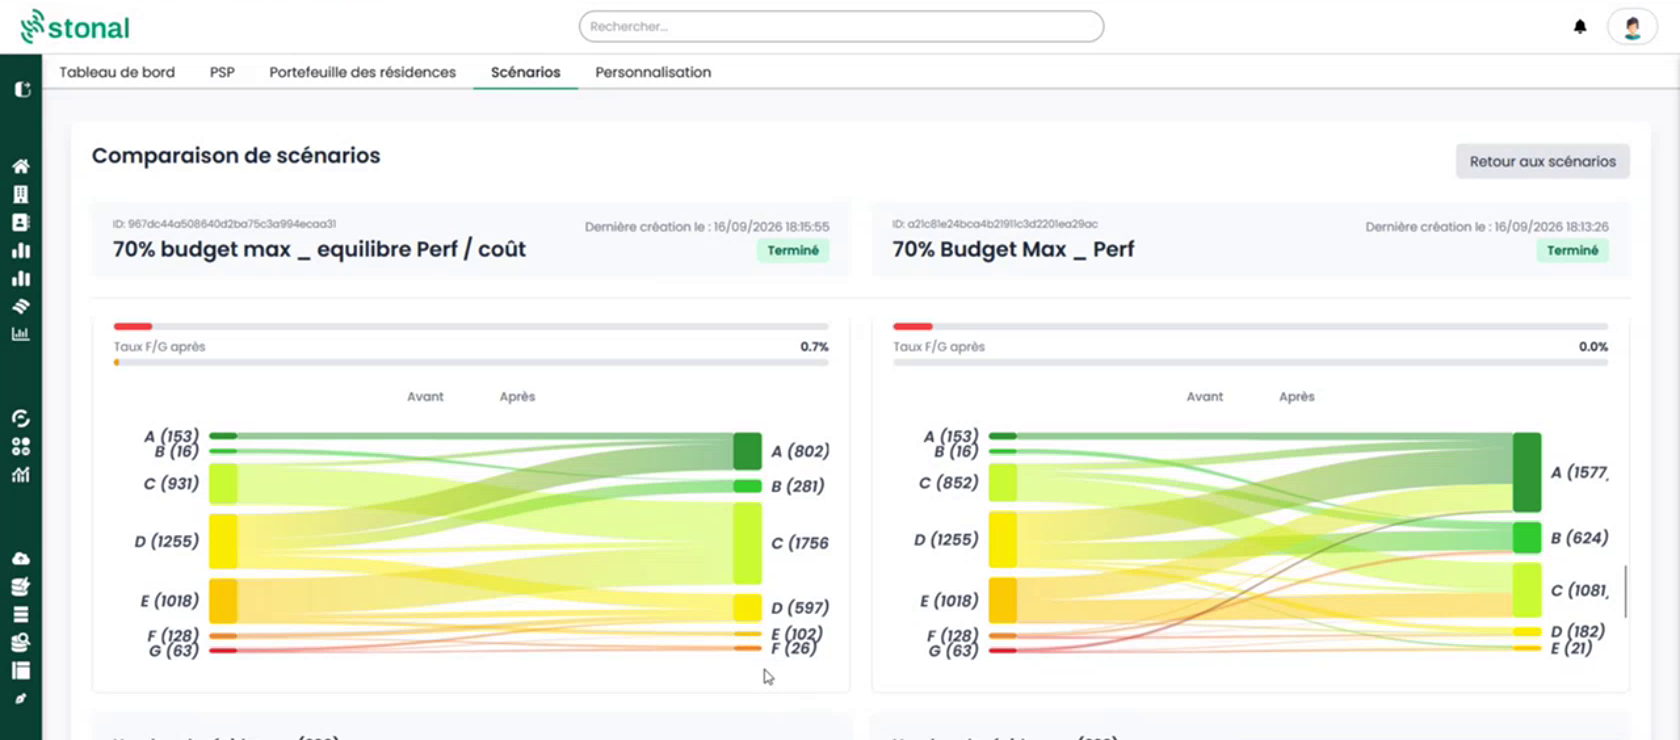
:::info An example of trade-off
On the same portfolio, an "everything in class C" scenario can cost more than a scenario
that balances cost and performance, and end up with a slightly lower average performance.
In return, it guarantees that every property with homes below class C gets a renovation
solution, whenever one exists. Conversely, the balanced scenario leaves out of the programme
the properties judged too costly to renovate. The comparison sets side by side what you gain
and what you pay, and the choice is yours.
:::
### 6. Adapt packages and prices to your practice
The **Customisation** page has two tabs.
**Works packages**:
- **Exclude this works package** for all your properties, or include it again;
- **Add a custom action** to a package, for example scaffolding or an audit;
- **Custom constraints**: keep a package for properties with given characteristics.
Example: only accept individual heat pumps in properties that have balconies. Your
constraints add up to Stonal's, which cannot be changed.
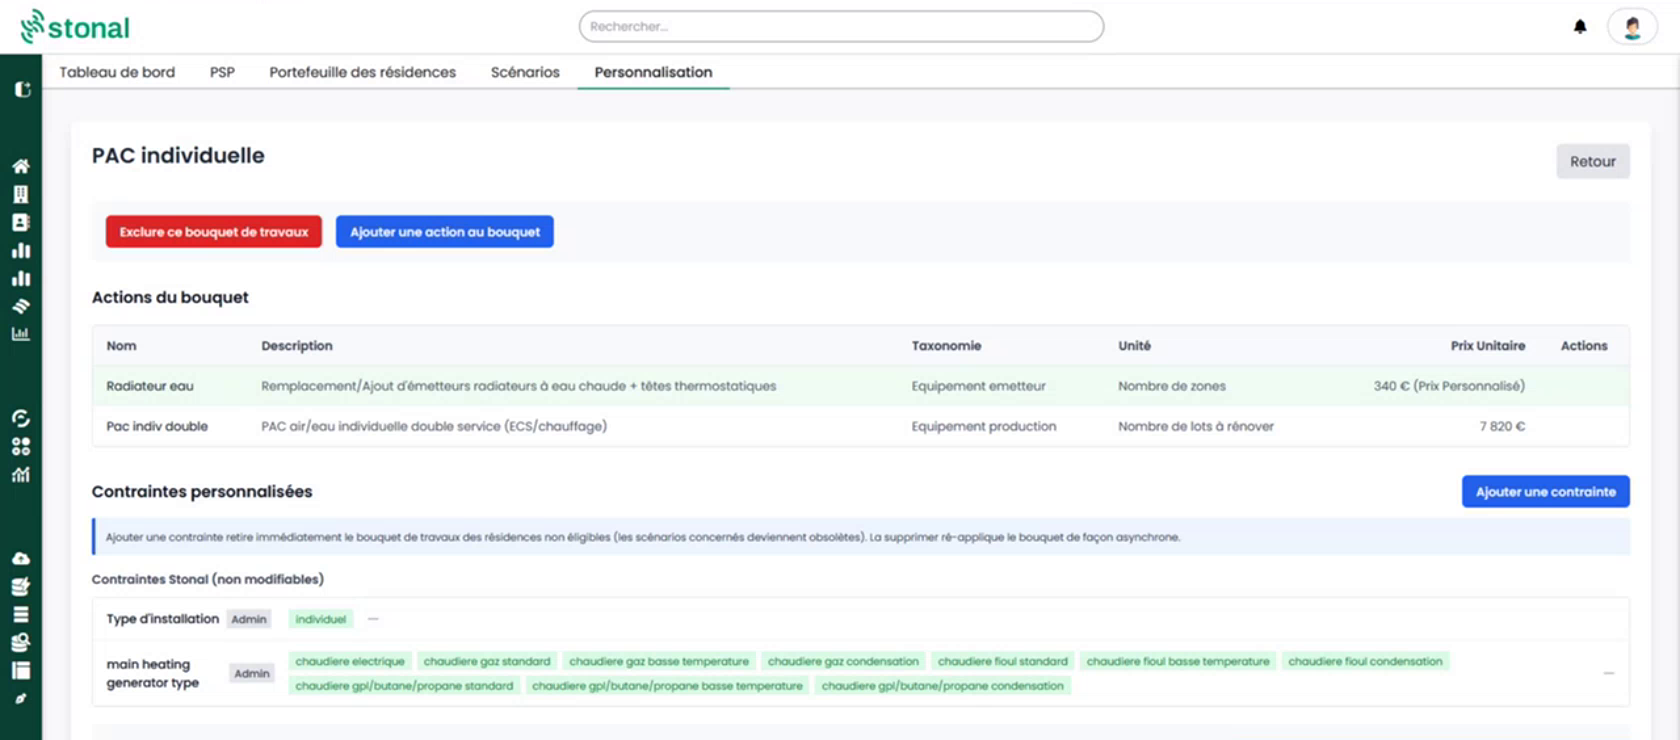
**Actions**:
- enter a **Custom price** instead of the Stonal price;
- **Create a new action** with its name, description, unit and unit price.
Any change reruns the computation of the packages concerned.
## How the module computes
### Where works packages come from
- **Energy renovation**: the packages are built from the works and equipment recommended by
ADEME, the French ecological transition agency, which have a real effect on the energy
label.
- **Other axes**: packages built by Stonal from real audits, grouping works that are done
together.
- Each package is only offered to buildings that can take it. For example, no external
insulation on stone or brick walls, nor within a historic monument perimeter; a district
heating connection only if a network runs nearby.
- Current packages apply to occupied properties.
A package becomes inactive, marked **Discarded**, when another package for the same property
does at least as well for a lower or equal cost.
### The classes of each axis
| Axis | A | B | C | D | E |
|---|---|---|---|---|---|
| Summer comfort (degree-hours) | under 200 | 200 to 400 | 400 to 700 | 700 to 1,000 | 1,000 and over |
| Clay, flooding (risk score out of 100) | under 20 | 20 to 40 | 40 to 60 | 60 to 80 | 80 and over |
| Accessibility (score out of 100) | 80 and over | 60 to 80 | 40 to 60 | 20 to 40 | under 20 |
Energy renovation follows the energy labels from A to G, with the double-threshold rule: the
label kept is the worse of consumption and emissions.
### Estimates
To cost the works, the module estimates the missing quantities (façade, window and roof
areas…) from the building's footprint, height and number of homes. For energy, a prediction
model trained on energy performance certificates estimates consumption and emissions after
works. These are **orders of magnitude to compare and decide**, not a quote: your prices and
constraints, entered on the **Customisation** page, bring them closer to your reality.
## Good to know
- **Accessibility**: there is no public data on adapted homes. Until you have declared your
adapted homes, your properties (except those built from 2018 onwards) show in class E.
- Scenarios are **personal**: a colleague in your organisation does not see yours.
- A banner warns you when data has changed since a scenario was computed: click **Rerun** to
update it.
- The module relies on French public data (BDNB, Géorisques, INSEE): it covers properties
located in France.
- Access to this module depends on the scope chosen by your organisation and on the rights
granted to you. If you need it, get in touch with your contact person.
## See also
- [Works plans](/guide/workflows/plans-de-travaux): multi-year planning of your works
---
# Rating your portfolio (PSP)
URL: https://docs.stonal.io/fr/guide/workflows/strategie/psp
# Rating your portfolio (PSP)
:::info A module that complements Strategy
The PSP is a **complementary module** to the [Strategy](/guide/workflows/strategie) module.
Strategy costs and compares works scenarios; the PSP offers another view of your portfolio,
by rating each property on its attractiveness, technical condition and market. The two are
meant to be read together.
:::
## What it is for
The **PSP** (strategic asset plan, *plan stratégique de patrimoine*) rates each property on
three axes, from 0 to 100:
| Axis | What it says about the property |
|---|---|
| **A, Attractiveness** | Its location: nearby services and shops, transport, schools, jobs, and its occupancy |
| **T, Technical** | The condition of the building and the financial effort to bring it up to standard |
| **M, Market** | The health of the housing market in its municipality |
By crossing these ratings, it sorts your portfolio into families and **product issue** zones.
It is a decision tool: where to maintain, where to refurbish, where to consider a sale or a
demolition.
## Prerequisites
To be rated, a property needs:
- its location (latitude and longitude) and its municipality code;
- an identifier in the French national building database (BDNB) and loaded data, for the
technical rating.
Your **vacancy**, **turnover** and **unpaid rent** rates per property enrich the
attractiveness rating. Without them, it relies on the property's location only.
## The screen at a glance
### The PSP page
Three charts, under the **ATM rating** title:
1. **ATM spider chart**: the average profile of your portfolio on the three axes, compared
with that of each of the four families.
2. **Product issue, T × A grid**: five zones, with the number and share of properties in
each. Click a zone to list the properties concerned.
3. **Portfolio segmentation**: each property is a bubble, placed by its attractiveness
(horizontally) and its technical rating (vertically). The bubble size gives the number
of homes, its colour the market class. Hover a bubble to read its ratings, click to open
the property.
On this last chart, zoom with the mouse wheel or by dragging, move around with Ctrl (or Cmd)
+ drag, and go back to the initial view with **Reset zoom**.
The portfolio filters also apply to this page: department, energy class, heating energy,
construction period, priority neighbourhood…
### A property's PSP tab
- **ATM signature**: one qualifier per axis, "+" for a rating of 60 or more, "°" between 40
and 60, "−" under 40.
- **ATM spider chart, property vs portfolio**: the property compared with the average of
your portfolio and that of its family.
- Three boxes, **Attractiveness**, **Technical** and **Market**: the rating, its class from
A to E, the sub-ratings, and the detail of the indicators with their values.
## Reading the results
### Families and issues
Families split the chart at 50 on attractiveness and on the technical rating: **Good product
· well located**, **Good product · poorly located**, **Fragile product · well located**,
**Fragile product · poorly located**.
Issues refine this reading:
| Situation | Product issue |
|---|---|
| Attractiveness and technical under 50 | Risk of obsolescence |
| Attractiveness under 50, technical 50 or more | Risk of downgrading |
| Attractiveness 50 or more, technical under 50 | Dilemma |
| Attractiveness 50 or more, technical between 50 and 70 | Investment issue |
| Attractiveness 50 or more, technical 70 or more | No product issue |
### A few typical signatures
| Signature | Profile | Possible direction |
|---|---|---|
| A+ T+ M+ | Favourable on all three axes | Maintain, with rigorous upkeep |
| A+ T− M° | Well located, fragile product | Refurbish: the investment makes sense |
| A− T+ M° | Good product, poorly located | Keep an eye on vacancy and turnover |
| A° T° M° | Middle of the road everywhere | Monitor, decide case by case |
| A− T− M− | Fragile on all three axes | Consider a sale or a demolition |
These directions are reading tips: the decision remains yours.
## How ratings are computed
Each rating is the average of the available sub-ratings. Missing data does not count as
zero: it simply drops out of the computation.
Most sub-ratings are **percentiles**: the property, or its municipality, is compared with
the whole of France and gets a rating from 1 to 100 based on its rank. 100 is the most
favourable situation.
- **Attractiveness**: the average of the occupancy rating (the property's vacancy, turnover
and unpaid rent) and the location rating (distance to schools, shops and transport lines
nearby, access to general practitioners, unemployment rate of the municipality). A
property in a priority urban policy neighbourhood loses 15 points.
- **Market**: the average of three ratings for the municipality: market tension (population
trend, A/B/C zoning, density of social housing), health of the municipal social housing
stock (vacancy, turnover, energy labels, age) and the level of social rents.
- **Technical**: the average of the renovation rating (energy label, summer comfort, clay and
flood risks of the property) and of the cost to bring the property to class C on each of
these axes, compared with that of 100,000 buildings in France.
Classes: A from 80 to 100, B from 60 to 80, C from 40 to 60, D from 20 to 40, E under 20.
## Exporting
The **Export (XLSX)** button produces a file with three tabs: the summary of your portfolio
(averages, families, issues), the rating property by property with every sub-rating, and the
raw values of each indicator with their percentile.
:::info The export covers the whole organisation
The charts only show ready properties and follow your filters. The export covers every
property of your organisation, regardless of filters. Some labels differ there:
"Investment issue" becomes "Maintenance", and "No product issue" becomes "No issue".
:::
## Good to know
- Ratings are compared with the whole of France, not with your department or your city.
- If a public data service does not respond, a banner warns you that some ratings may be
incomplete.
- Access to this module depends on the scope chosen by your organisation and on the rights
granted to you. If you need it, get in touch with your contact person.
## See also
- [Building your works strategy](/guide/workflows/strategie)
---
# Building a multi-year works plan
URL: https://docs.stonal.io/fr/guide/workflows/plans-de-travaux
# Building a multi-year works plan
## What it is for
The **Works Plans** module establishes the multi-year works programme (PPT) for your portfolio:
works are listed, budgeted and then arbitrated, property by property, and consolidated at
portfolio level.
You do not start from a blank page: the application lets you **generate your works lines
automatically** from the wear of your equipment as recorded in the platform. Your job is to arbitrate
those proposals and complete them.
The more complete that wear information is, the more reliable the lines generated automatically. Two
values matter most: the equipment's **overall condition** and its **last renewal date**.
Consolidating them beforehand is the best investment you can make in the quality of your plan.
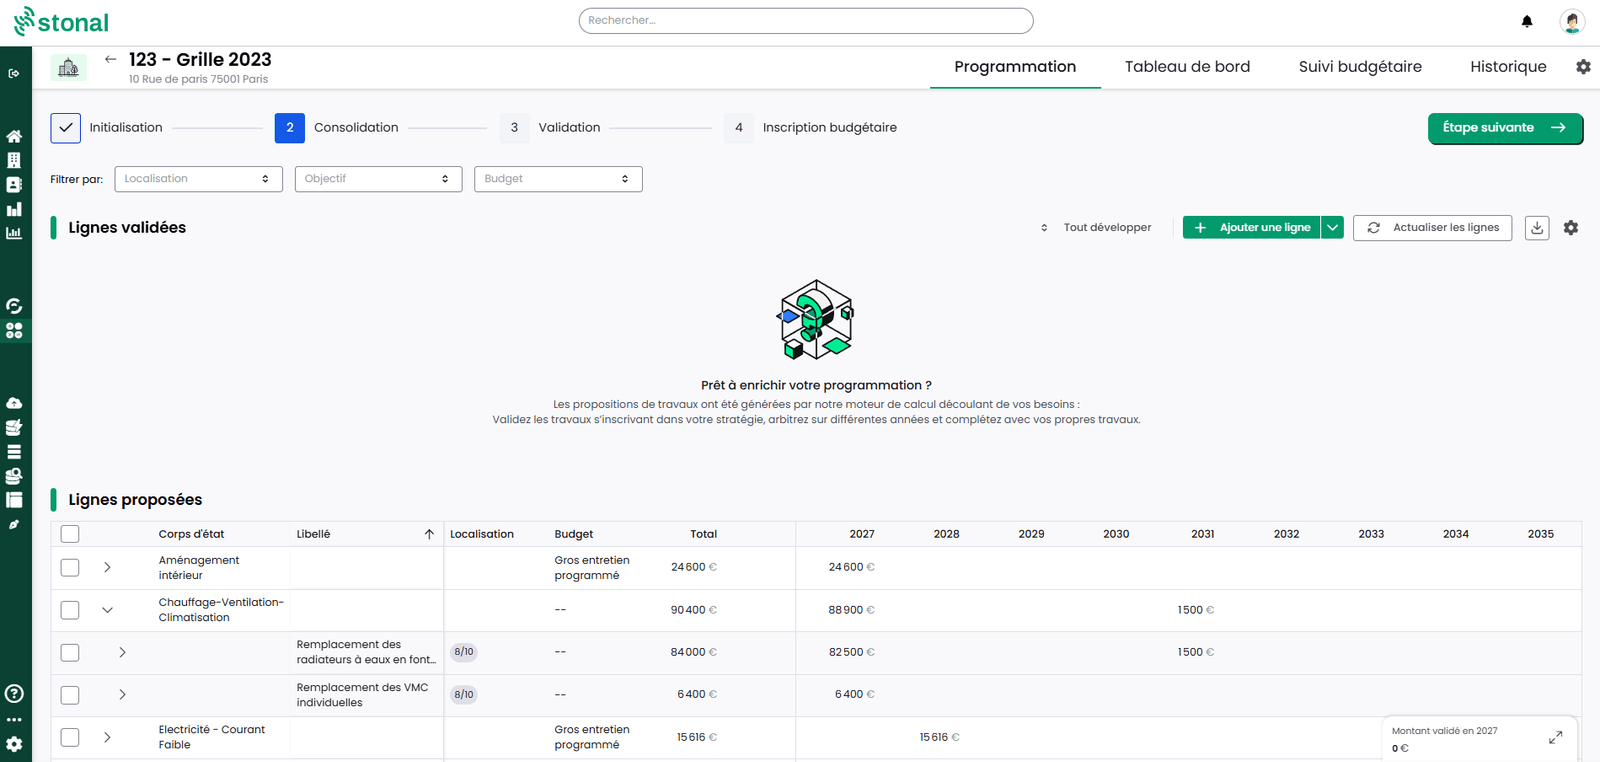
:::info Understand the module, or configure it
- [How the engine calculates your works](#how-the-engine-calculates-your-works) — why a line is
proposed for a given year, and the difference between Abyla and Graphlake organisations.
- [Settings and libraries](#configuring-expense-items-prices-and-criteria) — configure the
expense items, prices and criteria that feed your plans (Graphlake organisations).
:::
## Before you start
- Access to the **Works Plans** module (Workflows category of the menu).
- To reach **Settings and libraries**: the "PPT settings and Libraries" permission, granted by
someone with advanced permissions.
- **Deleting** a works plan, one at a time or in bulk, depends on the permissions you have been
granted, so you may not have access to it. If you need it, ask your internal contact.
## The properties list, at a glance
The properties list (Workflows > Works Plans) is where every works plan starts, and where you
keep track of them over time.
- **Search and filter** to narrow the list down to the properties you need.
- Each property shows its plan's **Stage** (see [step 5](#5-move-the-plan-through-its-stages)) and
its **Validated amount**. The **Period** column is the same for every property, since all plans
share one portfolio-wide horizon.
- An **icon** flags sites digitised as data only, without a model. It appears in the list and in
the programming header, and the **"Digitisation"** filter lets you isolate these sites. The icon
and the filter only show if your organisation has at least one such site.
- You can **delete several programmings at once**: tick the properties, then start the deletion
and confirm it. This deletion is permanent.
- **History** keeps every past works plan for a property, browsable year by year.
:::tip Reading the Validated amount column
- **1€ or more** — the plan already has validated lines.
- **0€** — either proposed lines are waiting for your arbitration, or the engine has not
proposed any line at all for this property.
- **"--"** — no works plan has been started yet.
If a property shows 0€ and you do not see any proposed line either, this is the same question as
[Why an expected line does not appear](#why-an-expected-line-does-not-appear) —
check there for the most common reasons.
:::
## Step by step
### 1. Start a works plan
From the list of properties:
- **For several properties at once**: tick them, click **"Start PPTs"**, then give the starting
year. Allow up to 3 minutes per property.
- **For a single one**: open the property and click **"Start a PPT"**, then reload the page.
This **generates your works lines automatically**, from the wear of your equipment.
For each piece of equipment, Stonal combines its **date of last renewal**, its **overall condition**
and the **service life** of the matching works item, to work out when its replacement should be
scheduled — see [How the engine calculates your works](#how-the-engine-calculates-your-works)
for the detail of this calculation.
These are **proposals**: you will be able to adjust them afterwards.
:::warning Check the year before confirming
If you pick the wrong starting year, the only fix is to delete the plan and start it again.
:::
### 2. Arbitrate the lines
Programming distinguishes **proposed lines** (calculated by Stonal) from **validated lines**
(the ones you retain). Lines are grouped by family, then by works item label.
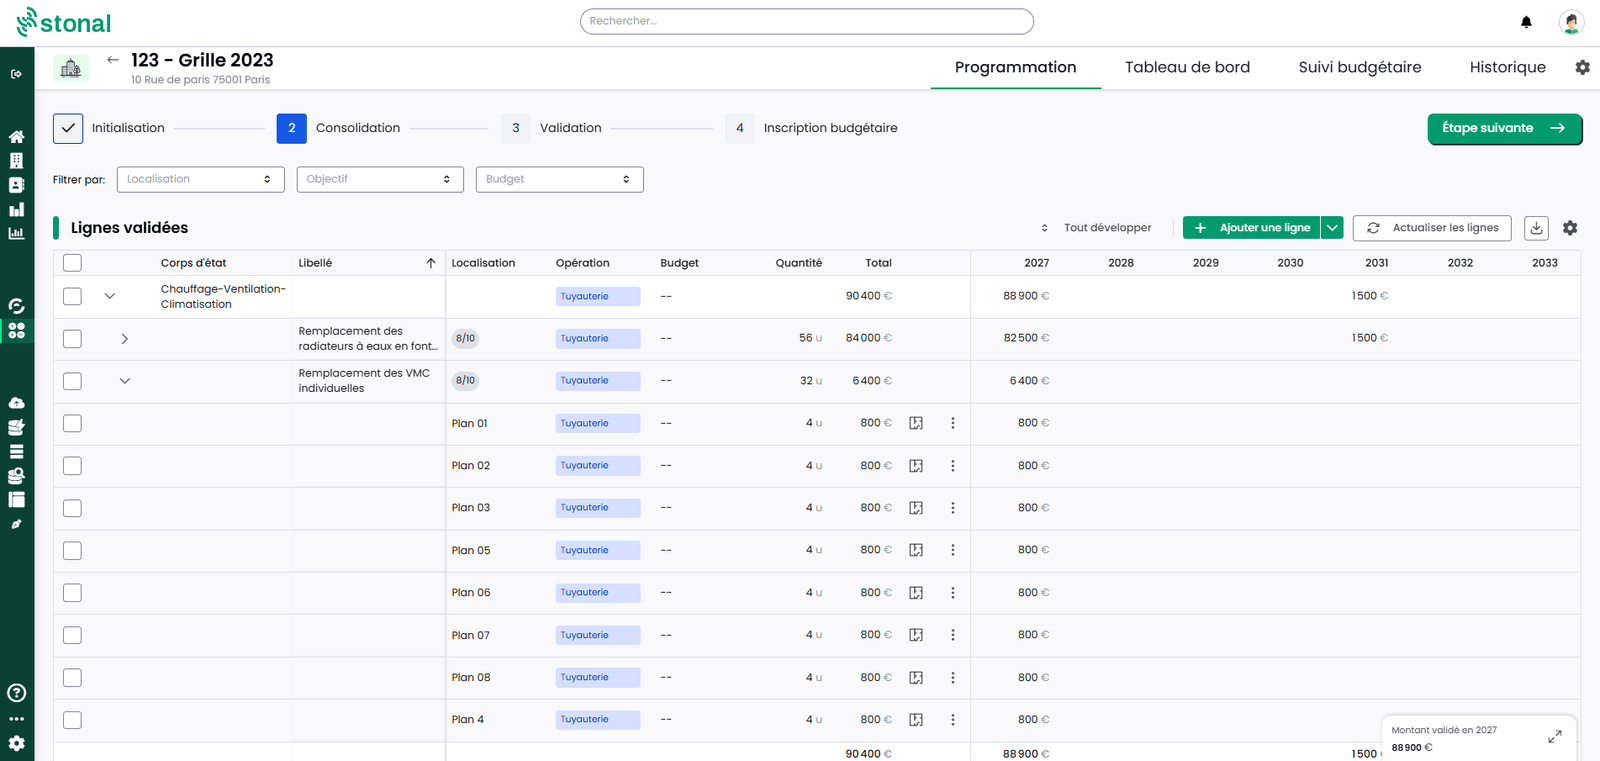
On one line, or on a selection of lines (**Shift + click** on a box ticks every row between the last one ticked and this one):
| Action | Effect |
|---|---|
| **Validate** / **Invalidate** | Validate the proposed lines that match what you see on the ground, invalidate the ones that no longer apply |
| **Shift** | Put the planned works back, or bring them forward |
| **Smooth** | Spread the amount of a line over the years of your choice, as a percentage, an amount or a quantity, for works that will not be finished within a single year |
| **Modify** | Adjust the amount of a works line, or the quantities behind it: number of items of equipment, area concerned… |
| **Revert to calculated amounts** | Cancel the manual changes made to the amount |
:::tip Expected a line that is not there?
See [Why an expected line does not appear](#why-an-expected-line-does-not-appear)
for the most common reasons — most of the time it is not a bug.
:::
### 3. Complete with your own lines
If the lines generated automatically do not suit you, or if they are incomplete, you can **create
your own works lines**.
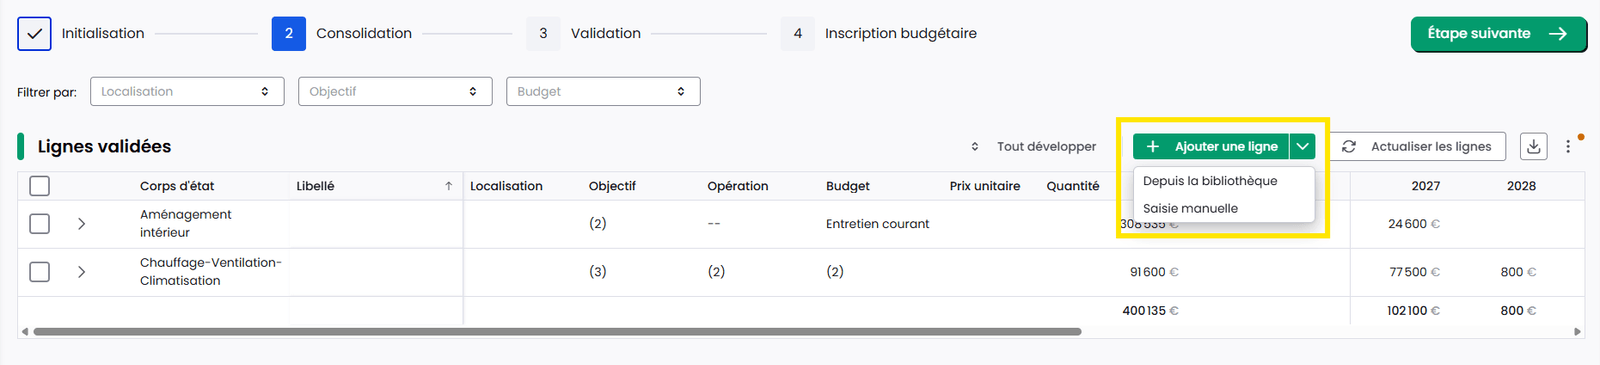
Click **"Add a line"**:
- **from the library** — Stonal picks up the price and quantities of the components concerned
(the "Location" field); when the property has a digital model, this is also how you pull the
total quantities straight from it, rather than entering them by hand;
- **by manual entry** — you fill in everything.
For the costing, you can enter either the unit price or the total amount directly, without going
through the quantity. The last field entered prevails.
Either way the line lands directly in the validated lines.
### 4. Resolve obsolete lines and conflicts
When you **refresh your lines** (after updating your plans, or changing a work item or a
price), Stonal recalculates every line from the latest wear data. Two situations can then
come up:
- **Obsolete lines** — lines that are no longer generated automatically, given the wear of the
equipment concerned. Keep them or delete them.
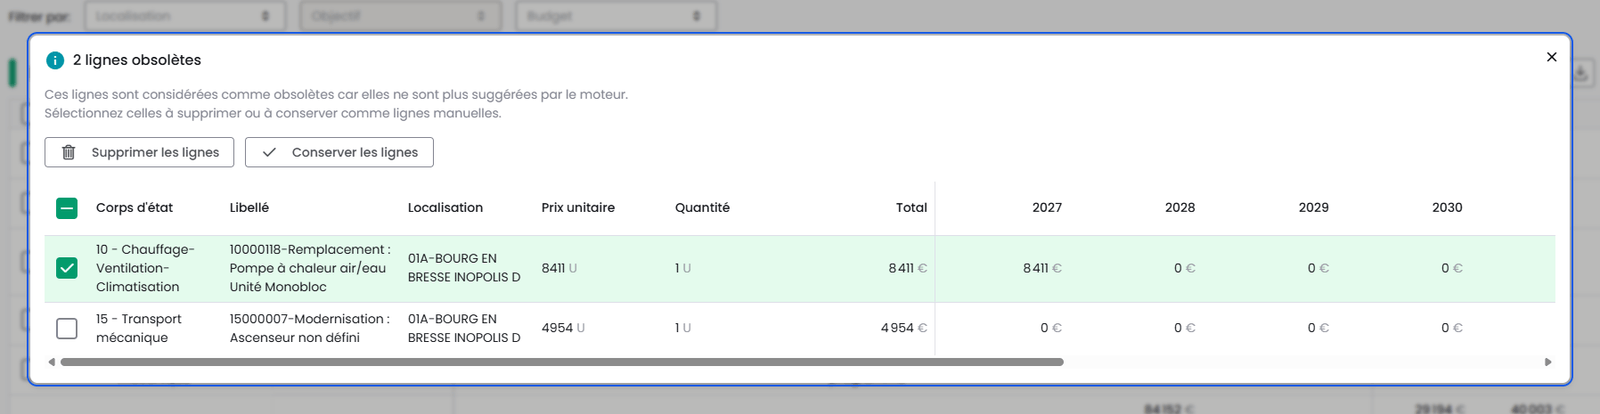
- **Lines in conflict** — the recalculated amount differs from yours, or the quantity has
changed in the plan. Choose the old or the new value.
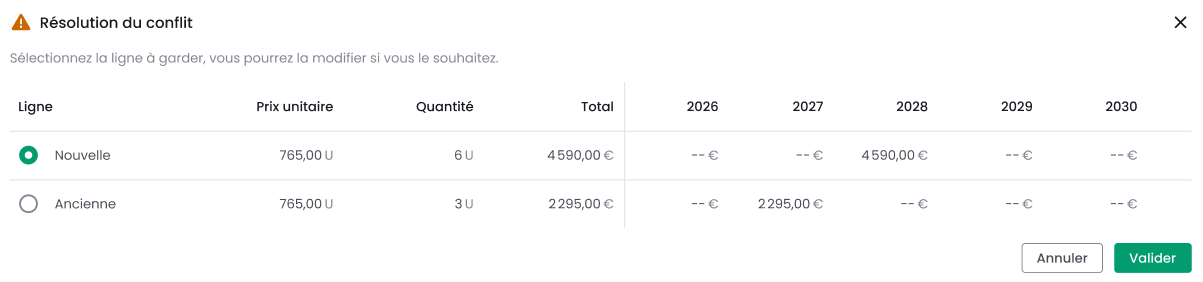
Your **validated lines keep your adjustments** (changed amount, shift, smoothing) when you
refresh — only lines still proposed start over entirely from the latest plans.
:::info
**Every conflict must be resolved** before you can validate your works plan. Bulk resolution is
available.
:::
### 5. Move the plan through its stages
A works plan goes through five stages:
**Initialisation** → **Consolidation** → **Validation** → **Budget entry** → **Validated**
From budget entry onwards, the plan can no longer be modified. Once validated, its first year
moves into budget tracking and the plan becomes the starting point for the next one.
### 6. Consolidate at portfolio level
The **Budget decisions** tab gives budgets by year across the whole portfolio: groupings,
breakdown by property, switching between validated and proposed lines, hiding columns.
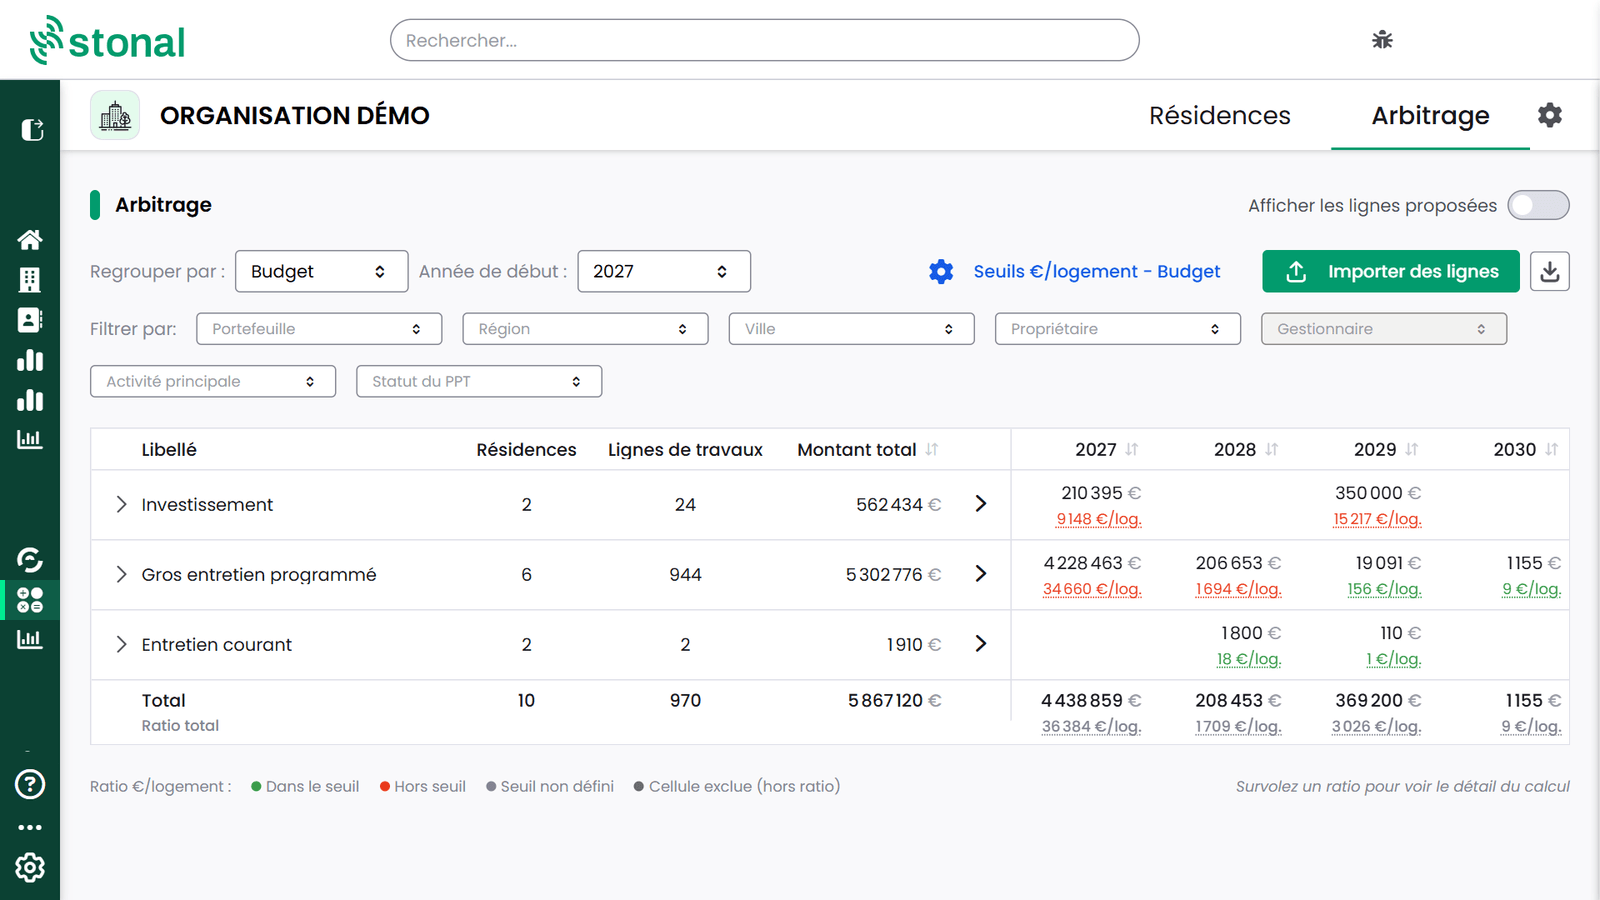
This is the view where **budget trade-offs get settled**. Property by property there is nothing to
compare against; here you see at a glance what each year weighs across the whole portfolio, and you
decide knowing the full picture.
Under each yearly amount, Budget decisions shows the **cost per dwelling** ("€/dwelling"): the
year's amount divided by the number of dwellings of the properties concerned. The calculation counts
every dwelling of a property, even when a line only carries part of its works. Hover over a ratio to
see how it is calculated. Under the **Total** row, the **Total ratio** relates each year's amount to
all the dwellings in the table.
To compare these ratios with your targets, click **"Thresholds €/dwelling"** and enter a threshold
for each row of the grouping, for example for each budget. The threshold applies to every year: a
ratio shows in green when it is within the threshold, in red above it. An empty field is prefilled
with the row's **portfolio average**, which you can adjust; a threshold already entered is never
replaced.
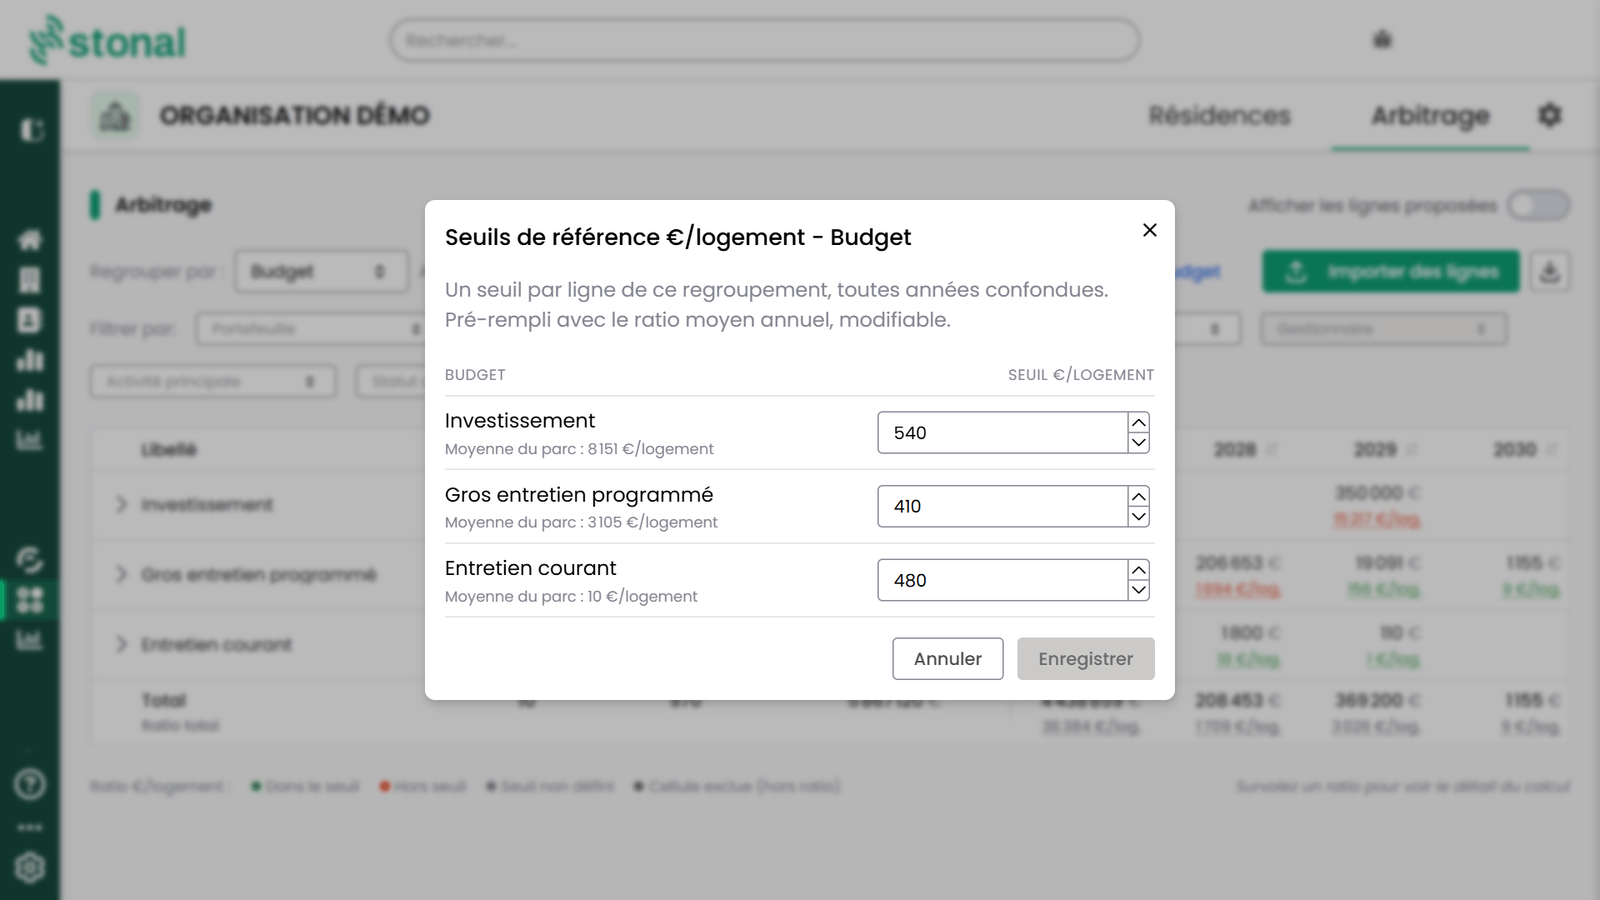
Each grouping keeps its own thresholds, shared across your whole organisation. Changing them depends
on the rights you have been given: you may not have access. If you need it, get in touch with your
contact person.
A property whose number of dwellings is not filled in has no ratio, and works without a budget are
left out of the calculation ("excluded from ratio").
Click a grouping's arrow to see the detail of every line it contains, across all statuses and
properties.
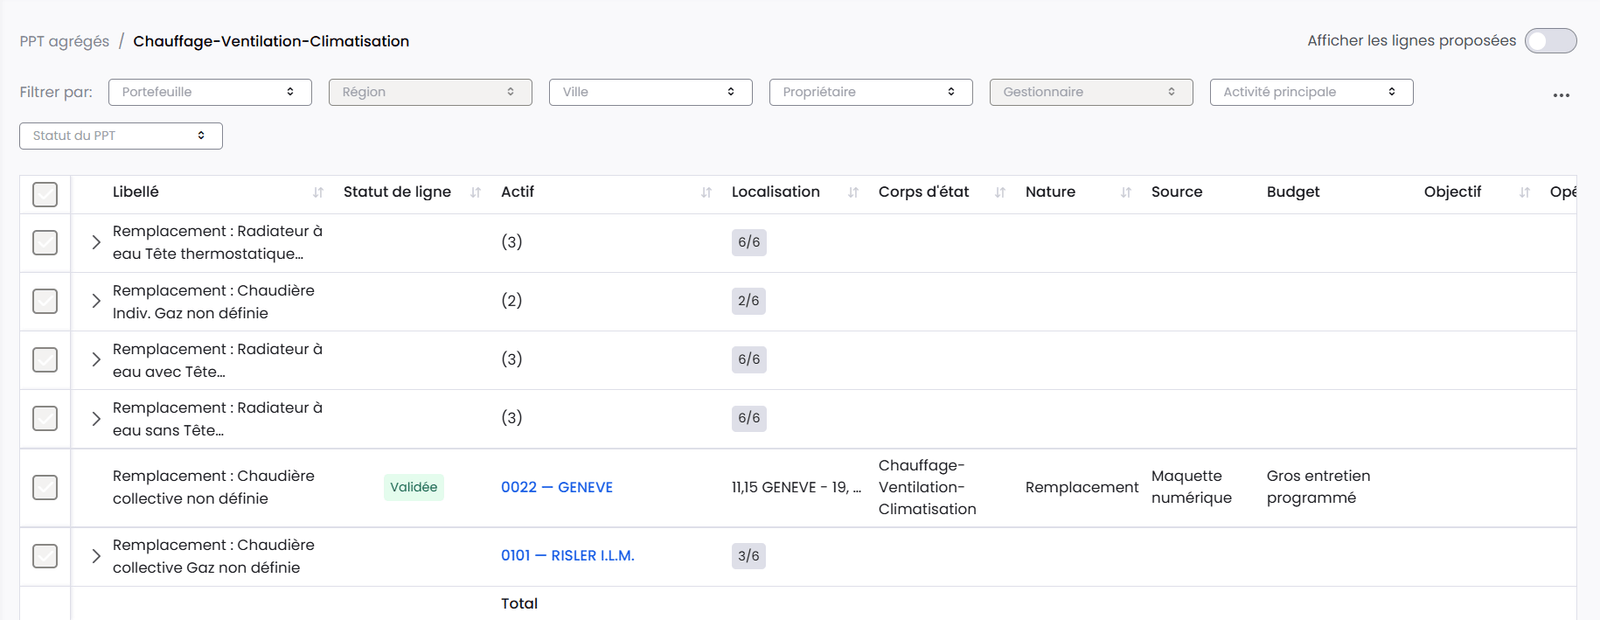
It is also the only place where you can **adjust several properties at once**, rather than going back
through each plan one by one.
To see where each property stands, use the **"PPT status"** filter: it offers five statuses, which
you can combine, and applies to the list, the detail and the CSV export. When you expand a
grouping, each property also shows the status of its plan.
To validate in bulk: choose a grouping (the whole portfolio, or a targeted budget), expand it,
tick the lines then click **"Validate lines"**. Repeat for each grouping. From the same selection,
you can also **invalidate**, **smooth** or **shift** lines from several properties at once. When the
selected plans do not cover the same years, only the shared years can be edited in the smoothing.
Lines that are already validated cannot be ticked (a tooltip explains why), and "Select all" only
picks the lines still open to arbitration. These validated lines stay visible, greyed out and
placed at the bottom of the group; sorting a column overrides this order.
### 7. Validate realised works
:::info This step requires Graphlake
It is only available to organisations running **Graphlake**. Organisations using **Abyla** do
not see it yet.
:::
Once a works plan has been validated at least once, a dedicated **Realised Works** tab becomes
available next to Programming and History. It lets you record, line by line, what has actually
happened over the year, and updates your portfolio accordingly — works completion date and
reference condition of the equipment concerned — without having to go back into the plans one
by one.
This is typically done at year-end closing, alongside or after building next year's plan:
recording what was realised is never required to move forward, you can start the next works
plan at any time.
The lines shown are the ones from your last validated works plan that still carry amounts for
the year being closed, grouped by trade or by operation. The operation view takes the form of a
progress table: number of lines, percentage completed, total amount and amount per year. Each
operation expands to show its lines.
Each line carries a status, which you can change one at a time or in bulk:
| Status | Meaning |
|---|---|
| **Budgeted** | Default status of every line |
| **Done** | The works have actually been carried out — updates the portfolio |
| **Postponed** | Moves the line to a target year, the same way as shifting works in Programming |
| **Cancelled** | Removes the line from the works to track, without touching the portfolio — it becomes a proposed line again in Programming |
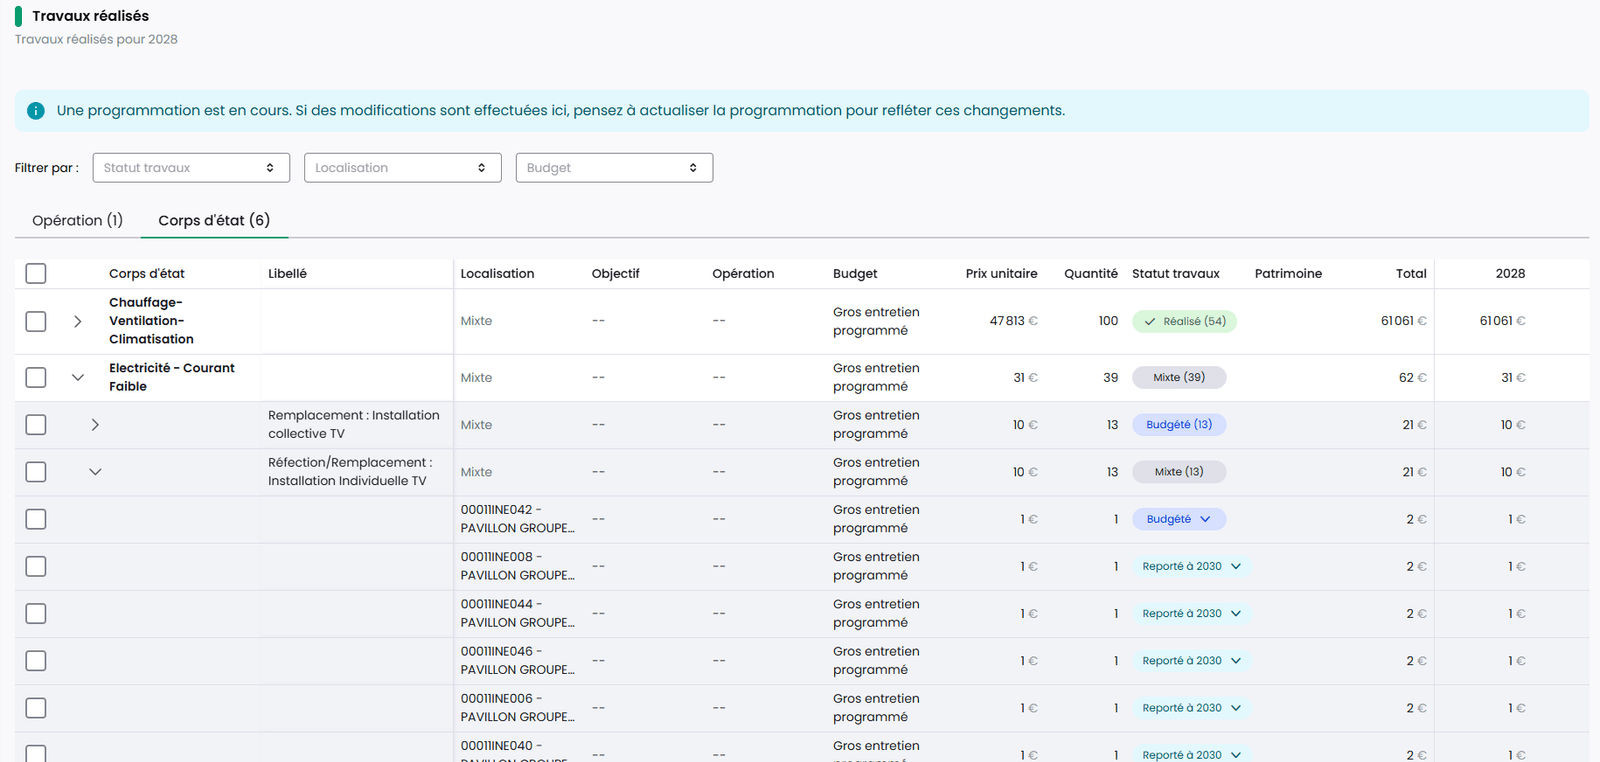
Marking a line **Done** opens the **"Confirm portfolio update"** dialog: it asks for the works
completion date, prefilled with the previous day, and the reference condition, and shows a
summary of every component about to change before you confirm.
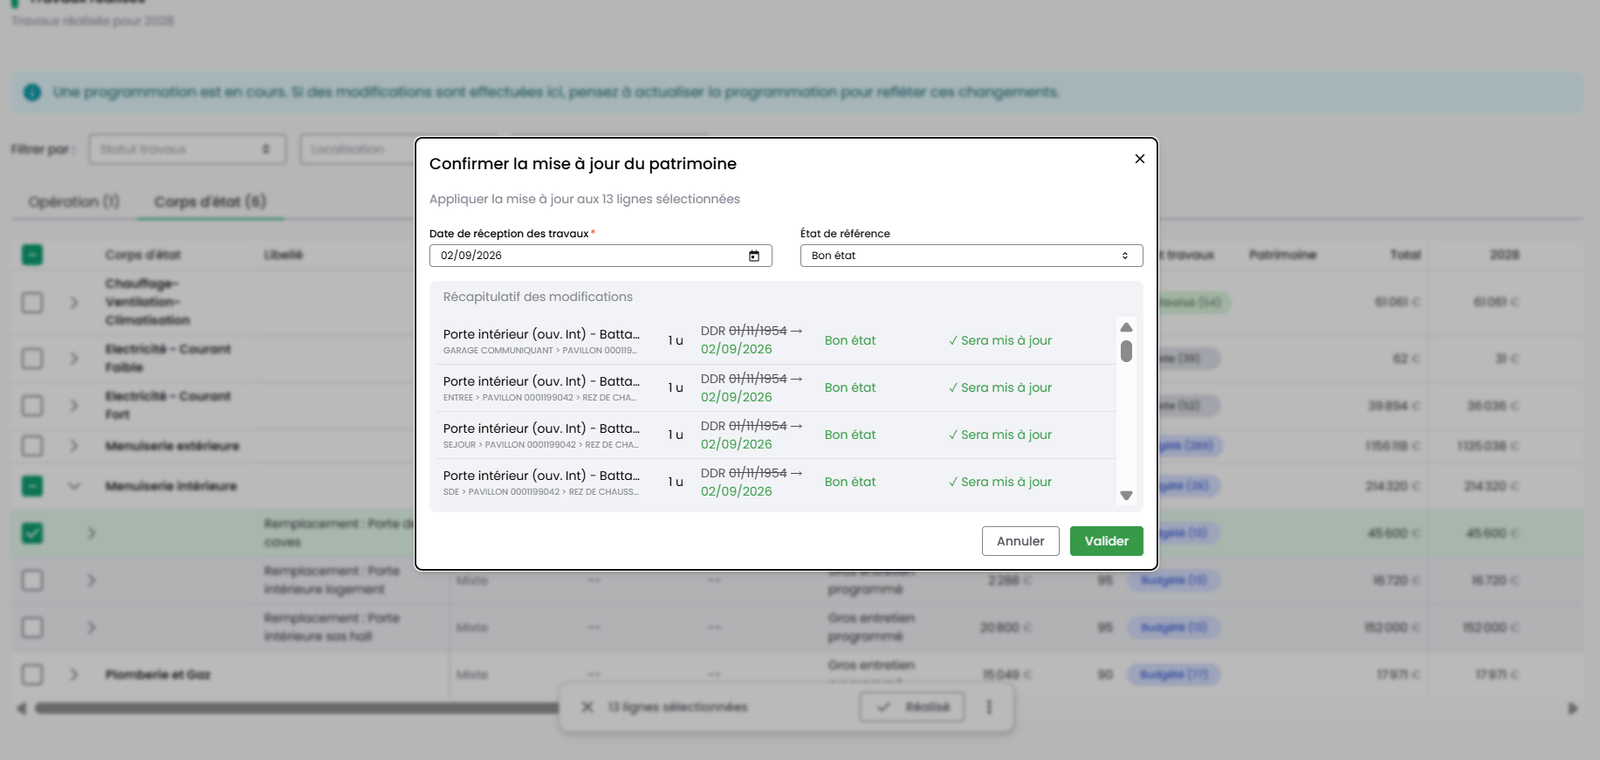
Once you confirm, the status of the portfolio update is shown, with the list of equipment that
could not be updated.
If you made a mistake on a line already marked Done, you can change its date and reference
condition directly, without having to cancel it.
You can also change your mind: the "Reset" button puts a Done or Postponed line back to
Budgeted at any time, as long as no later works plan has been validated yet — the portfolio is
then restored to its previous state.
When you start a new works plan, a banner shows you how many lines from the past year are still
Budgeted, with a direct link back to Realised Works. Starting is never blocked: lines you have
not gone through are simply carried over automatically to the new plan.
Everyone can view the Realised Works tab. Changing the status of lines requires edit
permissions on Works Plans, so you may not have access to it. If you need it, ask your
internal contact.
## How the engine calculates your works
This section explains **why** the module proposes a given works line for a given year,
rather than the day-to-day **how-to**. Useful when a proposal surprises you, or to explain
how the module works to your teams.
### The general principle
For every piece of equipment in your portfolio, Stonal has to answer one question: **in
which year should its replacement be budgeted?**
Three pieces of information feed the calculation:
- the equipment's **last renewal date**;
- the **lifespan** of the matching works item (its cyclicity, defined in the
[expense-item library](#configuring-expense-items-prices-and-criteria));
- its **observed condition**, which may bring the deadline forward or leave it unchanged.
```
equipment age = current year − year of the last renewal date
remaining lifespan = item lifespan − age
adjusted remaining lifespan = remaining lifespan corrected by condition (scale below)
estimated replacement year = current year + adjusted remaining lifespan
```
This estimate is then reframed against **your plan's period**:
| Estimated deadline | What happens |
|---|---|
| Within the plan period | The line is budgeted for that year. |
| Already past | The line is brought back to the **first year of the plan** — which is why the first year of a plan often carries the most lines: it absorbs the backlog already accumulated on the portfolio. |
| After the end of the plan | No line is created for now; it will appear on a later plan. |
:::info No last renewal date or no lifespan, no line
These are the only two pieces of information strictly required for the calculation. Without
either one, Stonal cannot estimate a deadline and proposes no line for that equipment.
:::
For organisations running **Graphlake**, the last renewal date is filled in automatically. Any
equipment created without this date, whatever its origin (Revit model, import, API), receives
the construction date of its building, or failing that the one of the site. Without further
information, this is the most cautious assumption: equipment never renewed since construction.
Existing equipment has been completed the same way.
This date remains a default value, to be corrected as soon as the real date is known: it does
not mean the equipment was checked on that date. Any date entered later takes precedence. Note:
a construction date entered after the equipment was created does not trigger this filling.
### The condition-correction scale
The equipment's observed condition (surveyed on-site, or via [EDIT](/guide/qualite-donnees/edit))
adjusts the remaining lifespan:
| Observed condition | Effect on remaining lifespan |
|---|---|
| Undefined | No adjustment |
| Good | No adjustment |
| Fairly good | No adjustment |
| Fairly poor | Remaining lifespan is reduced |
| Poor | Remaining lifespan is reduced further |
:::info An equipment already past its theoretical lifespan is not ignored
Its remaining lifespan is floored at zero, not negative: its deadline becomes the current
year, then the first year of the plan once reframed. The more up to date your states and
renewal dates are, the more reliable the engine's proposals — it is the best investment you
can make in the quality of your plan.
:::
### Two data sources depending on your organisation
The calculation differs depending on whether your organisation uses **Graphlake** or
**Abyla** to manage its plans — see
[From Abyla to Graphlake](/guide/faq/abyla-graphlake) if you are not sure which applies to
you.
| | Graphlake organisations | Abyla organisations |
|---|---|---|
| What feeds the calculation | Observed condition + last renewal date + item cyclicity — full calculation, done by Stonal | The equipment's observed condition, sent to Stonal — the rest of the calculation (dates, cyclicity) is driven by Abyla |
| Line quantities (surface, length…) | Calculated directly from your plans' geometry | Managed on the Abyla side |
| Expense items, prices and criteria settings | Available in [Settings and libraries](#configuring-expense-items-prices-and-criteria) | Managed in your Abyla repository |
:::info The switch happens at organisation level, not property by property
If your organisation runs Graphlake, all your properties benefit from the full calculation —
including those for which you have not yet supplied a digital model.
:::
### The parent/child rule (half-periodicity)
Some expense items are linked: a "parent" item covers the full replacement of a piece of
equipment (a window, for example), a "child" item covers the upkeep of one of its
components (resealing a joint).
Budgeting a component's upkeep just before the equipment's full replacement makes no
economic sense. The rule: **a child item is only kept if it falls within the first half of
the time remaining before the parent item's deadline** (the exact midpoint itself is kept).
Beyond that, the child line is dropped — this is not a bug, the upkeep will be covered by
the upcoming full replacement anyway.
### Replacing equipment with a different type
Some works items replace a piece of equipment with a different type entirely — a bath replaced
by a shower, for example. Because the original equipment disappears, this replacement does not
recur: it is budgeted once. The new equipment still needs its own upkeep, though, so the engine
also generates a second, separate line for it: an upkeep line that starts at *the replacement
year plus the upkeep item's own cyclicity*, then repeats until the end of the plan.
If you see two related lines where you expected one, this is usually why: one line for the
one-off replacement, another for the recurring upkeep of what replaces it.
### A worked example
A boiler surveyed in **Poor** condition, on a plan covering 2026-2040. We are in 2026.
| Data | Value | Detail |
|---|---|---|
| Last renewal date | 2010 | — |
| Item lifespan | 25 years | Cyclicity defined in the expense-item library |
| Age in 2026 | 16 years | 2026 − 2010 |
| Remaining lifespan before correction | 9 years | 25 − 16 |
| Condition correction (Poor) | Remaining lifespan reduced | See scale above |
| **Budgeted year** | **Before the theoretical deadline** | Within the plan period |
Without the condition correction, the same boiler would have been budgeted later: the
condition observed on-site brings the replacement date forward.
### Why an expected line does not appear
From most to least frequent:
- **No equipment matches the item** — the item's criteria (component type, properties,
location) find nothing on this property.
- **No last renewal date** on the equipment. In Graphlake, it is filled in automatically from
the construction date (see [The general principle](#the-general-principle)): this case can
still happen when that construction date is missing, or was entered after the equipment was
created.
- **No lifespan** available, neither on the item nor on the equipment.
- **Deadline after the end of your plan** — the equipment is too recent or in too good a
condition to be budgeted within this horizon; it will appear on a later plan.
- **Quantity not found** (surface, length…) — the line cannot be costed.
- **Postponed beyond the plan's horizon** — you shifted the line past the end of the plan
yourself.
- **Dropped by the parent/child rule** — see above, expected behaviour.
## Configuring expense items, prices and criteria
:::info Reserved to Graphlake organisations
This settings module is only available to organisations running **Graphlake**. If your
organisation is still on **Abyla**, your expense-item and price repository is managed on the
Abyla side — see [From Abyla to Graphlake](/guide/faq/abyla-graphlake).
:::
These settings define what [the engine](#how-the-engine-calculates-your-works) proposes in
your works plans: which items exist, at what price, and which criteria you use to arbitrate
them.
### Who can access it
Access is reserved to people holding the **"PPT and Libraries settings"** permission (User
management › Groups › rights on Works Plans):
- **read-only** — the Settings menu does not appear;
- **modification** — the menu is accessible and editable;
- **administration** — full access, including deletion.
### Expense Items library
The repository that defines each type of works: which components it applies to, its
cyclicity, and the default criteria of its lines.
- **Stonal items** — the reference library, covering every trade and reviewed yearly with a
construction economist. You can deactivate them, but not edit them directly.
- **Edited Stonal items** — a modified copy of a Stonal item; you can revert to the original
at any time.
- **Custom items** — your own items, fully editable and deletable.
Each item is described across four tabs:
1. **General information**
2. **Components** — the meta-library object type it applies to, quantity and unit, and
application filters
3. **Cyclicity** — the item's recurrence, plus the reference date and condition to use
4. **Criteria** — the default values applied to lines generated by this item
When you create an item, a **Price** step is added between cyclicity and criteria: you enter the
Organisation price excl. VAT and the VAT (10% by default), with a summary of the final price in
each of your price libraries. This price then shows in the "Reference price" column of the item
list.
:::warning A custom item covering a component already covered by another item
creates duplicate lines in your plans. Check the application filters before creating a new
item.
:::
### Price libraries
- **Stonal reference prices** can be viewed but not edited.
- You can create your own **regionalised** price libraries: item, unit price, unit, and a
default coefficient per region.
- Attaching a price library to your sites is currently a **manual** step.
### Criteria library
Three fixed criteria — **Objective**, **Budget**, **Priority** — whose values you customise,
plus up to three criteria of your choice (six maximum). These are the criteria you then use
to arbitrate your lines in the works programme.
## Good to know
- Displaying amounts excluding or including tax is set through the cog on the list of
properties. VAT defaults to 10% and can be changed line by line.
- Deleting a works plan is **permanent**.
- Deleting a custom expense item is **permanent**.
- Replacing equipment with a different type also creates a separate, recurring upkeep line for
the new equipment — see [Replacing equipment with a different
type](#replacing-equipment-with-a-different-type) if two
related lines show up where you expected one.
- **Refresh your plans after changing an expense item or a price** — until you do, they stay
calculated on the old values. The properties list offers a bulk refresh; see [Settings and
libraries](#configuring-expense-items-prices-and-criteria).
- A custom expense item that covers a component already covered by another item creates
**duplicate lines** in your plans — see the [Expense Items
library](#expense-items-library) before
creating one.
## See also
- [General information for a property](/guide/vue-densemble/mes-residences/informations-generales)
- [Data quality](/guide/qualite-donnees) — improving the conditions and renewal dates that feed
the calculation
---
# Assessing the ESG performance of your portfolio
URL: https://docs.stonal.io/fr/guide/workflows/esg
# Assessing the ESG performance of your portfolio
## What it is for
The **ESG** module measures the Environmental, Social and Governance performance of each of your
properties, through **assessment campaigns**. It lets you identify your best-rated properties and
those making the most progress, and build your ESG strategy — typically towards a label such as the French
ISR, valid for three years.
## The vocabulary of the module
| Term | What it is |
|---|---|
| **Campaign** | A name, a **scope** (the list of properties assessed) and a **validity period**. It is the central unit of the module. |
| **Scoring grid** | Your assessment system: the indicators and the form templates |
| **Indicator** | A question, with its theme, its weighting and its scored possible answers |
| **Form template** | A filter of indicators, so each respondent only gets the questions that concern them |
| **Supporting document** | The evidence behind an answer — an ISR auditor may require it |
Indicators are grouped into **themes**, themselves attached to **three fixed domains**:
Environment, Social, Governance. Each level carries its own weighting.
## A property's journey: four stages
**Initialisation** → **Collection** → **Qualification** → **Publication**
The campaign is finished when all its properties are published. You then create a new campaign for the
following period.
## Step by step
### 1. Create the campaign
Click **"Create a new campaign"** and give its name, its period and its scope. You land on the
management page, which lists the properties and their progress.
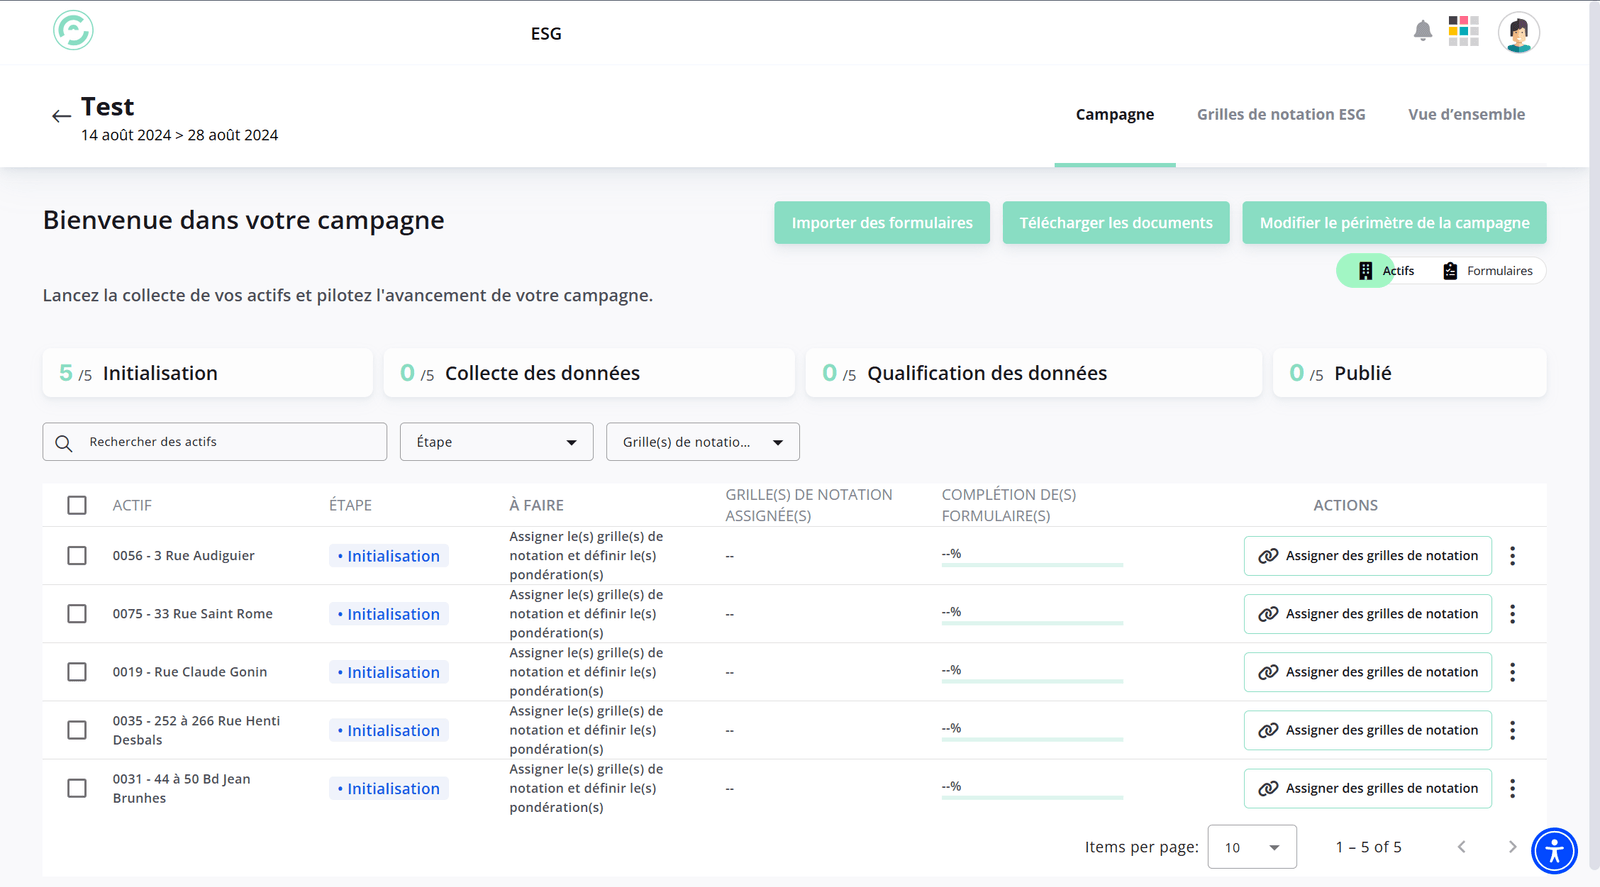
Four counters give you the campaign's progress, one per stage. The table lists your properties with,
for each, its stage, what remains **to do**, the grids assigned and the completion rate of its forms.
### 2. Build the scoring grid
In the **"ESG scoring grid"** tab:
1. Create the grid — empty, from a template, or from the grid of a previous campaign.
2. **"Manage domains"** to set the weightings.
3. **"Add a theme"**, then **"Add an indicator"**.
4. For each indicator, define the possible answers and their score. Three answer forms:
**single choice**, **multiple choice**, **range**.
5. Create form templates if you need them.
6. Click **"Activate"**.
:::warning Activation freezes the structure
Once the grid is activated, you can no longer change its structure. The weightings do remain
editable. Read the grid through before activating.
:::
Then assign the grid to the properties: they move to Collection.
### 3. Collect the answers
Create the **collection forms** and send them to your stakeholders through a **unique link**. The
respondent does not need to be a platform user: their link only gives access to their own form.
While filling in a form, **Ctrl + S** (**Cmd + S** on Mac) saves it.
Close the collection to move to Qualification. Missing answers are then completed by hand.
### 4. Qualify
Open a property's form from the ⋯ menu. For each question you get the current answer, an optional
**target answer**, a comments field, and the option to **add a supporting document** — strongly
recommended.
Use **"Check completion"** to make sure nothing is missing. If two respondents contradict each
other, it is for you to decide.
### 5. Publish
The **"Publish"** button becomes active once everything is complete.
:::warning Publication is final
No going back is possible. The frozen score becomes the property's ESG performance for this campaign.
:::
## How the score is calculated
The score is built by **cascading weightings**: answer → indicator → theme → domain → property.
- Each answer is worth a score from **0 to 10**.
- A property's score is out of **100**.
- Weightings must total **100% at every level** — the platform checks this and stops you otherwise.
The **target score** is an objective for a future campaign: it has no effect on your current score.
**Suggested answers**: an indicator connected to a piece of platform data shows its current value as
a suggestion. It is up to you to confirm or correct it — an unsaved suggestion is not counted.
## Moving to the following year
You do not extend a campaign: you create a new one **linked to the previous one**, through the
"Link to a previous campaign" field.
:::warning To be done at creation only
The link can only be established when creating the campaign. It carries over the grids, the scope and
the assignments, and last year's answers pre-fill the forms.
:::
Two things to know about the carry-over:
- It relies on the indicator's **code**. If you change the code, Stonal treats it as a new indicator
and carries nothing over.
- Pre-filling only takes effect after you have **opened and then saved** the form in the new
campaign.
## Import and export
- **Export a property's form** to Excel, with current and target answers.
- **Import forms in bulk** from the campaign page: export the multi-property template, fill it in (`?`
for "I don't know", `|` to separate multiple choices), then upload it. Stonal runs a **simulation**
and returns an error report without changing anything; you then confirm. Properties must be in
Qualification.
- **Download the documents**: a ZIP of all your supporting evidence.
## See also
- [General information for a property](/guide/vue-densemble/mes-residences/informations-generales) — the data behind
suggested answers
---
# Checking your data
URL: https://docs.stonal.io/fr/guide/qualite-donnees/controler-les-donnees
# Checking your data
## What it is for
This module — sometimes called **DQC**, for *Data Quality Control* — lets you verify **how many
components have been created** on your organisation, from properties and buildings down to
equipment, and consult **any loading errors** encountered during automatic loads.
It is also where you find, for every value, **where it came from** and **who changed it** — it is the
meeting point for the history of your data.
## Step by step
### Check and correct a value
Navigation cascades from the general to the specific.
**1. The list of item types** in your portfolio — properties, buildings, units, equipment, walls,
openings… For each, its **volume**, its number of **errors** and its number of **duplicates**. Click
a type to check its data.
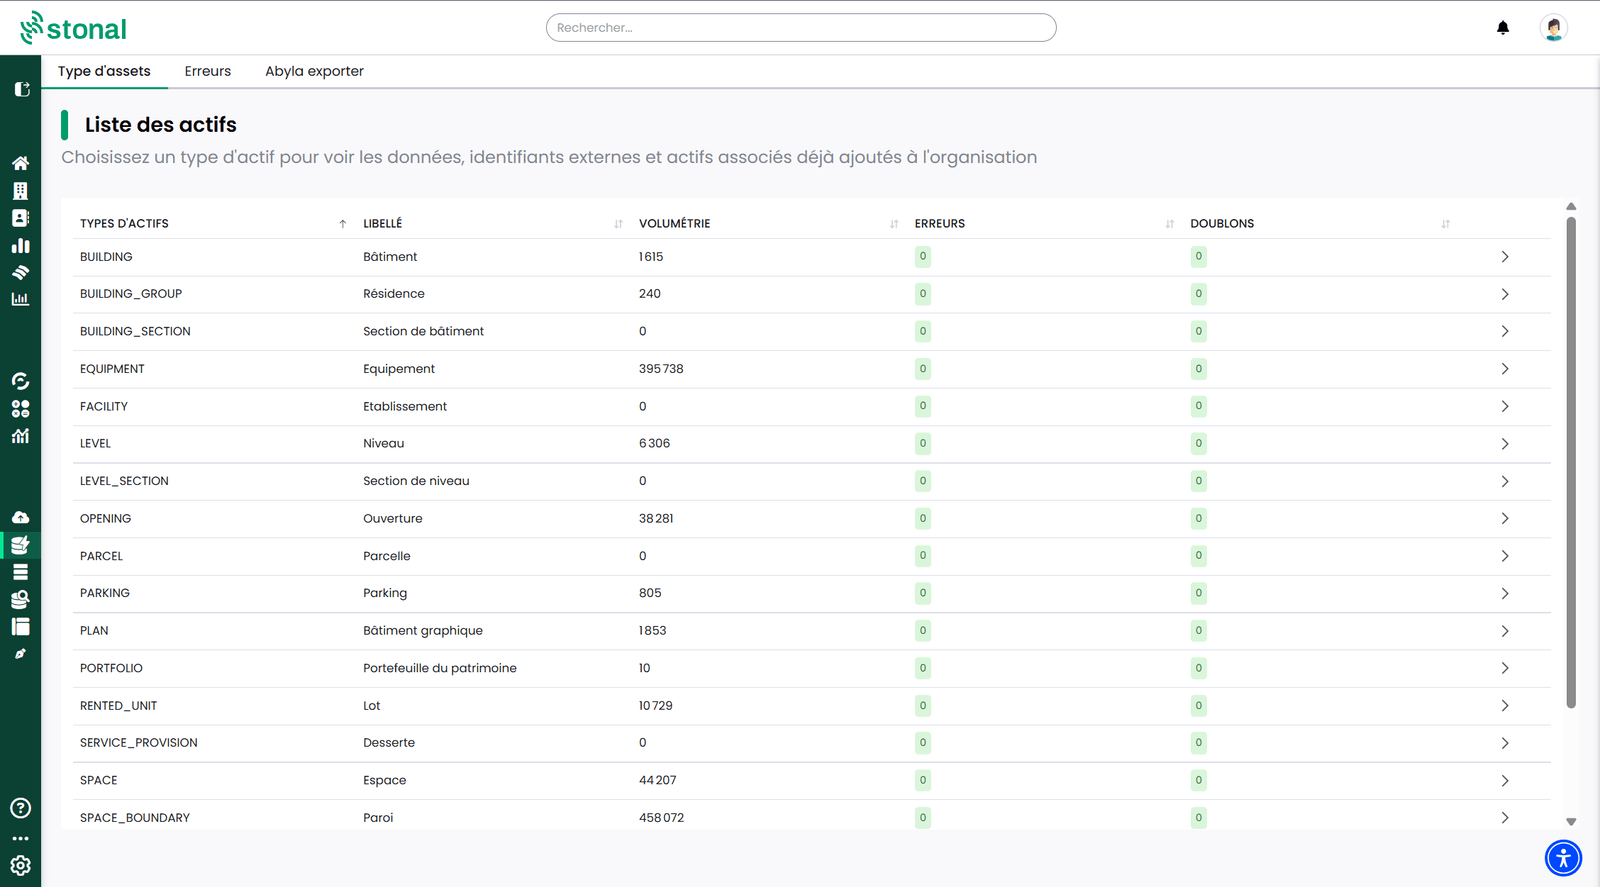
**2. The list of items** of that type, with their properties. The **"Download"** button exports the
list. Click a row to open its record.
**3. The item record**, **Data** tab: you view and change values there.
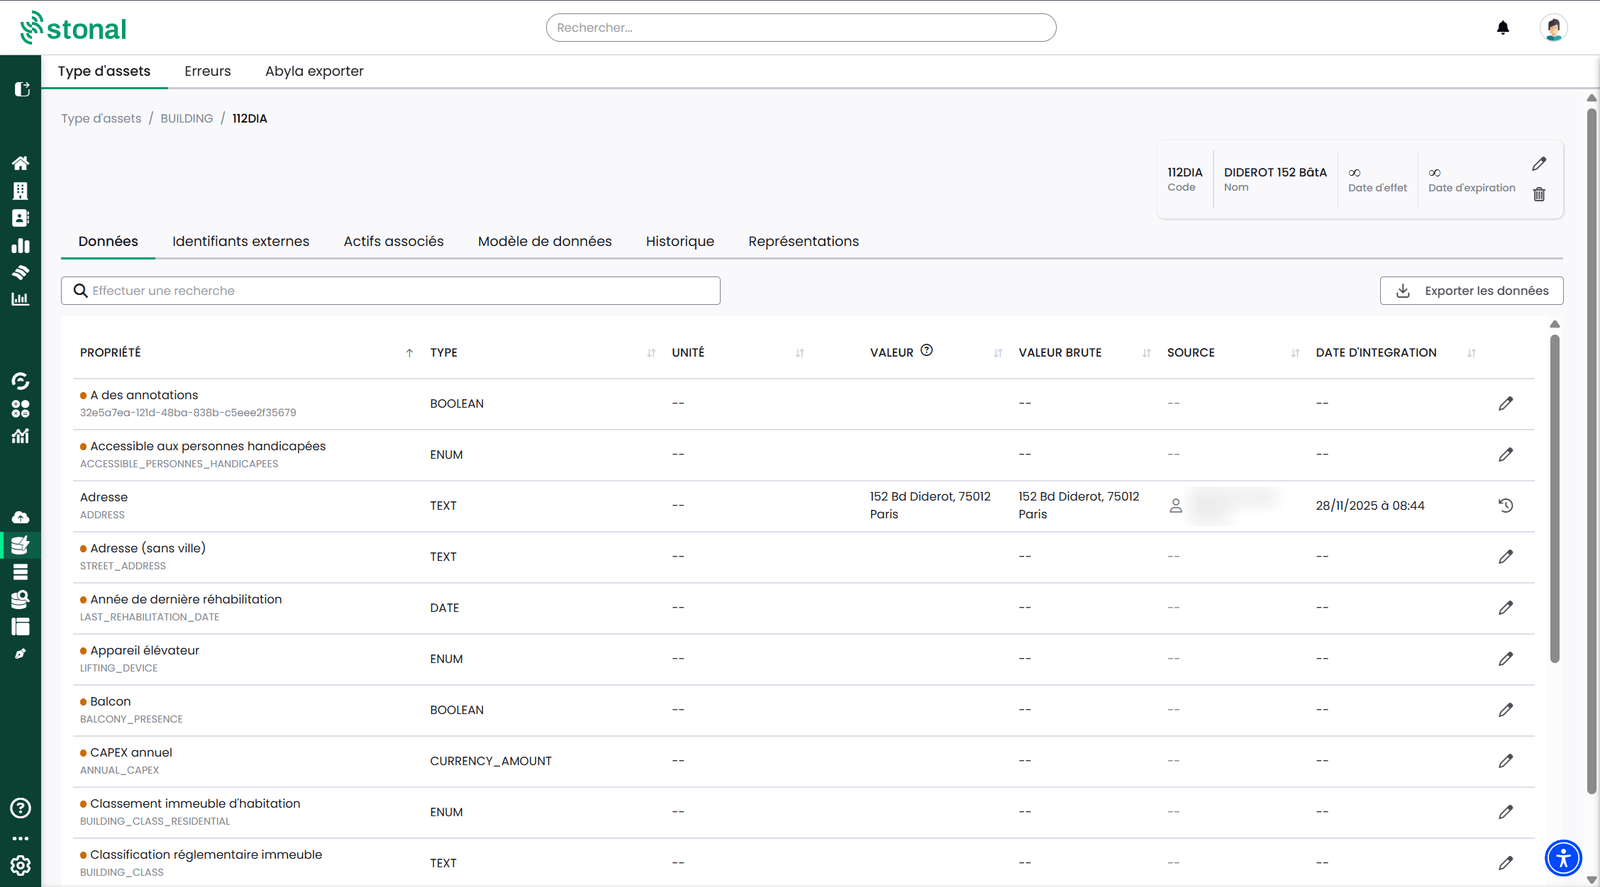
Each row gives you the **property** and its code in your reference data, its **type**, its **unit**,
its **value**, its **raw value** as it arrived, its **source** — the author of the last change — and
its **integration date**. The pencil at the end of the row lets you edit; the clock icon opens the
value's history.
An **orange dot** flags a value missing as of today.
The **"Export data"** button retrieves every property of the item, and **"Change the code"** lets
you change the item's own code.
To correct a value: choose the component, click the property to change, enter the value, then save.
The pencil at the top right of the record opens **"Edit asset"**, which holds the information of the
item itself: its code, its name, its effective and expiry dates, its type.
### The tabs of an item record
The record has **six tabs**. *Data* is the one you will open most often; the other five are there to
tell you where an item came from and how it hangs off the rest of your portfolio.
#### Data model
**Where this item sits** in your portfolio: what it belongs to, and what it is made up of. Two ways of
being attached appear:
- **is part of** — a floor is part of a building, a room is part of a floor;
- **groups** — a property groups its buildings.
Clicking any element opens its record. It is the quickest way to check an item is attached in the
right place, or to track down one that is not.
#### External identifiers
The **codes this item is known by in your other software**. Each entry gives the code, where it comes
from and what kind of tool it is. This is where its code in your management software lives, for
instance.
You can add, change and delete them.
:::warning Deleting a code has consequences
That code is how your other software recognises this item. Deleting it cuts the link, and information
coming from that source may stop arriving.
:::
#### Associated assets
The **other items attached to this one**. Pick a type first — equipment, dwellings… — and the list
shows those of that type associated with it, with their **code** and **name**. The table can be
downloaded.
Unlike the diagram, which shows the whole picture, this tab answers a precise question — "which
equipment is attached to this dwelling?" — and gives you the list.
#### History
**What has happened to this item**, most recent first. Not only the values that changed: also when it
was attached to another item or detached from one, and when one of its codes was added or removed.
Each row gives the **date**, the **nature** of the change and its **origin**. This is what you open
when a value changed and nobody knows when or why.
#### Representations
What makes it possible to **draw this item on a plan**: its outline and its faces.
An **"Invalid"** badge flags a shape the platform cannot use. That is usually the explanation when an
item does not appear on the plan, or appears wrongly. You can isolate a face to look at it more
closely.
:::note "No representation" is not a fault
It is the normal case for an item described by its data alone, with no plan.
:::
### Consult loading errors
The **"Errors"** tab lists the errors encountered during loading. You can **download** it, sort it and
search it for a specific message.
## Good to know
**Changing a value** from this module depends on the permissions you have been granted, so you may
not have access to it. If you need it, ask your internal contact.
From the Plans tab, the **"View history"** button in the information panel brings you here: it is the
same history.
## See also
- [Querying data](/guide/qualite-donnees/requeter-les-donnees) — correcting in bulk
- [The plans of a property](/guide/vue-densemble/mes-residences/plans)
---
# Querying your data
URL: https://docs.stonal.io/fr/guide/qualite-donnees/requeter-les-donnees
# Querying your data
:::info Availability
This page concerns organisations running **Graphlake**.
:::
## What it is for
The **Query tool** lets you view and export **all** the information held in the platform, and
**update your data in bulk** to improve your portfolio.
It is the free-form query tool: you define a scope with filters, you choose the information you are
interested in, then you export or you correct.
## Before you start
This module is generally open to Graphlake organisations. If you do not have access to it and you
need it, ask your internal contact.
## The screen explained
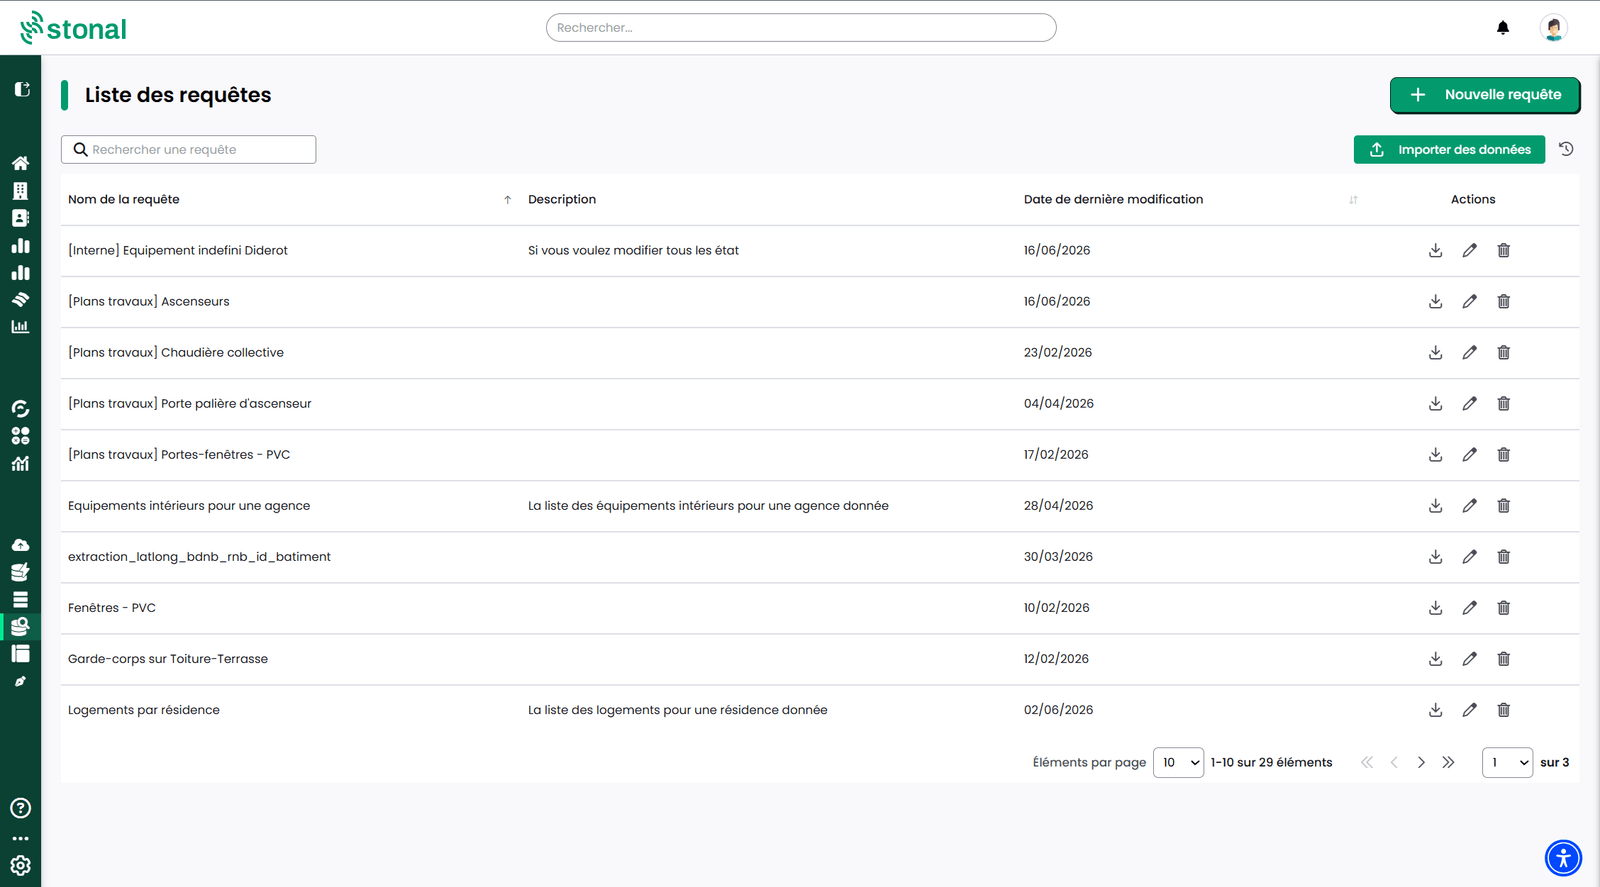
The home page lists your **saved queries**, with their description and the date they were last
changed. The query's author is also shown, for queries created since September 2026. From the table
you can:
- **open** a query, adjust its settings and see its results;
- **create** a new query;
- **download** the results as CSV;
- **edit** the name and description, or **delete** — depending on your permissions.
:::info Saved queries are shared
A query you save becomes **visible to every user in your organisation**, not just to you. That is
what makes it worth saving — a useful query benefits everyone — but keep it in mind when naming it.
:::
## Step by step
### 1. Define the scope with filters
This first step is where you **narrow things down to what interests you**: a few properties rather
than the whole portfolio, one specific equipment type, the dwellings built before a given date…
Everything you see afterwards covers that scope, and only that scope.
A filter has four parts: a **component** (the type of item: property, building, unit, equipment…), a
**property**, an **operator** (greater than, less than, equal to…) and a **value**.
You combine them with **AND** or **OR**, including across several components.
1. **"Add a component"** to choose the type of item.
2. **"Add a filter"** to set a condition. Repeat to stack them.
A concrete example: equipment in "poor condition" or "dangerous condition", in buildings acquired
before 2020 with an EPC rating of C.
You can select **several sub-types of the same component** in a single query — equipment, level, graphical
building, space, wall, zone. This lets you target, for instance, sanitary fittings and lighting
equipment in one go. The filters then apply to the whole selection.
### 2. Choose the columns
**Some information is already selected**: whatever you used to narrow down your scope at the previous
step.
You can **add anything else you want**. The overall condition of your equipment, its power rating,
the construction date of a building: select that information and it appears as **extra columns** in
your results.
To do so:
| Action | Effect |
|---|---|
| **Add a column** | Add properties of a component |
| **Add a component** | Add new columns |
| Cross | Remove a property |
| Bin | Remove every property of a component |
| **Preview** | See a preview at any time |
You can also drag the components to change their order.
:::info Filters and columns are independent
Adding or removing a column does **not** change the filtered scope. You can filter on a property
without showing it, and the other way round.
:::
At any point, **"Preview"** shows you a sample of the result without leaving the settings. It is the
habit worth forming before running the query: you check you have the right scope and the right
information, rather than finding out across thousands of rows.
#### Show the validity period of a value
A value is not always valid forever: an energy performance certificate (DPE) expires, a unit leaves
the portfolio. On a property, a building or a piece of equipment, you can add the **effective date**
and **expiration date** columns, like any other column. They show from when and until when the value
is valid.
For a property, click **"Add effective date and expiration date"** when you add it as a column.
These columns appear in the preview, in the results and in exports. They are ignored if you re-import
the file. A value with no end date shows the **∞** symbol.
For instance, to spot the DPEs due for renewal, add the expiration date column on the DPE property:
you read the deadlines directly, without setting a filter.
:::info Filtering on these dates
By default, the query tool only keeps what is valid today. When you filter on these dates yourself,
that default filter no longer applies on top of yours.
To anticipate units leaving the portfolio (units sold, leases ending), you can therefore filter on an
upcoming expiration date, for example within three months. You get the units concerned, including
those that are hidden by default once expired.
This filter applies to the component, not yet to a specific property.
:::
### 3. Read, save and export the results
The next page shows **all the results** of your query: one row per item found, one column per
piece of information selected.
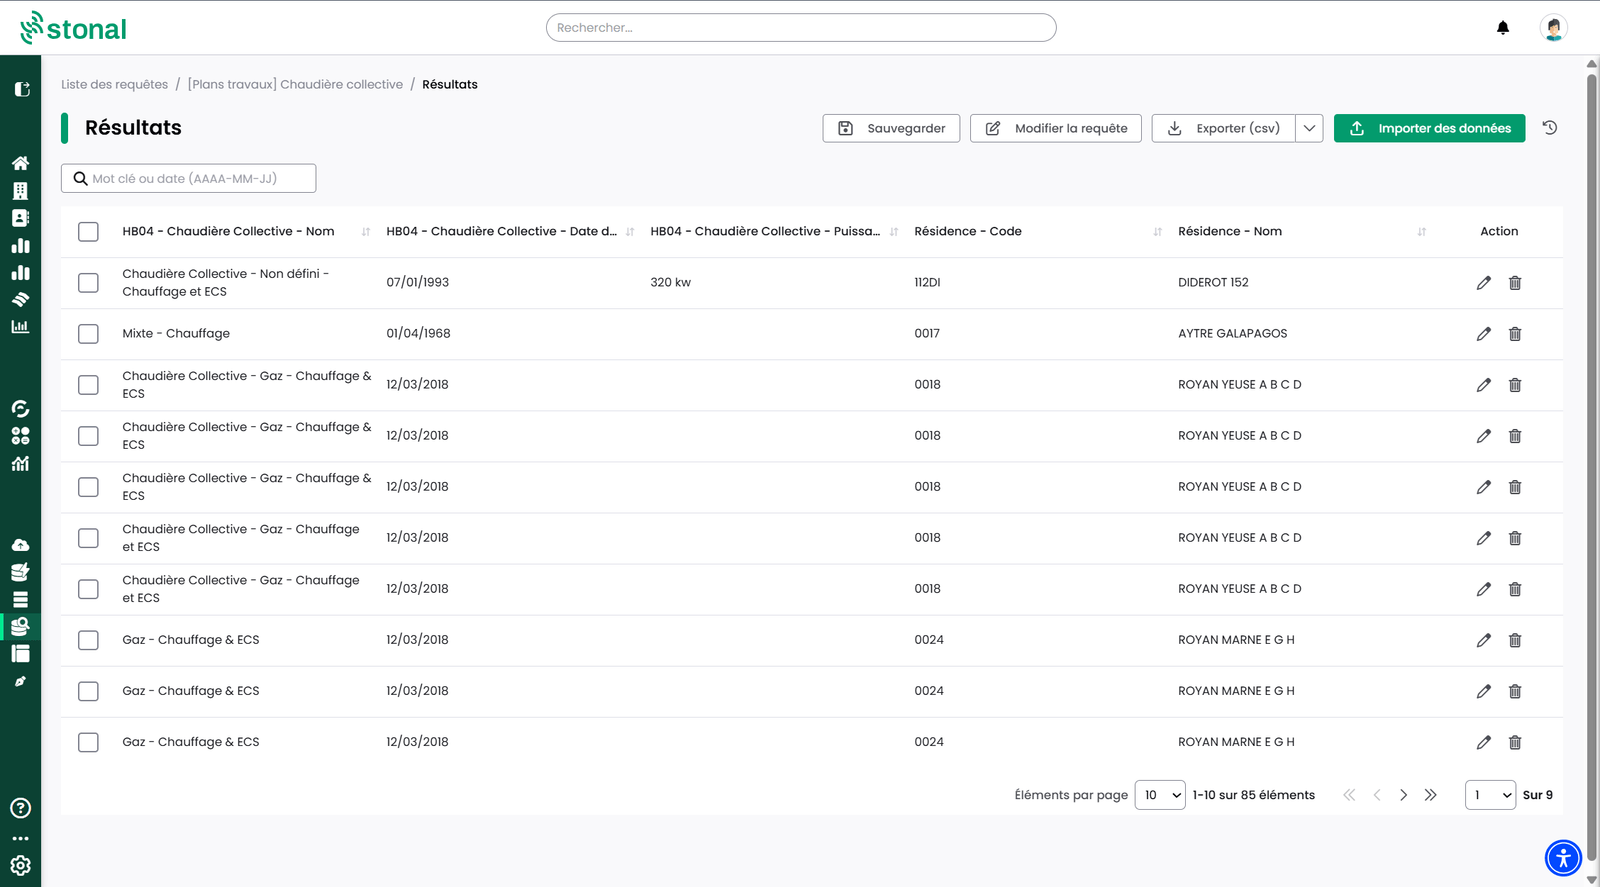
Each column matches a piece of information you chose at the previous step. Its name is **prefixed by
the component it belongs to**:
| What you are after | The column name |
|---|---|
| The property's name | **Property – Name** |
| A boiler's condition | **Boilers – Condition** |
That prefix is what tells you what each value attaches to, even when two components carry information
of the same name.
Three actions are available on this page:
- **Save the query** — it then becomes available to your whole organisation, so it is easily reusable
and shareable. You will not have to rebuild it next time.
- **Export** — the button offers three choices. **"Export (CSV)"** gets every result in a file, with
the same columns as on screen. It is the format that opens in Excel and any spreadsheet: enough to
rework the data, pass it on, or compare it with another tool's. **"Export for modification (CSV)"**
and **"Export for creation (CSV)"** prepare a file to re-import (see step 5). The exported file is
named after the query.
- **Edit the query** — you go back to the settings, filters and columns intact, to adjust and run it
again.
### 4. Multiple actions
The query tool is not only for reading your data: you can also **change or fill in the information
recorded**, across as many rows as you like, without leaving the results page. It is the quickest way
to correct a missing or wrong value on a large number of items at once.
If your permissions allow it, this happens straight from the results.
1. **Select the rows**: the pencil on a row for a single correction, the box at the top left for the
whole table, or the boxes row by row. A bar appears at the bottom of the screen reminding you how
many results are selected. **Shift + click** on a box ticks every row between the last one ticked and this one.
2. Click **"Edit data"**. A panel opens on the right, in two steps: first choose the **component
type** concerned, then **edit the data**.
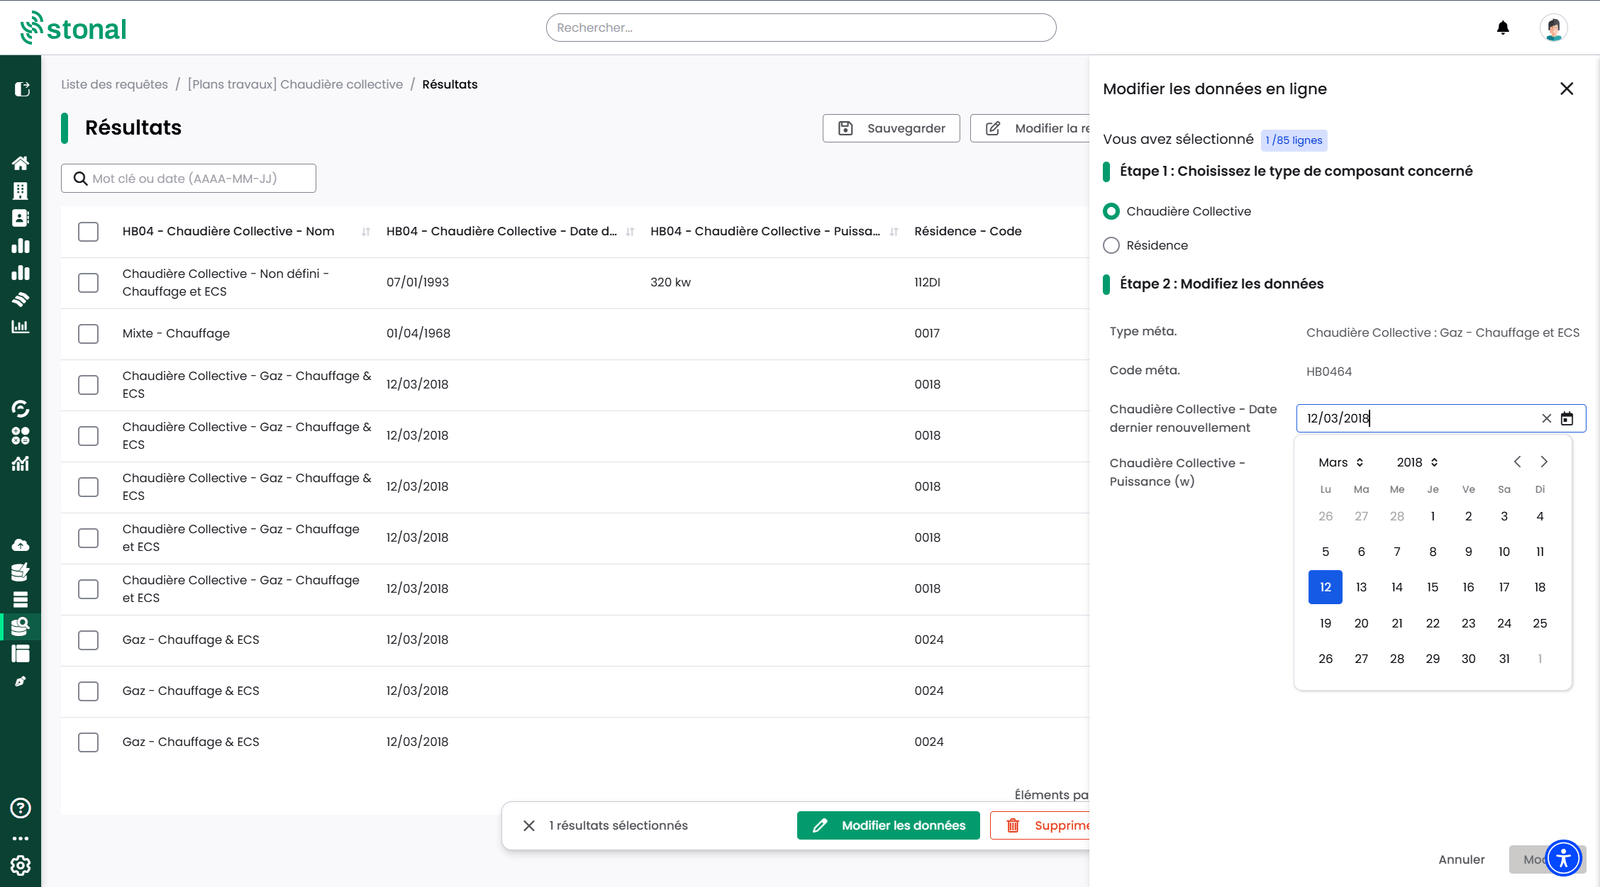
The panel reminds you how many rows are selected, and offers one field per property shown as a column
— with the right input type, a date picker for a date for instance.
:::warning Only the columns shown can be edited
The edit window only offers the columns present in your table. If you want to correct a property, add
it as a column first.
:::
Bulk editing **can take several minutes**. A notification at the top right keeps you informed of its
progress.
### 5. Modify or create components by CSV import
When there are many corrections, or they differ from one row to the next, it is often easier to make
them in a spreadsheet, then re-import the file. From the results page, the **"Import data"** button
offers two types of import, still in beta.
#### Modify or enrich existing components
1. Add the columns to correct to your query. To change the type of components, also add the **Code
meta.** column.
2. Export the query with **"Export for modification (CSV)"**.
3. Correct the values in the file, with Excel or another spreadsheet.
4. Click **"Import data"**, choose **"Modify or enrich existing components"**, then drop your file.
To **change the type** of one or more components, replace their code in the Code meta. column. For
example, to change bathtubs into showers, replace `KA0211` with `KA0111`. The end-of-export message
contains a link to the meta-code library, to find the right code. The same file can both change types
and correct properties.
:::warning Changing a component's type is not trivial
Properties common to both types are kept. Those that only exist on the old type are deleted, those of
the new type are added empty.
Never change the **Stonal identifier** column: it is used to find each component, and the import would
be invalid.
:::
#### Create new components
Build a query that returns the location of the future components (site, building, level, room), then
export it with **"Export for creation (CSV)"**. Fill in the meta code of each new component, then
import the file with **"Import data"** and **"Create new components"**. For now, this creation covers
equipment, and equipment created this way does not appear on plans.
An import can take several minutes. The **import history** lists the imports in progress and finished,
with the detail of the rows processed and in error.
Importing data depends on the permissions you have been given: you may not have access to it. If you
need it, ask your internal contact.
### 6. Delete components in bulk
An import or a manual entry has created components that should not be there: wrong type, duplicates,
units integrated by mistake. Rather than deleting them one by one, you find them with a query and
delete them in one go, from the results.
1. **Select the rows**, as you would for an edit.
2. In the bar at the bottom of the screen, click **"Delete"**.
3. If your selection mixes several component types, choose the one to delete.
4. A confirmation screen lists the components concerned and everything deleted along with them
(sub-equipment, associated plans). Read it through, then confirm.
:::warning Deletion is permanent
Deleted components cannot be restored, and neither can what is deleted along with them. Take the time
to read the confirmation screen before you confirm.
:::
This action depends on a dedicated permission, **"Asset deletion"**, which no group has by default:
you may not have access to it. If you need it, ask your internal contact.
## Good to know
Changes, from the results or by import, only apply to the portfolio you have permissions on.
Automatically calculated areas (floor area, SHAB, SDP) are **indicative** and do not replace a
certified measurement.
## See also
- [Checking data](/guide/qualite-donnees/controler-les-donnees)
- [The unit record](/guide/vue-densemble/mes-residences/fiche-lot) — completing the data of a unit
---
# Running a field survey with EDIT
URL: https://docs.stonal.io/fr/guide/qualite-donnees/edit
# Running a field survey with EDIT
## What it is for
**EDIT** is the application your field staff install on their tablet or phone. It lets them view
plans on the move in order to **update the portfolio as described in Stonal**.
In the field, your staff create **annotations** on the plans to report the updates needed: create a
piece of equipment missing from the plans, modify one, delete one. Those annotations are then
confirmed, and partly processed automatically to update your portfolio.
EDIT also opens properties **without a plan**: you can browse their structure, view their data and
create annotations, even where the portfolio has not been modelled yet.
## Before you start
Access to EDIT depends on the scope defined by your organisation.
A plan is not required: on a property without one, annotations are created from the sheet of the
items, see [Properties without a plan](#properties-without-a-plan).
## Installing the application
_Video tutorial, 1 min 10: placing the shortcut on your phone's home screen._
1. Sign in to your organisation's address from the tablet or phone.
2. On Android, choose **"Add to home screen"**. On iPhone or iPad, **"Add to Home Screen"**.
:::danger Important
A new interface was released on **22 May 2026**. If the application was already installed on your
phone, you must **uninstall it and reinstall it**. Before uninstalling the previous version,
**remember to synchronise your annotations** if they were entered offline.
**The new address is: https://app.stonal.io/edit/**
*The previous address was of the form: https://edit.stonal.io/*
:::
## The screen explained
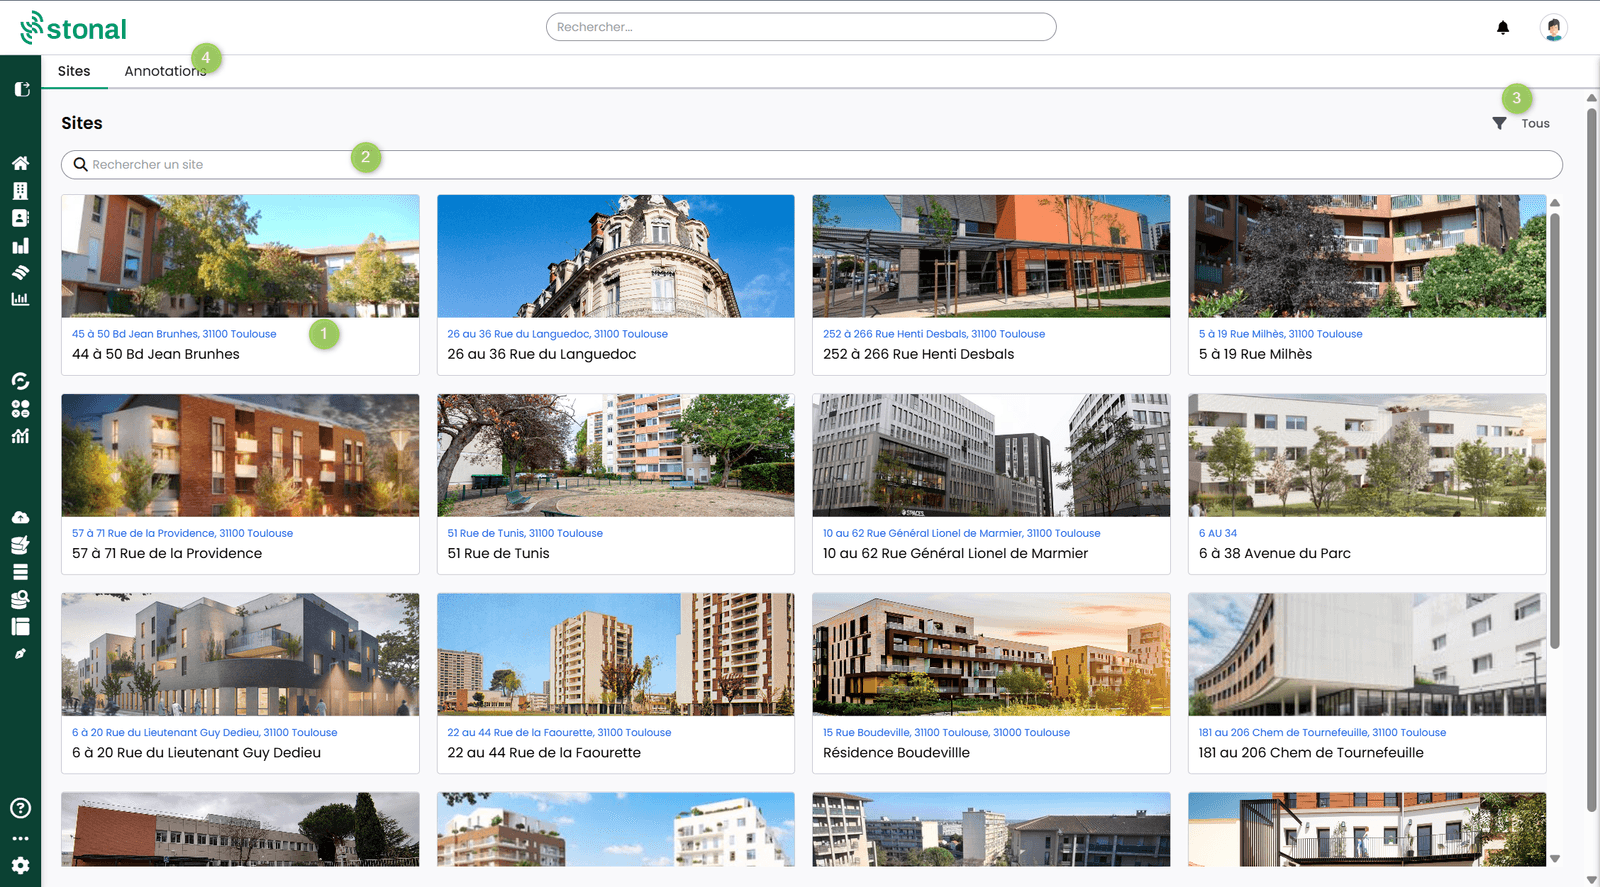
1. **Property** — click a property to open its model.
2. **Search** — find your property.
3. **Filter** — show only properties that carry annotations.
4. **Annotations** — every annotation in the portfolio, with grouped actions.
### Finding your property
- **Search** works on the name and on the code, ignores upper and lower case as well as accents,
and accepts a partial entry.
- **Filter by modelling**: when the list opens, it only shows properties that have a plan
(**Maquette numérique**). Also tick **Alphanumérique** to see properties without a plan.
- **Filter by portfolio**, as on the main platform.
- The **address of the building** is shown as you move down towards the plans.
### Find your way around a building
Open a building: on a computer, the screen splits into three areas.
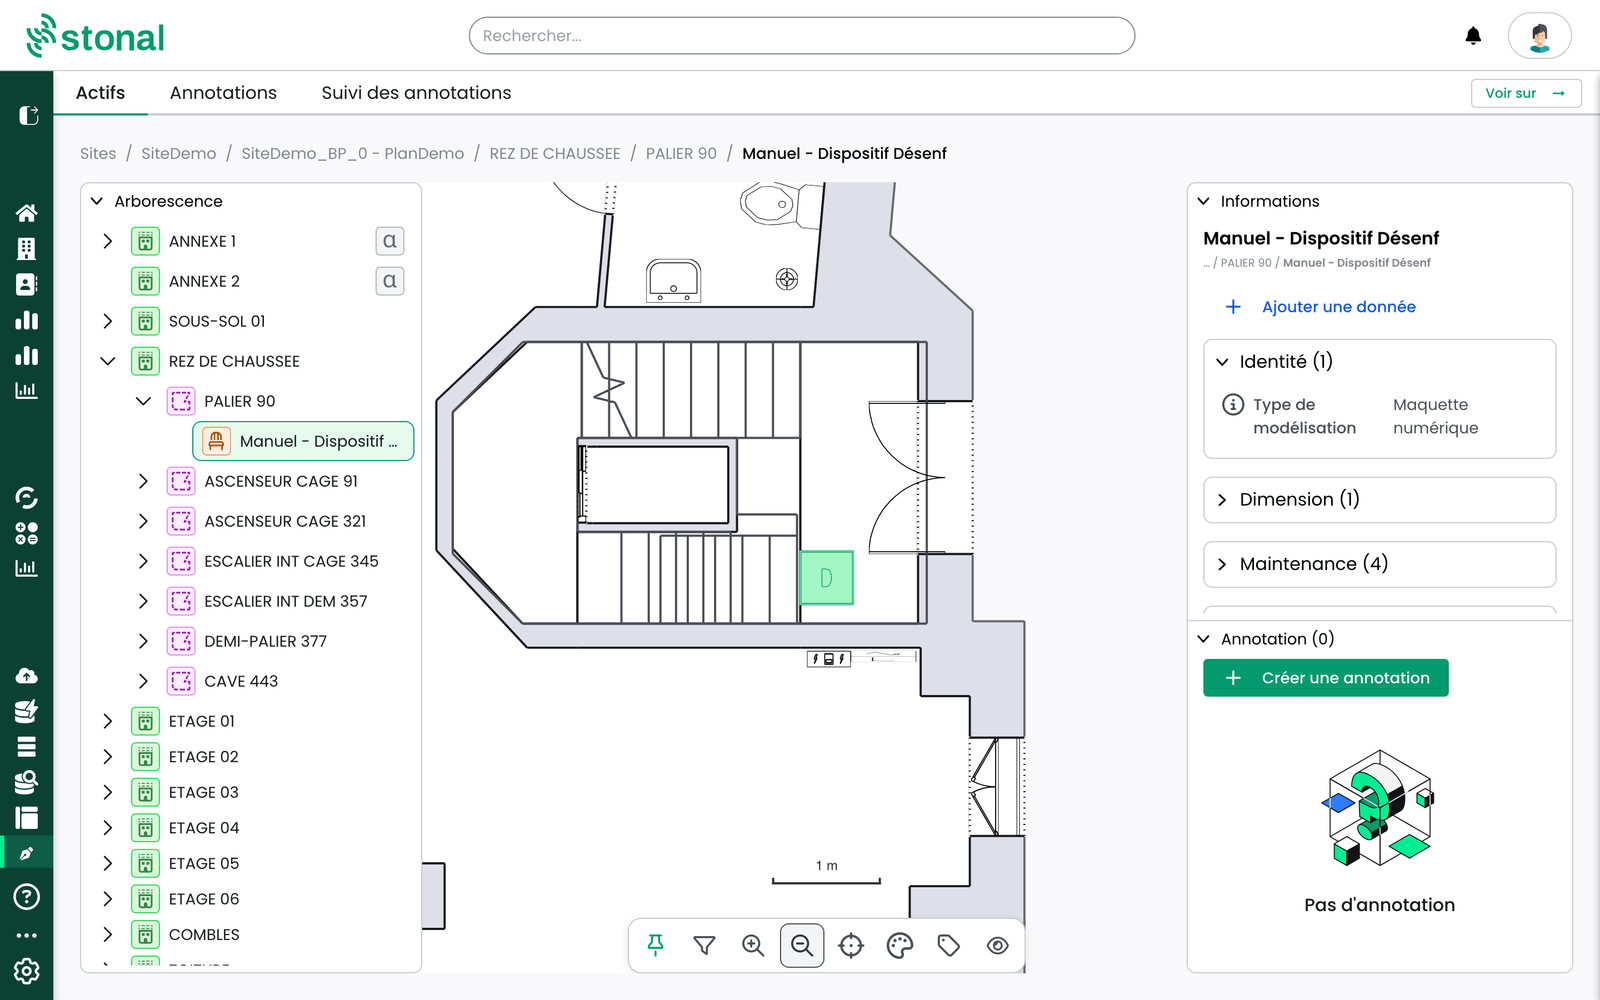
1. **Structure** — the floors of the building, from top to bottom. Expand them to go down to the
zones (a dwelling, for instance), the rooms and the equipment. Each floor shows its number of
annotations.
2. **Plan** — click an item in the structure tree: the plan of its floor opens, centred and zoomed
on it.
3. **Information** — the sheet of the selected item. Depending on your organisation, this panel is
called **Attributes**.
Until you pick a floor, the plan shows the whole building in an **isometric view**, its floors
stacked on top of each other. Click a room to open the plan of its floor, with the room already
selected.
To get your bearings, hover over a row of the structure tree: the item lights up on the plan. Hover
over an item on the plan: its row expands and lights up in the tree. You can also widen the
structure tree or the **Information** panel by dragging their edge, or collapse them to their
title.
On a phone or tablet, the three areas do not fit on one screen: switch between them with the tabs
at the bottom, **Tree** (**Structure tree** on a tablet), **2D Plan** and **Information**.
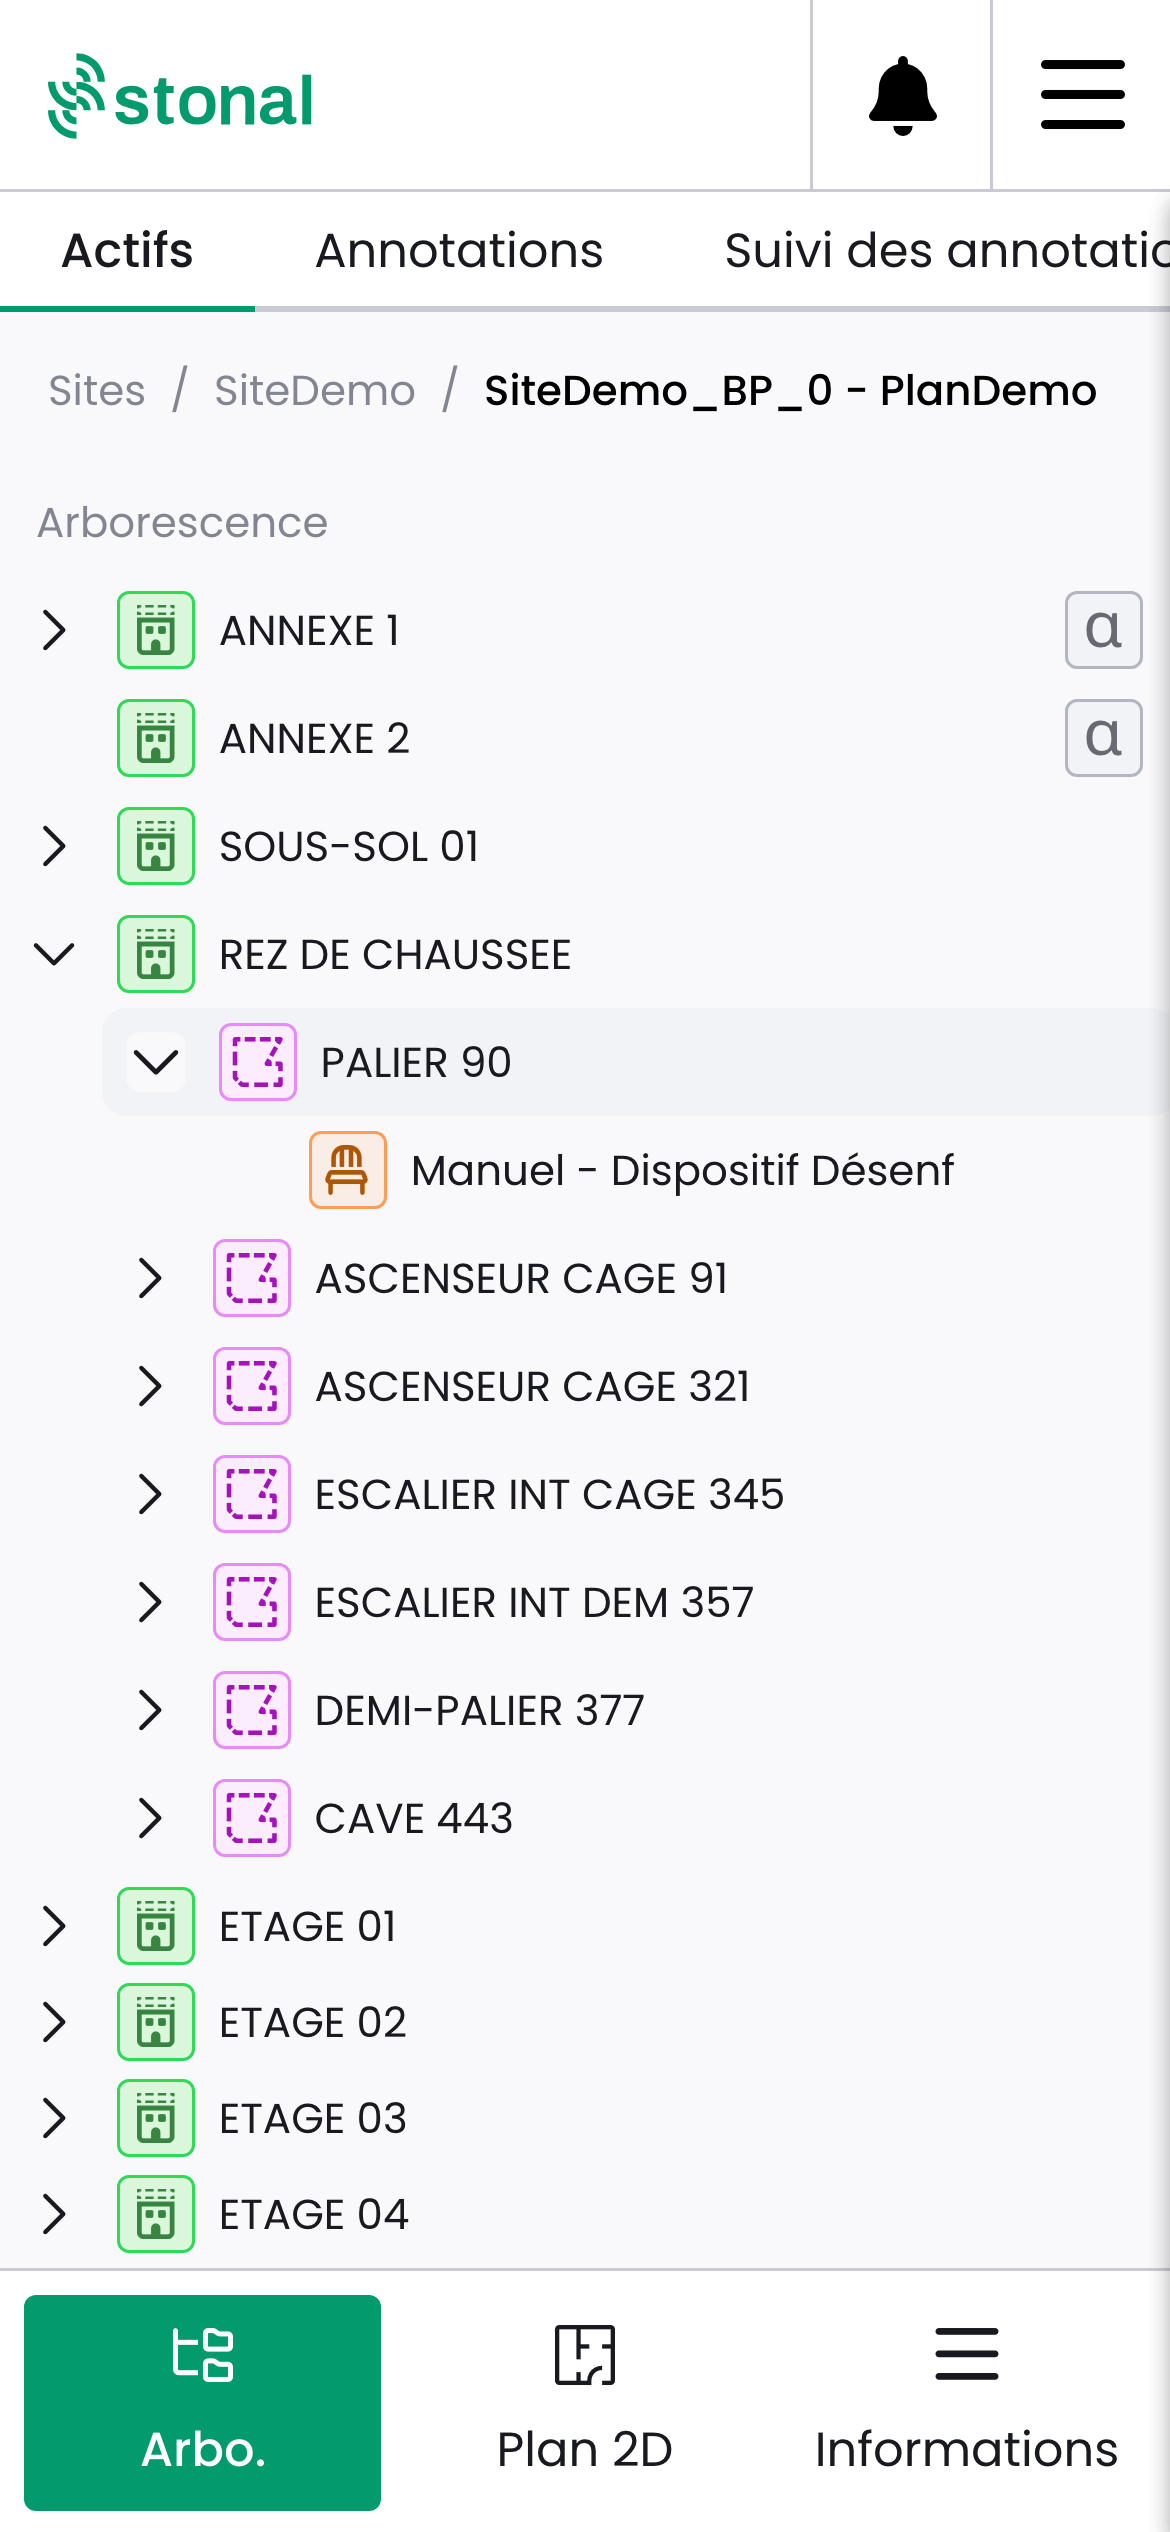
When you pick an item in the tree, EDIT opens the **2D Plan** tab straight away, or **Information**
if the item has no plan.
### Properties without a plan
A property without a plan also opens in EDIT. You can browse its structure and view the sheet of
each floor, zone or room: a way to check a piece of data on site, even where the portfolio has not
been modelled yet.
To show them in the list, open **Filter**, then **Modeling type**, and tick **Alphanumérique**. The
options keep their French names, whatever your language. When the list opens, it only shows
properties that have a plan.
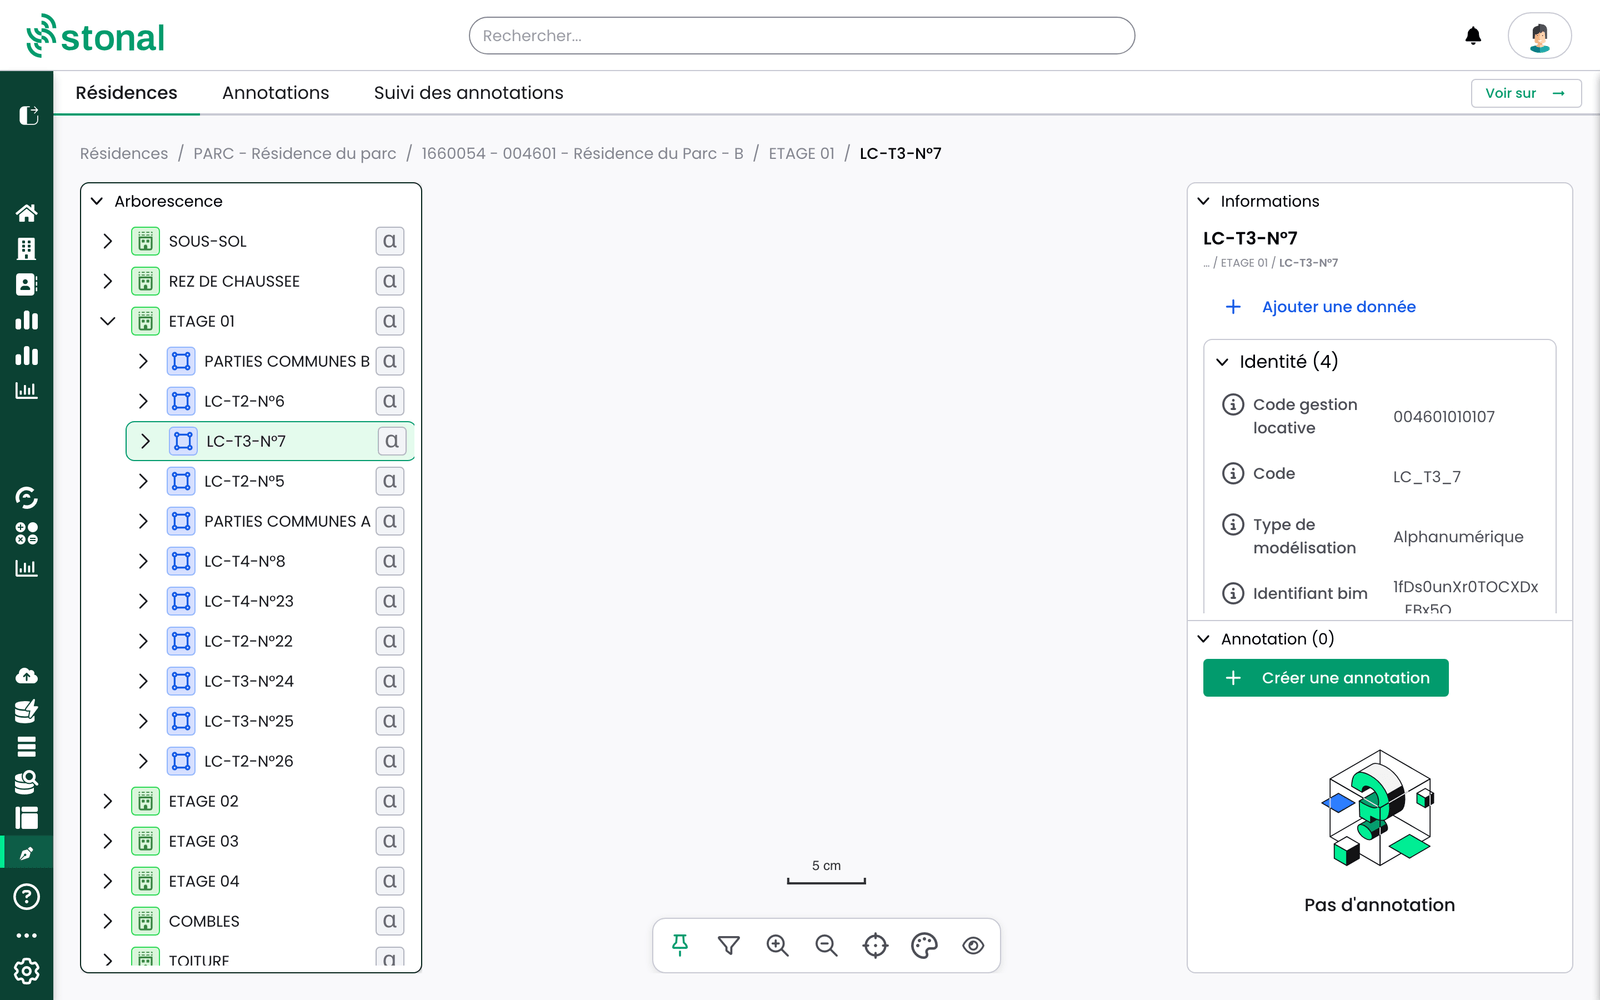
In the structure tree, an icon marks each item without a plan. Hover over it to read
"Alphanumeric asset - no graphical representation". In the centre, the screen reads "No plan for
this building" and, on a phone, the **2D Plan** tab is greyed out.
To report a correction on a property without a plan, create the annotation from the sheet of the
item concerned, see [Create an annotation from the sheet](#create-an-annotation-from-the-sheet).
## Step by step
### Place an annotation
_Video tutorial, 1 min 37: annotating the plan and updating a component from the field._
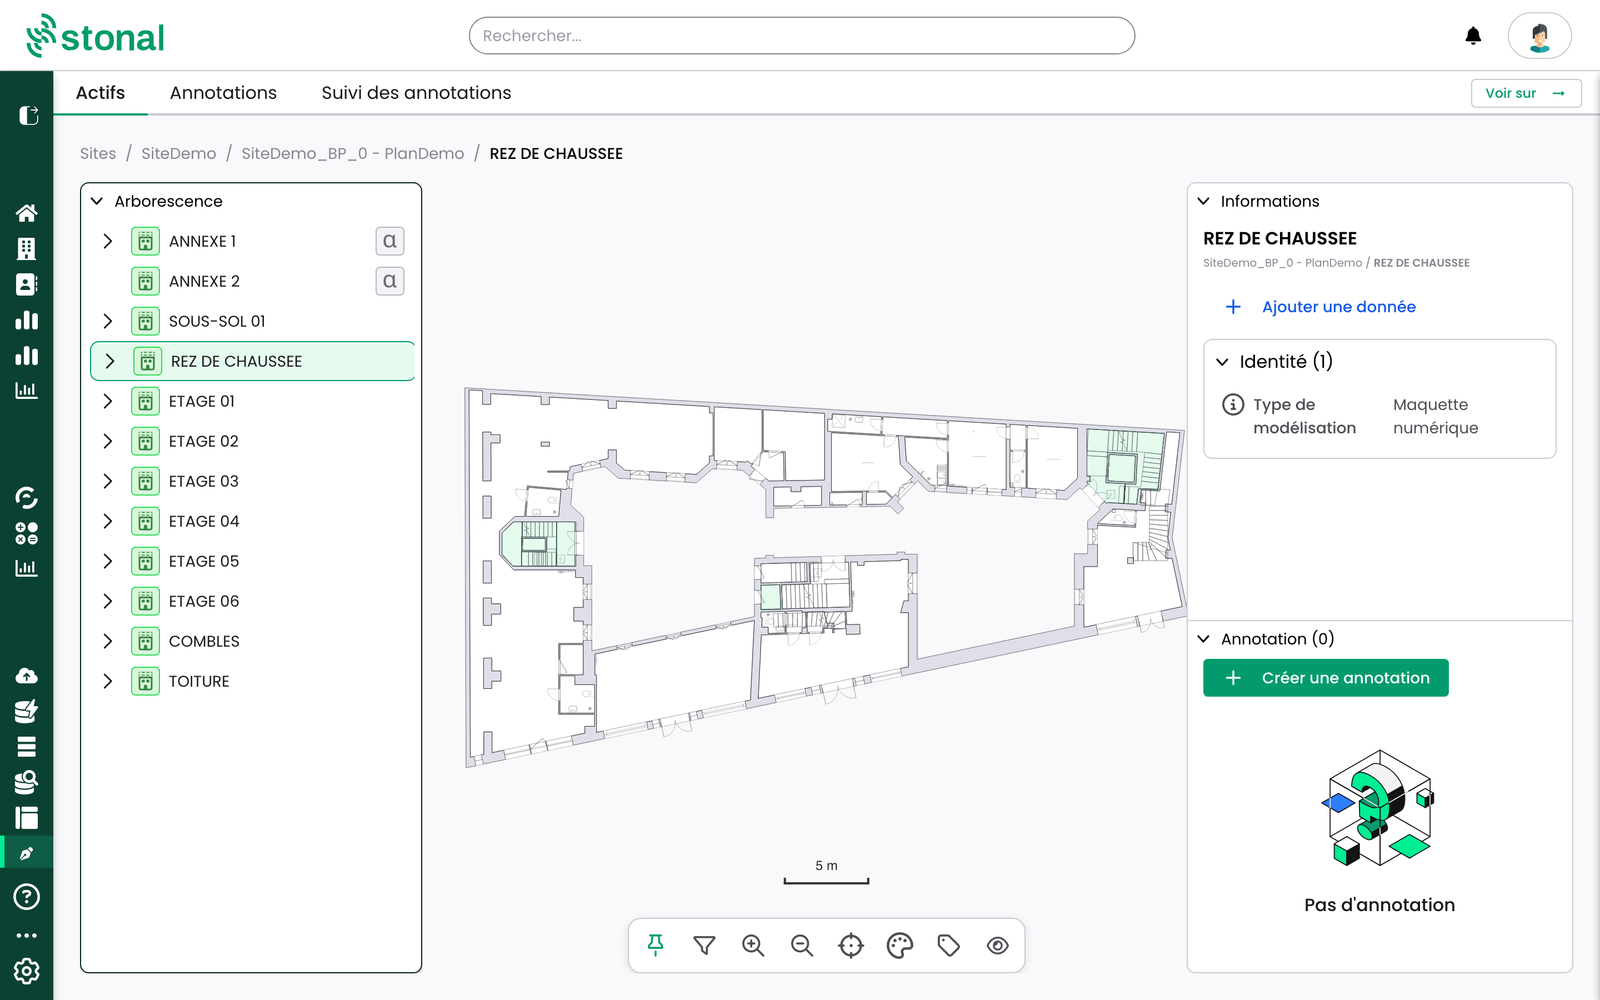
1. **New annotation** — the pin in the toolbar, to place a pin on the plan.
2. **Information** — the sheet of the selected item (**Attributes** depending on your
organisation).
The steps themselves:
1. Select a site, then a building (or an outdoor space), then a floor in the structure tree.
2. Click the **New annotation** icon. Annotation mode is **off when you open a plan**, so that the plan
loads faster and stays readable. Once you switch it on, the application remembers your choice.
3. Click the room or the piece of equipment concerned — on a phone, **press and hold**.
4. Fill in the information and attach one or more files if needed.
The window reminds you of the **site, the building and the floor** you are annotating, so you can
check you are in the right place. When you choose a type of equipment, the list opens straight at
the level you are already in, instead of starting again from the top.
:::info Several pieces of equipment under your finger
If the point you click covers more than one piece of equipment, a **"Several equipment
here"** window lists them and asks you to pick the one to annotate. This is what lets you reach a
piece of equipment hidden underneath another, instead of creating a duplicate.
:::
**Moved the pin by mistake, or placed it slightly off?** You can drag an existing pin to the right
spot. There is no need to delete the annotation and create it again. Its link is updated
automatically: the annotation is attached to the room or the piece of equipment where you drop it.
Moving a pin requires a network connection.
The colour code of the pins:
| Colour | Meaning |
|---|---|
| **Purple** | General information |
| **Green** | Creating a component |
| **Red** | Deleting a component |
### Create an annotation from the sheet
You can also annotate an item from its sheet, without going through the plan. It is the only way to
annotate an item that has no plan.
- **On a computer**, in the **Information** panel (**Attributes** depending on your organisation),
the **Annotation** section lists the annotations of the item. Click **Create an annotation**, at
the top of the section.
- **On a phone or tablet**, in the tab of the same name, tap **Create an annotation**, under the
name of the item. As soon as the item has annotations, this button becomes **See the
annotations**: it opens their list, with **Create an annotation** at the top.
The window is the same as on the plan, already linked to the item (**Concerning**). If the item is
drawn on the plan, the pin is placed at its centre. Otherwise, the annotation has no position on a
plan. Either way, it joins the list of annotations like the others.
### Three tips for usable annotations
- Create **one annotation per piece of equipment or per finish**. A single overall annotation
covering several changes cannot be acted upon.
- For a replacement or a deletion, place the annotation **by clicking the original equipment** on the
plan.
- For a creation or a replacement, select the type and characteristics of the new equipment.
### Find and handle an annotation
Open the **Annotations** tab, filter on the status you need (for
instance **To be handled automatically** or **To be handled by Stonal**), then open the annotation. The
**View on plan** button takes you back to it.
To change the status, open the annotation and change it at the top of the page. You can filter the
plan to show only handled annotations.
The **"See the annotations"** button on the main page opens every annotation across your portfolio,
with **bulk actions**.
The same filters are available on the plan and in the annotation list, so there is only one set to
learn: by **status**, by **equipment family**, and by **branch, agency or property**. The name of
the property is shown on each annotation, which makes it quicker to find the one you are after.
On the plan, the **Legend** button reminds you what each pin means:
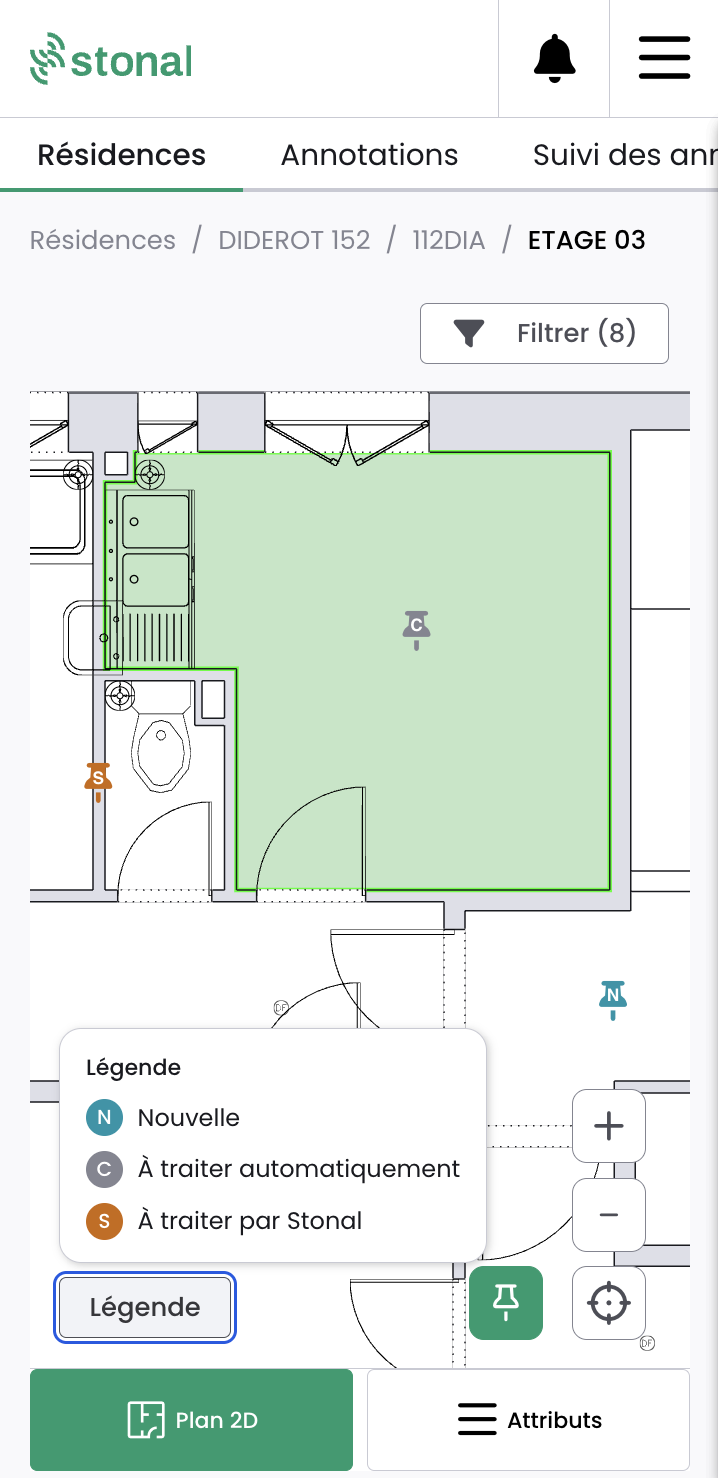
| Pin | Meaning |
|---|---|
| **N** — New | The annotation has just been created |
| **C** — To be handled automatically | It will be picked up automatically to update the portfolio |
| **S** — To be handled by Stonal | It needs our teams to step in |
To delete, open the annotation and click **Delete**.
### Update the attributes of a component
Click the component, on the plan or in the structure tree: its sheet shows in the **Information**
panel, on the right (**Attributes** depending on your organisation). On a phone or tablet, open the
tab of the same name at the bottom of the screen. Change the condition or the survey date.
Two attributes matter particularly: the **overall condition** and the **date of last renewal**. They
are the ones used to track wear and that feed your
[Works Plans](/guide/workflows/plans-de-travaux).
:::info Attributes are updated immediately
Unlike annotations, a change to an attribute goes through no approval process: it takes effect
directly.
:::
An attribute in **black type** is editable, an attribute in **grey type** is read-only — this depends
on your internal contacts' choices.
### Finding your way around the plan
Above the plan, a row of buttons gives you the same reading tools as the
[Plans tab](/guide/vue-densemble/mes-residences/plans) of the platform. On a tablet or a computer
each button opens a drop-down list; on a phone it opens a window.
| Button | What it does |
|---|---|
| **Themes** | Colour the plan by a criterion, for instance the type of room. A **legend** appears with the colours used. |
| **Labels** | Show a label on the elements of the plan: room name, area, dwelling number. |
| **Plan display** | Show or hide the layers of the plan: drawing lines, dimensions, façade outline, equipment, openings, room names, dwelling numbers. |
| **Legend** | A reminder of what each annotation pin means. |
:::info Text labels are hidden by default
Room names, dwelling numbers and dimensions are hidden when you open a plan. Displayed all together
they overlap each other and hide the annotation pins. Switch on only the one you need.
:::
A button only offers a layer that the plan actually contains. Dwelling numbers, for instance,
require your areas to be linked to coded dwellings.
Two things make the pins easier to read: each pin is **coloured according to its status**, and pins
keep a minimum size when you zoom out, so they stay visible on a large plan. Floor and wall
coverings are drawn more lightly, so the plan is less cluttered.
## What happens after your survey
Handling is **semi-automatic**: it depends on what the annotation asks for.
- **Adding, replacing or removing a piece of equipment** can be handled automatically, by you, from
the annotation list.
- **A structural change** — reworking a wall, correcting a plan's geometry, changing circulation —
needs the **Stonal teams** to step in.
### Launch the automatic processing
**1. Check and reclassify.** From the **annotation list**, look at the ones with the **"New"** status.
Check that the **type** is right — you can reclassify it, turning an *Info* annotation into a
*Creation* for instance, if the type chosen in the field was not the right one. Then check that the
**required information** is complete: a message tells you.
**2. Confirm.** Select one or more annotations ready to be processed, then click **"Start auto
processing"**.
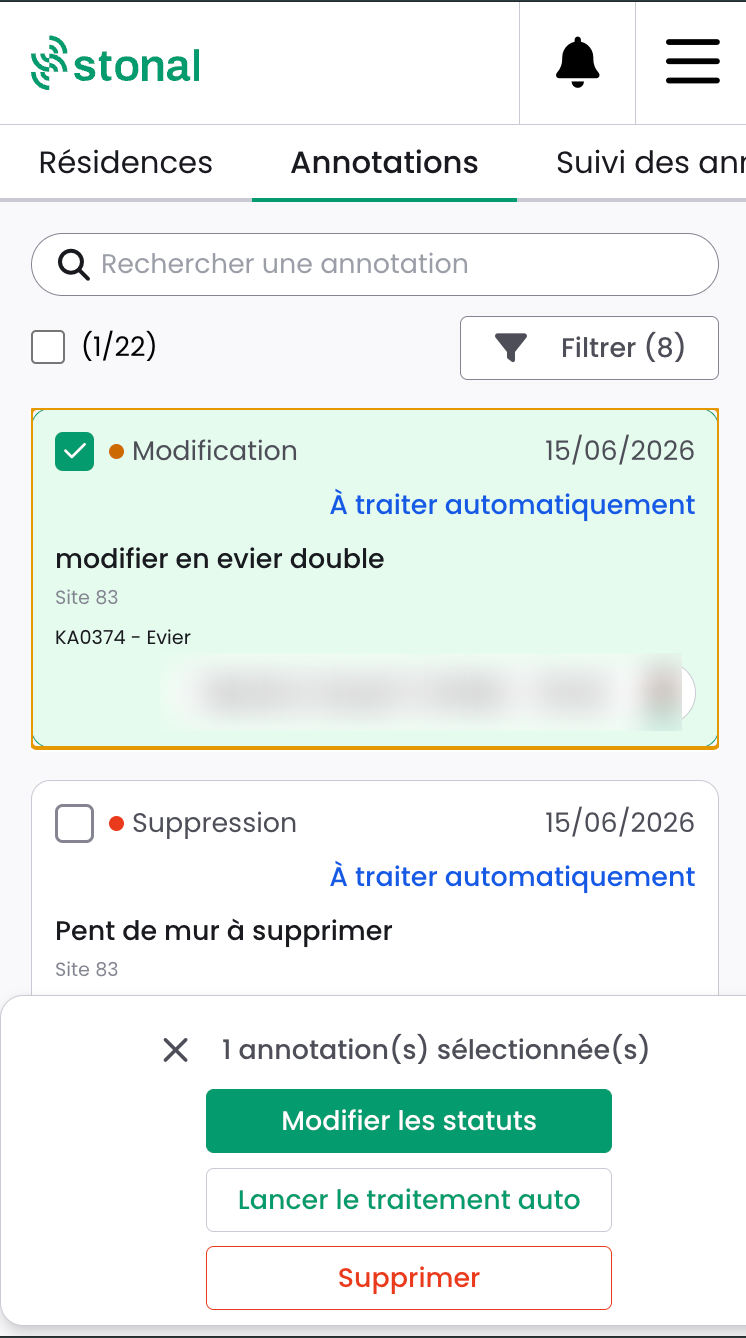
:::info The button is not always active
It only becomes active when **every condition** on the annotation is met. If a required piece of
information is missing, a message tells you exactly what to complete.
:::
**3. Processing.** On confirmation, the change is applied to your portfolio reference data:
| Annotation type | What happens |
|---|---|
| **Creation** | The equipment is created at the coordinates given |
| **Deletion** | The equipment is deactivated and given an end-of-life date |
| **Modification** | The selected equipment is replaced by the new one |
The annotation then takes the **"Auto-processed"** status ✅.
:::note Drawing on the plan depends on your platform
The equipment is created in your data. Depending on your platform, it may be drawn on the plan at a
later stage.
:::
If processing fails, the annotation takes the **"Error"** status, with the reason shown. It is then
picked up by the Stonal teams.
### The cases that go through the Stonal teams
- **Info** annotations — no automatic processing;
- **geometry corrections**: reworking a wall, plan anomaly, changed circulation;
- **façade annotations**, with no room attached.
For these, set the annotation to **"To be handled by Stonal"**. Depending on your subscription, it is
picked up within the contractual timeframe agreed.
:::info Automatic processing requires a dedicated permission
It is being rolled out gradually: get in touch with your Stonal contact to have it enabled.
:::
## Tracking your teams' activity
The **"Annotation tracking"** tab lets you follow your teams' activity and the status of your
annotations. It is refreshed **every night**. If you do not have access to it and you need it, ask
your internal contact to open the permission.
You can filter by organisation, branch, site or building code and label, floor, Stonal identifier,
**author**, object type, annotation type, status and label.
It reads in four blocks:
1. **Overview** — the counters: total annotations, to be decided, to handle, handled.
2. **Activity by property** — the last 10 properties annotated, and the number of annotations per
property.
3. **Breakdown and resolution** — by type and by status, with a progress gauge and the request dates.
4. **Annotation detail** — the full list, with location, author, content and status.
The report also tracks the **attribute updates** made through EDIT: number of attributes changed,
trend by month, breakdown by attribute type, and the detail of before and after values.
## Working offline
Field surveys often happen where there is no network. EDIT therefore lets you **work without an
internet connection**.
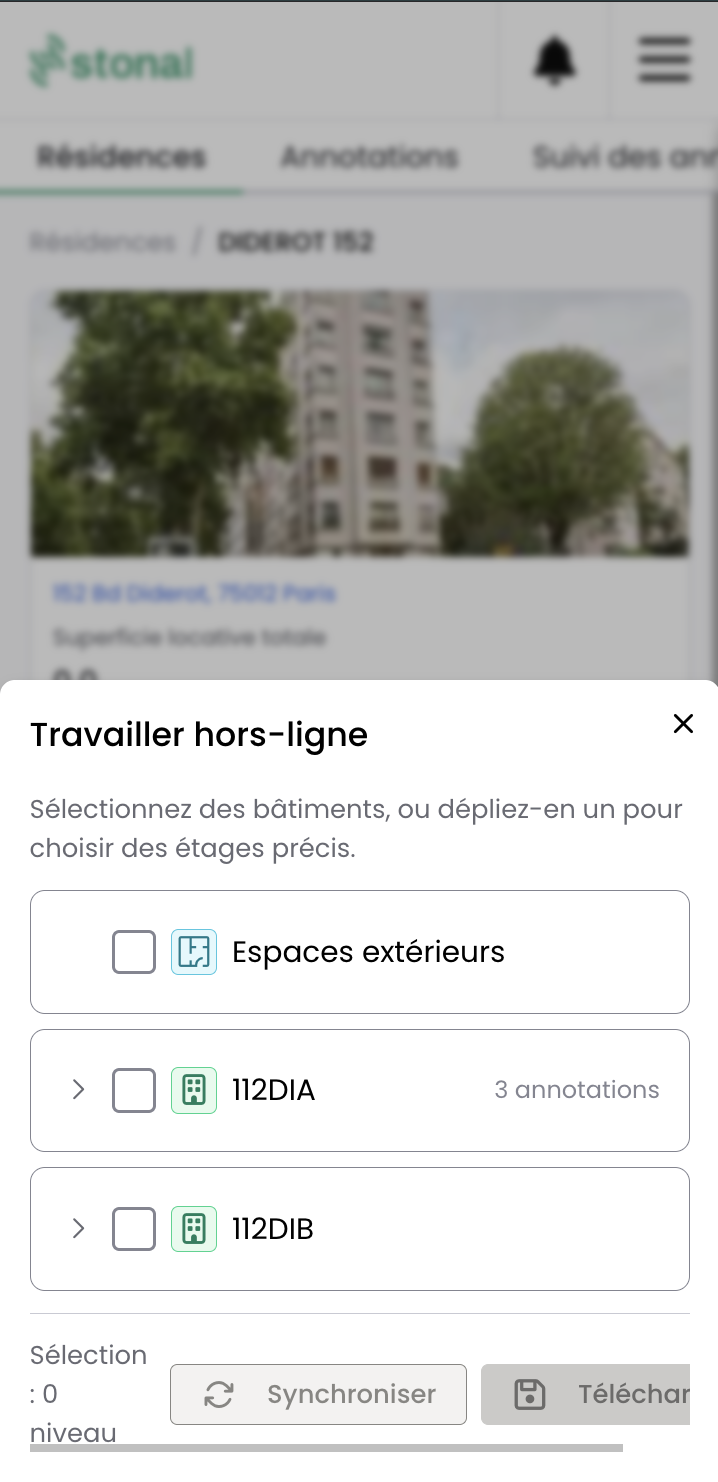
**Download your plans before you leave.** Downloading works **level by level** — site, building,
floor. You prepare your visit without having to download the whole portfolio: select the buildings
concerned, or expand one to pick specific floors, then **Download**.
The download also brings the **themes and labels** of the plan, so a plan reads the same offline as
online. If you downloaded a site before this was available, the button stays visible but inactive,
and invites you to download the site again.
**Synchronise when you get back.** Annotations created offline are synchronised automatically as
soon as you are back on the network.
:::warning Synchronise before signing out
Remember to synchronise your annotations **before signing out of the application**. It is the same
precaution as before a reinstall.
:::
Do not have access to offline mode and would find it useful? Ask your internal contact.
## Good to know
You can attach **several files** to one annotation, and not only a single photo.
Taking a photo straight from EDIT works on iPhone and iPad, on Android and in Chrome. If your device
still does not offer the camera, take the photo with the camera app and attach it to the annotation.
## Keyboard and mouse shortcuts
| Gesture | Effect |
|---|---|
| **Scroll wheel** | Zoom in or out on the plan |
| Drag the plan | Move it |
| Pinch, on a tablet or phone | Zoom |
| Drag a pin (long press on a tablet or phone) | Move it |
| **Arrow keys**, after **Move** in the pin menu | Nudge the pin; with **Shift**, in big steps |
| **Enter** / **Esc**, during that move | Drop the pin / put it back where it was |
| **→** / **←**, in the structure tree | Expand / collapse a level |
## See also
- [The plans of a property](/guide/vue-densemble/mes-residences/plans)
- [Works Plans](/guide/workflows/plans-de-travaux) — what your surveys feed
---
# Managing users and their permissions
URL: https://docs.stonal.io/fr/guide/administration/gestion-des-utilisateurs
# Managing users and their permissions
:::tip Do your users sign in with their company account?
Stonal can delegate sign-in to your own identity provider (for example Microsoft Entra ID / Office
365). See [Set up identity delegation (SSO)](/guide/administration/gestion-des-utilisateurs/delegation-didentite).
:::
## What it is for
This module administers the accounts and permissions of your organisation: creating, modifying and
deleting accounts, importing user lists, configuring access to applications, the geographical scope
and the permission level.
## Before you start
Access to this module depends on the permissions you have been granted: it is only open to users who
belong to a user group of the **"Administration"** type. It may not appear in your menu; if you need
it, ask your internal contact.
## The seven tabs
User list · Application groups · User groups · Report groups · Profiles · Companies ·
API – Personal access tokens.
### 1. User list
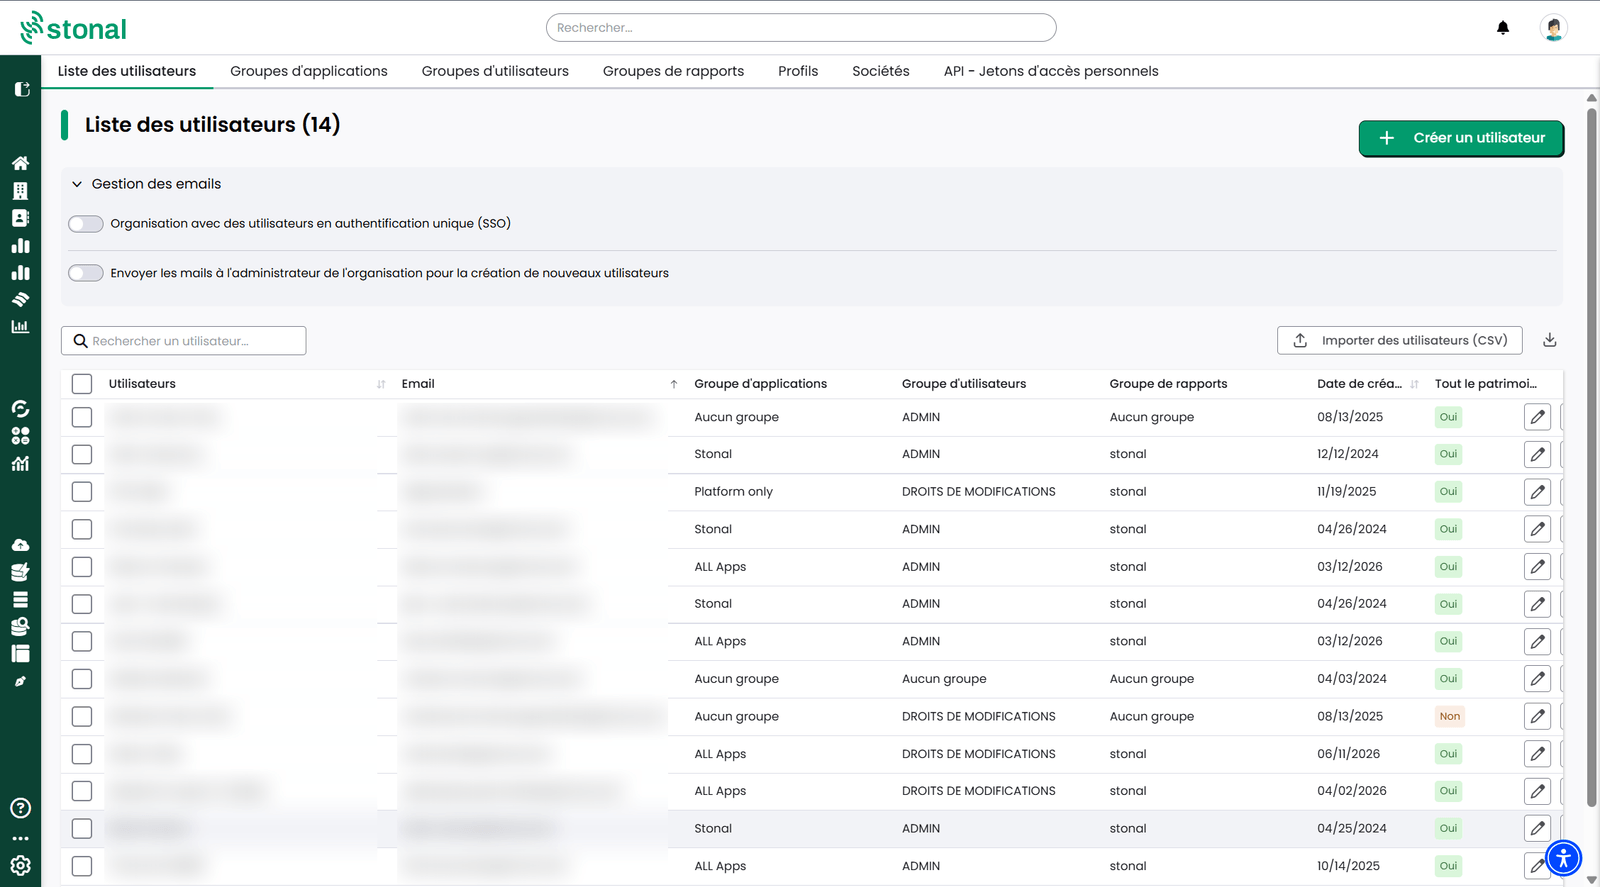
The table of all your accounts. You can **search** (email, last name, first name), **edit**,
**delete**, **resend the account creation email** and **export the table**.
To act on several accounts, tick them: **Shift + click** on a box ticks every account between
the last one ticked and this one, on the page shown.
Each row gives you the **application group**, the **user group**, the **report group**, the account's
**creation date** and whether it covers **the whole portfolio** or not.
:::tip Export before auditing
Exporting the table is the starting point for auditing your permissions and preparing a bulk update —
it is the same format as the one expected on import.
:::
**Creating a user** happens in three sections:
**Information** — email, first name and last name are required.
**Account settings**:
| Setting | What it determines |
|---|---|
| **Application group** | Which applications the user can reach |
| **User group** | Their permission level |
| **Report group** | Which analysis reports they can consult |
| **Profile** | Fine-grained permissions on the previous-generation modules |
| **Company** | No effect on the platform; useful for segmenting by subsidiary or branch |
| **Temporary account** | The date on which the account's access stops on its own |
**Portfolio permissions** — either "Include the whole portfolio", or a manual selection by branches,
properties or buildings.
### Granting time-limited access
A contractor, an intern, an audit assignment: when access is only needed for a while, you can give it
an end date at the moment you create the account, rather than having to remember to remove it when
the day comes.
In the account settings, turn on the **"Temporary account"** toggle. The **"Expiration date"** field
then appears and becomes required; the calendar only offers future dates. The toggle is available
when creating an account as well as on an account that already exists.
On the chosen date, the person's access to your organisation is switched off automatically, exactly
as if you had switched it off yourself. The account, its groups and its permissions are kept: the
person loses access, you do not lose their configuration. The chosen day is included, access runs
until the end of it.
:::tip Extending access, or making it permanent
To extend it, simply change the date. To remove the deadline, turn the toggle off and save: the
account becomes an account with no end date again.
If access has already expired, re-enabling it from the user list also removes the date. The account
will therefore not be switched off a second time.
:::
### Import users in bulk
The **"Import users"** button creates and updates accounts from a CSV file. To get the expected
layout, download your user list first.
The last column of that file, **"Expiration date"**, carries time-limited access, in `YYYY-MM-DD`
format. A cell left empty removes the account's deadline.
:::warning The import deletes nothing
An account missing from your file is **not** deleted. Deletion goes through the dedicated option in
the list.
:::
### Email settings
Two options are available:
They sit in the **Email settings** section, at the top of the tab:
- **"Organisation with single sign-on users (SSO)"** — turns off the password creation email. Turn it on once
[identity delegation](/guide/administration/gestion-des-utilisateurs/delegation-didentite) is in place.
- **"Send the emails to the organisation administrator when new users are created"** — notifies you
whenever an account is created.
### 2. User groups — the permission level
Three levels exist: **Administration** (full access), **Modify** and **Read-only**.
The **Modify** level is refined by theme:
- **Portfolio and data** — create and modify the portfolio, add and modify data, retrieve open data,
create and modify a shared query. Deleting components in bulk from the query tool depends on a
separate permission, **"Asset deletion"**, unticked by default for every group;
- **Contacts & operators** — create and modify contacts and contracts. Deleting them depends on a
separate permission;
- **Documents** — advanced document actions, configuring document templates, importing documents,
modifying documents and their information.
### 3. Application groups
Group applications to grant access to them as a block: a name, then the tick boxes. The table shows
the linked applications and the number of users attached to each group.
### 4. Personal access tokens (API)
Create and revoke tokens for the Stonal public API: a name, a duration, then "create".
:::warning Copy the token as soon as it is created
It cannot be viewed afterwards. The duration is deliberately limited; you can revoke a token early
from the table.
:::
### 5. Analysis report groups
Manage access to reports: create a group (a name, the reports ticked), see the number of users
attached, modify, delete.
:::warning Grant asset deletion with care
The **"Asset deletion"** permission is flagged as a critical action: deleting components is
permanent. Only turn it on for the groups that genuinely need it. See
[Delete components in bulk](/guide/qualite-donnees/requeter-les-donnees#6-delete-components-in-bulk).
:::
## Good to know
Your users can also be managed **via API**.
## See also
- [Signing in to Stonal](/guide/demarrer/se-connecter) — what the user you create experiences
- [Organisation management](/guide/administration/gestion-de-lorganisation)
- [Identity delegation (SSO)](/guide/administration/gestion-des-utilisateurs/delegation-didentite), signing in through your identity provider
- [API guide — Users](/api/users)
---
# Set up identity delegation (SSO)
URL: https://docs.stonal.io/fr/guide/administration/gestion-des-utilisateurs/delegation-didentite
Identity delegation lets a customer's users authenticate through their own identity provider (OIDC). This is a one-time setup per organization.
:::warning
This step usually requires a small meeting between our technical team and the customer technical team.
:::
## How it works
When we add a new identity provider, we proceed as follows:
- **SSO**: We save a new identity provider for the customer (we call it `organization`) that would like to use their own identity management system (eg: `orga`).
- **Customer Identity System**: The customer creates a new OIDC client (usually called `stonal`) on their identity system.
## Information exchange
### Customer provides
- `discovery endpoint`: The identity provider [standard OIDC discovery endpoint](https://openid.net/specs/openid-connect-discovery-1_0.html#rfc.section.4)
- `client_id`: The client ID associated with the client created on the customer identity system for our SSO
- `client_secret`: The client secret of the client created on the customer identity system for our SSO
:::info
We only need one *required* claim to be present in the identity provider token response: the **email** claim in the payload.
:::
### We provide
- `redirect_uri`: The redirect URI of the client created on the customer identity system that will redirect to our SSO.
## End result
At the end of the setup, we provide a final login link to the customer to use when they want their users to authenticate through their own SSO.
:::info
Customers typically embed this link into their own portal.
:::
---
For the end-user login flow, see [Authenticating users](/api/users/authenticating-users).
---
# Your organisation's settings
URL: https://docs.stonal.io/fr/guide/administration/gestion-de-lorganisation
# Your organisation's settings
## What it is for
This is where you set what is **specific to your organisation**, and therefore applies to all of its
users.
Today those settings cover two points:
- the **display of service provisions**, that is the links between a piece of equipment
and what it serves (for example a communal boiler and the dwellings it heats);
- the **key indicators**: you choose up to **four properties** to highlight at the top of the
[General information](/guide/vue-densemble/mes-residences/informations-generales) tab of every
property and every building.
This page will grow as further settings are brought together here.
## How to get there
⚙️ **Settings** in the sidebar › **Organisation management** › the **Edit KPIs** page.
## The screen explained
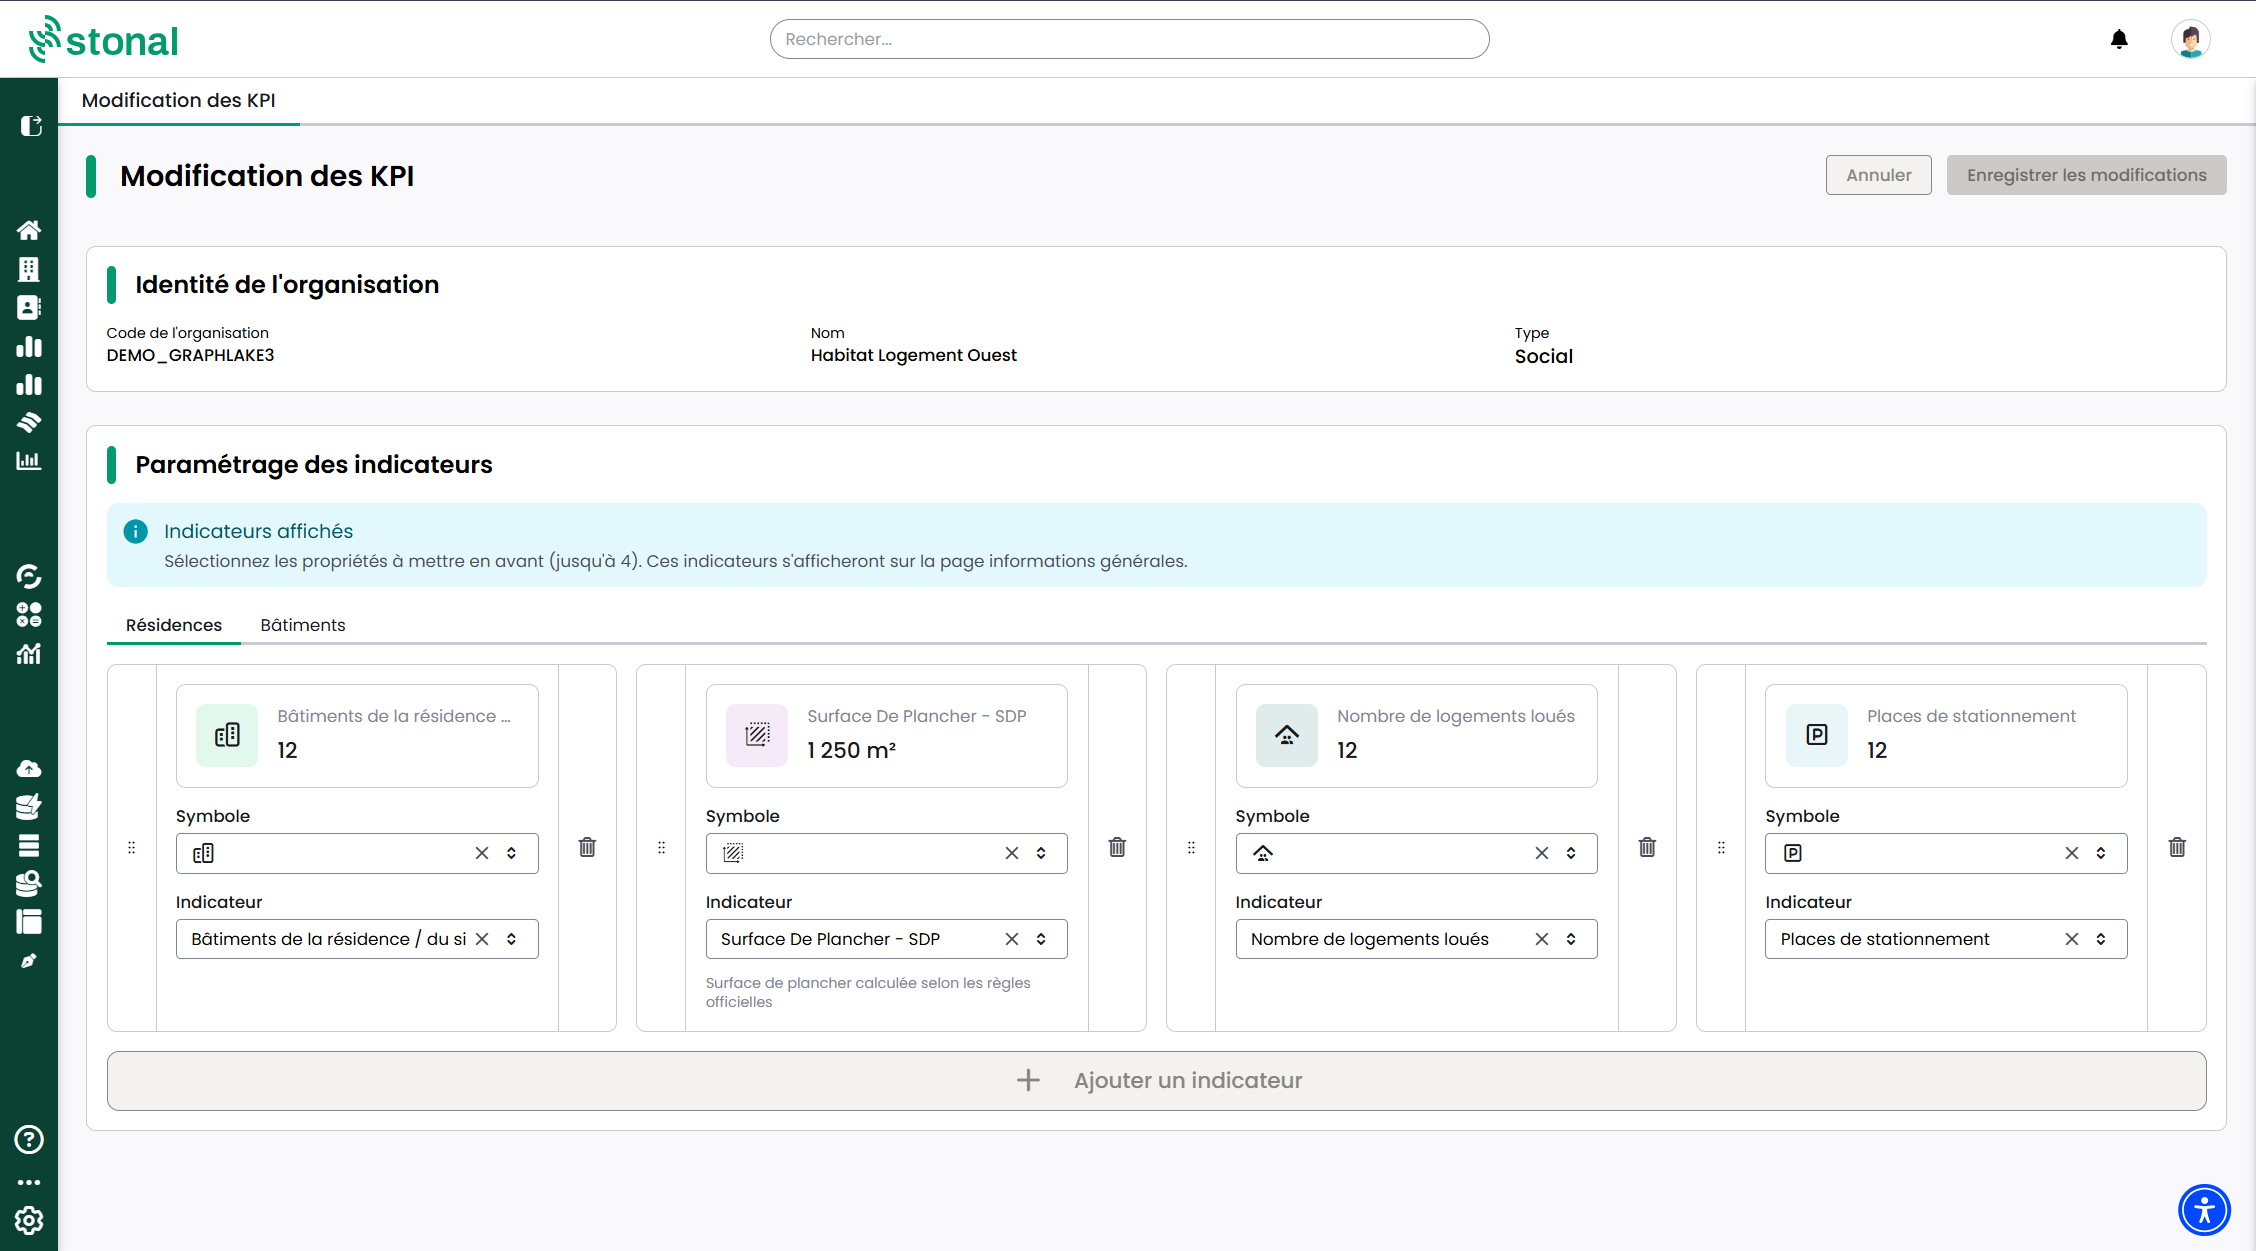
The page has two blocks:
1. **Organisation identity**: its code, name and type, read-only, together with the **Display service
provisions** switch.
2. **Indicator settings** — one tab per property type present in your portfolio (Establishments,
Properties, Buildings), with up to four indicators each.
If your organisation holds no items of a given type, the matching tab does not appear.
## Step by step
### Show or hide service provisions
1. In the **Organisation identity** block, flip the **Display service provisions** switch.
2. Click **Save changes**.
Once the display is on, service provisions appear on the sheet of every piece of equipment and on the
sheet of every unit. Until you save, **Cancel** puts the switch back to its previous state.
### Add an indicator
1. Open the tab of the property type concerned.
2. Click **+ Add an indicator**.
3. Choose the **property** — the list is tailored to the property type and comes from your reference
data.
4. Choose the **icon**.
5. Click **Save changes**.
### Modify or delete
Change the property or the icon on the row, then save. To delete, use the 🗑️ icon on the row, then
save.
**Cancel** remains possible as long as you have not saved.
To change the display order of the indicators, drag them by their numbered handle.
## Good to know
:::info Service provisions are hidden by default
Until someone turns on **Display service provisions**, no service provision is visible in your organisation. The
setting applies to all your users.
Seeing service provisions requires nothing more. Creating, editing or deleting them depends on the rights
you have been granted: you may not have access. If you need it, speak to your Stonal contact.
:::
:::info The setting is global
A configuration made for "Properties" applies to **every** property in your organisation. You cannot
set indicators property by property, but you can have different configurations between Properties and
Buildings.
Your changes are visible to all users the next time they sign in.
:::
Three recommendations:
- **Three to four indicators** give the most balanced result. With no indicator configured, the block
does not appear at all.
- Prefer properties that **hold a value on most of your properties**: an indicator that is often empty
loses its point.
- The labels are those of your **reference data**. To rename one, speak to your Stonal contact.
Only properties **compatible with the property type** are offered. If a property you expected does not
appear, contact your Stonal contact.
## See also
- [General information for a property](/guide/vue-densemble/mes-residences/informations-generales) — where your
indicators appear
- [User management](/guide/administration/gestion-des-utilisateurs)
---
# The component type reference
URL: https://docs.stonal.io/fr/guide/administration/referentiel-types-de-composant
# The component type reference
## What it is for
Your portfolio is described with a **shared vocabulary**: every element — building, dwelling, wall,
boiler, lift — matches a **component type** in the reference.
This report lets you **explore that reference**: which types exist, under which name and which code,
and how they relate to one another.
Examples of when it comes in useful:
- before building a query, to know **which type to target** and the name it goes under;
- when you come across an **unfamiliar label** in an export or in the platform;
- when you want to know **whether a piece of equipment is described** in the portfolio, or **what it
is called**.
## How to get there
⚙️ **Settings** in the sidebar › **Reference: component types**.
## Finding a component
Two filters let you search:
| Filter | What it lets you do |
|---|---|
| **Component name** | Search by name — "boiler", "fence"… |
| **Component code** | Search by the reference code, if you know it |
:::tip Accents and capitals do not matter
"cloture", "Clôture" and "CLOTURE" all return the same result. So you can type the simplest form,
without worrying about how the label was entered.
:::
The **Component name** filter searches every level of the reference, down to the finest
characteristic. Searching "gate" therefore finds both a family and the precise variant carrying that
word.
## Good to know
This reference describes **the types**, not your components themselves. To find a given piece of
equipment in a property, go through
[Querying your data](/guide/qualite-donnees/requeter-les-donnees) or the search in the
[Plans](/guide/vue-densemble/mes-residences/plans) tab.
The reference is **shared across organisations**: you only see the types actually present in your
portfolio, but their names and codes are not configurable per organisation. If a label looks wrong to
you, raise it with your usual contact.
## See also
- [Querying your data](/guide/qualite-donnees/requeter-les-donnees) — using these types in a query
- [Checking your data](/guide/qualite-donnees/controler-les-donnees) — volumes per type
---
# Making your data reliable
URL: https://docs.stonal.io/fr/guide/administration/monitoring/fiabilisation-des-donnees
# Making your data reliable
## What it is for
Your portfolio is described in Stonal as a nesting: a property contains buildings, a building
contains zones, a zone contains equipment.
This report lists the places where **that nesting does not hold**: a building attached to no
property, an empty property, a zone still present although the building containing it has left
the portfolio.
These inconsistencies are not just awkward to read: **they distort figures elsewhere**. A
building attached to nothing can go missing from the counters on the home page or from a report,
with nothing to flag it.
## How to get there
⚙️ **Settings** in the sidebar › **Monitoring** group › **Data reliability**.
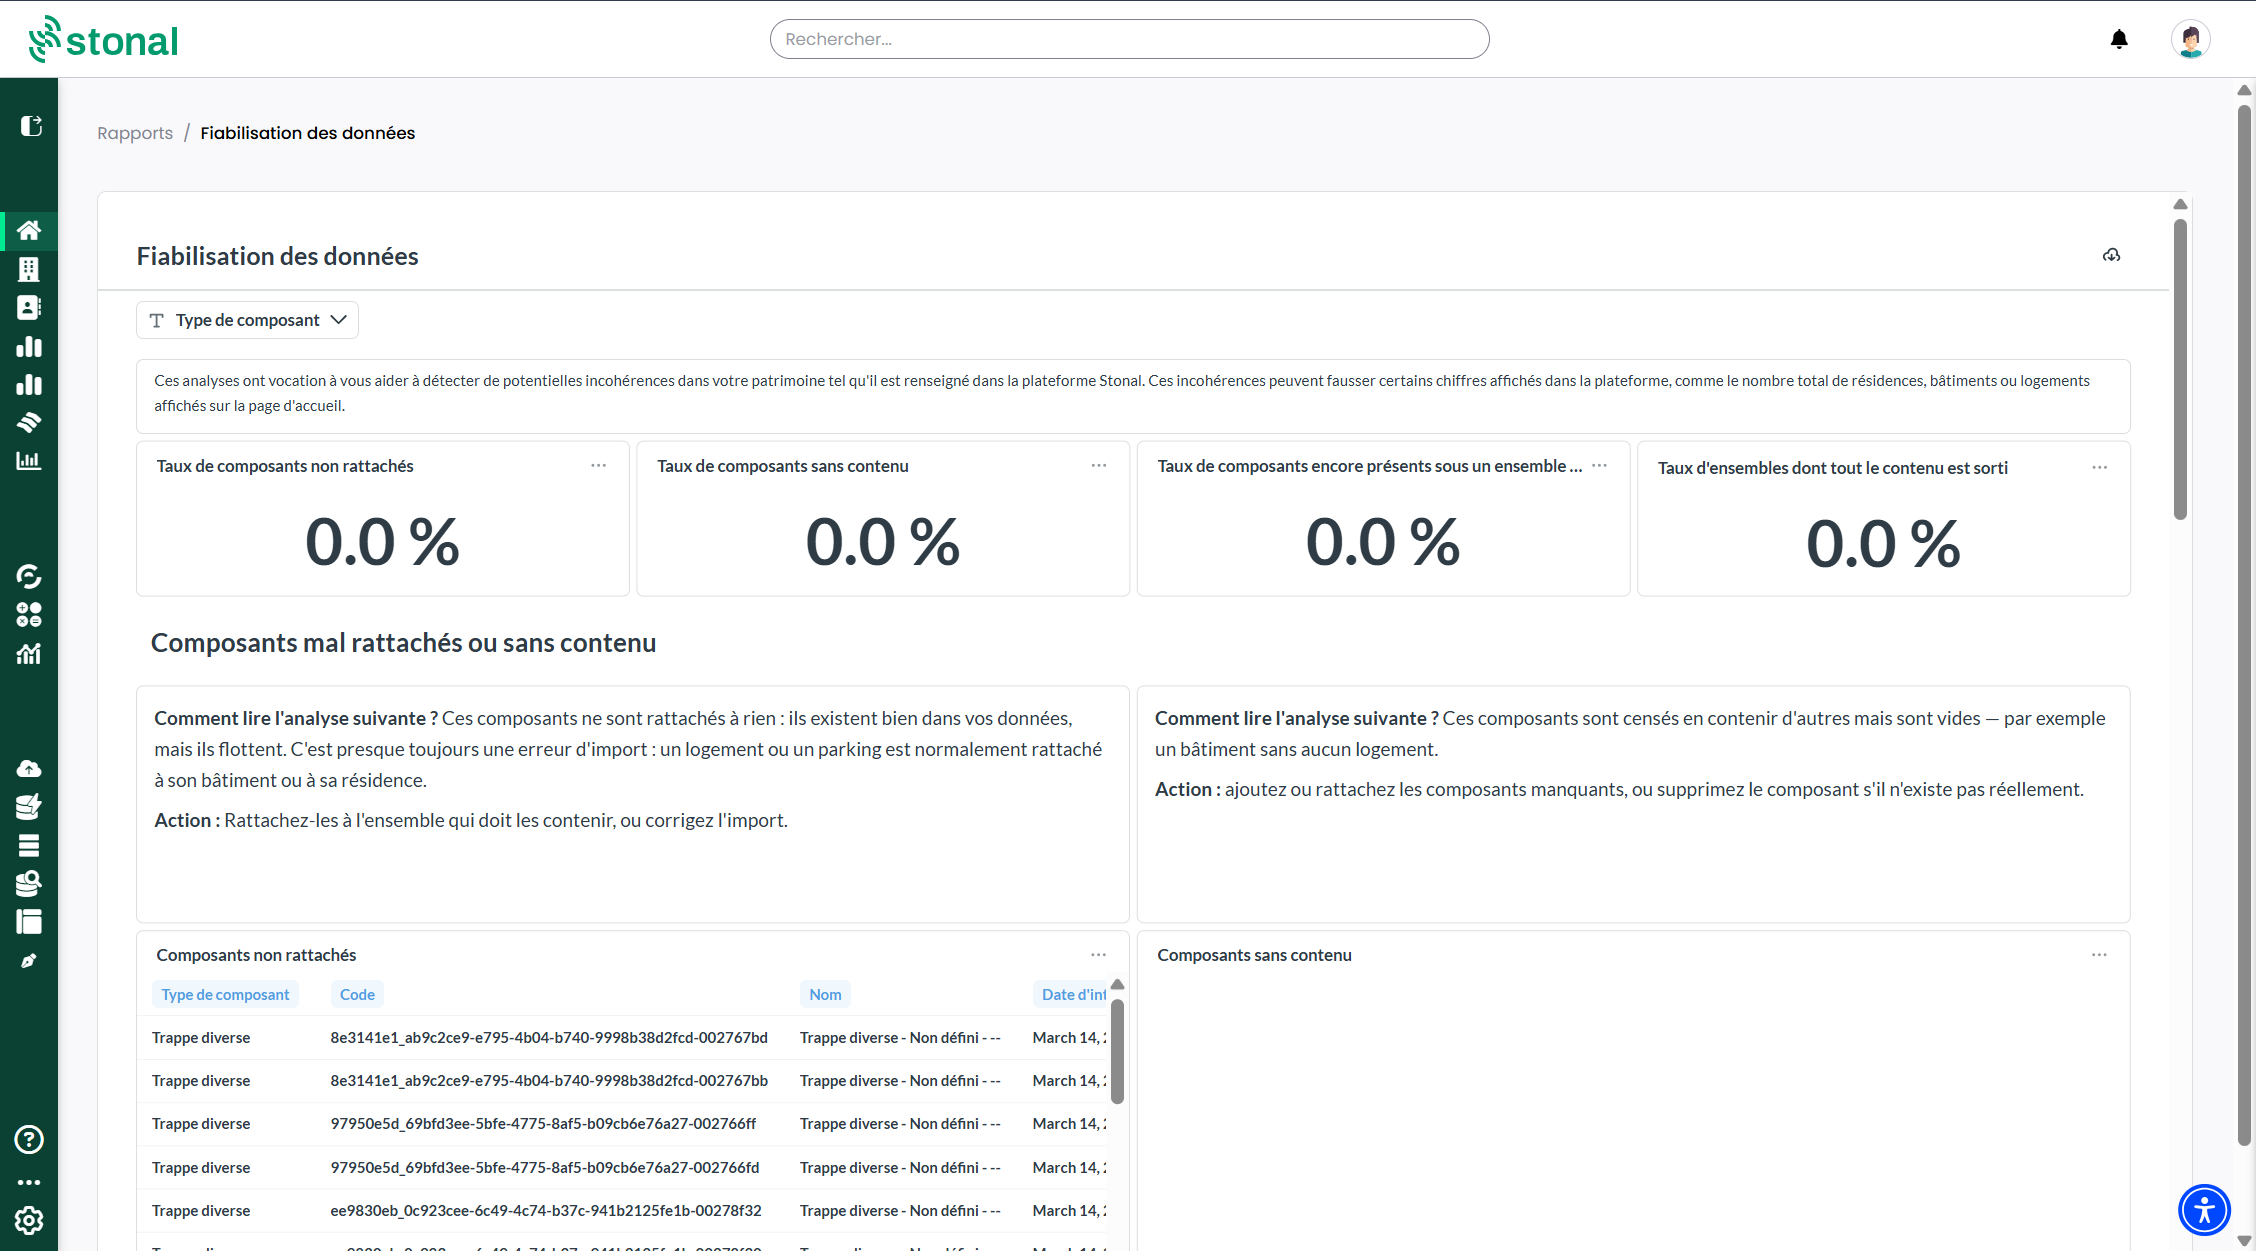
## The four anomalies tracked
At the top of the page, four percentages give you the scale of the problem. Below them, four
tables tell you exactly **which** of your components are affected.
### Unattached components
A component that is **attached to nothing**: a building belonging to no property, a zone
belonging to no building.
It does exist in your data, but it floats. This is the most common anomaly, and the one that most
often explains a discrepancy in a count.
### Components with no content
The opposite: an **empty** container. A property with no building, a building with no zone.
Only components meant to contain something are checked. A unit or a parking space never appears
here: they are terminal components, and it is normal for them to contain nothing.
### Components still present under an exited group
A zone **still in your portfolio** although the building containing it has left it — sold,
demolished.
In almost every case this is an exit that was not propagated: the building was dealt with, its
contents were forgotten.
### Groups still present although all their content has gone
A building still present although **everything** it contained has left. Normally it should have
left too.
:::tip This indicator should stay at zero
Unlike the other three, this one is not a counter to bring down: it is an alarm. When all of a
group's content leaves, the group leaves with it. If it shows anything other than 0, an exit went
wrong.
:::
## Reading the percentages
Each rate is measured against **the population that can actually be affected**, not against your
whole portfolio.
"3% of components with no content" means 3% of the components meant to contain something — not 3%
of your entire portfolio. That is what makes the figure readable: across 50,000 units, an anomaly
measured against the total would always sit near zero and tell you nothing.
## Finding the components affected
For each component, every table gives its **type**, its **code**, its **name** and its
**integration date**.
Three filters narrow the view: **Agency**, **Component type**, and the **identifier** of one
specific component.
:::tip The integration date is often the best lead
Anomalies sharing the same date usually come from the same load. Dealing with them as a batch is
quicker than component by component.
:::
## Correcting
The attachments between components come from **your source data**. They cannot be corrected from
the platform's screens: neither a component's record in
[Checking your data](/guide/qualite-donnees/controler-les-donnees) nor the bulk edit in the
[query tool](/guide/qualite-donnees/requeter-les-donnees) lets you change what a component is
attached to.
**Export the list, then speak to your usual contact**: the correction happens upstream, where your
data is produced.
## See also
- [Checking your data](/guide/qualite-donnees/controler-les-donnees) — where a value came from and
its history, component by component
- [The home page](/guide/vue-densemble/accueil) — the counters these inconsistencies can distort
- [Equipment dates and conditions](/guide/administration/monitoring/dates-et-etats-des-equipements) — the other report in the Monitoring group,
for the renewal dates and conditions of your equipment
---
# Knowing whether you can trust the condition of your equipment
URL: https://docs.stonal.io/fr/guide/administration/monitoring/dates-et-etats-des-equipements
# Knowing whether you can trust the condition of your equipment
## What it is for
A multi-year works plan is only as good as the data behind it: the **date of last renewal** of
each piece of equipment and its **general condition**. If a date was copied by default, or a
condition was never surveyed, the plan schedules works where none are needed, or misses them
where they are.
This report shows your equipment and coverings **from two angles that can be compared**, then
shows you **what is left to make reliable and how to correct it**:
- the **general condition** is what was **observed** during a survey (visit, diagnostic,
import);
- the **theoretical condition** is the condition a component **should be in given its age**. It
is calculated automatically from its date of last renewal and the lifespan expected for its
type.
When the two agree, your dates are reliable and your portfolio is ageing normally. When they
differ, that is where to look.
## How to get there
⚙️ **Settings** in the sidebar › **Monitoring** group › **Dates et états des équipements**. If it does not appear in your menu, contact your referent.
The report is read-only: corrections are made in the platform; the report measures and tells you
where to act.
## The four tabs
| Tab | What it is for |
|---|---|
| **1 · Synthèse du parc** (portfolio overview) | The picture of your portfolio: what it contains, the average observed condition, the average expected condition, the age of your components and where your data comes from. |
| **2 · Fiabilisation des dates et des états** (making dates and conditions reliable) | What is left to correct, and which query to start with. See [Making dates and conditions reliable](/guide/administration/monitoring/dates-et-etats-des-equipements/fiabiliser-les-dates-et-les-etats). |
| **3 · Vétusté par corps d'état** (wear by trade) | The same reading by trade, by equipment family, then by equipment. See [Reading wear](/guide/administration/monitoring/dates-et-etats-des-equipements/lire-la-vetuste). |
| **4 · Vétusté par résidence et bâtiment** (wear by property and building) | The buildings to make reliable first, then the reading property by property. See [Reading wear](/guide/administration/monitoring/dates-et-etats-des-equipements/lire-la-vetuste). |
## The filters
The filters at the top of the page apply to all four tabs.
| Filter | What it does |
|---|---|
| **Résidence**, **Bâtiment**, **Usage** | Narrow the reading to part of the portfolio. The building list follows the property and use you selected. |
| **Périmètre** | **Composants prioritaires** (priority components, the default) or **Tous les composants** (all components). Priority components are those whose date of last renewal and condition are expected first: major technical equipment, exterior doors and joinery, terminal units, building envelope, fittings. |
| **Corps d'état**, **Famille d'équipement**, **Équipement** | Go down from one level to the next in the component types: for example Roofing, then Flat roof covering. |
:::tip Start with a family you know
The report speaks most clearly at the scale of one property and one equipment family. If you know
all your roofs were redone in 2018, a different date stands out immediately.
:::
## Reading the portfolio overview
### What your portfolio contains
The **Résidences** and **Bâtiments** tiles count those that have components within the filters.
Below them, three figures complete the reading: those **without a construction date**, those
**without components**, and the **total**.
**Equipment** and **coverings** are counted separately. Coverings (wall, ceiling and floor
finishes, facade coverings) are managed by surface, not by unit; they are all treated as
priority components.
### The average general condition
The gauge gives the average of the conditions entered, on the same scale as in the platform: very
good 1, good 2, fair 3, poor 4, critical or dangerous 5. "Indéfini" (undefined) and empty
conditions are not counted.
**Always read the tile below it**: it tells you how many components the average rests on, and
what share of the scope that is. A portfolio that has seldom been surveyed gives an average that
only represents the components that were seen.
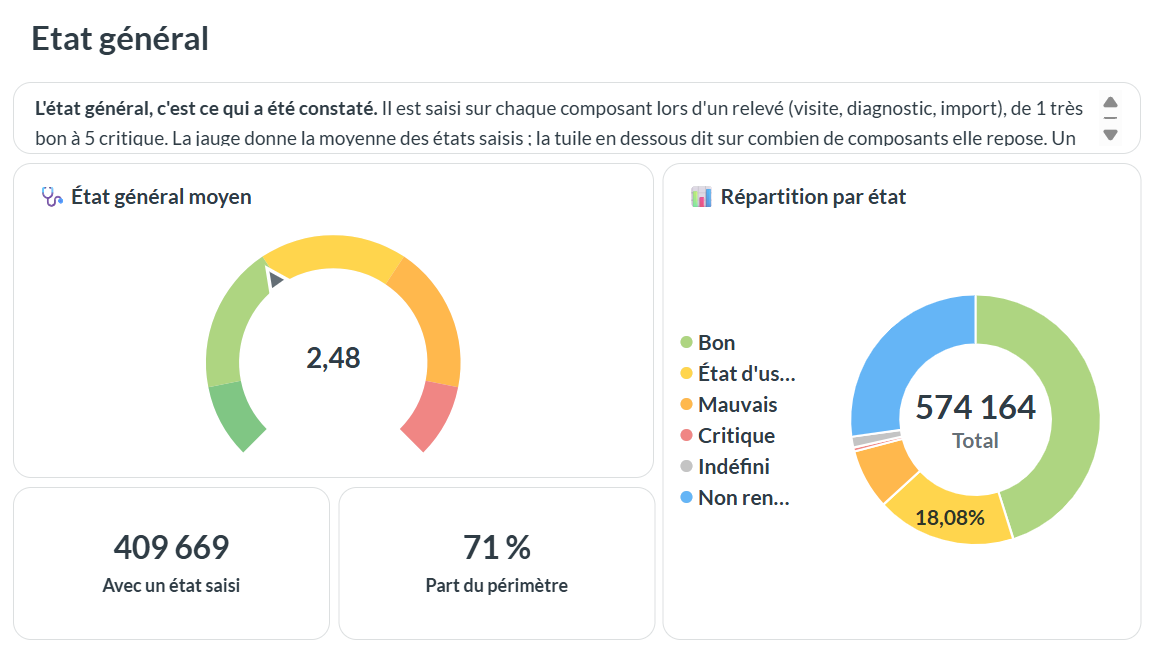
### The average theoretical condition
The theoretical condition depends on how much of the lifespan has been used since the last
renewal:
| Lifespan used | Theoretical condition |
|---|---|
| less than 15% | 1 · Very good |
| 15 to 30% | 2 · Good |
| 30 to 70% | 3 · Fair |
| 70 to 90% | 4 · Poor |
| beyond, or lifespan exceeded | 5 · Critical |
It is only calculated for components whose **date of last renewal and lifespan are both known**.
The **Âge et durée de vie** (age and lifespan) chart shows the others as not calculable: unknown
lifespan, date earlier than construction, no date.
:::info Comparing the two gauges
If the observed condition is **much better** than the theoretical one, either the component has
been well maintained, or its renewal date is wrong: that is where to check. If it is **worse**,
maintenance has not kept up.
:::
### Where the data comes from
The two tables **Origine des états** and **Origine des DDR** tell you where your values come
from: entered by a user, modelling (digital model), file import, API or connector, or automatic
association.
A date of last renewal whose origin is **Association automatique** is the construction date
copied by the platform for lack of anything better: it is not a real works date.
## Good to know
- **Data is updated every night.** A correction made in the platform shows in the report the
next morning.
- **Low figures do not mean the report is wrong.** They often say the data is still missing:
survey dates rarely filled in, unknown lifespans. Bringing that to light is exactly what the
report is for.
## See also
- [Making dates and conditions reliable](/guide/administration/monitoring/dates-et-etats-des-equipements/fiabiliser-les-dates-et-les-etats) — what is left to
correct, rule by rule
- [Reading wear](/guide/administration/monitoring/dates-et-etats-des-equipements/lire-la-vetuste) — by trade, by property and by building
- [A building's equipment](/guide/vue-densemble/mes-residences/equipements) — where to find the
date of last renewal and the general condition of a piece of equipment
- [Building a multi-year works plan](/guide/workflows/plans-de-travaux) — what this data feeds
---
# Making your equipment dates and conditions reliable
URL: https://docs.stonal.io/fr/guide/administration/monitoring/dates-et-etats-des-equipements/fiabiliser-les-dates-et-les-etats
# Making your equipment dates and conditions reliable
## What it is for
The **2 · Fiabilisation des dates et des états** tab of the
[Dates et états des équipements](/guide/administration/monitoring/dates-et-etats-des-equipements) report is for the person who corrects the data. It
answers two questions: **how much is left to make reliable**, and **where to start**.
It does not correct anything itself: for each anomaly, it tells you which query to run and where
to enter the right value.
## How to get there
⚙️ **Settings** › **Monitoring** group › **Dates et états des équipements** › tab
**2 · Fiabilisation des dates et des états**.
## Conditions: are they recent?
Two indicators open the tab:
- **États relevés depuis moins de 5 ans** (conditions surveyed less than 5 years ago): the share
of your components whose general condition is filled in and was surveyed recently. A condition
surveyed fifteen years ago says little about the equipment today.
- **Durée de vie dépassée** (lifespan exceeded): the share of your components whose age, counted
from the date of last renewal, exceeds the lifespan expected for their type. Either the
equipment is original and overdue, or it was replaced without the date being updated.
The **Fraîcheur des états** (freshness of conditions) and **Durée de vie** (lifespan) charts
break these two figures down. Below them, **États saisis par classe** and **États théoriques par
classe** are read side by side: same scale, same classes, from 1 Very good to 5 Critical.
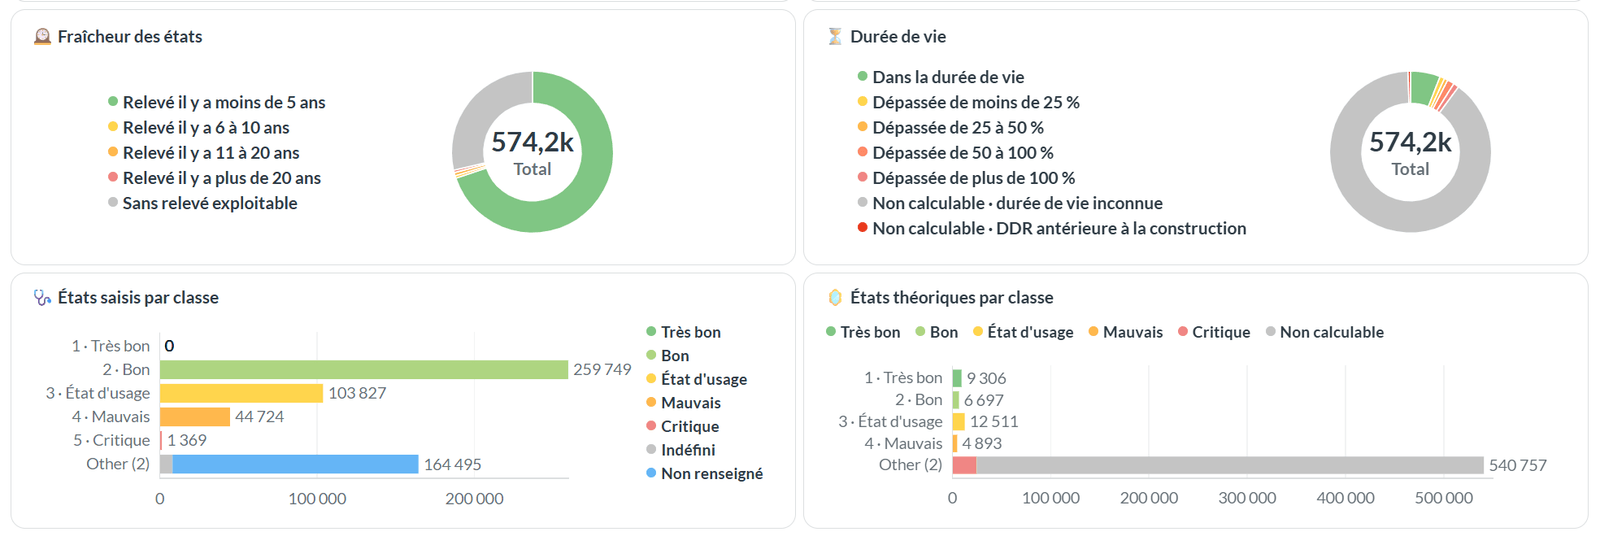
:::tip The survey date is still rarely filled in
The share of conditions surveyed less than 5 years ago is often very low at first. It rises as
the survey date is filled in during your visits and imports.
:::
## Dates: are they plausible?
- **DDR par année et construction**: your dated components, year by year, compared with the
construction year of the building (or else of the property). A bar dominated by "égale à la
construction" (equal to construction) almost always signals a **date copied by default**, not a
real works date.
- **DDR et construction**: the same total, all years combined: date earlier than, equal to or
later than construction, or construction date missing. A date **earlier than construction** is
impossible.
- **DDR par année et état**: your dated components, coloured by general condition. It brings
inconsistencies to light: equipment renewed recently but found in poor condition, or very old
equipment declared in very good condition.
## Correcting, rule by rule
The **Comment corriger** (how to correct) table, at the bottom of the tab, gives one rule per row
with the number of components affected, the share of the portfolio, a **severity** and the action
to take.
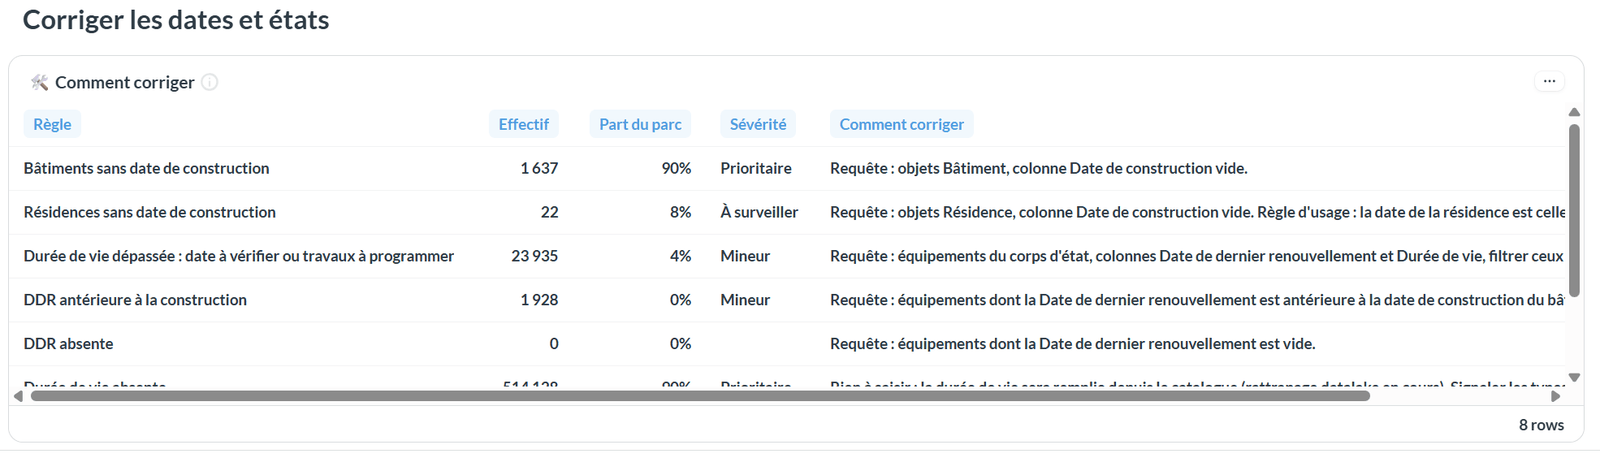
| Severity | Share of the portfolio affected |
|---|---|
| **Prioritaire** (priority) | 20% or more |
| **À surveiller** (to watch) | 5 to 20% |
| **Mineur** (minor) | less than 5% |
The first two rules concern buildings and properties and only follow the Résidence filter; the
others concern the filtered components.
| Rule | What to do |
|---|---|
| **Buildings without a construction date** | In the [query tool](/guide/qualite-donnees/requeter-les-donnees), start from buildings and display the Date de construction column: the empty rows are the ones to complete. |
| **Properties without a construction date** | Same query on properties. A property's date is that of its oldest building. |
| **Lifespan exceeded** | Query the equipment of the trade concerned with the Date de dernier renouvellement and Durée de vie columns. Check building by building: enter the real year if the equipment was replaced, otherwise schedule the works. |
| **Date of last renewal earlier than construction** | Query the equipment whose date of last renewal is earlier than the building's construction, and replace it at least with the construction year. |
| **Date of last renewal missing** | Query the equipment without a date of last renewal and complete it. |
| **Lifespan missing** | Nothing to enter on your side: the lifespan comes from the component type library. If a type has none, report it to your referent. |
| **General condition missing** | Query the equipment without a general condition. Survey it on site with [EDIT](/guide/qualite-donnees/edit) (component › Attributes › general condition), or enter it in bulk from the query tool. |
| **"Indéfini" condition** | Query the equipment whose general condition is Indéfini. A large number of Indéfini usually comes from an import: correct the source, or else enter a real value. |
:::warning Corrections show the next day
The report is recalculated every night. A correction made during the day only shows the next
morning: there is no point reloading the page to check it.
:::
## See also
- [Equipment dates and conditions](/guide/administration/monitoring/dates-et-etats-des-equipements) — reading the portfolio overview and the two
average conditions
- [Reading wear](/guide/administration/monitoring/dates-et-etats-des-equipements/lire-la-vetuste) — spotting the families and buildings to act on first
- [Querying your data](/guide/qualite-donnees/requeter-les-donnees) — building the query and
correcting in bulk
- [Running a site survey with EDIT](/guide/qualite-donnees/edit) — entering the general
condition on site
---
# Reading equipment wear by family and by building
URL: https://docs.stonal.io/fr/guide/administration/monitoring/dates-et-etats-des-equipements/lire-la-vetuste
# Reading equipment wear by family and by building
## What it is for
Tabs 3 and 4 of the [Dates et états des équipements](/guide/administration/monitoring/dates-et-etats-des-equipements) report use the same indicators,
but **row by row**: one equipment family, one property, one building. This is where you decide
**where to act first**.
## How to get there
⚙️ **Settings** › **Monitoring** group › **Dates et états des équipements** › tab
**3 · Vétusté par corps d'état** or **4 · Vétusté par résidence et bâtiment**.
## Wear by trade
Three tables, from broadest to finest: **Par corps d'état** (by trade), **Par famille
d'équipement** (by equipment family; for example, in heating and ventilation: terminal units,
heat production, ventilation), then **Par équipement** (by equipment). Rows are grouped under
their trade. The library code is shown in brackets after the label: it is what lets you find the
right type in the query tool.
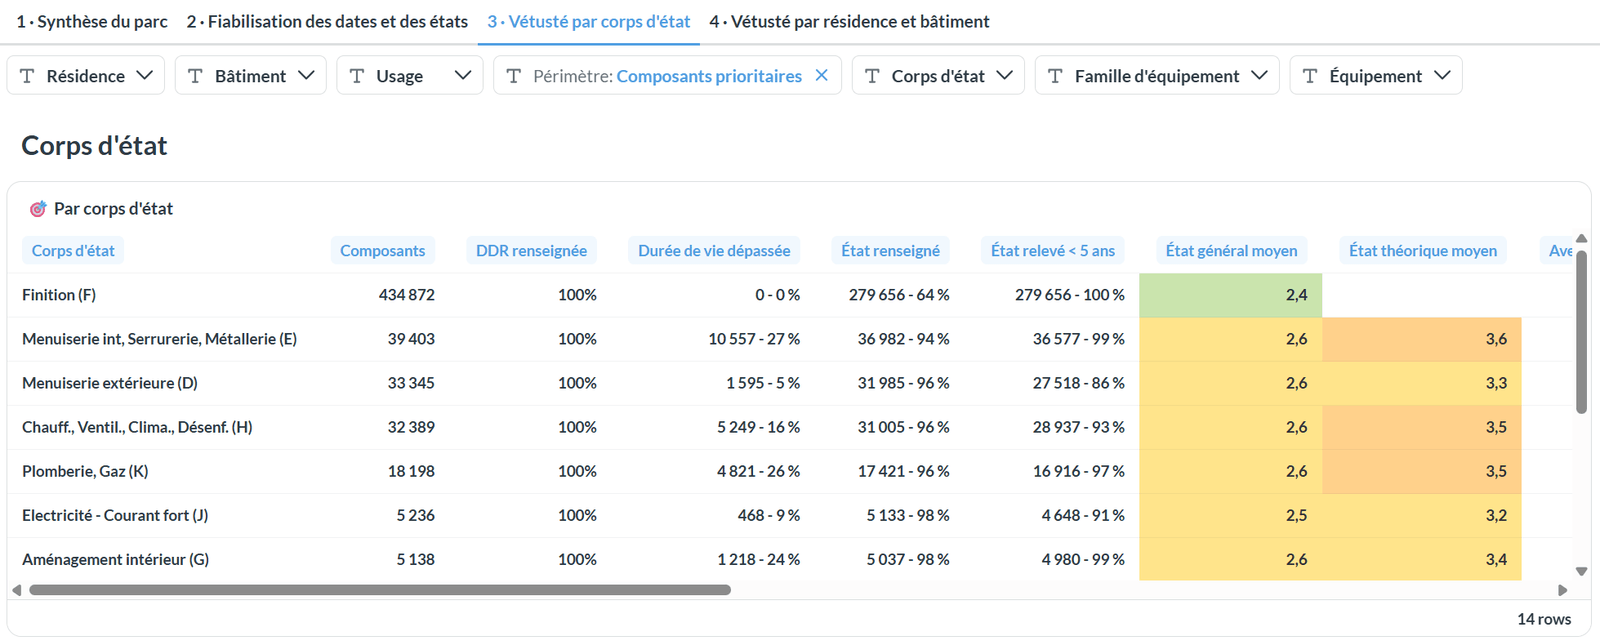
Each row gives:
| Column | What it tells you |
|---|---|
| Composants | the number of components in scope |
| DDR renseignée | how many have a date of last renewal |
| Durée de vie dépassée | among those with a date, how many have exceeded their lifespan |
| État renseigné | how many have a general condition (excluding Indéfini) |
| Relevé depuis moins de 5 ans | among those with a condition, how many were surveyed recently |
| État général moyen, état théorique moyen | on the scale from 1 very good to 5 critical |
| Mieux que l'âge | components whose observed condition is at least two classes better than the theoretical one: their date should be checked first |
| Lists of dates and conditions | the values present and their count; ★ marks the most frequent |
Shares are shown as "count - share". "<1%" means at least one component is affected.
:::tip The list of dates is often the most telling
A family where almost every date is the same, and equal to the construction year, has most likely
never been dated: it is a copied date, to be corrected.
:::
:::info Finishes are numerous
Finish coverings account for many components and can hide the other families. Remove them with
the **Corps d'état** filter to read the rest.
:::
## Wear by property and building
### Buildings to make reliable
The first table gives one row per building: construction date, last refurbishment, number of
components, number of distinct dates, and the list of dates and conditions (★ the most frequent).
It is sorted to put first what needs correcting: buildings **without a construction date** first,
then those whose most frequent date is **equal to construction**. When the building has no
construction date, the site's date is shown instead, marked "absente" (missing).
Each building's name opens its record in the platform, where you can correct it.
### By property
The **Par résidence** table uses the same reading as the trade table, property by property, sorted
by number of components. Properties without components in scope come last.
Two charts complete the reading, each limited to the 40 properties most affected:
- **État général par résidence**: the breakdown of the conditions entered, properties with the
highest share of poor and critical first;
- **Durée de vie dépassée par résidence**: the share within lifespan, exceeded by bracket, or not
calculable, most exceeded properties first.
## See also
- [Equipment dates and conditions](/guide/administration/monitoring/dates-et-etats-des-equipements) — the filters and the portfolio overview
- [Making dates and conditions reliable](/guide/administration/monitoring/dates-et-etats-des-equipements/fiabiliser-les-dates-et-les-etats) — the correction to make
for each anomaly
- [The component type reference](/guide/administration/referentiel-types-de-composant) — the
trades, families and codes of the library
---
# The Document tracking report
URL: https://docs.stonal.io/fr/guide/administration/gestion-documentaire/suivi-documentaire
# The Document tracking report
:::info Availability
This page concerns organisations running **Stonal Smartdoc** document management.
:::
## What it is for
This report complements the [Documents](/guide/vue-densemble/mes-residences/documents) tab: it lets
you track the **quality** and **completeness** of your documents, with an overview across **your
whole portfolio** — rather than property by property.
## How to get there
From the side navigation menu, open **Settings**, then, in the **Document management** block,
click **Document tracking**. The report is not in the Analysis reports menu.
## Before you start
:::info Requires Stonal's document management
This module is available to users who have **Stonal Smartdoc document management (GED)**. Access also
depends on the permissions you have been granted, so the link may not appear in your menu. If you
need it, ask your internal contact.
:::
## The six tabs
At the top of the report, filters apply to every tab: **Branch**, **Site/building code**,
**Site/building label** and **Document label**. The last one finds documents whose name contains
the text you type, regardless of accents and capital letters.
The report is refreshed **twice a day**, in the early afternoon and overnight: a document uploaded
in the morning appears in the afternoon, a document uploaded in the afternoon appears the next day.
### 1. Global indicators
A summary of your portfolio's documentary situation: the **total number of documents** per document
template, the **documents to file**, the **duplicates** and the **empty documents**, then the
**number of documents uploaded per month** and their breakdown by folder and by class.
The report distinguishes two kinds of duplicates:
- **true duplicates**: documents with the **same content**;
- **false duplicates**: documents with the **same name** but different content.
### 2. Documents to file, duplicates and obsolete documents
The named list of documents that need action:
- documents **waiting to be filed** in a folder;
- **empty** documents (a file with no data at all) and **corrupted** ones (a damaged PDF, unreadable
and impossible to classify automatically): delete them, then upload them again;
- **duplicate** documents, with the same content.
### 3. Users
Who feeds your document base: the **three users who uploaded the most documents** (over the last 30
days by default), then the **detail of uploads** and of **deletions**.
Filters specific to this tab let you choose a period (**From** and **To**) to list the documents
uploaded or deleted during that interval.
### 4. Mandatory documents
For each property, a **presence rate for the documents set as mandatory**, and the table of
documents present or missing.
If the tab shows "No results!", no document type has been set as mandatory for your organisation.
Configuration happens in [Document templates](/guide/administration/gestion-documentaire/modeles-documentaires): select
the template, then "Mandatory documents".
### 5. Metadata
The value drawn from information extracted automatically by Stonal's artificial intelligence: an
analysis **by document class carrying metadata** — surveys, deeds of sale, leases…
Three useful things to know about this tab:
- **filters by branch** and by **site or property**;
- an **export not subject to the usual 2,000-row limit**;
- **classes with no document are hidden automatically**, so you only read what concerns you.
### 6. Survey reliability
A targeted check on your regulatory surveys (energy performance certificate, asbestos, lead,
electricity, gas):
- surveys **linked to no unit and no building**, or linked to a building without a unit;
- energy performance certificates whose **ADEME number** is missing, malformed or shared by several
documents.
Each row links to the documents of the property concerned, so you can fix the link or the metadata
directly in SmartDoc. A filter by **survey class** narrows the analysis. The tab can take around
twenty seconds to load the first time.
:::info Expired certificates
Energy performance certificates past their validity date, or issued before the reform of 1 July 2021,
are counted separately and excluded from the ADEME number checks.
:::
## See also
- [The documents of a property](/guide/vue-densemble/mes-residences/documents) — the day-to-day work
- [Document templates](/guide/administration/gestion-documentaire/modeles-documentaires) — defining your mandatory
documents
---
# Configuring your document templates
URL: https://docs.stonal.io/fr/guide/administration/gestion-documentaire/modeles-documentaires
# Configuring your document templates
## What it is for
This is where you define how the documentation of your properties is organised: the **folders** and
their structure, and the **mandatory documents**.
:::info Restricting access to a folder happens elsewhere
Reserving a folder for certain users is not configured here. It has its own screen, described in
[Document permissions](/guide/administration/gestion-documentaire/habilitations-documentaires).
:::
It is the configuration counterpart of the [Documents](/guide/vue-densemble/mes-residences/documents) tab, and the
source of the configuration checked by the
[Document tracking](/guide/administration/gestion-documentaire/suivi-documentaire) report.
## How to get there
⚙️ **Settings** at the bottom of the menu › the **Document management** block › **Document
templates**.
## Before you start
You need the **Administration** permission, or the dedicated **"Configure document templates"**
permission, included by default in the Administration group.
## Step by step
### Create a template
A template is defined by a **name**, an **attachment type** and one or more **languages**.
The **attachment type** is what the template applies to: properties, buildings or tenants.
:::info The structure is shared
The folder structure of a documentation is the same for all your properties: you define it only once.
It can differ for buildings, though.
:::
### Create the folders from a CSV file
Rather than creating the folders one by one, you can **import your filing plan as a CSV file**: all
the folders and sub-folders of the template are then created in one go.
The import is offered at two moments:
- **when creating the template**, in the **"Folder structure (optional)"** block ›
**"Import a .csv file"**;
- **on a template already created but still empty**, with the **"Import a folder structure"** button.
:::warning The import is only offered on an empty template
As soon as the template contains at least one folder, the import button disappears: only **"Export
the folder structure"** remains. The import **adds** folders, it never replaces the existing ones. To
start again from a corrected file, create a new template.
:::
:::tip Starting from an export is the simplest way
On any template already filled in, the **"Export the folder structure"** button produces a CSV file
that can be **re-imported as is**. This is the most reliable way to get a file in the right format:
export it, replace the lines with your own, import it back.
:::
**The file format.** A `.csv` encoded in **UTF-8**, with the **semicolon** `;` as separator. In Excel,
choose "CSV UTF-8 (semicolon delimited)" when saving: the default "CSV" format is not UTF-8 and your
accented characters will be damaged.
**The first line is a header line**, mandatory and not imported. It carries exactly these three
labels, in this order:
```text
Folder Number;Folder Name;Document Class
```
Then one line per folder:
| Column | Mandatory | Content |
|---|---|---|
| `Folder Number` | yes | the folder number, levels separated by dots: `1`, `2`, `2.1`, `2.1.1` |
| `Folder Name` | yes | the displayed name of the folder |
| `Document Class` | no | the code of the document class to associate with the folder, left empty if you associate none |
For example:
```text
Folder Number;Folder Name;Document Class
1;ORGANISME;
1.1;Identification;
1.2;Autorisations;
2;DESCRIPTION DU BIEN;
2.1;Note désignation;
2.2;Surface et plans géomètre;
3;DIAGNOSTICS TECHNIQUES;
3.1;DPE;DPE
3.2;Amiante;DIAGNOSTIC_AMIANTE
```
**The numbering describes the filing plan**, it is not decorative: this is what blocks people most
often. Four rules, all checked on import:
- the **first line** carries the number `1`;
- two folders at the **same level** follow each other without a gap: `1`, `2`, `3`… and `2.1`, `2.2`,
`2.3`…;
- a **sub-folder** always starts at `1`: the first sub-folder of `2` is `2.1`, never `2.2`;
- each folder is **immediately followed by its sub-folders**, before moving on to the next folder at
the same level.
In other words, the order of the lines in the file is the reading order of the filing plan, from top
to bottom.
**If the file does not comply**, no folder is created and the message displayed points to the rule at
fault:
| Message displayed | What to fix |
|---|---|
| The file contains a folder without a name. | A line has a number but no name, often a separator line, or an empty line at the bottom of the file left over by the spreadsheet. |
| The file contains a folder without a number. | A line has nothing in the first column: either a name without a number, or an empty line, including the ones your spreadsheet leaves at the end of the file. |
| The file contains an empty line. | Remove the empty lines, including at the end of the file. |
| The numbering of the first folder must start with 1. | The first line after the header must carry the number `1`. |
| The numbering of folders at the same level must be continuous. | A number was skipped between two folders at the same level. |
| The numbering of child folders must be continuous. | A first sub-folder does not start at `1`. |
| The numbering of parent folders must be continuous. | A line goes back up a level without picking up the numbering of that level. |
| The file selected is not in .csv format. | The file does not have the `.csv` extension, save it again from your spreadsheet software. |
**A few traps worth knowing:**
- **No quotation marks and no semicolon inside names.** The semicolon separates columns: a name
containing one is cut in two. Quotation marks are not interpreted, they would be kept as they are
in the folder name.
- **The header line carries only three labels**, with no trailing semicolon. On folder lines, on the
other hand, a final semicolon followed by nothing is normal: that is the "class" column left empty.
- **Classes are not created by the import.** A code unknown to your organisation is not added to the
reference data. When in doubt, leave the column empty and associate the classes afterwards from the
interface, folder by folder.
- **Names are imported in French.** If your template is multilingual, the other languages still have
to be entered from the interface.
- The folders stay fully editable after the import: rename, move, delete, associate a class.
### Manage the folders of a template
You can add sub-folders, rename them, move them, delete them, and **associate a document class**
with a folder.
To move a folder, drag it: where you drop it decides the result.
| Where you drop the folder | Result |
|---|---|
| Top of another folder | Placed just before it, at the same level |
| Bottom of another folder | Placed just after it, at the same level |
| Middle of another folder | Filed inside it, as a sub-folder |
That association is what triggers **automatic filing**: every document recognised as belonging to a
class goes straight to the folder associated with it. So take the time to associate a class with each
of your folders — it is the condition for your documents to file themselves.
An **"To be filed"** folder exists by default: documents land there on upload, while the artificial
intelligence processes them.
### Assign the template
**By default the template is made available on every property or every building** in your portfolio —
depending on its attachment type.
You can turn that off to make it available on **a few specific properties or buildings** only.
### Define the mandatory documents
Select the template, open **"Mandatory documents"**, then choose the classes matching the documents
**you** treat as mandatory.
Two effects follow:
- a **"mandatory documents unavailable"** counter and the **"Missing documents"** detail appear on the
Documents tab of your properties;
- a dedicated tab becomes active in the Document tracking report.
:::warning Two limits worth knowing
The check does not handle **expiry**: an out-of-date EPC counts as present. And it applies **at
property level only**, neither to units nor to buildings.
:::
## See also
- [The documents of a property](/guide/vue-densemble/mes-residences/documents) — on the user side
- [Document actions](/guide/administration/gestion-documentaire/actions-documentaires) — bulk import and modification
- [Document permissions](/guide/administration/gestion-documentaire/habilitations-documentaires) — reserving a folder for certain groups
- [User management](/guide/administration/gestion-des-utilisateurs) — creating the groups
---
# Importing and modifying documents in bulk
URL: https://docs.stonal.io/fr/guide/administration/gestion-documentaire/actions-documentaires
# Importing and modifying documents in bulk
## What it is for
When you have several thousand documents to load into the platform, or a whole series to reclassify,
we recommend using the **document actions** on this screen rather than going property by property
through the Documents tab.
## How to get there
⚙️ **Settings** › **Document actions**.
## Before you start
These actions depend on the permissions you have been granted — the **"Advanced document actions"**
permission. You may not have access to them: if you need them, ask your internal contact.
## Step by step
### Import a batch of documents
1. Open Settings › **"Import documents"**.
2. Fill in the **configuration file** in CSV format, with **one row per document**:
| Column | Required | Where to find it |
|---|---|---|
| **File name** (with its extension) | Yes | |
| **Property code** (or building code) | Yes | It is the code of your property or building. You can also take the one shown in the property's URL |
| **Document template identifier** | Yes | Settings › Document templates |
| Folder identifier | No | |
| Class code | No | |
3. Import the configuration file. The platform **checks it is valid** — that the properties and templates
really exist. If there is an error, correct it and import again.
4. Once the file is valid, **upload the documents**. They are filed according to your file and appear
in the Documents tab of each property.
If you leave the folder and class empty, the **artificial intelligence** determines them. The result is
visible in the property's imported document tracking.
### Reclassify several documents
Upload a **reclassification file** on the bulk document actions page. After processing, a summary is
presented to you; the listed documents change class and/or folder.
## Good to know
Four precautions that avoid unpleasant surprises:
- **Do not change the column headers** of the configuration file.
- **No empty rows at the end of the file**: the resulting error message is misleading.
- Save in **CSV** format.
- **Run a first test with a few documents** before launching your full batch.
:::warning The limit is 5 GB per import
This limit covers the configuration file and the documents. There is no limit on the number: work in
batches. As a rough guide, around 4,000 documents (4.1 GB) take in the order of an hour and ten
minutes.
:::
Do not navigate away during the import — open another browser tab if you need to work in parallel.
## See also
- [Document templates](/guide/administration/gestion-documentaire/modeles-documentaires) — where to find the template
identifier
- [The documents of a property](/guide/vue-densemble/mes-residences/documents)
---
# Restricting access to certain folders
URL: https://docs.stonal.io/fr/guide/administration/gestion-documentaire/habilitations-documentaires
# Restricting access to certain folders
## What it is for
Some documents are not for everyone to see: a litigation folder, tenant-related papers, financial
items. This is where you reserve those folders for the people concerned.
:::info By default every folder is open
Until a permission has been set, **every folder is accessible to every user**. These permissions exist
to **restrict** access, not to grant it: you only deal with them if you want to reserve certain
folders.
:::
## How to get there
⚙️ **Settings** in the sidebar › **Document management** › **Documentary permissions**.
It is a screen of its own, at the same level as Document templates. You do not go through the
templates to get to it.
## Step by step
The screen lists your **user groups**. Pick the one you want to restrict, then select the folders it
has access to. The screen you land on is titled **Access authorisation**, followed by the name of the
group you picked.
The user groups are the ones defined in
[User management](/guide/administration/gestion-des-utilisateurs): that is where you create a group
and put people in it.
## The two rules to know
- As soon as a folder is reserved for one or more groups, **only members of those groups** see it.
- A user who belongs to several groups gets the permissions of each of those groups.
## What the user sees
In the [Documents](/guide/vue-densemble/mes-residences/documents) tab, only the folders they have
access to appear. A reserved folder is not greyed out — it is simply absent.
:::warning Unfiled documents escape this restriction
A document still **to be filed** remains visible to anyone who reaches the documentation, for as long
as it is not filed into a folder. A sensitive document is therefore only protected once it has been
filed — one more reason not to let the queue pile up.
:::
## See also
- [Document templates](/guide/administration/gestion-documentaire/modeles-documentaires) — defining
the folders themselves
- [User management](/guide/administration/gestion-des-utilisateurs) — creating the groups
- [The documents of a property](/guide/vue-densemble/mes-residences/documents)
---
# Platform - Plans tab (Model)
URL: https://docs.stonal.io/fr/guide/versions-anterieures/plateforme-onglet-plans-model
# Platform - Plans tab (Model)
:::info Availability
This page concerns organisations still on **Abyla** (the Model interface).
:::
## What it is for
:::info This interface belongs to earlier versions
If your organisation is still on an earlier version of our plan management tool, **Model On Platform**
is what you see in the Plans tab. It is built on **Abyla**.
On the latest version, this tab is the one described in
[Plans](/guide/vue-densemble/mes-residences/plans).
:::
This tab lets you view the **digital models** of the selected property or building. The same data also
feeds your **analysis reports**.
## The screen explained
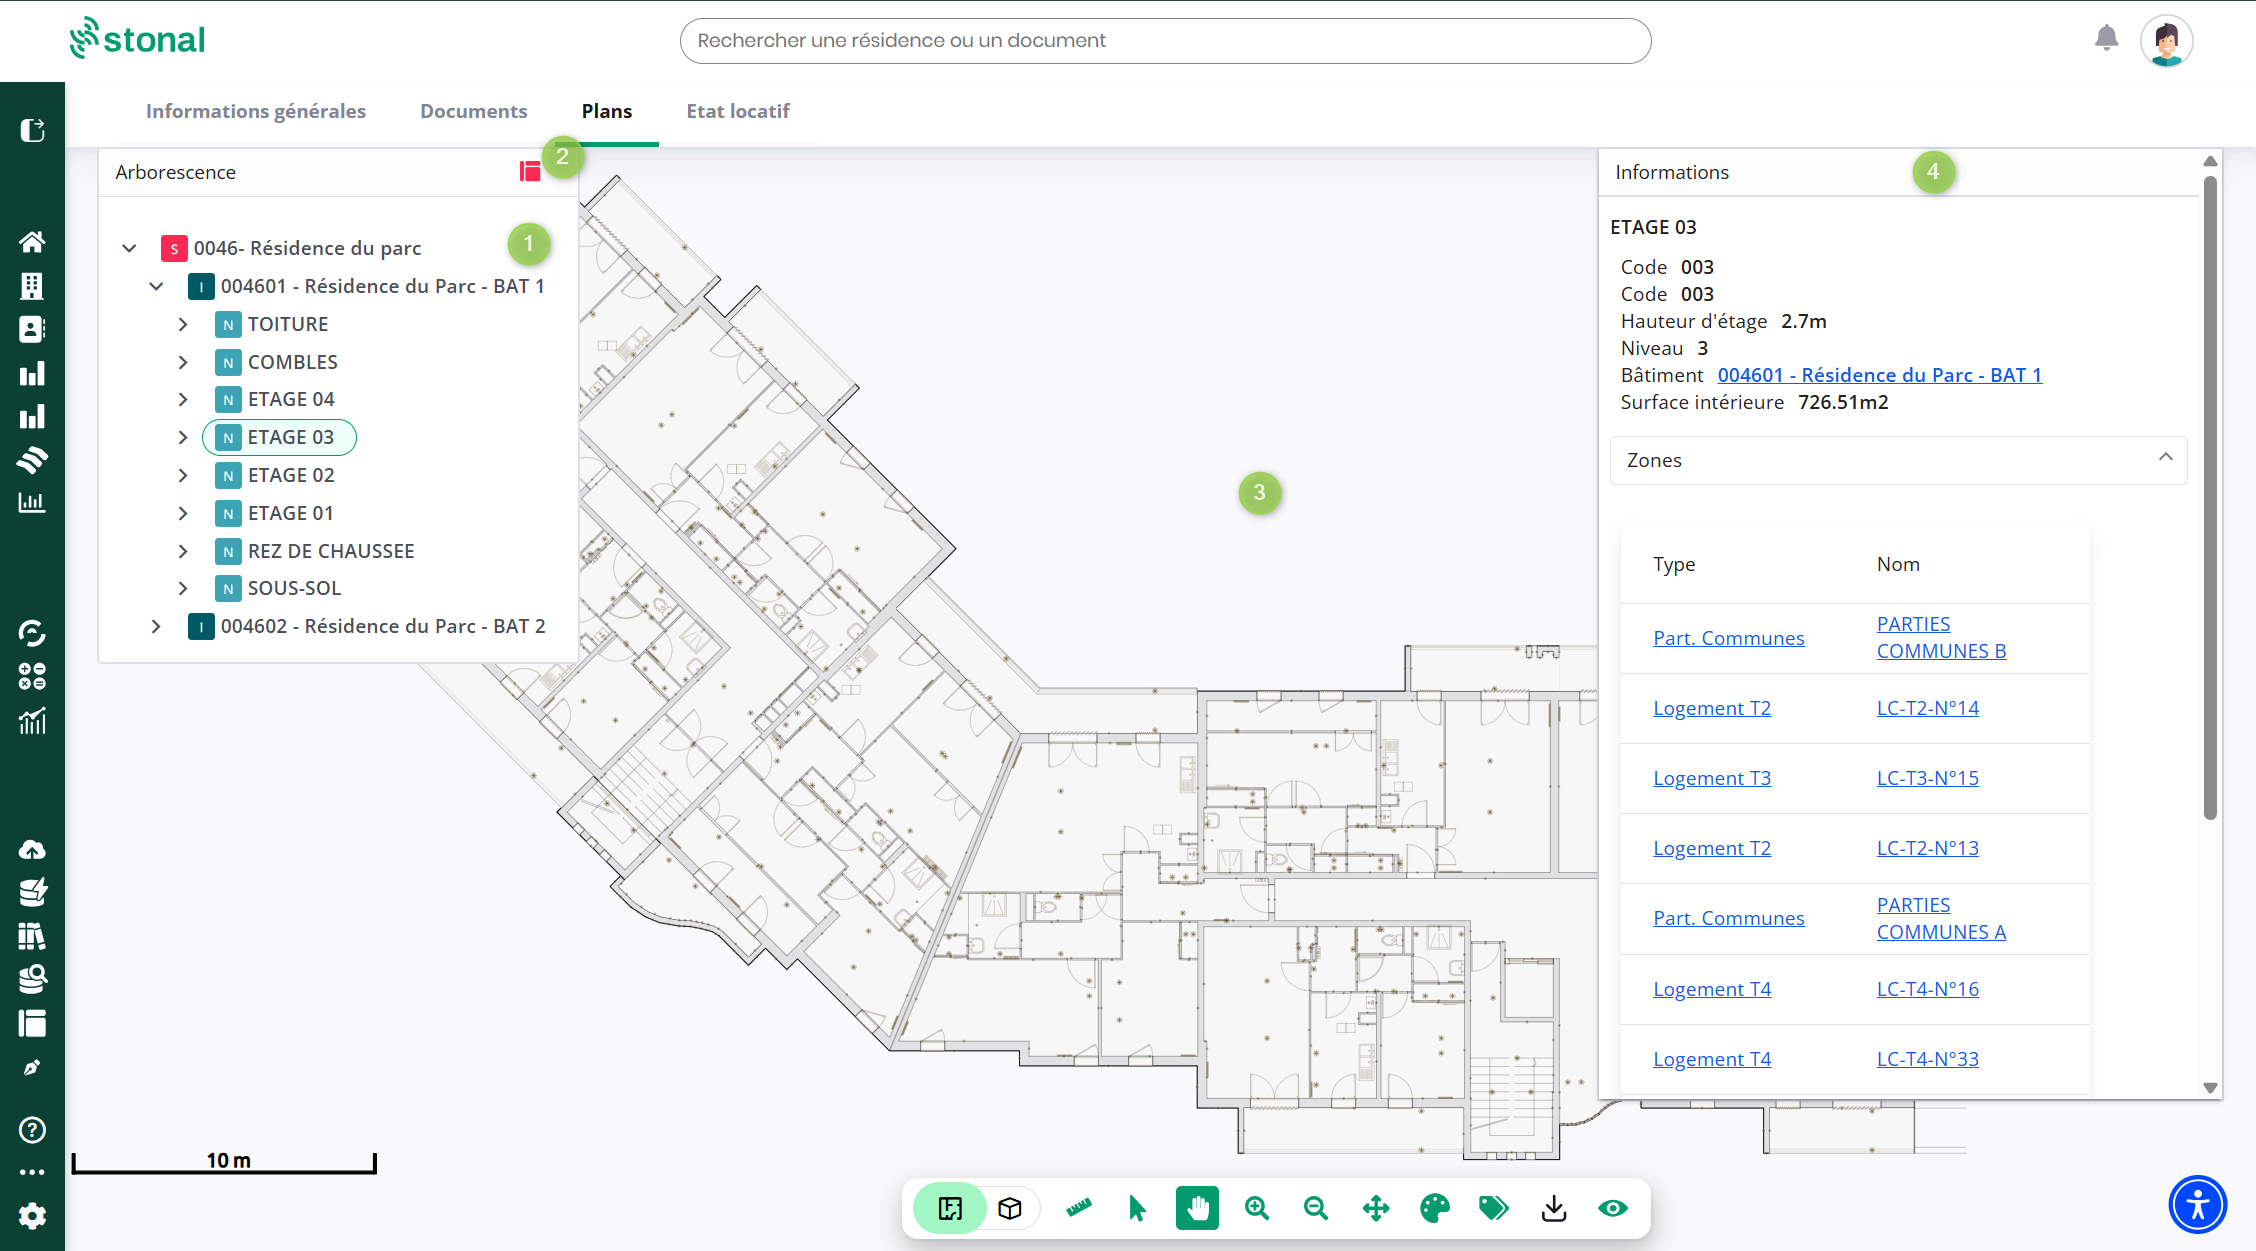
| Marker | What it gives you |
|---|---|
| 1 | **Tree** — the breakdown of the property or building. Expand it and select an element to zoom in on it |
| 2 | **Model** — open [Model](/guide/versions-anterieures/model), the 3D model viewer |
| 3 | **Plan** — the viewing area |
| 4 | **Information panel** — for the selected element, all its information: renewal date, make, equipment type… |
The information panel appears **on the right**, whether you selected the element in the tree or
directly on the model.
## The toolbar
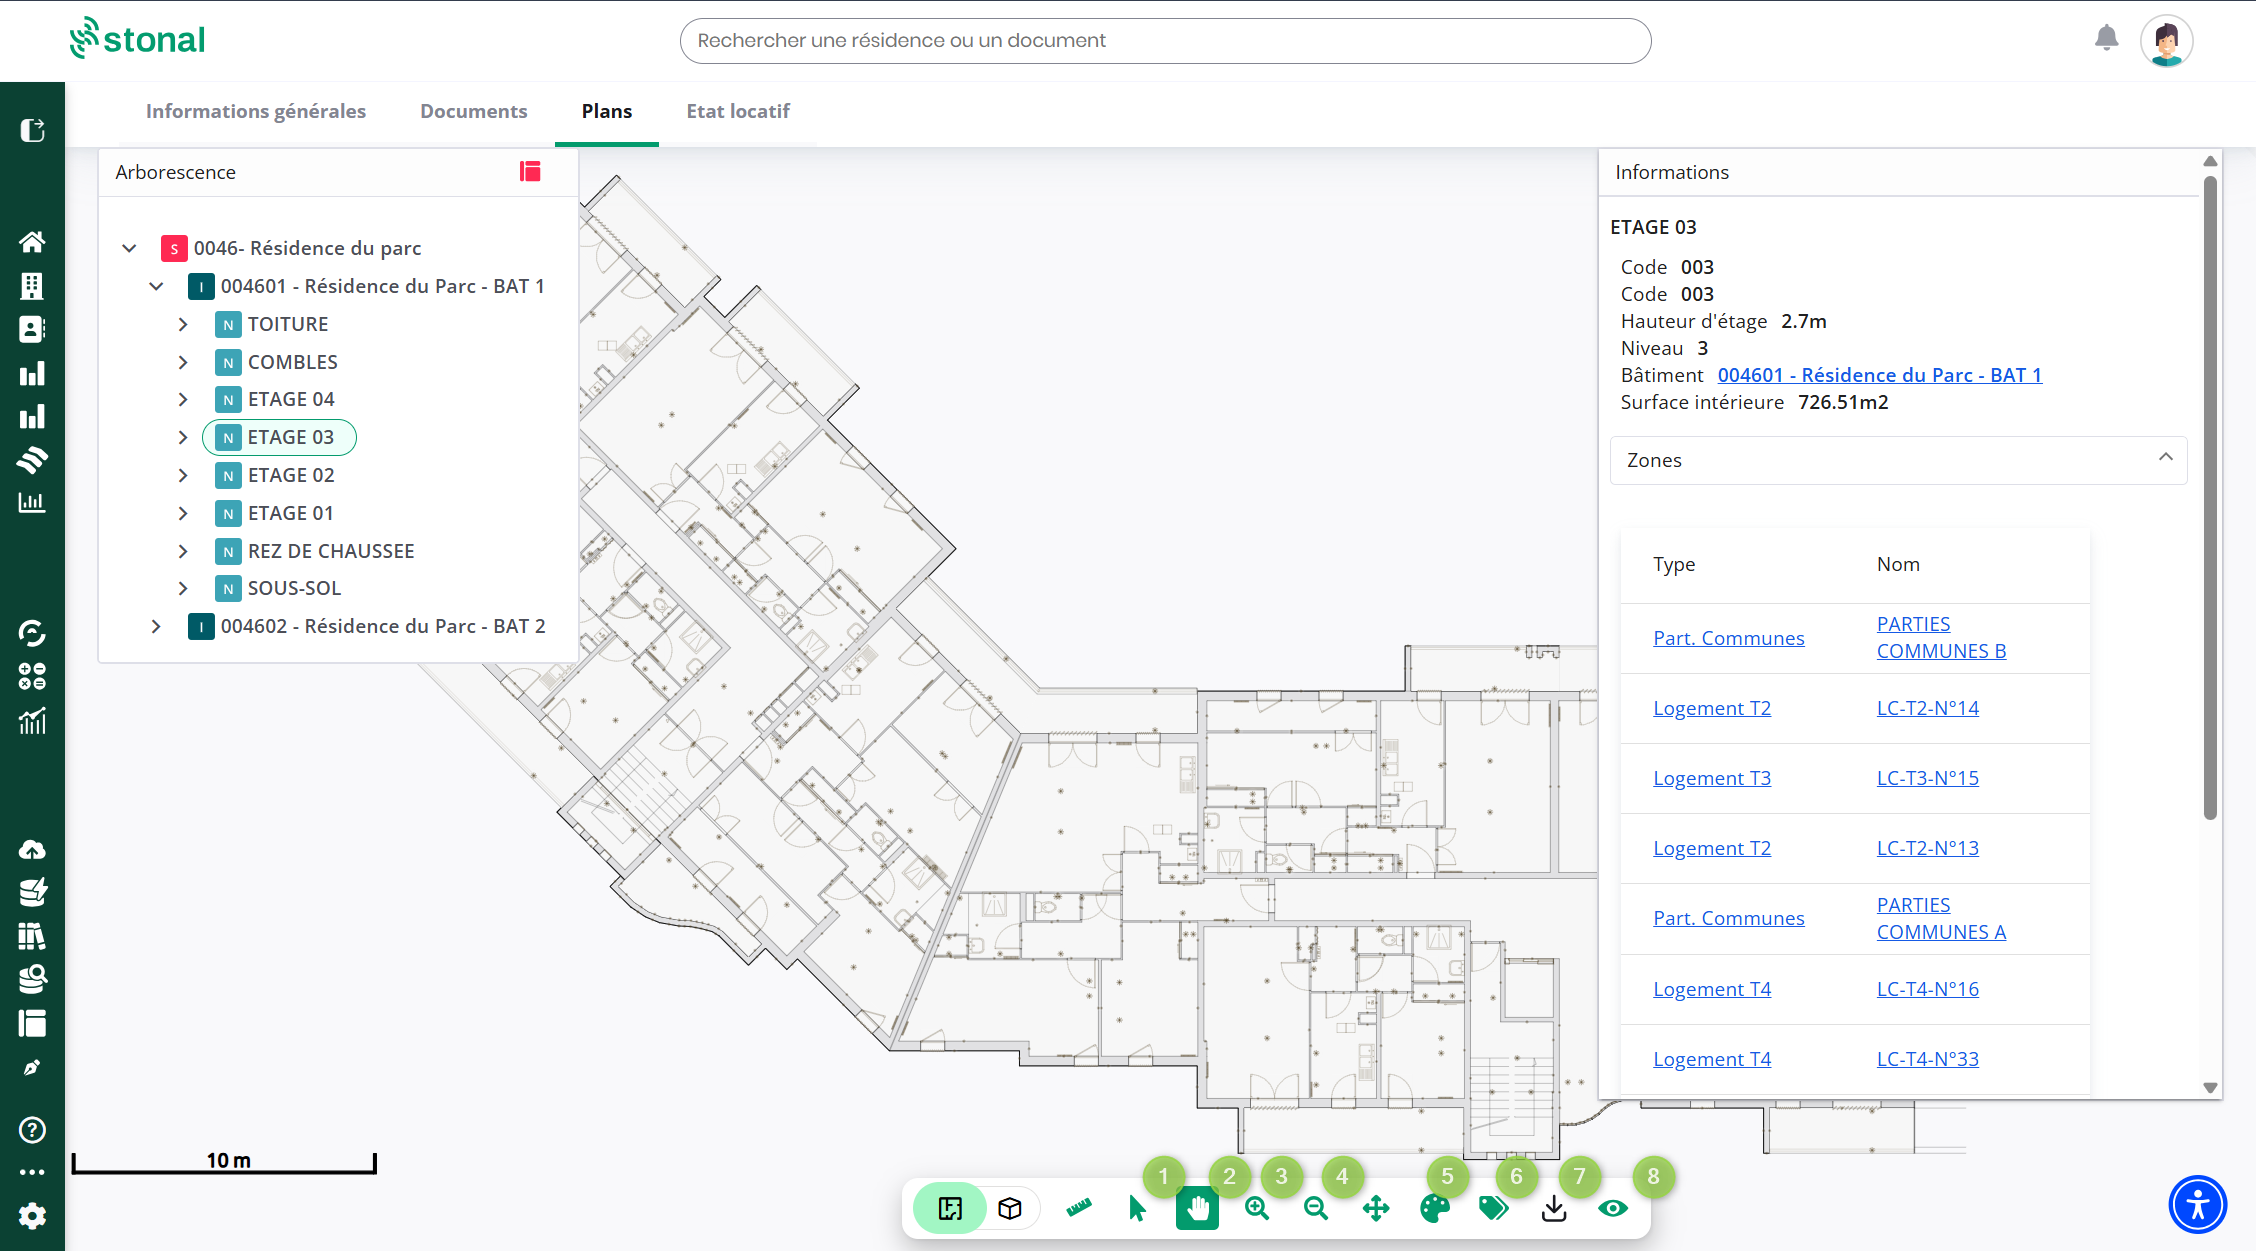
| Marker | Tool | Use |
|---|---|---|
| 1 | **Selector** | Select equipment, rooms… Key **A** |
| 2 | **Cursor** | Move the plan. Dragging with the right button also works, whichever tool is selected. Key **V** |
| 3 | **Zoom in** | Click to zoom in, or draw a rectangle around the area you want. Ctrl + scroll wheel also works. Key **Z** |
| 4 | **Zoom out** | Ctrl + scroll wheel also works. Keys **Alt + Z** |
| 5 | **Themes** | Colour the components that share a theme: vacant dwellings, dwelling types… |
| 6 | **Labels** | Show the name and area of spaces on the plan, and set the font size of the labels |
| 7 | **PDF download** | Get the plan as a PDF |
| 8 | **Overlays** | Show or hide certain elements: plots, networks, areas… |
The scroll wheel alone does not zoom: hold **Ctrl** (on Mac too). Hold the **Space** bar to move
the plan for one gesture, whichever tool is selected, and press **F** to fit the whole plan. The
tool keys match a French AZERTY keyboard: on a QWERTY keyboard, the Selector is **Q**, Zoom in is
**W** and Zoom out is **Alt + W**.
You move around the building by selecting the level you want: **site**, **building**, **floor**.
On the site plan, buildings are coloured as the mouse passes over them.
## Themes
| Marker | What it gives you |
|---|---|
| **Tree** | Selecting the level |
| **Theme type** | The themes available, which depend on the level chosen. They apply to zones, rooms or equipment |
| **Legend** | It appears as soon as the theme is applied |
| **Themed plan** | The plan colours itself automatically |
:::note Not every theme is available at every level
Site areas, for instance, are only visible when the **site** is selected. If a theme you expected does
not appear, check which level you are on first.
:::
## Good to know
Would these functions be useful to you and you do not have access? Speak to your usual contact.
## See also
- [Plans](/guide/vue-densemble/mes-residences/plans) — the tab on the latest version
- [Model](/guide/versions-anterieures/model) — the full 2D/3D viewer
- [Keep](/guide/versions-anterieures/keep) — the document management of earlier versions
---
# Model
URL: https://docs.stonal.io/fr/guide/versions-anterieures/model
# Model
:::info Availability
This page concerns organisations still on **Abyla** (the Model interface).
:::
## What it is for
:::info This interface belongs to earlier versions
If your organisation is still on an earlier version of our plan management tool, **Model** is what you
use to view your models.
On the latest version, these plans are viewed straight from a property's
[Plans](/guide/vue-densemble/mes-residences/plans) tab.
:::
Model lets you view your **modelled portfolio in 2D and 3D**. The 3D view is only available on
properties whose model was produced using a 3D modelling method.
## Viewing plans and information panels
The tree of your portfolio takes the left of the screen. Click a level to expand it and move around
the property. To see a level's information, click it — or click a room or piece of equipment directly
on the plan.
Step by step:
1. Choose the level you want in the tree: site, building, floor, room, equipment.
2. Go to the **Information** tab.
3. Expand the panel's group.
:::tip Before you start
Check that your display settings are compatible, in the dedicated menu.
:::
### The left pane
| Tool | Use |
|---|---|
| **Portfolio** | Expand the tree to reach the plans |
| **Query tool** | Query the levels of your portfolio: rooms, floors, buildings… |
| **Plan export** | Export plans in **DWG** format |
### The right pane
| Tool | Use |
|---|---|
| **Information** | View the information panels of the selected level |
| **Themes** | Colour the components that share a theme |
| **Selection** | Find a piece of equipment or a room on a given level |
| **Labels** | Show room labels on the plan |
### Finding your way around the screen
| Element | What it gives you |
|---|---|
| **Search** | Find a group or a component by its name or code |
| **Tree** | Your portfolio in hierarchy: agency › site › building › floor › zone › room › equipment |
| **Plan** | The plan for the selected level — a site gives a site plan, a floor gives a floor plan |
| **Information panel** | The selected component's information: technical attributes, quantities and areas, letting management codes, wear-and-tear condition. Grouped information expands with a click |
| **Ruler** | Measure a dimension between two points: the plans are to scale |
| **Zoom in / out** | Ctrl + scroll wheel also works |
| **Centre** | Bring the plan back to its origin |
| **Window zoom** | Zoom into an area you draw |
| **Pan** | Move the plan — Alt + left click also works |
| **Display and print** | Print as PNG or PDF, and show the layers you want: dimensions, room names, finishes |
## Themes
Themes colour the plans from the data held in the model: equipment condition, dwellings' letting
management code, room type…
1. Choose your level.
2. Choose the **Themes** tab.
3. Choose the **theme type** — which themes are available depends on the level selected.
4. Apply it: the **plan colours** itself automatically.
5. Press the **eraser** to clear it.
## Viewing a level in 3D
| Tool | Use |
|---|---|
| **3D model** | Switch the view to three dimensions |
| **Section** | Slice through the selected level |
| **Level** | Choose the level to view |
| **Display** | Choose what is shown: shadows, edges… |
## Selection
Selection lets you **list, count and locate** components on a floor plan.
1. Click **Selection mode**, or choose the selector in the drop-down.
2. Choose the **component** to query, for the level you are on.
3. Narrow to a **sub-system** to target a single component.
4. The **result** appears, and the equipment found is coloured on the plan.
5. The **eraser** clears the search.
## Good to know
Would these functions be useful to you and you do not have access? Speak to your usual contact.
## See also
- [Plans](/guide/vue-densemble/mes-residences/plans) — the equivalent on the latest version
- [Platform - Plans tab (Model)](/guide/versions-anterieures/plateforme-onglet-plans-model) — viewing built into the platform
- [Keep](/guide/versions-anterieures/keep) — the document management of earlier versions
---
# Keep
URL: https://docs.stonal.io/fr/guide/versions-anterieures/keep
# Keep
:::info Availability
This page only concerns organisations still on **Keep**.
:::
These answers concern **Keep**, the document management of earlier versions of the platform.
If your organisation has moved to the latest version, the tab that concerns you is
[Documents](/guide/vue-densemble/mes-residences/documents).
For plans on earlier versions, everything is described in
[Model](/guide/versions-anterieures/model) and
[Platform - Plans tab (Model)](/guide/versions-anterieures/plateforme-onglet-plans-model).
## How do I create a filter?
1. Click the **triangle** in the search bar.
2. Add your conditions.
3. Choose **"Share the filter"** to let your colleagues use it.
4. You can also create the filter on properties that have been sold.
## How do I upload documents?
:::tip If you already know where the document belongs
Drop it **straight into the folder concerned**: it is the most reliable route.
:::
**First method — from the Tree tab**
- Drop the document or documents.
- Add the document date if you know it.
- Rename it if you want to.
**Second method — from the Keep home page**
Use the **"Drag and drop"** boxes and select your documents.
- If you do not know which property the documents belong to, tick **"Property not referenced or
concerns several buildings"**. Otherwise, choose the property concerned.
- Click **Done** once every document has loaded to **100%**.
With this method the documents are sent for automatic filing, which will try to place them on the
right properties and in the right folders.
## How do I move a document?
1. Select the document to move.
2. Move it into the folder you want.
## See also
- [Model](/guide/versions-anterieures/model) — plans on earlier versions
- [Platform - Plans tab (Model)](/guide/versions-anterieures/plateforme-onglet-plans-model)
---
# What to ask of your surveyors
URL: https://docs.stonal.io/fr/guide/recommandations/diagnostics
# What to ask of your surveyors
## What it is for
Your surveys are processed automatically as they arrive in the
[Stonal Smartdoc document library](/guide/vue-densemble/mes-residences/documents): they are filed, and
the information they contain is extracted from them.
How well that works depends a great deal on **how the documents were produced**. So the
recommendations below are for your **surveying contractors**, ideally written into the specifications
of your contracts.
:::info These are not requirements
A survey that does not follow them will still be handled. These recommendations exist to **greatly
simplify the transmission** of your surveys and to **make the information they hold more usable**.
:::
## A report to open to your surveyors
Before any question of format, give your surveyors **the list of rooms in your portfolio as it
exists in Stonal**. The **"Diagnostiqueurs : libellés des pièces"** report (surveyors: room labels)
is there for that. You will find it under ⚙️ **Settings**, in the platform's side menu.
For each room, it shows:
- the **property** and the **building**, with their code and label;
- the **floor** and the **unit**;
- the **room type** and its **label in Stonal**;
- its **floor area**.
The surveyor can filter by property, building, unit, address or room type, then download the table
as Excel or CSV to prepare the visit.
What you gain: survey reports that **reuse your room labels**, so each finding attaches
unambiguously to the right room, unit and building.
**How to open it to a surveyor**: create an account for them in
[user management](/guide/administration/gestion-des-utilisateurs), with:
- a **report group** that contains this report;
- a **portfolio scope** limited to the properties covered by their assignment;
- an end date, using the
[temporary account](/guide/administration/gestion-des-utilisateurs#granting-time-limited-access)
option, so that access stops on its own when the contract ends.
This action depends on the permissions granted to you: you may not have access to it. If you need
it, get in touch with your contact person.
:::note Organisations still on Abyla
The report also exists in an Abyla version. That version presents the portfolio at the level of your
organisation: the account's portfolio scope does not narrow its content.
:::
## 1. Send surveys through the API
This is the recommendation that pays off most. Ask your surveyors to use our **document API** to
upload their surveys automatically.
What you gain:
- **direct, immediate** integration, with no manual transmission — so nothing forgotten, no wrong
recipient, no delay;
- compliance analyses that are **always up to date**, since the survey arrives as soon as it is
produced.
The API is available and documented: [Upload a file](/api/documents/upload-a-file).
## 2. Use the Stonal building codes
Ask your surveyors to use **your portfolio's codes as they exist in Stonal** to identify what they
survey: buildings, units, premises.
Without them, what a document attaches to has to be guessed. With them, it is certain.
Surveyors can query our base directly to retrieve those codes without asking you: see
[Searching data](/api/assets/search) in the API Guide. For rooms, the
[dedicated report](#a-report-to-open-to-your-surveyors) is simpler.
## 3. Have the metadata sent too
Our artificial intelligence automatically extracts the key information from a survey — visit date,
validity, rating, result. But a poor-quality document, or an unsuitable format, limits how precise that
extraction can be.
Where possible, have that information sent **directly through the API**. The error rate then drops to
zero, because there is nothing left to interpret.
## 4. Where the API is not an option: produce readable documents
These practices markedly improve extraction accuracy:
| Good practice | Why |
|---|---|
| **Native PDFs**, not scans | Avoids character-recognition errors |
| **One survey per file**, with no cover page | A PDF bundling several surveys is hard to split |
| If scanning cannot be avoided, **scan well** | Good resolution, straight page, decent contrast, no rotation; avoid coloured text |
| **Explicit plain-text statements** for key information | Information that is readable is information that can be extracted |
| **No tick boxes**, and nothing that appears only in an image or a watermark | Those are not text, even in a native PDF |
| A **consistent document structure** across contractors | Fewer errors, simpler processing |
| The **property and unit code** in the file name **and** in the document | That is what attaches the document to the right place |
:::tip Tables and lists are no longer a problem
Our artificial intelligence handles them well. For information that only exists in a technical diagram
or on a plan — a location, for instance — a **written description** remains far more reliable.
:::
## See also
- [The documents of a property](/guide/vue-densemble/mes-residences/documents) — what happens to a survey once uploaded
- [The Compliance report](/guide/vue-densemble/rapports/conformite) — what these surveys feed
- [Managing users and their permissions](/guide/administration/gestion-des-utilisateurs): create a surveyor's account
- [API Guide — Upload a file](/api/documents/upload-a-file)
---
# Placing a good annotation in EDIT
URL: https://docs.stonal.io/fr/guide/recommandations/edit
# Placing a good annotation in EDIT
## What it is for
An EDIT annotation is not just a comment: it is a **request to update your portfolio**. Placed
well, it can be applied automatically in a few seconds. Too vague, too broad, or placed next to
the equipment it is about, it has to be reread, interpreted, sometimes sent back to you:
processing takes longer and the risk of error goes up.
This page gathers the good practices to pass on to your field teams and to the people who
validate annotations. For how the application itself works, see
[Running a field survey with EDIT](/guide/qualite-donnees/edit).
## Who does what
| Who | What they do |
|---|---|
| **People in the field** (agents, technicians, caretakers, survey contractors) | Place annotations on the plan, with a photo when useful |
| **The people who validate annotations** in your organisation | Reread annotations, complete or send back the imprecise ones, then launch the automatic processing |
| **Stonal** | Takes care of what the automatic processing cannot do ("To be handled by Stonal" status) |
## The 5 golden rules
1. **One annotation = one piece of equipment** (or one finish). No broad annotation such as
"replace every bathtub in the building": place one for each element concerned.
2. **Click on the original element.** For a modification, a replacement or a deletion, the
annotation goes on the existing equipment: not next to it, not on the wall that carries it. If
several pieces of equipment overlap, EDIT asks you which one you mean.
3. **For a creation, click in the room**, where the equipment actually is.
4. **Choose the type and characteristics** of the new element from the list (for instance
Radiator, then Steel…). A free-text description does not replace this choice: it is what makes
automatic processing possible.
5. **Choose the right annotation type** (table below). The *Information* type is for anything that
is not an equipment update.
## Which annotation type should you choose?
| In the field | What to do | What to fill in | Processing |
|---|---|---|---|
| A piece of equipment exists but is not on the plan (a missing radiator, for instance) | **Creation** annotation (green) | The room (click where it is), the equipment type and characteristics, a photo if possible | Automatic. Depending on your platform, the equipment may be drawn on the plan at a later stage |
| A piece of equipment is on the plan but no longer exists | **Deletion** annotation (red) | A click on the equipment concerned | Automatic |
| A piece of equipment has been replaced by another (a replaced boiler, for instance) | **Modification** annotation | A click on the original equipment, the type and characteristics of the new equipment | Automatic |
| A characteristic of a piece of equipment is wrong (condition, last renewal date…) | No annotation: the sheet of the equipment, **Information** panel (or **Attributes**) | The new value | Immediate, depending on your permissions |
| The plan itself is wrong (moved partition, missing room, wrong area) | **Information** annotation (purple), describing the correction precisely | The room concerned, a description, a photo or a sketch | By Stonal (plan rework) |
| A remark that does not concern the portfolio (damage, cleanliness, work request) | Do not use EDIT: go through your usual request tool | — | — |
## Good and bad examples
| Hard to process | Can be processed automatically |
|---|---|
| *Information* annotation placed in the middle of the home: "radiator missing in living room" | *Creation* annotation placed in the living room, Radiator type, characteristics filled in, photo attached |
| A single annotation: "all the windows are PVC" | One *Modification* annotation per window, placed on each window, PVC material. If many elements are concerned, talk to your Stonal contact |
| Annotation placed on the wall: "tiles instead of paint" | Annotation placed on the wall finish, new Tiles finish selected |
| "To check" | A description that says what to correct, and to what |
## Before launching the automatic processing
For the people who validate annotations, a 30-second check is enough:
- the annotation is placed on the right element, or in the right room for a creation;
- the equipment type is chosen from the list, not just described in text;
- it concerns a single element;
- it does not duplicate another annotation in the same place.
If something is missing, complete the annotation yourself or send it back to its author. An
incomplete annotation passed on to Stonal will come back to you with the **"Waiting for customer"**
status, and the question asked in the annotation.
The **"Start auto processing"** button only becomes active when the conditions are met, and a
summary window shows you, before you confirm, what will and will not be processed automatically.
The full procedure is in
[Launch the automatic processing](/guide/qualite-donnees/edit#launch-the-automatic-processing).
:::info Automatic processing requires a dedicated permission
It is being rolled out gradually: get in touch with your Stonal contact to have it enabled.
:::
## Tracking your annotations
| Status | What it means |
|---|---|
| **New** | The annotation has just been placed and is waiting to be checked |
| **To be handled automatically** | It has been checked and is ready for automatic processing |
| **Processing in progress** | The automatic processing is applying it |
| **Auto-processed** | The automatic processing has applied it to your portfolio |
| **Error** | The automatic processing failed; the reason is shown and our teams take it over |
| **To be handled by Stonal** | It has been handed over to the Stonal teams |
| **In Progress** | Our teams are working on it |
| **Waiting for customer** | A piece of information is missing: the question is asked in the annotation |
| **Done** | The update has been made |
The **"Annotation tracking"** report, refreshed every night, lets you follow these volumes by
property, by author and by status.
## During a survey campaign: 3 tips
- **Start small.** Try it on one property and have the first annotations reread before sending
the whole team out.
- **Offline, sync before you sign out.** Download the floors you need before leaving, and sync
before you sign out of the application: otherwise the annotations stored on the device are lost.
- **Filter by equipment family** to show only one type of equipment once the plan is loaded.
## See also
- [Running a field survey with EDIT](/guide/qualite-donnees/edit) — how the application works
- [Launch the automatic processing](/guide/qualite-donnees/edit#launch-the-automatic-processing) — the step-by-step procedure
---
# Making good data quality requests for your models
URL: https://docs.stonal.io/fr/guide/recommandations/maquettes
# Making good data quality requests for your models
## What it is for
The digital models of your portfolio underpin many uses in Stonal: viewing plans by building group,
themes, field surveys with EDIT, analysis reports, synchronisation with your ERP. A modelling or
model update request that is **complete from the start** is processed faster, without back-and-forth,
and gives a result you can use straight away.
This page helps you prepare your request: which type of request to choose and which documents to
attach.
## Which type of request?
| Your situation | Type of request | Steps (carried out by Stonal or by you, in full or in part) |
|---|---|---|
| A **new development**, an acquisition, a portfolio not yet in Stonal | **New modelling** | 1. Building the portfolio sheet · 2. Revit modelling compliant with Stonal prerequisites (charter, metalibrary) · 3. Quality check and integration into Stonal |
| A model already in Stonal, but with **a building, a floor or partitions that are wrong or missing** | **Modelling supplement** | Same process, limited to the elements concerned |
| A **major refurbishment** or works that **change the structure** (partitions, redistribution of units, extension…) | **Model update** | 1. Updating the portfolio sheet · 2. Updating the original Revit file · 3. Quality check and integration |
| **Data attached to the model** to correct: naming, codes, addresses, dates, conditions | **Data correction** | Correction in the database and display check |
:::tip No request needed for a simple equipment change
Replacing, adding or removing equipment **without changing the structure** (replacing bathtubs with
showers, for example) does not, in most cases, need to go through Stonal. These updates are made
with [EDIT](/guide/recommandations/edit) or, for organisations equipped with **Graphlake**, with the
[Query tool](/guide/qualite-donnees/requeter-les-donnees), which allows bulk updates. A request is
only needed when the model requires a **graphical rework**.
:::
## The 3 golden rules
### 1. Name the request precisely
**One building group per request.** Give the code and name of the building group, the number of units and the
nature of the request.
*Example: "Group 1405 – Les Fougères – 24 units – Update following refurbishment"*
### 2. Detail the request
For an update: the nature of the works, the dwellings concerned, the changes to make.
*Example: "Bathtubs replaced with showers in the 24 units of building A; attributes to update:
equipment type, installation date"*
### 3. Attach the necessary documents
| Document | New modelling / supplement | Model update | Data correction |
|---|:---:|:---:|:---:|
| **Plans**: floors, elevations, sections, site plan, in **RVT** format if possible, otherwise DWG or PDF | Essential | Essential (post-works plans) | — |
| **As-built file** (DOE) | Recommended | Essential | — |
| **Portfolio sheet**, if you produce it, otherwise an **export of your portfolio codes** (from your ERP, or from the Query tool for Graphlake organisations) | Essential | Essential | If codes need completing |
| **ERP extract** (codes, addresses, stairwells) | Recommended | If units change | Essential if codes need completing or updating |
| **Photos** or any other useful item | If available | If available | — |
| **Approved quote or schedule of rates**, or at least the **purchase order or service order reference** | Essential if the service is priced | Essential if priced | Depending on your contract |
The attached documents (as-built file, plans) are also filed in the building group's **document
management**: they remain available after integration.
## Do you model yourself or through a contractor?
Read the **Stonal modelling prerequisites** (Revit files, BIM charter, metalibrary) in the FAQ
[From Abyla to Graphlake](/guide/faq/abyla-graphlake), and require them in your design or survey
contracts. A compliant Revit file reduces the cost and lead time of integration.
The full process can be **tested on a first model**, with Stonal support to plan: contact your
Stonal representative.
## What Stonal checks before delivery
So that your model can be used everywhere (themes, EDIT, reports, ERP synchronisation), Stonal checks
at each integration:
- the **naming** of sites, buildings, floors and dwellings, in line with **your naming charter**;
- a **valid portfolio code at each level** (site, building, dwelling), essential for
synchronisation with your ERP;
- for each dwelling and usable zone: the **stairwell** and the **address**;
- the life-cycle information of components: **construction date**, **condition**, **date of last
renewal**;
- the **filing of the documents** (plans, as-built file) in document management.
If information is missing from the documents provided, Stonal comes back to you before integration.
## Where to send your request?
On the **Stonal customer portal**: [serviceclients.stonal.com](https://serviceclients.stonal.com/)
## See also
- [The plans of a building group](/guide/vue-densemble/mes-residences/plans)
- [Successful field surveys](/guide/recommandations/edit)
- [From Abyla to Graphlake](/guide/faq/abyla-graphlake)
---
# Frequently asked questions
URL: https://docs.stonal.io/fr/guide/faq
# Frequently asked questions
The questions we are asked most often, one page per topic. Pick the one closest to your question.
On those pages, when the answer is a step carried out on a screen, the link takes you straight to
the page of the guide that describes it, with the video where there is one. What does not belong to
a single screen is answered in full on the topic page itself.
| Topic | What you will find |
|---|---|
| **[Your portfolio](/guide/faq/patrimoine)** | Adding a property, a building, a piece of data |
| **[Units](/guide/faq/lots)** | The GL code, the spaces listed as units |
| **[Documents](/guide/faq/documents)** | Uploading, filing, finding, retagging |
| **[Plans](/guide/faq/plans)** | Opening plans, themes, information panels, areas |
| **[Data quality](/guide/faq/qualite-donnees)** | Missing properties, correcting a value |
| **[EDIT](/guide/faq/edit)** | Annotations and their automatic processing |
| **[Works plans](/guide/faq/plans-de-travaux)** | Starting a plan, validation stages |
| **[Analysis reports](/guide/faq/rapports)** | Filtering, exporting, missing tabs |
| **[From Abyla to Graphlake](/guide/faq/abyla-graphlake)** | The move, plans, the metalibrary |
## Cannot find your answer?
The rest of the guide describes each screen in detail. Start with
[Getting started](/guide/demarrer/se-connecter) if the platform is new to you.
For a question covered nowhere, or for access you do not have, **speak to your usual contact**: they
know the configuration chosen for your organisation.
If they cannot help, [write to us](/guide/contact).
Finally, if you are connecting Stonal to your own tools, the technical documentation is in the
[API Guide](/api).
---
# Your portfolio — frequently asked questions
URL: https://docs.stonal.io/fr/guide/faq/patrimoine
# Your portfolio — frequently asked questions
## How do I add a property?
See [Add a property](/guide/vue-densemble/accueil#add-a-property), on the home page.
:::tip
If your portfolio is kept up to date by an ERP, adding a property by hand is not recommended: the next
synchronisation may contradict it. This action is also reserved for administrators.
:::
## How do I add a building?
See
[Add a building](/guide/vue-densemble/mes-residences/informations-generales#add-a-building), in the
general information of a property.
## How do I add a piece of data?
See
[Add a piece of data](/guide/vue-densemble/mes-residences/informations-generales#add-a-piece-of-data),
in the general information of a property.
## How do I change a piece of data?
See
[Modify an existing piece of data](/guide/vue-densemble/mes-residences/informations-generales#modify-an-existing-piece-of-data),
in the general information of a property.
To trace where a value came from and see its earlier values, go through
[Checking your data](/guide/qualite-donnees/controler-les-donnees#check-and-correct-a-value).
---
# Units — frequently asked questions
URL: https://docs.stonal.io/fr/guide/faq/lots
# Units — frequently asked questions
## What is a unit's "GL code" and where does it come from?
The GL code is the **business identifier** given to each unit in your management software. It is the
label the unit record uses as its reference.
It is entered and editable from the **portfolio record, composition tab**.
If you do not recognise a code or have a doubt, speak to your usual contact.
## Why do spaces such as roofs or plant rooms appear in the list of units?
They appear when they have been **attached to a unit code in your source data**.
This is a data configuration matter, not a platform malfunction. Speak to your usual contact to have
it looked at.
---
# Documents — frequently asked questions
URL: https://docs.stonal.io/fr/guide/faq/documents
# Documents — frequently asked questions
## How do I upload a document?
See [Import documents](/guide/vue-densemble/mes-residences/documents#import-documents), which covers
both routes: dropping the file and letting the automatic filing place it, or filing it yourself.
To upload a large batch, go through
[Importing and changing documents in bulk](/guide/administration/gestion-documentaire/actions-documentaires).
## How is a document filed?
Automatic filing suggests a folder and a class. Depending on how confident it is, the document is
either filed directly or left in **Action required** for you to confirm.
Everything is described in
[The Document management sub-tab](/guide/vue-densemble/mes-residences/documents#the-document-management-sub-tab).
## How do I find a document?
Two routes: the [search bar](/guide/demarrer/barre-de-recherche#find-something-quickly), which also
searches the text inside your documents, or the **Documents** tab of the property concerned.
## How do I change the folder or the class of a document, or add a tag?
See [Correct a filing](/guide/vue-densemble/mes-residences/documents#correct-a-filing).
---
# Plans — frequently asked questions
URL: https://docs.stonal.io/fr/guide/faq/plans
# Plans — frequently asked questions
## How do I open the plans of a property?
See
[Open the plans of a property](/guide/vue-densemble/mes-residences/plans#open-the-plans-of-a-property).
## How do I colour a plan by theme?
See [Colour a plan by theme](/guide/vue-densemble/mes-residences/plans#colour-a-plan-by-theme).
## How do I view the information panel of a component?
See
[View the information of a component](/guide/vue-densemble/mes-residences/plans#view-the-information-of-a-component).
## How do I change a property from the information panel?
See
[Correct a piece of information](/guide/vue-densemble/mes-residences/plans#correct-a-piece-of-information).
## How do I search for an element on the plan?
See
[Search for an element on the plan](/guide/vue-densemble/mes-residences/plans#search-for-an-element-on-the-plan).
## How are areas calculated?
See
[Automatically calculated areas](/guide/vue-densemble/mes-residences/plans#automatically-calculated-areas),
which lists the three areas calculated, the rules applied and the known limits.
## How do I report an anomaly, or ask for a plan to be added?
Both go through your internal contact, as set out in
[Good to know](/guide/vue-densemble/mes-residences/plans#good-to-know).
Reporting a modelling error matters: it is what keeps the data attached to your portfolio reliable.
---
# Data quality — frequently asked questions
URL: https://docs.stonal.io/fr/guide/faq/qualite-donnees
# Data quality — frequently asked questions
## Why do some properties not appear?
This question comes up on every screen that shows a list of properties: the
[unit record](/guide/vue-densemble/mes-residences/fiche-lot), the
[General information](/guide/vue-densemble/mes-residences/informations-generales) tab of a property,
and the information panels of the [Plans](/guide/vue-densemble/mes-residences/plans) tab.
The rule is the same everywhere: **only properties that have a value are displayed**. A property with
nothing entered is hidden rather than shown empty.
So a line you expected and cannot find means the information has not been entered yet for this item,
not that the platform cannot hold it.
If you have the necessary permissions, you can add it straight from the record. To fill in many items
at once, go through [Querying your data](/guide/qualite-donnees/requeter-les-donnees).
## How do I correct a value and see where it came from?
See [Check and correct a value](/guide/qualite-donnees/controler-les-donnees#check-and-correct-a-value).
The same screen shows the earlier values of a property and the loading errors of your last
synchronisation.
---
# EDIT — frequently asked questions
URL: https://docs.stonal.io/fr/guide/faq/edit
# EDIT — frequently asked questions
## How do I add an annotation?
See [Place an annotation](/guide/qualite-donnees/edit#place-an-annotation).
## How do I find an annotation to handle, and change its status?
See [Find and handle an annotation](/guide/qualite-donnees/edit#find-and-handle-an-annotation).
## How do I launch the automatic processing of an annotation?
See [Launch the automatic processing](/guide/qualite-donnees/edit#launch-the-automatic-processing),
which also lists the cases that cannot be automated and go through the Stonal teams.
## How do I change the value of an attribute?
See
[Update the attributes of a component](/guide/qualite-donnees/edit#update-the-attributes-of-a-component).
---
# Works plans — frequently asked questions
URL: https://docs.stonal.io/fr/guide/faq/plans-de-travaux
# Works plans — frequently asked questions
## How do I start a works plan?
See [Start a works plan](/guide/workflows/plans-de-travaux#1-start-a-works-plan), which covers both
starting one plan and starting several at once.
## What are the validation stages?
There are five: initialisation, consolidation, validation, budget entry, validated. They are
described in
[Move the plan through its stages](/guide/workflows/plans-de-travaux#5-move-the-plan-through-its-stages).
## How do I add a works line?
See [Complete with your own lines](/guide/workflows/plans-de-travaux#3-complete-with-your-own-lines),
which covers the two routes: a line taken from the Stonal library, with its prices, or a line you
enter freely.
## How do I validate the works across my whole portfolio?
See
[Consolidate at portfolio level](/guide/workflows/plans-de-travaux#6-consolidate-at-portfolio-level).
## How does the engine determine the year of a works item?
See [How the engine calculates your works](/guide/workflows/plans-de-travaux#how-the-engine-calculates-your-works), which
details the budgeting-year calculation and the condition-correction scale.
## My organisation is on Abyla or Graphlake: does that change anything for my works plans?
Yes, the calculation differs depending on the data source — see [Two data sources depending on
your organisation](/guide/workflows/plans-de-travaux#two-data-sources-depending-on-your-organisation).
For the transition itself, see
[From Abyla to Graphlake](/guide/faq/abyla-graphlake).
## Where do I configure my expense items, prices and criteria?
See [Configuring expense items, prices and criteria](/guide/workflows/plans-de-travaux#configuring-expense-items-prices-and-criteria)
— reserved to Graphlake organisations.
## Why don't I have a line for a piece of equipment I expected?
See [Why an expected line does not
appear](/guide/workflows/plans-de-travaux#why-an-expected-line-does-not-appear) — the seven
most common reasons, from most to least frequent.
## Why do I see two lines for what looks like one replacement?
See [Replacing equipment with a different
type](/guide/workflows/plans-de-travaux#replacing-equipment-with-a-different-type).
## Who can delete a works plan?
Deleting a works plan is reserved to administrators, and it is permanent.
---
# Analysis reports — frequently asked questions
URL: https://docs.stonal.io/fr/guide/faq/rapports
# Analysis reports — frequently asked questions
## How do I move between reports?
See [Move between reports](/guide/vue-densemble/rapports#move-between-reports).
## How do I filter my portfolio?
See [Adjust the scope](/guide/vue-densemble/rapports#adjust-the-scope).
## How do I make my dashboard interactive?
See [Make the report interactive](/guide/vue-densemble/rapports#make-the-report-interactive).
## How do I export a table as CSV?
See [Export a table as CSV](/guide/vue-densemble/rapports#export-a-table-as-csv).
For an export built to your own specification, go through
[Querying your data](/guide/qualite-donnees/requeter-les-donnees).
## How do I extract a list of equipment?
See [Extract a list of equipment](/guide/vue-densemble/rapports/requete#extract-a-list-of-equipment),
in the Query report.
## A dwelling is marked Missing although I do have the survey
The document is most likely attached to the wrong dwelling. Look at the
[Unassigned surveys](/guide/vue-densemble/rapports/conformite#diagnostics-non-affectes)
page of the tab concerned, and have the filing corrected.
## Why are dwellings not applicable for electricity when they all have electricity?
The regulatory criterion is the **age of the dwelling** — over 15 years — not whether
electricity is present. A recent dwelling is not applicable whatever it is fitted with. See
[Why some dwellings are "not applicable"](/guide/vue-densemble/rapports/conformite#non-concernes).
## Where does the report get the idea that a dwelling has no gas?
It does not know whether gas is actually present: it applies the same age criterion. If you
hold that information, it can be loaded into the platform to narrow the scope down. Speak to
your usual contact.
## What does "Incomplete metadata" mean?
The document is there, but automatic reading could not extract any date from it — a poor
quality scan, an unusual layout. Without a date, the report cannot tell whether the survey
is still valid, which is why the status scores lower than an expired one.
One date is enough: when the validity date is missing but the issue date was read, the
validity date is worked out from it. So this status only comes up when neither of the two
could be extracted.
Open the document from the table to check it, and report it if need be.
## My compliance rate looks high although I know surveys are missing
Dwellings that are not applicable count as compliant, since they carry no risk. To steer your
actions, rely on the "no survey" counters and on the forecast schedule rather than on the rate
alone.
## Is the data up to date?
The date of the last update is shown at the top of every page of the report, in the "Last
update" indicator.
## Why do some tabs not appear?
What a report contains depends on **what was agreed with your organisation**. It is normal for some
tabs to be missing on your side while they exist elsewhere.
The same goes for the reports themselves: which ones you can reach depends on what was chosen for
your organisation. If one of them would be useful to you, speak to your usual contact.
## How do I have a report changed or created?
Speak to your usual contact. Depending on your subscription, adding or changing a piece of data may
be possible.
---
# From Abyla to Graphlake — frequently asked questions
URL: https://docs.stonal.io/fr/guide/faq/abyla-graphlake
# From Abyla to Graphlake — frequently asked questions
:::info Availability
This section concerns organisations moving from Abyla, the earlier plan management, to **Graphlake**,
or preparing to.
:::
## What is Graphlake?
It is the Stonal **plan management** interface. It runs entirely on the **Datalake**, which replaces
the Abyla databases.
The data model built in the Datalake makes the process of digitising your portfolio significantly
simpler.
## Why this change?
To let you decide faster and better, we have strengthened the way your data is structured.
Through REVIT and the Datalake, you keep a familiar framework and your existing data, with simpler
tools to view the technical management data, update your portfolio, query it in every form, and build
new uses on top of it (digital continuity, open data sources, and so on).
## What does it change for my users?
**Plans are read in the platform's [Plans](/guide/vue-densemble/mes-residences/plans) tab**, no longer
in a separate application.
You will find the main uses of the former Model interface there, on more direct screens. So the impact
on day-to-day navigation stays limited.
Added to that are applications that did not exist before:
- an **alphanumeric description** of the portfolio, built into the platform;
- a [query tool](/guide/qualite-donnees/requeter-les-donnees) usable without technical skills;
- [reports](/guide/vue-densemble/rapports) built into the journey, which make the data being used
visible.
:::note The people who administer data have more to learn
For everyday users the change is mostly visual. Data administration and data quality work, however,
used to happen in the Abyla core: those change tool, and call for support.
:::
## What are the prerequisites?
Two, both aimed at sharing a common framework across clients:
- using the **Stonal metalibrary**;
- using **REVIT** as the deliverable for future modelling.
## How does the transition happen?
Moving your base to the Stonal metalibrary is prepared beforehand with our teams. The transition then
happens in **three steps**:
1. the **technical synchronisation** of your data;
2. **opening Graphlake** to your users, moving from the Model interface to the Plans tab;
3. **validating the connectors** tied to Abyla, where there are any.
## When will my organisation move?
Organisations deployed from 2025 onwards are already on this version.
For organisations with a history of using Abyla, the schedule is set with you, taking your own
calendar constraints into account. Speak to your usual contact to know where you stand.
## Will there be any service interruption?
The transition follows our continuous deployment process, like any other change to the platform. The
steps are planned with you, favouring **outside business hours**.
## Is the move charged for?
No. Stonal does not pass the cost of upgrading its platform on to its clients.
## Do users need retraining?
The change of interface changes habits: **your training material will need updating**, and the change
communicating to your users.
Our teams support you through this and provide suitable material.
## How do I update my plans?
**Everyday updates, on your own**
- **File import from the [query tool](/guide/qualite-donnees/requeter-les-donnees)**: adding or
changing properties, replacing a piece of equipment (the new symbol takes the old one's place),
creating one (the symbol is created at the centre of the element it attaches to).
- **Field reports from [EDIT](/guide/qualite-donnees/edit)**, the survey app.
**Heavier graphical changes**
These go through **REVIT**. A tool built by Stonal generates a REVIT file holding the Datalake data;
you edit it; a second tool loads the edited model back into the Datalake.
## Can I be autonomous on graphical updates?
Yes, provided you or your contractors hold a **compatible REVIT licence** and have command of the
Stonal export and import tools.
These tools have been tested with our partners since 2025, and opening them to other external parties
is planned.
## Are the import and export tools charged for?
They do not change the data quality contract in force with your organisation.
Using them on your own, or through your contractors, does call for workshops and a support plan suited
to your situation: speak to your usual contact about it.
## How do I get access to the Stonal metalibrary?
Access is open to anyone who wants to use it:
1. Go to [BIM&CO Onfly](https://equipments-stonal.onfly.io/).
2. Click **"Not a member? Ask for access!"**.
3. Wait for a Stonal administrator to confirm your account, then activate it.
You can then browse the metalibrary or download it.
## Where do I find the REVIT / BIM charter?
It is freely available:
[BIM ↔ Platform charter (Datalake / Graphlake)](https://stonal.notion.site/Charte-BIM-Revit-Plateforme-Data-Graphlake-153aa28b3ffb800f84c8ee37d3c68d89).
The link always points to the latest version: the charter evolves continuously.
---
# Contact us
URL: https://docs.stonal.io/fr/guide/contact
# Contact us
## Contact the Stonal team
Do you have a question about using Stonal, or need help with one of the modules? Write to us at
**[support@stonal.com](mailto:support@stonal.com)**.
**We reply within 48 hours.**
## Customer support
**Monday to Friday**, **9 am to 6 pm**.
## Address
Stonal
28 cours Albert 1er
75008 Paris, France
## Before writing to us
Two habits that will often save you time:
- **Your internal contact** knows the configuration chosen for your organisation. For a question
about permissions, access to a module or the contents of a report, that is the quickest answer.
- The [guide](/guide/demarrer/se-connecter) describes each screen step by step, often on video: for a
specific step, the answer is there. The [frequently asked questions](/guide/faq) cover what does
not belong to any one screen.
If you are connecting Stonal to your own tools, the technical documentation is in the
[API Guide](/api).
---
# Assets hierarchy
URL: https://docs.stonal.io/fr/api/assets/hierarchy
# Assets hierarchy
## Overall hierarchy
These are the relations between assets:

## Asset type families
We have the following asset type families:
| Type | Physical / Logical | Description |
| ------------------ | ------------------ | --------------------------------------------------------------------- |
| `BUILDING_GROUP` | 🏢 Logical | A group of buildings |
| `BUILDING` | 💼 Logical | A building like it's handled in your ERP |
| `BUILDING_SECTION` | 💼 Logical | A section of a building (can be a stairwell, an entrance, etc.) |
| `PLAN\|INDOOR` | 🏢 Physical | A floorplan of a building (usually has multiple levels) |
| `PLAN\|OUTDOOR` | 🏢 Physical | A plan of an outdoor area (usually has only one level) |
| `LEVEL` | 🏢 Physical | A floor of a building (as like `PLAN\|INDOOR`) |
| `LEVEL_SECTION` | 💼 Logical | A section of a level (vertical division within a floor) |
| `RENTED_UNIT` | 💼 Logical | Something that could be rented (usually associated with a contract) |
| `ZONE` | 💼 Logical | A grouping of spaces (can be an apartment, a set of offices, etc.) |
| `SPACE` | 🏢 Physical | A space in a building (can be an office, a room, etc.) |
| `OPENING` | 🏢 Physical | An opening in a space (can be a door, a window, etc.) |
| `SPACE_BOUNDARY` | 🏢 Physical | A boundary of a space (can be a wall, a floor, a ceiling, etc.) |
| `EQUIPMENT` | 🏢 Logical | A physical or logical equipment (can a light, a door, a window, etc.) |
## Specific asset types
We have more than 4000 different types of asset.
The full list of types can be explored in [this Metabase dashboard with built-in filters](https://api.stonal.io/metabase/public/dashboard/840e5a5f-56e7-437d-aa68-3a8827eeb832?code_de_l%27asset=&nom_de_l%27asset=&tab=231-plans).
The full list of equipments is [published on buildingsmart.org](https://identifier.buildingsmart.org/uri/stonal/stonal-equip/1.0).
---
# Creating a user
URL: https://docs.stonal.io/fr/api/users/legacy/create-a-user
# Creating a user
This guide walks through the process of creating a new user in the Stonal platform using the API. The process involves several steps to gather required information before creating the user.
:::info Prerequisites
- A valid set of API credentials
- A valid access token (see: [**Get a token**](/api/reference/legacy/get-access-token))
- An organization code
:::
### Step 1: Search for an existing user
Before creating a new user, check if they already exist to avoid duplicates.
See: [**API Specification**](/api/reference/legacy/search-user-on-organization)
```http
POST /v1/organizations/{organizationCode}/users/search
```
Request body:
```json
{
"email": "firstName.lastName@corp.com"
}
```
If the user exists, you'll receive a 200 response with user details (See: [**Modifying a user**](/api/users/legacy/modify-a-user)). If not, proceed with user creation.
### Step 2: Lookup the necessary user information
Get the list of available companies that can be assigned to the user:
See: [**API Specification**](/api/reference/legacy/find-all-companies-by)
```http
GET /v1/organizations/{organizationCode}/users/companies
```
Query parameters:
- `page` (optional): Page number (default: 0)
- `size` (optional): Items per page (default: 100)
The resulting companies can be used to create a user with the `company` field.
Thus giving the user the right to access the assets of the corresponding company.
Get available user profiles:
See: [**API Specification**](/api/reference/legacy/find-all-profiles-by)
```http
GET /v1/organizations/{organizationCode}/users/profiles
```
The resulting profiles can be used to create a user with the `profile` field.
Get available user groups:
See: [**API Specification**](/api/reference/legacy/find-all-groups-by)
```http
GET /v1/organizations/:organizationCode/users/groups
```
The resulting groups can be used to create a user with the `groupUids` field.
Retrieve available authorization models:
See: [**API Specification**](/api/reference/legacy/find-all-authorizations-by)
```http
GET /v1/organizations/{organizationCode}/users/authorizations
```
The response includes:
- Model ID
- Name
- Description
- Available applications
The resulting authorization models can be used to create a user with the `authorization.modelId` field.
Thus giving the user the right to access the corresponding applications.
Fetch available permissions:
See: [**API Specification**](/api/reference/legacy/find-all-permissions-by)
```http
GET /v1/organizations/{organizationCode}/users/permissions?pageNumber=1&pageSize=10
```
Query parameters:
- `pageNumber` (required): Page number
- `pageSize` (required): Items per page
- `type` (optional): Permission type (e.g., ASSET)
- `subType` (optional): Permission sub-type (e.g., PORTFOLIO)
- `q` (optional): Search query on label
- `sortField` (optional): Field to sort by
- `sortOrder` (optional): Sort order (asc/desc)
The resulting permissions can be used to create a user with the `permissionUids` field.
Thus giving the user the right to access the corresponding assets.
### Step 3: Create the user
Finally, create the user with all gathered information:
See: [**API Specification**](/api/reference/legacy/create)
```http
POST /v1/organizations/{organizationCode}/users
```
Request body:
```json
{
"email": "firstName.lastName@corp.com",
"firstName": "firstName",
"lastName": "lastName",
"company": "companyName",
"fromExternalIdp": false,
"groupUids": ["0192d7b7-2994-7ad5-9952-26862f33c21a"],
"authorization": {
"modelId": "2b2e8a4b-bfbd-4c56-b8d6-c8cb1d8c58ba",
"profile": "Developer",
"asset": {
"all": false
}
},
"permissionUids": [
"0192d7b7-2994-7ad5-9952-26862f33c21a",
"0192d7b7-7073-7e58-896c-07113f22363a"
]
}
```
Required fields:
- `email`: User's email address
- `firstName`: User's first name
- `lastName`: User's last name
- `company`: Company name (must be from available companies)
- `groupUids`: Array of group UIDs
- `authorization`: Authorization configuration
- `modelId`: ID of the authorization model
- `profile`: User profile
- `asset`: Asset access configuration
- `permissionUids`: Array of permission UIDs
Possible responses:
- 201: User created successfully
- 202: User creation appears successful but cannot be confirmed
- 409: User already exists
### Notes
- All email addresses must be unique in the system
- The company assignment affects which assets the user can access
- If `fromExternalIdp` is true, the user must authenticate through their identity provider
- Asset access can be granted to all assets (`"all": true`) or specific assets using `permissionUids`
- Permission UIDs must be valid and retrieved from the permissions endpoint
### Error Handling
Common error scenarios:
- Invalid authorization model ID
- Invalid company name
- Duplicate email address
- Invalid permission UIDs
- Missing required fields
Always check the response status and handle errors appropriately in your implementation.
---
# Ingesting data
URL: https://docs.stonal.io/fr/api/assets/ingest
# Ingesting data
This guide explains how to ingest and manage assets like buildings, spaces, and equipment using the Stonal ingestion API.
:::info
You will need to get a personal access token to use the ingestion APIs.
:::
All ingestion requests use [the ingestion API](/api/reference/assets/upsert-assets) with the following structure:
```bash title="📄 ingest.sh"
#!/bin/sh -ex
# Your organization
STONAL_ORG=DEMO
# Fetch your token from here: https://app.stonal.io/users/app
STONAL_TOKEN=9631e269-e21e-4ce6-92a9-c6f7ed1fa98a
curl \
https://api.stonal.io/datalake/v1/organizations/$STONAL_ORG/assets \
-v \
-X POST \
-H 'Content-Type: application/json' \
-H "Authorization: Bearer $STONAL_TOKEN" \
-d @payload.json
```
## Root level assets
`BUILDING_GROUP`, `BUILDING`
These are the top-level assets in your hierarchy. A `BUILDING_GROUP` represents a site containing multiple buildings, and `BUILDING` represents a logical building as managed in your ERP.
```json title="📄 root-assets.json"
{
"assets": [
{
"externalIds": {
"CODE": "SITE_001"
},
"type": "BUILDING_GROUP",
"name": "Residence du Parc",
"properties": {
"simple": {
"ADDRESS": "123 Rue de la Paix, Paris, France"
}
}
},
{
"externalIds": {
"CODE": "SITE_001_BAT_001"
},
"type": "BUILDING",
"name": "Bâtiment A",
"parent": {
"externalIds": {
"CODE": "SITE_001"
}
}
}
]
}
```
## Building and Level Sections
`BUILDING_SECTION`, `LEVEL_SECTION`
Building and level sections provide logical divisions within your building structure. A `BUILDING_SECTION` represents a section of a building (such as a stairwell, entrance, or wing), while a `LEVEL_SECTION` represents a vertical division within a floor.
```json title="📄 building-level-sections.json"
{
"assets": [
{
"externalIds": {
"CODE": "SITE_001_ENTRANCE_A"
},
"type": "BUILDING_SECTION",
"name": "Entrée A",
"parent": {
"externalIds": {
"CODE": "SITE_001_BAT_001"
}
}
},
{
"externalIds": {
"CODE": "SITE_001_LEVEL_RDC_SECTION_A"
},
"type": "LEVEL_SECTION",
"name": "Section A - RDC",
"parent": {
"externalIds": {
"CODE": "SITE_001_LEVEL_RDC"
}
},
"groupedBy": [
{
"externalIds": {
"CODE": "SITE_001_ENTRANCE_A"
}
}
]
}
]
}
```
:::tip
The `groupedBy` field on a `LEVEL_SECTION` can link it to a `BUILDING_SECTION`, allowing you to associate floor sections with their corresponding building sections (e.g., stairwells or entrances that span multiple floors).
:::
## Physical building structure
`PLAN|INDOOR`, `LEVEL`, `SPACE`
Physical assets describe the actual geometry of your buildings. A `PLAN|INDOOR` groups multiple floors, a `LEVEL` represents a single floor, and `SPACE` represents rooms.
```json title="📄 physical-assets.json"
{
"assets": [
{
"externalIds": {
"CODE": "SITE_001_INDOOR_001"
},
"type": "PLAN|INDOOR",
"name": "Plan Bâtiment A",
"parent": {
"externalIds": {
"CODE": "SITE_001"
}
},
"groupedBy": [
{
"externalIds": {
"CODE": "SITE_001_BAT_001"
}
}
]
},
{
"externalIds": {
"CODE": "SITE_001_LEVEL_RDC"
},
"type": "LEVEL",
"name": "Rez-de-chaussée",
"parent": {
"externalIds": {
"CODE": "SITE_001_INDOOR_001"
}
}
},
{
"externalIds": {
"CODE": "SITE_001_SPACE_001"
},
"type": "SPACE",
"name": "Bureau 101",
"parent": {
"externalIds": {
"CODE": "SITE_001_LEVEL_RDC"
}
},
"groupedBy": [
{
"externalIds": {
"CODE": "SITE_001_ZONE_001"
}
}
]
}
]
}
```
:::tip
The `groupedBy` field on a `PLAN|INDOOR` links it to a logical `BUILDING`. This allows you to associate physical plans with your ERP's building structure.
:::
## Logical assets
`RENTED_UNIT`, `ZONE`
Logical assets organize spaces for business purposes. A `RENTED_UNIT` represents a housing unit that can be rented (linked to contracts), and a `ZONE` groups multiple spaces together (an apartment, a set of offices, etc.).
```json title="📄 logical-assets.json"
{
"assets": [
{
"externalIds": {
"CODE": "SITE_001_APT_101"
},
"type": "RENTED_UNIT",
"name": "Appartement 101",
"parent": {
"externalIds": {
"CODE": "SITE_001_BAT_001"
}
}
},
{
"externalIds": {
"CODE": "SITE_001_ZONE_001"
},
"type": "ZONE",
"name": "Appartement T3",
"parent": {
"externalIds": {
"CODE": "SITE_001_LEVEL_RDC"
}
},
"groupedBy": [
{
"externalIds": {
"CODE": "SITE_001_APT_101"
}
}
]
}
]
}
```
:::tip
The `groupedBy` field on a `ZONE` links it to a `RENTED_UNIT`, allowing you to associate physical spaces with rentable units and their contracts.
:::
## Equipments and Openings
`EQUIPMENT`, `OPENING`
Openings represent doors, windows, and other passages within a space. Equipments are items installed in openings (doors, windows) or directly in spaces (radiators, etc.).
```json title="📄 equipments-openings.json"
{
"assets": [
{
"externalIds": {
"CODE": "SITE_001_OPENING_001"
},
"type": "OPENING",
"name": "Porte entrée Bureau 101",
"parent": {
"externalIds": {
"CODE": "SITE_001_SPACE_001"
}
}
},
{
"externalIds": {
"CODE": "SITE_001_DOOR_001"
},
"type": "EQUIPMENT",
"name": "Porte bois",
"parent": {
"externalIds": {
"CODE": "SITE_001_OPENING_001"
}
}
}
]
}
```
## Response format
A successful ingestion returns the created/updated assets with their generated `uid`:
```json title="➡️ output"
{
"assets": [
{
"uid": "272e9b9c-31f1-4a6b-86af-a8737031a2bc",
"externalIds": {
"CODE": "SITE_001"
},
"type": "BUILDING_GROUP",
"name": "Residence du Parc",
"properties": {
"source": "DEFAULT",
"simple": {
"ADDRESS": "123 Rue de la Paix, Paris, France"
}
}
}
]
}
```
## Uses cases
### Updating an asset
:::info
We can refer to an asset using: `uid` or **one** `externalIds`. Same when referring to relations: `parent`, `groups`, `groupedBy`or `groupingAssetsToAdd`
:::
#### Updating asset's parent
Here we’re simply changing the parent of an asset
```json title="📄 updating-asset-parent.json"
{
"assets": [{
"uid": "1712974c-3758-4e67-8717-1aa2441efc29",
"parent": { "uid": "d3e98110-e494-4cac-a508-38058681fa62" }
}]
}
```
For removing a parent, we need to explicitly set it to `null`
```json title="📄 removing-asset-parent.json"
{
"assets": [{
"uid": "1712974c-3758-4e67-8717-1aa2441efc29",
"parent": null
}]
}
```
#### Adding or changing asset's externalId
:::info
When we want to change an external identifier, we need to specify the asset's `uid`.
:::
```json title="📄 adding-or-updating-an-external_id.json"
{
"assets": [{
"uid": "1712974c-3758-4e67-8717-1aa2441efc29",
"externalIds": {
"CODE": "SITE_001",
"PIH": "00001"
}
}]
}
```
#### Updating asset's expiration date
```json title="📄 adding-or-updating-an-expiration_date.json"
{
"assets": [{
"uid": "1712974c-3758-4e67-8717-1aa2441efc29",
"expirationDate": "2040-10-09"
}]
}
```
#### Updating asset's effective date
```json title="📄 adding-or-updating-an-effective_date.json"
{
"assets": [{
"uid": "1712974c-3758-4e67-8717-1aa2441efc29",
"effectiveDate": "2010-01-01"
}]
}
```
### Declaring properties for a building
Data declaration can be done while creating an asset or can be done later when updating an asset.
:::info
Automatically set `effectiveDate` to current date and `expirationDate` to max system date
:::
:::info
Keys of `simple` object are referring to property’s `code`.
This code can be found in [our DQC product](https://app.stonal.io/dqc) for each asset's type
In this example we are on an BUILDING, its property named *Adresse* has `ADDRESS` for code.
Screenshoot from DQC on a URL like `https://app.stonal.io/dqc/$ORGANIZATION_CODE/asset-types/EQUIPMENT/assets/$ASSET_UID`

Nb: code can also have uuid format
In this example we are on an EQUIPMENT, its property named *Date dernier renouvellement* has `43f1f705-b3b3-4ff3-9ca3-a5c5ed638eef` for code.
Screenshoot from DQC on a URL like `https://app.stonal.io/dqc/$ORGANIZATION_CODE/asset-types/EQUIPMENT/assets/$ASSET_UID`

:::
```json title="📄 adding-address-and-date-for-a-building.json"
{
"assets": [{
"externalIds": {
"CODE": "BUILDING_001"
},
"properties": {
"source": "PREMIANCE", // Optionnal - by default it's set to "DEFAULT"
"simple": {
"ADDRESS": "28, cours Albert 1er, 75008 PARIS, France",
"BUILDING_DATE": "2025-11-25"
}
}
}]
}
```
#### Ignoring unknown properties
:::tip
If we want to ignore unknown properties and create existing ones (instead of throwing and stopping ingestion) we can set `ignoreUnknowns` parameter to `true` in `options`
:::
```json title="📄 adding-data-for-existing-properties-and-ignore-unkown-properties.json"
{
"options": {
"properties": {
"ignoreUnknowns": true
}
},
"assets": [
{
"uid": "2009d42d-0f31-4c0f-a395-b7688e3b667d",
"properties": {
"source": "PREMIANCE",
"simple": {
"NON_EXISTING": "A value", // Will be ignored
"ADDRESS": "28, cours Albert 1er, 75008 PARIS, FRANCE", // Will be created because this property exists
}
}
}
]
}
```
The unknown properties will be ignored and not inserted and consequently not returned
```json title="➡️ output"
{
"assets": [
{
"uid": "2009d42d-0f31-4c0f-a395-b7688e3b667d",
"externalIds": {
"CODE": "BUILDING_001"
},
"type": "BUILDING",
"name": "Bâtiment 1",
"properties": {
"source": "PREMIANCE",
"simple": {
"ADDRESS": "28, cours Albert 1er, 75008 PARIS, FRANCE"
}
}
}
]
}
```
#### Expiring a property value
:::info
Sending a `simple` property mapped to `null` **expires** its current value on the asset (its `expirationDate` is set to today). Other properties sent in the same request are created or updated as usual.
:::
:::tip
This is the same `null` convention already used to remove a `parent` or an `externalId`.
:::
```json title="📄 expiring-a-property-for-a-building.json"
{
"assets": [{
"externalIds": {
"CODE": "BUILDING_001"
},
"properties": {
"simple": {
"ADDRESS": "28, cours Albert 1er, 75008 PARIS, France", // Created / updated as usual
"BUILDING_DATE": null // Expires the current BUILDING_DATE value
}
}
}]
}
```
- A property **key absent** from `simple` means "no change"; a key present with **`null`** means "expire".
- Sending an **empty string** (`""`) is rejected with a validation error.
- If the property has no current value, the `null` is silently ignored (any future-dated value is left untouched).
- An expired property is **not** returned in the response, since it no longer has a current value. Sending a value again re-activates it.
#### Declaring time-based properties
:::info
If not specified, automatically set `startDate` to current date and `endDate` to max system date
:::
```json title="📄 defining-tenants-by-dates-for-a-building.json"
{
"assets": [{
"externalIds": {
"CODE": "BUILDING_001"
},
"properties": {
"precise": {
"TENANT_NAME": [
{
"rawValue": "Laboratoire A",
"endDate": "2029-01-31"
},
{
"rawValue": "Avocats B",
"startDate": "2029-02-01",
"endDate": "2035-01-01"
}
]
}
}
}]
}
```
### Deleting an asset
:::warning
Only the `uid` is allowed when specifying the asset to delete. Using `externalIds` is not allowed for deletion.
:::
:::info
We cannot set a `deletedAt` value that is more than 1h after or before the current time.
:::
:::info
The asset to delete must not have any child assets. It may still have parent assets, but it cannot reference other assets as its descendants.
:::
```json title="📄 deleting-an-asset.json"
{
"assets": [{
"uid": "1712974c-3758-4e67-8717-1aa2441efc29",
"deletedAt": "2025-02-21T23:30:58.284Z"
}]
}
```
---
# Introduction
URL: https://docs.stonal.io/fr/api
# Welcome to the Stonal API
## What is the Stonal API for?
Connect Stonal to your tools so your real-estate data stays up to date without re-keying: your
buildings, documents and contracts sync automatically, both ways.
In practice, the API lets you:
- **feed** Stonal from your own tools (ERP, management software, company directory…);
- **retrieve** the data enriched by Stonal in your tools (classified documents, extracted
information…);
- **be notified** automatically whenever data changes.
:::note A word on terminology
In Stonal, an **asset** is any element of your real-estate portfolio: a building, a unit, a piece of
equipment… This is the term used throughout the Stonal interfaces.
:::
## Available APIs
| API | What it does | Learn more |
|-----|--------------|------------|
| **Assets** | Import, synchronize and link your assets (buildings, units, equipment), manage their hierarchy and search across your portfolio. | [Guide](/api/assets) |
| **Users** | Provision users and manage their access rights: which portfolio, applications and reports each one can see. | [Guide](/api/users) |
| **Documents** | Upload your documents in bulk (surveys, deeds of sale, leases, insurance certificates…) and let the AI classify them, extract the key information and link them automatically to your portfolio. | [Guide](/api/documents) |
| **Stakeholders** | Add and keep your contacts up to date in the Stonal platform (building caretakers, maintenance operators…). | [Guide](/api/stakeholders) |
| **Contracts** | Add and keep contracts up to date (leases, maintenance contracts…), specifying the scope of work, the equipment type involved and the linked contact. | [Guide](/api/contracts) |
| **Webhooks** | Be notified in real time of changes (document creation, update, deletion). | [Guide](/api/webhooks) |
## Use-case examples
Here are a few concrete scenarios. They are often combined within a single integration project.
### 1. Automatically synchronize your portfolio
Keep an up-to-date repository of your **assets** (buildings, units, equipment) in Stonal by importing
and synchronizing them from your IS (ERP, management software), rather than through manual double
entry. Whenever something changes on the IS side, the assets and their **properties** (area,
address, internal identifiers…) are updated in Stonal, ensuring a single, reliable source of truth.
You can also create **links between assets** to reconstruct their hierarchy: a piece of equipment
attached to a unit, itself attached to a building. *For example*, when a new building enters your
portfolio, your IS triggers its creation in Stonal together with its full tree, with no manual work.
→ [**Assets**](/api/assets) API
### 2. Manage your users' access
Automatically provision your **users** from your company directory, then keep them synchronized. For
each user, define what they can access: the portfolio concerned, the features allowed and the
applications opened. To save time, bundle users who share the same rights into **groups**.
*For example*, when an employee joins, their account and access are created automatically; when they
leave, these are revoked — with no manual steps and no risk of oversight.
→ [**Users**](/api/users) API
### 3. Centralize and leverage your documents
Upload your documents in bulk (surveys, electrical-compliance certificates, deeds of sale, leases,
tenant insurance certificates…) and let **Stonal's AI** do the filing: it **categorizes** each file
to file it automatically in the right folder, **extracts the key information** (dates, key survey
details, buyer…) and **automatically links** it to the relevant assets (for example, a unit-level
survey is attached to the matching unit). You can also specify, right at import, the document type
(its class), the folder to file it in and the unit or building it refers to — if you already know the
information, we recommend filling it in.
You then retrieve these documents and their metadata through **search**, directly in your tools. *For
example*, a DAPP is categorized as such, filed in the right folder of the documentary tree and linked
to the right building.
→ [**Documents**](/api/documents) API
### 4. Record your contacts and contracts
Create **contracts** (leases, maintenance contracts, service agreements…) and link them to everything
they involve: the **scope of work** (the buildings covered), the **equipment type** involved (e.g.
elevators — the precise equipment is then derived from the scope + the type), as well as the
**contacts** — tenants, owners or service providers, whether individuals or companies. You then keep
these contracts up to date throughout their lifecycle (renewal, amendment, termination).
*For example*, an elevator maintenance contract covers a scope of several buildings and the
"elevator" equipment type; it is linked to its provider, giving a consolidated view of who works on
which scope, and until when.
→ [**Stakeholders**](/api/stakeholders) and [**Contracts**](/api/contracts) APIs
### 5. React to changes in real time
Rather than polling the API constantly to spot what's new, let Stonal **notify you**: every time a
document is created, updated or deleted in your organization — including during automated processing
(OCR, AI classification…) — a **webhook** calls your system with the details of the event.
You can then trigger an action on your side in real time. *For example*, as soon as a new lease is
classified by the AI, your business tool is notified and can start the corresponding validation
workflow.
→ [**Webhooks**](/api/webhooks)
## Getting started
1. **Create credentials** — define an API user and [generate a personal access token (PAT)](/api/auth/pat).
No account yet? Reach out to an administrator in your organization or your Stonal account
manager — it's required to create API credentials.
2. **Pick your use case** — find the matching API in the table above, then hand the related technical
guide to your IT department.
---
# Managing documents
URL: https://docs.stonal.io/fr/api/documents
# Managing documents
This document introduces the concepts behind Stonal's document management platform enhanced by artificial intelligence.
Understanding these concepts will help you navigate the system, from uploading documents to leveraging AI-powered analysis and organization.
## Overview
The platform enables organizations to **store**, **organize**, and **analyze documents** efficiently.
It provides advanced AI capabilities to automatically **extract**, **categorize**, and **relate information** from the uploaded files.
The main objectives of the system are:
- Centralizing all documents related to assets and activities.
- Enhancing document quality and structure via automated AI processing.
- Ensuring traceability and controlled access across organizational structures.
## Core Concepts
### Organizations
Organizations are the primary structure used to group and manage documents.
Each document is attached to a specific organization.
:::info
The `organizationCode` is used throughout the APIs to associate actions with the correct organization.
:::
### Documents
Documents are any files (PDFs, images, spreadsheets, etc.) uploaded into the system.
Once uploaded, documents can be enriched with metadata, structured into folders, and linked to various assets (such as facilities or buildings).
### AI Enrichment
Once a document is uploaded, the platform's AI services can perform operations such as:
- **Automatic extraction** of key metadata (dates, addresses, asset identifiers, etc.).
- **Classification** of documents into predefined categories.
- **Contextual linking** to existing assets and documentation structures.
:::note
AI enrichment can happen immediately after upload or as part of scheduled processing.
:::
### Permissions and Access
The platform enforces strict access control based on organizational memberships and user permissions, ensuring that documents are securely managed and accessible only to authorized users.
## Uploading Documents
Uploading documents is the first step towards building a structured and intelligent document repository.
Documents can be uploaded through the public API by providing:
- The file itself
- An optional **manifest** JSON providing contextual information
Uploaded documents are processed and stored, making them available for AI enrichment and further organization.
---
# Personal Access Token (Recommended)
URL: https://docs.stonal.io/fr/api/auth/pat
# Personal Access Token (Recommended)
Personal access tokens require minimal setup and don't need credential exchange between your organization and Stonal. When you generate a token, Stonal only stores its hashed version, enhancing security.
## Creating an API user
:::info Prerequisites
You must have admin account access.
:::
1. Navigate to the [**User Management Interface**](https://app.stonal.io/users) (staging is [here](https://app.stonal-staging.io/users))
2. Create an api user account
3. Store the password securely - you'll need it for the next step
4. You may log out after completing this step

## Generating a Personal Access Token
1. Log in using the api user credentials you created
2. Navigate to the [**Personal Access Token Management Interface**](https://app.stonal.io/users/pat) (staging is [here](https://app.stonal-staging.io/users/pat))
:::info
Select an appropriate token duration based on your security requirements.
:::

3. After generation, copy and securely store your token using the provided button

## Using Your Personal Access Token
Include your token in the `Authorization` header of all API requests using the `Bearer` prefix:
```
Authorization: Bearer
```
For example:
```
Authorization: Bearer 42e66530-251a-48ca-8da7-22768cbf6982
```
---
# Understanding access
URL: https://docs.stonal.io/fr/api/users/understanding-access
# Understanding access
A user's access is granted through exactly **two** mechanisms — **user groups** (`userGroupUids`) and **permissions** (`permissions[].uid`). Everything else — profiles, application groups, assets, report groups — is not a separate concept; it's just a permission with a different `type`/`subType`.
## Permissions by type
| What you grant | `type` | `subType` | Controls |
| --- | --- | --- | --- |
| Profile | `PROFILE` | — | Functional scope; some apps (Keep, Model) use it for access rights |
| Application access | `SCOPE_GROUP` | `APPLICATION` | Which applications the user can open (e.g. document storage via `stonal.application.platform`) |
| Company | `ASSET` | `COMPANY` | A company and the assets it owns |
| Portfolio | `ASSET` | `PORTFOLIO` | A portfolio and its assets |
| Facility | `ASSET` | `FACILITY` | A facility |
| Building group | `ASSET` | `BUILDING_GROUP` | A building group |
| Building | `ASSET` | `BUILDING` | A single building |
| Report group | `REPORT_GROUP` | — | The underlying reports |
:::info
`allAssets: true` is the shortcut for "all assets" instead of listing `ASSET` permissions.
:::
:::note
Permissions are hierarchical — the API exposes `level`, `parentUids`, and `children { count, uids }` (e.g. a company contains its buildings); the [lookup reference](/api/users/lookup-reference) shows how to walk the tree.
For completeness, the full enums: `type` ∈ ASSET, PROFILE, SCOPE, SCOPE_GROUP, REPORT, REPORT_GROUP; `subType` ∈ BUILDING, BUILDING_GROUP, FACILITY, PORTFOLIO, COMPANY, APPLICATION, RIGHT, POWERBI, METABASE.
:::
## Authorization at a glance
```mermaid
graph TD
User -->|userGroupUids| Groups
User -->|"permissions[].uid"| Permissions
Groups --> Permissions
Permissions --> PROFILE
Permissions --> SCOPE_GROUP["SCOPE_GROUP — Application groups"]
Permissions --> ASSET
Permissions --> REPORT_GROUP
ASSET --> COMPANY & PORTFOLIO & FACILITY & BUILDING_GROUP & BUILDING
SCOPE_GROUP --> APPLICATION & RIGHT
```
## Suspending access
Independently of the groups and permissions above, a user's access to an organization can be **suspended** without removing the user. A disabled user keeps their record and permissions but loses all access to the organization; user listings surface this as a `disabled` flag so you can find and re-enable them. See [disabling a user](/api/users/delete-a-user#disabling-a-user).
Next: [look up the groups and permissions](/api/users/lookup-reference) you'll assign, then [create or update a user](/api/users/create-or-update-a-user).
---
# Getting Started
URL: https://docs.stonal.io/fr/api/getting-started
# Getting Started
## Create credentials
Define an API user and [generate a personal access token (PAT)](/api/auth/pat) for it. No account yet? Reach out to an administrator in your organization or your Stonal account manager — it's required to create API credentials.
## Define what you want to do
- [Manage assets](/api/assets)
- [Manage users](/api/users)
- [Manage documents](/api/documents)
- [Manage stakeholders](/api/stakeholders)
- [Manage contracts](/api/contracts)
- [Receive live updates](/api/webhooks)
## 📮 Try it in Postman
Download the Stonal API collection and import it into [Postman](https://www.postman.com/) to explore the endpoints interactively:
- stonal-api.postman_collection.json
The collection bundles Assets, Documents, Users, and Legacy endpoints in separate folders, and is refreshed on every build.
## 🧠 Using AI coding agents
This documentation follows the [llms.txt](https://llmstxt.org/) convention so AI coding agents can work autonomously on your Stonal integration. Point your agent (Claude Code, Cursor, GitHub Copilot, etc.) at one of these URLs:
- [`https://docs.stonal.io/llms.txt`](https://docs.stonal.io/llms.txt) — concise index with links to every guide and API reference
- [`https://docs.stonal.io/llms-full.txt`](https://docs.stonal.io/llms-full.txt) — full documentation bundled into a single file
Both are refreshed on every build, so your agent always sees the current API.
---
# Authenticating
URL: https://docs.stonal.io/fr/api/auth
# Authenticating
We currently support two authentication methods for our APIs:
- [Personal access tokens](/api/auth/pat) (recommended) - the simplest approach requiring minimal setup
- [OpenID Connect](/api/auth/openid) - for organizations requiring more advanced authentication flows
---
# Authenticating users
URL: https://docs.stonal.io/fr/api/users/authenticating-users
# Authenticating users
At Stonal, we use a dedicated service for identity management.
:::info
We support only the OpenID Connect (OIDC) protocol for authentication.
:::
Need an API access token instead? See [Authentication](/api/auth).
Federating a customer's own SSO? See [Set up identity delegation](/guide/administration/gestion-des-utilisateurs/delegation-didentite).
## Authentication
### Workflow
We use **authorization_code** grant type flow for OIDC authentication.
```mermaid
sequenceDiagram
actor A as User
participant B as Platform Stonal (Web App)
participant C as API GATEWAY
participant D as SSO
participant E as Stonal Service (Stonal API)
A->>B: 1 - goes to
B->>C: 2 - Request user authorization
C->>D: 3 - Redirect to SSO
D->>C: 4 - Authorization Code
C->>D: 5 - Request Access Token
D-->>C: 5 - Return Access Token
C->>B: 6 - Redirect to Platform
B->>C: 7 - Request data via private Stonal API with Session
C->>E: 7 - Request data via private Stonal API with Access Token
E->>B: 8 - Return data
```
### Description
All Stonal APIs are protected by authentication and authorization mechanisms.
By default, our platform frontend fetches the user connected authorization through an internal API Gateway.
The API Gateway is responsible for checking if current user is connected via a secured cookie.
Depending on whether the user is connected, the API Gateway will use the access and refresh tokens (JWT tokens)
stored alongside with the cookie in a private data store to fetch the user connected authorizations and access
Stonal private APIs.
If the user is not connected, the API Gateway will redirect the user to our SSO service to authenticate.
When authenticated, our SSO service will redirect the user back to the API Gateway with an authorization code
which will be exchanged for an access token and a refresh token associated with the user and stored in the private data store
alongside with the cookie.
:::info
Be aware, users account need to be created before users can authenticate through the SSO.
Go to [Managing users](/api/users) for more information.
:::
---
# Modifying a user
URL: https://docs.stonal.io/fr/api/users/legacy/modify-a-user
# Modifying a user
This guide explains how to update an existing user in the Stonal platform using the API. Similar to user creation, updating a user requires gathering current information before making changes.
:::info Prerequisites
- API access credentials
- A valid access token (see: [**Get a token**](/api/reference/legacy/get-access-token))
- An organization code
:::
:::note Update by email
If you wish to update an existing user by email, you can follow the previous creation process, as described: [Here](/api/users/legacy/create-a-user)
The creation endpoint will update the user if it already exists.
:::
### Step 1: Lookup the user information that needs change
Verify available companies that can be assigned to the user:
See: [**API Specification**](/api/reference/legacy/find-all-companies-by)
```http
GET /v1/organizations/{organizationCode}/users/companies
```
Query parameters:
- `page` (optional): Page number (default: 0)
- `size` (optional): Items per page (default: 100)
The resulting companies can be used to update a user with the `company` field.
Thus giving the user the right to access the assets of the corresponding company.
Retrieve available authorization models (application groups):
See: [**API Specification**](/api/reference/legacy/find-all-authorizations-by)
```http
GET /v1/organizations/{organizationCode}/users/authorizations
```
This returns available authorization models (application groups) with:
- Model ID
- Name
- Description
- Available applications
The resulting authorization models can be used to update a user with the `authorization.modelId` field.
Thus giving the user the right to access the corresponding applications.
Get available user groups:
See: [**API Specification**](/api/reference/legacy/find-all-groups-by)
```http
GET /v1/organizations/:organizationCode/users/groups
```
The resulting groups can be used to create a user with the `groupUids` field.
Retrieve available user profiles:
See: [**API Specification**](/api/reference/legacy/find-all-profiles-by)
```http
GET /v1/organizations/{organizationCode}/users/profiles
```
The resulting profiles can be used to update a user with the `profile` field.
Get the current list of available permissions:
See: [**API Specification**](/api/reference/legacy/find-all-permissions-by)
```http
GET /v1/organizations/{organizationCode}/users/permissions?pageNumber=1&pageSize=10
```
Query parameters:
- `pageNumber` (required): Page number
- `pageSize` (required): Items per page
- `type` (optional): Permission type (e.g., ASSET)
- `subType` (optional): Permission sub-type (e.g., PORTFOLIO)
- `q` (optional): Search query on label
- `sortField` (optional): Field to sort by
- `sortOrder` (optional): Sort order (asc/desc)
The resulting permissions can be used to update a user with the `permissionUids` field.
Thus giving the user the right to access the corresponding assets.
### Step 2: Update the user
Update the user with the modified information:
See: [**API Specification**](/api/reference/legacy/create)
```http
PUT /v1/organizations/{organizationCode}/users/{id}
```
Request body:
```json
{
"firstName": "updatedFirstName",
"lastName": "updatedLastName",
"company": "updatedCompanyName",
"groupUids": ["0192d7b7-2994-7ad5-9952-26862f33c21a"],
"authorization": {
"modelId": "2b2e8a4b-bfbd-4c56-b8d6-c8cb1d8c58ba",
"profile": "Developer",
"asset": {
"all": false
}
},
"permissionUids": [
"0192d7b7-2994-7ad5-9952-26862f33c21a",
"0192d7b7-7073-7e58-896c-07113f22363a"
]
}
```
Required fields:
- `firstName`: User's first name
- `lastName`: User's last name
- `company`: Company name (must be from available companies)
- `groupUids`: Array of group UIDs
- `authorization`: Authorization configuration
- `modelId`: ID of the authorization model
- `profile`: User profile
- `asset`: Asset access configuration
- `permissionUids`: Array of permission UIDs
Note: Unlike creation, the update request doesn't include the email address as it cannot be modified.
Possible responses:
- 204: User updated successfully
- 404: User not found
### Key Differences from Creation
When updating a user, note these important differences:
1. Email address cannot be modified
2. Use PUT instead of POST method
3. Requires user ID in the path
4. Returns 204 (no content) on success instead of 201
### Important Considerations
1. **Partial Updates**: The API does not support partial updates. You must provide all required fields in the update request, even if you're only changing one value.
2. **Asset Access**:
- When modifying asset access, provide the complete new set of asset codes
- Setting `"all": true` overrides any specific permissions for the asset type
3. **Permissions**:
- Provide the complete new set of permission UIDs
- All existing permissions will be replaced
- All permission UIDs must be valid
4. **Authorization Model**:
- Changing the authorization model might affect user's access to various features
- Ensure the new model provides appropriate access levels
### Error Handling
Common error scenarios:
- User not found (404)
- Invalid authorization model ID
- Invalid company name
- Invalid group UIDs
- Invalid permission UIDs
- Missing required fields
- Invalid format of asset codes
### Best practices
1. Always retrieve current user data before updating
2. Validate all new values against the lookup endpoints
3. Keep track of sensitive changes (authorization, permissions)
4. Implement proper error handling for 404 responses
---
# OpenID Connect
URL: https://docs.stonal.io/fr/api/auth/openid
# OpenID Connect
## Obtaining Client Credentials
A client defines the application authorized to generate tokens for users.
To request your client credentials, contact us at [api-support@stonal.com](mailto:api-support@stonal.com).
## Creating an API User
:::info Prerequisites
You must have admin account access.
:::
1. Navigate to the [**User Management Interface**](https://app.stonal.io/users)
2. Create an api user account
3. Store the password securely - you'll need it for token generation
4. You may log out after completing this step

## Retrieving an Access Token
Make a POST request to:
```
POST https://sso.stonal.io/realms/stonal/protocol/openid-connect/token
```
Headers:
```
Content-Type: application/x-www-form-urlencoded
Authorization: Basic
```
URL-encoded parameters:
```
grant_type=password&username=&password=
```
You'll receive a response similar to:
```json
{
"access_token": "eyJhbGciOiJSUzI1NiIsInR5cCIgOiAiSldUIiwia2lkIiA6ICI0bWxIZkFFR1ItN2RkOTZyR205SjQ0NlRpQlVNZFdFNE00Uk1ETFIxUE44In0.eyJleHAiOjE3Mzk4OTYyMDgsImlhdCI6MTczOTg5NTkwOCwianRpIjoiYTEwZTg5NmMtODc1NC00NGI4LWEwZDEtZTNkZjIyZmVjNGIyIiwiaXNzIjoiaHR0cHM6Ly9zc28uc3RvbmFsLWRldi5pby9yZWFsbXMvc3RvbmFsIiwiYXVkIjpbInJlYWxtLW1hbmFnZW1lbnQiLCJhY2NvdW50Il0sInN1YiI6ImNkNjEzMDlmLWU0NTQtNGVjYy1hNThlLTMxNDU2MmZlYmQyOSIsInR5cCI6IkJlYXJlciIsImF6cCI6ImF1dGhvcml6YXRpb24tc2VydmVyIiwic2lkIjoiNGM1YTQ4YTMtMjBlYi00ZWQ0LWIwZjMtNjBiNzQ5MWY3YzMyIiwiYWNyIjoiMSIsInJlYWxtX2FjY2VzcyI6eyJyb2xlcyI6WyJkZWZhdWx0LXJvbGVzLXN0b25hbCIsIm9mZmxpbmVfYWNjZXNzIiwidW1hX2F1dGhvcml6YXRpb24iXX0sInJlc291cmNlX2FjY2VzcyI6eyJyZWFsbS1tYW5hZ2VtZW50Ijp7InJvbGVzIjpbImltcGVyc29uYXRpb24iXX0sImFjY291bnQiOnsicm9sZXMiOlsibWFuYWdlLWFjY291bnQiLCJtYW5hZ2UtYWNjb3VudC1saW5rcyIsInZpZXctcHJvZmlsZSJdfX0sInNjb3BlIjoicHJvZmlsZSBvcGVuaWQgZW1haWwiLCJlbWFpbF92ZXJpZmllZCI6dHJ1ZSwibmFtZSI6ImFkbWluIGFkbWluIiwicHJlZmVycmVkX3VzZXJuYW1lIjoiYWRtaW4tcGxhdGVmb3JtZUBsYWZvbmNpZXJlbnVtZXJpcXVlLmNvbSIsImdpdmVuX25hbWUiOiJhZG1pbiIsImZhbWlseV9uYW1lIjoiYWRtaW4iLCJlbWFpbCI6ImFkbWluLXBsYXRlZm9ybWVAbGFmb25jaWVyZW51bWVyaXF1ZS5jb20ifQ.A8K_CXFRG7MdXiMoQhHv4flsomkMlI8OVZ_siC6BwAIDg19Q-LzfMjSbGZuwwx_k-UIeFAfrOvsEK1Pcr5QSVFsnJ-cThr4abaKIXGDOh11QUisM7ZTmk5iAWkoIOOni94Q4WgWscoZxgEOqtXGJsmpx9xipTXCNfW_nA_okquMmJLdm3zzHqAaq0uD7LmMavxWYQfyG0OT8NB-Xm7baiZgL_BdQnILjbZ2eeoJJPf0fv5i_tuyoOyC3NbOMMrBhzJd187KUpQx0lODhprT53DY2DMth-44evdCjBiQsw_BHI9HPT_qr7BBO_8EbbBQVZF3ny5RrI4cUxhsm_xhODQ",
"expires_in": 300,
"refresh_expires_in": 172800,
"refresh_token": "eyJhbGciOiJIUzUxMiIsInR5cCIgOiAiSldUIiwia2lkIiA6ICI4ODZkZDRlMi1hNzUwLTQ5NmQtODhiYy04YmM1MGM1OTViOTEifQ.eyJleHAiOjE3NDAwNjg3MDgsImlhdCI6MTczOTg5NTkwOCwianRpIjoiYmEzYzczM2EtM2Y2OS00YzEwLTgzMDYtYzcwMTdlODFkOTZmIiwiaXNzIjoiaHR0cHM6Ly9zc28uc3RvbmFsLWRldi5pby9yZWFsbXMvc3RvbmFsIiwiYXVkIjoiaHR0cHM6Ly9zc28uc3RvbmFsLWRldi5pby9yZWFsbXMvc3RvbmFsIiwic3ViIjoiY2Q2MTMwOWYtZTQ1NC00ZWNjLWE1OGUtMzE0NTYyZmViZDI5IiwidHlwIjoiUmVmcmVzaCIsImF6cCI6ImF1dGhvcml6YXRpb24tc2VydmVyIiwic2lkIjoiNGM1YTQ4YTMtMjBlYi00ZWQ0LWIwZjMtNjBiNzQ5MWY3YzMyIiwic2NvcGUiOiJiYXNpYyByb2xlcyBhY3IgcHJvZmlsZSB3ZWItb3JpZ2lucyBvcGVuaWQgZW1haWwifQ.E9kEudbh2CVVRxlXly6UA15cX6VYhyJ4_appoA-Bjw73OZ7RbW8TemhntqBC--JHuoWCIPp5HGT7oSywySMPNA",
"token_type": "Bearer",
"not-before-policy": 0,
"session_state": "4c5a48a3-20eb-4ed4-b0f3-60b7491f7c32",
"scope": "profile openid email"
}
```
#### Using Your Access Token
Include the token in the `Authorization` header of all API requests using the `Bearer` prefix:
```
Authorization: Bearer
```
For example:
```
Authorization: Bearer eyJhbGciOiJSUzI1NiIsInR5cCIgOiAiSldUIiwia2lkIiA6ICI0bWxIZkFFR1ItN2RkOTZyR205SjQ0NlRpQlVNZFdFNE00Uk1ETFIxUE44In0.eyJleHAiOjE3Mzk4OTYyMDgsImlhdCI6MTczOTg5NTkwOCwianRpIjoiYTEwZTg5NmMtODc1NC00NGI4LWEwZDEtZTNkZjIyZmVjNGIyIiwiaXNzIjoiaHR0cHM6Ly9zc28uc3RvbmFsLWRldi5pby9yZWFsbXMvc3RvbmFsIiwiYXVkIjpbInJlYWxtLW1hbmFnZW1lbnQiLCJhY2NvdW50Il0sInN1YiI6ImNkNjEzMDlmLWU0NTQtNGVjYy1hNThlLTMxNDU2MmZlYmQyOSIsInR5cCI6IkJlYXJlciIsImF6cCI6ImF1dGhvcml6YXRpb24tc2VydmVyIiwic2lkIjoiNGM1YTQ4YTMtMjBlYi00ZWQ0LWIwZjMtNjBiNzQ5MWY3YzMyIiwiYWNyIjoiMSIsInJlYWxtX2FjY2VzcyI6eyJyb2xlcyI6WyJkZWZhdWx0LXJvbGVzLXN0b25hbCIsIm9mZmxpbmVfYWNjZXNzIiwidW1hX2F1dGhvcml6YXRpb24iXX0sInJlc291cmNlX2FjY2VzcyI6eyJyZWFsbS1tYW5hZ2VtZW50Ijp7InJvbGVzIjpbImltcGVyc29uYXRpb24iXX0sImFjY291bnQiOnsicm9sZXMiOlsibWFuYWdlLWFjY291bnQiLCJtYW5hZ2UtYWNjb3VudC1saW5rcyIsInZpZXctcHJvZmlsZSJdfX0sInNjb3BlIjoicHJvZmlsZSBvcGVuaWQgZW1haWwiLCJlbWFpbF92ZXJpZmllZCI6dHJ1ZSwibmFtZSI6ImFkbWluIGFkbWluIiwicHJlZmVycmVkX3VzZXJuYW1lIjoiYWRtaW4tcGxhdGVmb3JtZUBsYWZvbmNpZXJlbnVtZXJpcXVlLmNvbSIsImdpdmVuX25hbWUiOiJhZG1pbiIsImZhbWlseV9uYW1lIjoiYWRtaW4iLCJlbWFpbCI6ImFkbWluLXBsYXRlZm9ybWVAbGFmb25jaWVyZW51bWVyaXF1ZS5jb20ifQ.A8K_CXFRG7MdXiMoQhHv4flsomkMlI8OVZ_siC6BwAIDg19Q-LzfMjSbGZuwwx_k-UIeFAfrOvsEK1Pcr5QSVFsnJ-cThr4abaKIXGDOh11QUisM7ZTmk5iAWkoIOOni94Q4WgWscoZxgEOqtXGJsmpx9xipTXCNfW_nA_okquMmJLdm3zzHqAaq0uD7LmMavxWYQfyG0OT8NB-Xm7baiZgL_BdQnILjbZ2eeoJJPf0fv5i_tuyoOyC3NbOMMrBhzJd187KUpQx0lODhprT53DY2DMth-44evdCjBiQsw_BHI9HPT_qr7BBO_8EbbBQVZF3ny5RrI4cUxhsm_xhODQ
```
:::info
Important: Access tokens expire after 5 minutes. After expiration, you must either:
1. Generate a new access token, or
2. Use the refresh token to obtain a new access token
:::
---
# Upload a file
URL: https://docs.stonal.io/fr/api/documents/upload-a-file
This guide covers the supported strategies for uploading documents to the Stonal platform. It details the main combinations you can use to tell the system where and how to place your document during upload.
---
### Prerequisites
* A valid OAuth access token (see [Authentication](/api/auth))
* Your organization code (used in the endpoint path)
* A file to upload
---
## 1. Upload Strategies & Required Fields
Each strategy maps to a combination of manifest fields. Use the table below to identify which payload suits your scenario.
| Strategy | Required Manifest Fields | Description |
| --- | --- | --- |
| **1. Asset UID + Documentation Template** ⭐ | `asset.uid`, `documentation.template` | **Recommended**: let the platform resolve the correct documentation for the asset. |
| **2. External Asset Code + Documentation Template** ⭐ | `asset.externalIds.{source}`, `documentation.template` | **Recommended** when your integration does not use Stonal asset UIDs. |
| **3. Asset + Documentation Template + Folder Template** ⭐ | Strategy 1 or 2 + `folder.template` | **Recommended** when you want to target a specific folder type within the documentation. |
| **4. Documentation UID** | `documentation.uid` | Use this when you already know the existing documentation you want to upload into. |
`linkedAssets`, `tags.documentation` and `documentClass` are optional enrichments that can be added on top of these strategies.
---
## 2. Manifest Example Payloads
Include only the fields you need for your chosen strategy.
### 2.1 By Asset UID + Documentation Template ⭐
```json
{
"asset": {
"uid": "822d8c50-0deb-4dae-8def-c9f9eab7f5be"
},
"documentation": {
"template": "f90ee77d-b6cc-41fa-8d1f-bea649e6d93d"
}
}
```
### 2.2 By External Asset Code + Documentation Template ⭐
```json
{
"asset": {
"externalIds": {
"code": "BUILDING_001"
}
},
"documentation": {
"template": "f90ee77d-b6cc-41fa-8d1f-bea649e6d93d"
}
}
```
### 2.3 By Asset + Documentation Template + Folder Template ⭐
```json
{
"asset": {
"externalIds": {
"code": "BUILDING_001"
}
},
"documentation": {
"template": "f90ee77d-b6cc-41fa-8d1f-bea649e6d93d"
},
"folder": {
"template": "e8df7c2a-b5bb-41fa-8d1f-bea649e6d93d"
}
}
```
### 2.4 By Documentation UID
Use this when the documentation UID is already known, for example because you previously retrieved it from the asset documentations endpoint.
```json
{
"documentation": {
"uid": "62c42614-31a8-43bb-a76f-8499c1b868e0"
}
}
```
### 2.5 Add linked assets
`linkedAssets` can be combined with the recommended template-based strategies.
```json
{
"asset": {
"externalIds": {
"code": "BUILDING_001"
}
},
"documentation": {
"template": "f90ee77d-b6cc-41fa-8d1f-bea649e6d93d"
},
"linkedAssets": [
{ "code": "RU-001" },
{ "uid": "fac98b98-c8ba-47e7-b5a6-2bc5222ae402" }
]
}
```
Important notes:
- `linkedAssets` by `code` are resolved relative to the parent `asset`.
- If you send `linkedAssets` without an `asset`, linked assets may be ignored.
- Use the list format shown above for new integrations.
### 2.6 Add documentation tags and a document class
Documentation tags are only associated if they already exist on the target documentation. The upload API does not create tags on the fly.
```json
{
"asset": {
"uid": "822d8c50-0deb-4dae-8def-c9f9eab7f5be"
},
"documentation": {
"template": "f90ee77d-b6cc-41fa-8d1f-bea649e6d93d"
},
"documentClass": "123e4567-e89b-12d3-a456-426614174007",
"tags": {
"documentation": ["LEASE 2026", "SIGNED"]
}
}
```
---
## 3. Template Discovery (Recommended Workflow)
Before using template-based strategies, discover available templates:
### 3.1 List available templates
```bash
curl -H "Authorization: Bearer {accessToken}" \
"https://api.stonal.io/document-storage/v1/organizations/{organizationCode}/templates?language=fr-FR"
```
**Response:**
```json
{
"templates": [
{
"id": "f90ee77d-b6cc-41fa-8d1f-bea649e6d93d",
"name": "DOE",
"organizationCode": "STONAL",
"attachmentType": "BUILDING_GROUP"
}
]
}
```
### 3.2 Get template details with folders
```bash
curl -H "Authorization: Bearer {accessToken}" \
"https://api.stonal.io/document-storage/v1/organizations/{organizationCode}/templates/{templateId}?language=fr-FR"
```
**Response:**
```json
{
"template": {
"id": "f90ee77d-b6cc-41fa-8d1f-bea649e6d93d",
"name": {
"fr-FR": "DOE"
},
"organizationCode": "STONAL",
"attachmentType": "BUILDING_GROUP",
"folders": [
{
"id": "e8df7c2a-b5bb-41fa-8d1f-bea649e6d93d",
"name": {
"fr-FR": "Documents généraux"
},
"parentId": null,
"documentClass": {
"identifier": "documentClassIdentifier",
"code": "DPE"
}
}
]
}
}
```
You can then use:
- `template.id` as `documentation.template`
- `template.folders[].id` as `folder.template`
### 3.3 Retrieve existing documentations for an asset
If you want to upload into an existing documentation, first retrieve the documentations attached to the asset:
```bash
curl -H "Authorization: Bearer {accessToken}" \
"https://api.stonal.io/document-storage/v1/organizations/{organizationCode}/assets/{assetId}/documentations"
```
Use the returned `identifier` as `documentation.uid`.
For the full retrieval workflow, see [Retrieve documentations for an asset](/api/reference/documents/get-documentations-for-asset).
---
## 4. Single-Request API Call
Send both your manifest and file in one `multipart/form-data` POST:
```bash
curl -X POST \
"https://api.stonal.io/document-storage/v1/organizations/{organizationCode}/files/upload" \
-H "Authorization: Bearer {accessToken}" \
-F 'manifest=@manifest.json;type=application/json' \
-F 'file=@/path/to/your/file.pdf;type=application/pdf'
```
Replace placeholders with your actual values.
---
## 5. Response Format
**200 OK** with JSON:
```json
{
"documentId": "123e4567-e89b-12d3-a456-426614174000",
"duplicateDocumentIds": []
}
```
The API may also return non-blocking warnings in the `X-DOCUMENT-STORAGE-WARNING` response header.
Examples:
- `LINKED_ASSETS_NOT_FOUND`
- `LINKED_ASSETS_NOT_FOUND:RU-001,PARK-002`
- `LINKED_ASSETS_SKIPPED_NO_PARENT`
### When is AI processing triggered?
In public upload flows, an AI request is sent when the uploaded file is attached to a documentation context.
The requested treatment then depends on the upload context:
- if the file is uploaded only into a documentation, AI classification is requested
- if a document class is provided, metadata extraction is requested
- OCR is always requested as part of the AI request
In practice, template-based uploads remain the main public way to place the document in the right documentation before AI processing starts.
---
## 6. Error Handling
| Status | When |
|---|---|
| **400 Bad Request** | Missing or invalid manifest fields, invalid multipart request, or a rejected file (see [6.1](#61-rejected-files)) |
| **404 Not Found** | Referenced asset, documentation, template folder, or matching documentation for the provided asset and documentation template was not found |
| **409 Conflict** | Specified asset and documentation are not linked |
| **413 Payload Too Large** | The file exceeds the size allowed for its type |
| **415 Unsupported Media Type** | The file type is not supported |
| **422 Unprocessable Entity** | No documentation template matches the asset |
Handle these responses gracefully in your integration.
### 6.1 Rejected files
When the file itself is rejected, the body follows the Stonal error envelope ([RFC 9457](https://www.rfc-editor.org/rfc/rfc9457)):
```json
{
"type": "tag:UnsupportedFileType",
"title": "Unsupported file type",
"status": 415,
"detail": "Unsupported file type: malware.exe"
}
```
| `type` | Status | Meaning |
|---|---|---|
| `tag:EmptyFile` | 400 | The file is empty |
| `tag:InvalidFileName` | 400 | The file name is missing or contains a path |
| `tag:InvalidContentType` | 400 | The declared `Content-Type` does not match the file extension |
| `tag:InvalidFileSignature` | 400 | The file content does not match its extension, e.g. a JPEG photo renamed `.pdf` |
| `tag:FileTooLarge` | 413 | The file exceeds an upload size limit. When the per-file-type limit is exceeded, the body also carries `fileName`, `documentType`, `fileSizeBytes` and `maxFileSizeBytes`; these fields are absent when the server rejects the multipart body before validation. |
| `tag:UnsupportedFileType` | 415 | The file extension is not supported |
Branch on `type`, never on the wording of `detail`, which may change. Manifest errors are still returned as plain text.
The body also contains `error` and `message` fields, kept for existing integrations. They are deprecated and will be removed: use `type` and `detail` instead.
---
## 7. Best Practices
* **Prioritize templates**: This is the main public integration path and the most future-proof one.
* **Discover templates first**: Use the `/templates` API to explore available options.
* **Prefer asset UIDs when possible**: They remain the clearest identifiers.
* **Use documentation UID only when already known**: Retrieve it first from the asset documentations endpoint.
* **Use linked assets only with a parent asset**: Code-based linked assets are resolved relative to that parent.
* **Remember that documentation tags are not created automatically**: Only existing documentation tags are associated.
For more details, see our [API specification](/api/reference/documents/upload-file).
---
## 8. Complete Example
### 8.1 Recommended approach
For this manifest example:
```json title="manifest.json"
{
"asset": {
"externalIds": {
"code": "BUILDING_001"
}
},
"documentation": {
"template": "f90ee77d-b6cc-41fa-8d1f-bea649e6d93d"
},
"folder": {
"template": "e8df7c2a-b5bb-41fa-8d1f-bea649e6d93d"
},
"linkedAssets": [
{ "code": "RU-001" }
],
"tags": {
"documentation": ["DPE 2026"]
},
"documentClass": "123e4567-e89b-12d3-a456-426614174007"
}
```
We will use the following command to upload the file:
```bash
curl \
-X POST "https://api.stonal.io/document-storage/v1/organizations/{organizationCode}/files/upload" \
-H "Authorization: Bearer {accessToken}" \
-F 'manifest=@manifest.json;type=application/json' \
-F 'file=@sample.pdf;type=application/pdf'
```
### 8.2 Existing documentation already known
For this manifest example:
```json title="manifest.json"
{
"documentation": {
"uid": "62c42614-31a8-43bb-a76f-8499c1b868e0"
}
}
```
We will use the same upload command with that manifest.
---
# Deleting a user
URL: https://docs.stonal.io/fr/api/users/legacy/delete-a-user
# Deleting a user
This guide walks through the process of deleting an existing user from the Stonal platform using the API.
:::info Prerequisites
- A valid set of API credentials
- A valid access token (see: [**Get a token**](/api/reference/legacy/get-access-token))
- An organization code
:::
### Step 1: Retrieving the user UID
Before deleting a user, verify that they exist to ensure the correct user will be deleted.
See: [**API Specification**](/api/reference/legacy/search-user-on-organization)
```http
POST /v1/organizations/{organizationCode}/users/search
```
Request body:
```json
{
"email": "firstName.lastName@corp.com"
}
```
If the user exists, you'll receive a 200 response with the user's details including their ID. If not, you'll need to verify the user information.
### Step 2: Delete the user
Once you have confirmed the user's existence and have their ID, you can proceed with deletion.
See: [**API Specification**](/api/reference/legacy/delete)
```http
DELETE /v1/organizations/{organizationCode}/users/{id}
```
Path parameters:
- `organizationCode`: Code of client (e.g., "STONAL")
- `id`: ID of user to delete (e.g., "123456789")
Possible responses:
- 204: User has been successfully deleted
- 404: User to delete does not exist
### Notes
- The deletion operation is permanent and cannot be undone
- You must have appropriate authorization to delete users
- The user ID must be obtained from a previous search or get user operation
- All user permissions and authorizations will be removed upon deletion
### Error Handling
Common error scenarios:
- User UID not found
- Invalid organization code
- Insufficient permissions to delete users
- Invalid or expired access token
- Network connectivity issues
Always check the response status and handle errors appropriately in your implementation.
---
# Search Documents
URL: https://docs.stonal.io/fr/api/documents/search-documents
# Search Documents
This guide covers **all** supported filters for querying documents in the Stonal platform. It details every filter you can use to refine your search queries.
---
### Prerequisites
* A valid OAuth access token (see [Authentication](/api/auth))
* Your organization code (used in the endpoint path)
---
## 1. Filter Groups & Fields
Each group represents a set of filters targeting different aspects of your documents.
### 1.1 Filing Location Filters
| Filter | Type | Description |
| -------------------------- | ------------ | --------------------------------------------------------- |
| `assetIdentifiers` | Set\[String] | Only return documents attached to these asset UIDs. |
| `documentationIdentifiers` | Set\[String] | Only return documents linked to these documentation UIDs. |
| `folderIdentifiers` | Set\[String] | Only return documents stored in these folder UIDs. |
### 1.2 Business Context Filters
| Filter | Type | Description |
| ----------------------- | ------------ | ------------------------------------------------------------------------------------------ |
| `linkedAssetIdentifiers` | Set\[String] | Documents related to specific linked assets (e.g., building, apartments). |
| `tenantIdentifiers` | Set\[String] | Documents belonging to or created by specific tenants. |
| `linkedAsset` | String | Partial or full name match of the linked asset—useful when you don’t have the UIDs on hand. |
| `hasLinkedAssets` | Boolean | Filter documents that have at least one linked asset (`true`) or none (`false`). |
### 1.3 Basic Document Filters
| Filter | Type | Description |
| ---------------- | ------------ | ----------------------------------------------------------|
| `identifier` | Set\[String] | Exact document UIDs to retrieve. |
| `name` | String | Partial or full name match (case-insensitive). |
| `documentStatus` | String | One of `CLASSIFICATION`, `METADATA_EXTRACTION`, `COMPLETED`. |
| `hashSha256` | String | SHA-256 checksum of the document’s contents. |
| `updatedAfter` | String | *(Query parameter — see [Query Parameters](#query-parameters))* Filters documents updated during or after this date. Accepts an ISO-8601 date (`YYYY-MM-DD`) or a full ISO-8601 date-time with a time zone/offset (e.g. `2026-07-01T00:00:00Z`). Invalid or malformed values return `400 Bad Request`. |
| `createdAfter` | String | *(Query parameter — see [Query Parameters](#query-parameters))* Filters documents created during or after this date. Same accepted formats as `updatedAfter`. Invalid or malformed values return `400 Bad Request`. |
### 1.4 Metadata Filters
| Filter | Type | Description |
| ------------- | ------------------- | ------------------------------------------------------------------- |
| `tags` | Set\[String] | Documents tagged with one or more specified tags. |
| `properties` | Map\[String,String] | Documents with matching metadata key-value pairs. |
| `propertyKey` | String | Documents containing a specific metadata key (regardless of value). |
| `hasMetadata` | Boolean | Filter documents with exploitable metadata (`true`) or none (`false`). |
### 1.5 Folder & Classification Filters
| Filter | Type | Description |
| --------------------- | ------------------ | ---------------------------------------------- |
| `parentFolderName` | String | Partial match on the parent folder’s name. |
| `predictedFolderName` | String | AI-predicted folder name after classification. |
| `folder` | `{ name, locale }` | Match folder by exact name and locale. |
| `documentClass` | `{ name, locale }` | Match classification class by name and locale. |
| `hasPendingSuggestion` | Boolean | Filter documents with an AI classification suggestion pending human validation (`true`) or none (`false`) — i.e. an AI-predicted folder and document class exist but have not been manually validated yet. |
---
## 2. Search Document API Call
Filters go in the JSON request body. Pagination, sorting, and the date filters (`updatedAfter`/`createdAfter`) are passed as **URL query parameters**, not in the body.
### Query Parameters
| Parameter | Type | Description |
| -------------- | ------- | ------------------------------------------------------------------------------------------------ |
| `pageNumber` | Integer | Page number for offset-based pagination (starts at `1`; `0` is accepted for backward compatibility). Default `1`. |
| `pageSize` | Integer | Page size for offset-based pagination. Default `20`. |
| `sortOrder` | String | Sort order for offset-based pagination: `ASC` or `DESC`. |
| `columnToSort` | String | Column to sort by for offset-based pagination (e.g. `creationDate`). Set to `updateDate` together with `afterId` to enable update-date cursor pagination — see [Cursor-based Pagination](#21-cursor-based-pagination-recommended-for-polling) below. |
| `updatedAfter` | String | Filters documents updated during or after this date. Accepts an ISO-8601 date (`YYYY-MM-DD`) or a full ISO-8601 date-time with a time zone/offset (e.g. `2026-07-01T00:00:00Z`). Invalid or malformed values return `400 Bad Request`. |
| `createdAfter` | String | Filters documents created during or after this date. Same accepted formats as `updatedAfter`. |
| `afterId` | String | Cursor for keyset pagination — see [Cursor-based Pagination](#21-cursor-based-pagination-recommended-for-polling) below. |
| `afterValue` | String | Cursor value used together with `afterId` and `columnToSort=updateDate` — see [Cursor-based Pagination](#21-cursor-based-pagination-recommended-for-polling) below. |
### Example request
```bash
curl -X POST "https://api.stonal.io/document-storage/v1/organizations/{organizationCode}/documents/search?pageNumber=1&pageSize=100&sortOrder=DESC&columnToSort=creationDate" \
-H "Authorization: Bearer {accessToken}" \
-H "Content-Type: application/json" \
-d '{
"name": "Invoice",
"tags": ["important","finance"],
"folderIdentifiers": ["folder-123"],
"assetIdentifiers": ["asset-456"],
"linkedAsset": "Unit A"
}'
```
Pagination is **1-based**: use `pageNumber=1` for the first page.
### 2.1 Cursor-based Pagination (recommended for polling)
When you need to reliably walk through documents ordered by modification date — for example, to periodically poll for documents changed since the last run — use cursor-based pagination instead of `pageNumber`/`columnToSort`/`sortOrder`. Unlike tracking `max(updatedAfter) + 1 second` client-side, this cannot silently skip documents that were updated within the same second.
* `afterId` — cursor position, keyset-ordered by `id` ascending. Pass `afterId=0` to start a new walk; pass the previous response's `nextCursor` to fetch the next page.
* `afterValue` — cursor value used together with `afterId` and `columnToSort=updateDate` to walk documents ordered by update date instead of `id`. Omit it to start a new walk from the beginning.
* `columnToSort=updateDate` — switches the cursor walk to update-date ordering. Any other (or omitted) value falls back to plain `id`-ordered cursor pagination.
When `afterId` is present, `pageNumber`, `sortOrder`, and `columnToSort` (other than `updateDate`) are ignored.
**Starting from a specific date instead of the beginning**: pass your own `afterValue` alongside `afterId=0` (it only defaults to the very beginning when omitted). `afterValue` must be a plain ISO-8601 date-time **without a time zone/offset** — e.g. `2026-01-01T00:00:00`, not `2026-01-01T00:00:00Z` (this differs from `updatedAfter`/`createdAfter`, which do accept a `Z`/offset). A malformed `afterValue` is **not rejected with an error** — it is silently ignored and the walk restarts from the very beginning instead, so double-check the format before relying on it.
**First call** — start an update-date-ordered walk from the beginning:
```bash
curl -X POST "https://api.stonal.io/document-storage/v1/organizations/{organizationCode}/documents/search?afterId=0&columnToSort=updateDate" \
-H "Authorization: Bearer {accessToken}" \
-H "Content-Type: application/json" \
-d '{}'
```
The response includes `nextCursor` and `nextCursorValue` (see [Response Format](#3-response-format)). **Subsequent calls** pass those values back as `afterId`/`afterValue`:
```bash
curl -X POST "https://api.stonal.io/document-storage/v1/organizations/{organizationCode}/documents/search?afterId=12345&afterValue=2026-07-17T14%3A32%3A10.123456&columnToSort=updateDate" \
-H "Authorization: Bearer {accessToken}" \
-H "Content-Type: application/json" \
-d '{}'
```
Keep polling with the latest `nextCursor`/`nextCursorValue` until the response no longer returns a `nextCursor` (there is no further page).
---
## 3. Response Format
**200 OK** with JSON:
```json
{
"result": [],
"total": 42,
"pageable": {
"pageNumber": 1,
"pageSize": 100,
"sort": {}
},
"nextCursor": null,
"nextCursorValue": null
}
```
`pageable.pageNumber` is also **1-based** in responses.
`nextCursor` and `nextCursorValue` are only populated when paginating with `afterId` (see [Cursor-based Pagination](#21-cursor-based-pagination-recommended-for-polling)):
* `nextCursor`: opaque cursor to pass as `afterId` on the next call. `null` when there is no further page, or `afterId` was not used for this request.
* `nextCursorValue`: cursor value to pass as `afterValue` on the next call, when using `columnToSort=updateDate`. `null` when there is no further page, or this mode was not used.
---
## 4. Error Handling
* **400 Bad Request**: Missing or invalid filters. For invalid `updatedAfter`/`createdAfter` values, the response body is a plain-text error message (not JSON), e.g. `Invalid updatedAfter: 2026-07-00. Expected an ISO-8601 date (e.g. 2026-07-01) or date-time (e.g. 2026-07-01T00:00:00Z)`.
* **401 Unauthorized**: Invalid or missing access token
* **403 Forbidden**: Missing `stonal.document.read` scope
* **404 Not Found**: `organizationCode` not recognized
---
## 5. Best Practices
* **Use UIDs whenever possible** (`identifier`, `assetIdentifiers`) for precise, performant queries.
* **Combine multiple filters** to narrow down results (e.g., status + metadata + folder).
* **Leverage `linkedAsset`** for human-friendly searches when you don’t have exact UIDs.
* **Tag and property filters** are ideal for contextual grouping across documents.
* **Prefer cursor-based pagination (`afterId`/`afterValue`/`columnToSort=updateDate`)** over `updatedAfter` polling for reliably tracking document changes over time — see [Cursor-based Pagination](#21-cursor-based-pagination-recommended-for-polling).
For full API reference, see the [Stonal API specification](/api/reference/documents/search).
---
# Searching data
URL: https://docs.stonal.io/fr/api/assets/search
# Searching data
This guide explains how to fetch the right kind of data depending on your usage, by using the Stonal search API with filters, pagination, and advanced search patterns.
:::info
You will need to get a personal access token to use the search API.
:::
## Getting started
### Authentication
Here is a sample request around [the search API](/api/reference/assets/search-assets), where we will fetch `BUILDING_GROUP`s and `BUILDING`s.
You need to pass a query with something like that:
```bash title="📄 search.sh"
#!/bin/sh -ex
# Your organization
STONAL_ORG=DEMO
# Fetch your token from here: https://app.stonal.io/users/app
STONAL_TOKEN=9631e269-e21e-4ce6-92a9-c6f7ed1fa98a
curl \
https://api.stonal.io/datalake/v1/organizations/$STONAL_ORG/assets/search \
-v \
-X POST \
-H 'Content-Type: application/json' \
-H "Authorization: Bearer $STONAL_TOKEN" \
-d @query.json -o output.json
```
### Initial query
```json title="📄 query.json"
{
"search": {
"type": {
"equals": [
"BUILDING",
"BUILDING_GROUP"
]
}
},
"properties": {
"simple": ["LAT", "LNG"]
},
"fields": [
"name",
"type",
"uid",
"externalIds"
],
"paginate": {
"size": 2
}
}
```
The output will be similar to this:
```json title="📄 output.json"
{
"assets": [
{
"uid": "f6472f1a-9473-4fbf-9e1c-1c063eebb430",
"name": "Building Group 1",
"type": "BUILDING_GROUP",
"externalIds": {
"SOURCE_NAME": "BG001"
},
"properties": {
"simple": {
"LAT": "46.800",
"LNG": "1.6959"
}
}
},
{
"uid": "b81ce341-86f0-4cfe-a806-1d4a0f9a12ed",
"name": "Building 1",
"type": "BUILDING",
"externalIds": {
"SOURCE_NAME": "B001"
},
"properties": {
"simple": {
"LAT": "46.500",
"LNG": "1.7959"
}
}
}
],
"paginate": {
"size": 2,
"cursor": "123456"
}
}
```
### Subsequent queries
Then to fetch the next batch of 10 assets, you shall issue the same query with the `paginate.cursor` set to
the received value, ie `"123456"`.
```json title="📄 query.json"
{
"search": {
"type": {
"equals": [
"BUILDING",
"BUILDING_GROUP"
]
}
},
"fields": [
"name",
"type",
"uid",
"externalIds",
"parent"
],
"paginate": {
"size": 2,
"cursor": "123456"
}
}
```
The output will be similar to this:
```json title="📄 output.json"
{
"assets": [
{
"uid": "dd127caf-5b9b-4116-884e-b42505ac1bd6",
"name": "Building Group 2",
"type": "BUILDING_GROUP",
"externalIds": {
"CODE": "BG002"
}
},
{
"uid": "2c2ca7be-78f1-4734-a4c6-bbc773c9027b",
"name": "Building 2",
"type": "BUILDING",
"externalIds": {
"CODE": "B002"
},
"parent": {
"uid": "dd127caf-5b9b-4116-884e-b42505ac1bd6"
}
}
],
"paginate": {
"size": 2,
"cursor": "234567"
}
}
```
## Going further
There are many other ways to query data. And you can mix any of these filters.
### Searching by external IDs
You can search using a single external ID, either from the asset itself or from its relations.
Searching a specific asset by one of its external IDs.
```json title="🔎 by asset's external ID"
"search": {
"asset": {
"externalIds": {
"SOURCE_NAME": "BG001"
}
}
}
```
Searching assets whose parent matches the given external ID.
```json title="🔎 by the external ID of asset’s parent"
"search": {
"parent": {
"externalIds": {
"SOURCE_NAME": "BG001"
}
}
}
```
### Free-text search
Use `q` to find assets whose **name or external id** contains a term — typically to back a search bar.
The term is looked up in both fields at once and can appear anywhere in the value, not only at its start. Case and accents are ignored.
```json title="🔎 assets whose name or external id contains '01S'"
{
"search": { "q": "01S" },
"fields": ["uid", "name", "type", "externalIds"],
"paginate": { "size": 50 }
}
```
It combines with the other filters (applied with `AND`), so you can scope it to a type or to a branch of the hierarchy. The exception is `includeDeleted` and `isDeleted`: free-text search only covers non-deleted assets, and combining them returns a validation error.
```json title="🔎 '01S' among the equipments of a site"
{
"search": {
"q": "01S",
"type": { "matches": ["EQUIPMENT\\|.*"] },
"parentRecursive": { "externalIds": { "CODE": "SITE_001" } }
},
"fields": ["uid", "name", "type"],
"paginate": { "size": 50 }
}
```
:::note
A term shorter than 3 characters, or longer than 500, is rejected with a validation error. It is matched as one whole substring rather than split into words: `q: "Building 1"` looks for the sequence `building 1`, not for `building` and `1` independently. Only identifier **values** are searched, never the name of their source; when you already know the exact identifier, `asset.externalIds` is the better filter.
:::
### Navigating the hierarchy
Assets are organized in a hierarchy (see [Assets hierarchy](/api/assets/hierarchy)). You can use the following relation filters to navigate up and down the tree. Only one relation filter can be used per request.
#### Find direct children of a parent
Use `parent` to find all assets that are direct children of a given parent asset.
```json title="🔎 direct children of a building group"
"search": {
"parent": { "uid": "dd127caf-5b9b-4116-884e-b42505ac1bd6" }
}
```
#### Find all descendants of an ancestor
Use `parentRecursive` to find all assets nested under a given ancestor at any depth.
```json title="🔎 all descendants of a building group (buildings, plans, levels, spaces, equipments...)"
"search": {
"parentRecursive": { "externalIds": { "CODE": "SITE_001" } }
}
```
#### Find direct parents of a child
Use `child` to find assets that are direct parents of a given child asset.
```json title="🔎 direct parents of a building"
"search": {
"child": { "uid": "b81ce341-86f0-4cfe-a806-1d4a0f9a12ed" }
}
```
#### Find all ancestors of a descendant
Use `childRecursive` to find all ancestor assets of a given descendant at any depth. This is useful for walking up the hierarchy from a leaf asset (e.g. equipment) to find its building, building group, etc.
```json title="🔎 find the building of an equipment"
{
"search": {
"childRecursive": { "uid": "$equipmentUid" },
"type": { "equals": ["BUILDING", "BUILDING_SECTION"] }
},
"fields": ["name", "type"],
"paginate": { "size": 10 }
}
```
You can also use `externalIds` to identify the descendant:
```json title="🔎 find all ancestors of an equipment by external ID"
"search": {
"childRecursive": {
"externalIds": { "TRIRIGA": "EQP1008473" }
}
}
```
:::note
`childRecursive` returns all ancestors but excludes the queried child asset itself from the results. All other filters (`type`, `name`, `fields`, `properties`, `paginate`) apply normally on the returned ancestors.
:::
#### Find the assets grouped by a grouping parent
Besides the hierarchy, an asset can be **grouped by** other assets: a `PLAN|INDOOR` is grouped by its logical `BUILDING`, a `ZONE` by a `RENTED_UNIT`, a `LEVEL_SECTION` by a `BUILDING_SECTION` (see [Ingesting data](/api/assets/ingest)). Use `groupingParent` to list the assets a given asset groups, and request the `groupedBy` field to read the grouping parents of each result.
```json title="🔎 zones of a rented unit, with their grouping parents"
{
"search": {
"groupingParent": { "externalIds": { "CODE": "RU_001" } }
},
"fields": ["name", "type", "groupedBy"]
}
```
The filters above return the *related* assets as rows. To get, on **every** result, the rented unit, building or site it belongs to, use the root-level `belongsTo` projection instead (see [Fetch what each result belongs to](#fetch-what-each-result-belongs-to)).
### Matching on a pattern
You can search for types matching a regex pattern.
#### Searching for spaces
:::note
`SPACE` is another name for rooms in the Stonal platform.
:::
This will return assets of `SPACE` and `SPACE|*` types:
```json title="🔎 asset type pattern"
"search": {
"type": {
"matches": [
"SPACE",
"SPACE\\|.*"
]
}
}
```
Please note that this will apply to all spaces within the organization. If you want to limit it to a particular building, you should combine it with a parent filter like this:
```json title="🔎 spaces within a specific building group"
"search": {
"type": {
"matches": [
"SPACE",
"SPACE\\|.*"
]
},
"parent": {
"externalIds": {
"SOURCE_NAME": "BG001"
}
}
}
```
### Excluding by type
:::info
Only one of `notMatches` or `notEquals` is accepted (same as `matches` & `equals`)
:::
#### By matching on a pattern
Exclude specified equipments _(those having a type starting by `EQUIPMENT|C|CA|`)_ when listing equipments in a building group
```json title="Using Regex to exclude types"
"search": {
"type": {
"matches": ["EQUIPMENT\\|.*"],
"notMatches": ["EQUIPMENT\\|C\\|CA\\|.*"]
},
"parentRecursive": {
"externalIds": { "CODE": "SITE_001" }
}
}
```
#### By strict equality
Exclude specified equipments _(those having a type equals to `EQUIPMENT|C|CA|CA01` or `EQUIPMENT|A|AA`)_ when listing equipments in a building group
```json title="Using strict equality to exclude types"
"search": {
"type": {
"matches": ["EQUIPMENT\\|.*"],
"notEquals": ["EQUIPMENT|C|CA|CA01", "EQUIPMENT|A|AA"]
},
"parentRecursive": {
"externalIds": { "CODE": "SITE_001" }
}
}
```
### Filtering on a property's current data
Assets carry **properties**: data points like address, rental area, construction date, or number of tenants. Each property is identified by a **code** (e.g. `ADDRESS`, `RENTAL_AREA`, `BUILDING_DATE`, `TENANT_COUNT`).
:::info
Property codes for each asset type are listed in [the DQC product](https://app.stonal.io/dqc). See [Fetch a subset of properties](#fetch-a-subset-of-properties) for details.
:::
Add a `search.properties` block to filter assets by their property values.
:::tip
`search.properties` **filters** which assets are returned. The root-level `properties` controls **which data** appears in the response. They can be used together.
:::
**Example:** buildings in 8th arrondissement of Paris with more than 2 tenants
```json
{
"search": {
"properties": {
"conditions": [
{ "op": "gt", "property": "TENANT_COUNT", "value": "2" },
{ "op": "contains", "property": "ADDRESS", "value": "75008 Paris" }
]
},
"type": {
"equals": ["BUILDING"]
}
},
"fields": ["uid", "name", "type"],
"properties": {
"simple": ["TENANT_COUNT", "ADDRESS"]
},
"paginate": { "size": 50 }
}
```
#### Condition structure
A condition is an object with the following fields:
| Field | Description |
|-------|-------------|
| `op` | The operator to apply (see [Operators](#operators) below) |
| `property` | The property code to filter on (for leaf conditions) |
| `value` | The value to compare against (for single-value operators) |
| `values` | A list of values to compare against (for `in`/`notIn` operators) |
| `conditions` | A list of nested conditions (for `and`/`or` group operators) |
Multiple conditions at root level are combined with **AND**. Use `or`/`and` groups for explicit logic:
```json title="🔎 address contains 75008 Paris OR more than 10 tenants"
{ "op": "or", "conditions": [
{ "op": "contains", "property": "ADDRESS", "value": "75008 Paris" },
{ "op": "gt", "property": "TENANT_COUNT", "value": "10" }
]}
```
Groups can be nested:
```json title="🔎 main property type is Bureau AND (rental area > 500 OR more than 10 tenants)"
{
"conditions": [
{ "op": "eq", "property": "MAIN_ASSET_NATURE", "value": "Bureau" },
{ "op": "or", "conditions": [
{ "op": "gt", "property": "RENTAL_AREA", "value": "500" },
{ "op": "gt", "property": "TENANT_COUNT", "value": "10" }
]}
]
}
```
#### Operators
##### Comparison
Text comparisons are case and accent insensitive ("chatelet" matches "Châtelet").
| Operator | Description | Required fields |
|----------|-------------|-----------------|
| `eq` | Equals | `value` |
| `neq` | Not equals | `value` |
| `in` | Matches any value in a list | `values` (non-empty) |
| `notIn` | Matches none of the values | `values` (non-empty) |
```json title="🔎 main property type is Bureau"
{ "op": "eq", "property": "MAIN_ASSET_NATURE", "value": "Bureau" }
```
```json title="🔎 main property type is Commerce or Logement"
{ "op": "in", "property": "MAIN_ASSET_NATURE", "values": ["Commerce", "Logement"] }
```
##### Text
| Operator | Description | Required fields |
|----------|-------------|-----------------|
| `contains` | Substring match (case/accent insensitive) | `value` |
| `notContains` | Excludes substring match | `value` |
| `regex` | Regular expression match | `value` (valid regex) |
| `notRegex` | Excludes regex match | `value` (valid regex) |
```json title="🔎 address contains 'Rue du chat'"
{ "op": "contains", "property": "ADDRESS", "value": "Rue du chat" }
```
##### Numeric and date
All values are passed as strings but must be a valid **number** (e.g. `"100"`) or **ISO 8601 date** (e.g. `"2024-01-15"`).
| Operator | Description | Required fields |
|----------|-------------|-----------------|
| `gt` | Greater than | `value` (number or date) |
| `gte` | Greater than or equal | `value` (number or date) |
| `lt` | Less than | `value` (number or date) |
| `lte` | Less than or equal | `value` (number or date) |
```json title="🔎 rental area between 100 and 500"
{
"conditions": [
{ "op": "gte", "property": "RENTAL_AREA", "value": "100" },
{ "op": "lte", "property": "RENTAL_AREA", "value": "500" }
]
}
```
```json title="🔎 buildings constructed after 2000"
{ "op": "gt", "property": "BUILDING_DATE", "value": "2000-01-01" }
```
##### Presence
| Operator | Description | Required fields |
|----------|-------------|-----------------|
| `isNull` | No current value for this property | none (`value`/`values` must be absent) |
| `isNotNull` | Has a current value | none (`value`/`values` must be absent) |
```json title="🔎 assets with no address"
{ "op": "isNull", "property": "ADDRESS" }
```
##### Logic groups
| Operator | Description | Required fields |
|----------|-------------|-----------------|
| `and` | All nested conditions must match | `conditions` (at least 2) |
| `or` | At least one must match | `conditions` (at least 2) |
#### Negation and missing data
Negation operators (`neq`, `notIn`, `notContains`, `notRegex`) exclude assets that have **no value** for the property. To include them, combine with `isNull`:
```json title="🔎 main property type is not Commerce or Parking, including assets without one"
{ "op": "or", "conditions": [
{ "op": "notIn", "property": "MAIN_ASSET_NATURE", "values": ["Commerce", "Parking"] },
{ "op": "isNull", "property": "MAIN_ASSET_NATURE" }
]}
```
### Fetch a subset of fields
Fields are attributes directly associated with an asset. You can specify which fields to retrieve.
Allowed values: `uid`, `name`, `updatedAt`, `deletedAt`, `type`, `externalIds`, `representations`, `parent`, `groupedBy`, `effectiveDate`, `expirationDate`, `integrationDate`, `childCount`, `containsChildCount`, `groupsChildCount`
- `parent` is the hierarchy parent; `groupedBy` is the list of grouping parents (see [Navigating the hierarchy](#navigating-the-hierarchy)).
- `childCount` counts all children, `containsChildCount` only the hierarchy children, `groupsChildCount` only the grouped ones.
- What an asset belongs to is not a field: request it with the root-level `belongsTo` object (see [Fetch what each result belongs to](#fetch-what-each-result-belongs-to)).
Unique identifier `uid` is always returned.
```json title="🔎 get asset's name, date of update and external ids"
{
"search": {
"asset": { "uid": "2cb3683a-90f6-48de-aaa0-08f45c7bf808" }
},
"fields": ["name", "updatedAt", "externalIds"]
}
```
### Fetch what each result belongs to
`childRecursive` walks up from **one** asset per request. When you sync a whole subtree with `parentRecursive`, that would mean one extra call per asset to know which rented unit, building or site each equipment belongs to. Ask for the `belongsTo` projection instead: add a root-level `belongsTo.types` list, and every returned asset carries, for each requested type, the assets it belongs to.
```json title="🔎 equipments of a site, each with its rented unit and its building"
{
"search": {
"parentRecursive": { "externalIds": { "CODE": "SITE_001" } },
"type": { "matches": ["EQUIPMENT\\|.*"] }
},
"fields": ["name", "type", "parent"],
"belongsTo": { "types": ["RENTED_UNIT", "BUILDING"] },
"paginate": { "size": 50 }
}
```
```json title="➡️ response: a boiler in a zone grouped by a rented unit, and a finish on the building itself"
{
"assets": [
{
"uid": "7a0c6d3e-1f2b-4c5d-9e8f-0a1b2c3d4e5f",
"name": "Boiler B-04",
"type": "EQUIPMENT|F|FA|FA01|FA0111",
"parent": { "uid": "4e1f9c2a-7b3d-4a6e-8c5f-2d1e0b9a8c7d" },
"belongsTo": {
"RENTED_UNIT": [ { "uid": "0d19bb25-78ee-413f-8291-1d122332064f" } ],
"BUILDING": [ { "uid": "b81ce341-86f0-4cfe-a806-1d4a0f9a12ed" } ]
}
},
{
"uid": "9c2e4b17-5d0a-4f8e-a3b6-71c8d2e9f0a4",
"name": "Exterior paint",
"type": "EQUIPMENT|C|CB|CB02|CB0211",
"parent": { "uid": "b81ce341-86f0-4cfe-a806-1d4a0f9a12ed" },
"belongsTo": {
"BUILDING": [ { "uid": "b81ce341-86f0-4cfe-a806-1d4a0f9a12ed" } ]
}
}
],
"paginate": { "size": 50, "cursor": "345678" }
}
```
Three ways to navigate the hierarchy, easy to confuse:
| | anchored on **one** asset, returns **rows** | applied to **every** returned asset, returns a **field** |
|---|---|---|
| walks **down** | `parentRecursive` | — |
| walks **up** | `childRecursive` | `belongsTo` |
How `belongsTo` is resolved and how to read it:
- Upwards through both **hierarchy** (`parent`) and **grouping** (`groupedBy`) relations, at any depth. The boiler above reaches its rented unit even though its zone is *grouped by* the unit rather than *contained* in it.
- The key is the code you asked for: requesting `PLAN` also matches `PLAN|INDOOR` and `PLAN|OUTDOOR` and folds them under the single `PLAN` key, so you never need the organization's type nomenclature.
- **Only the codes actually matched are keys.** A requested code with no match, or unknown to your organization, is absent from the map — read it as `belongsTo. ?? []`. A missing key is normal and frequent, not a data gap: an equipment in a common area belongs to no rented unit, and a finish on an exterior wall belongs to no room — the second asset above.
- Each key maps to a list with **no defined order**: an asset usually belongs to several levels at once, and the first one is not the nearest. Picking a single one is a precedence rule of the calling system.
- Each entry carries the asset `uid`, the same shape `parent` and `groupedBy` use; to get their names or external identifiers, query them in a second call with the `assets` filter. Deleted assets are never returned.
- `types` accepts 1 to 10 distinct type codes (duplicates and surrounding whitespace are ignored). It is independent of `fields`, and the `belongsTo` object is only present in the response when it was requested.
### Fetch a subset of properties
Properties are associated with time-series data linked to an asset.
You can fetch the reference data for a specified property at the current time.
:::info
Items of `simple` list are referring to property’s `code`.
This code can be found in [our DQC product](https://app.stonal.io/dqc) for each asset's type
In this example we are on an BUILDING, its property named *Adresse* has `ADDRESS` for code.
Screenshoot from DQC on a URL like `https://app.stonal.io/dqc/$ORGANIZATION_CODE/asset-types/EQUIPMENT/assets/$ASSET_UID`

Nb: code can also have uuid format
In this example we are on an EQUIPMENT, its property named *Date dernier renouvellement* has `43f1f705-b3b3-4ff3-9ca3-a5c5ed638eef` for code.
Screenshoot from DQC on a URL like `https://app.stonal.io/dqc/$ORGANIZATION_CODE/asset-types/EQUIPMENT/assets/$ASSET_UID`

:::
```json title="🔎 get building's data for ADDRESS and BUILDING_DATE property"
{
"search": {
"type": { "equals": ["BUILDING"] }
},
"properties": {
"simple": ["ADDRESS", "BUILDING_DATE"]
}
}
```
```json title="➡️ response with current reference data for ADDRESS and BUILDING_DATE property"
{
"assets": [
{
"uid": "1321987a-b94f-4180-ab93-94432be0855f",
"properties": {
"simple": {
"ADDRESS": "28 Cr Albert 1er, 75008 Paris",
"BUILDING_DATE": "2001-09-29"
}
}
}
]
}
```
### Fetch a property's source and history
Use `properties.precise` instead of `properties.simple` when you need each value's source, its validity dates, and whether it is the reference value. A typical use is syncing an external model (BIM/Revit, your own database) and deciding whether to overwrite a value.
`precise` takes a `codes` list plus optional filters:
- `onlyReference` (default `true`): only the reference value, or `false` for every source.
- `startDate` / `endDate` (default: now): the validity window. Omit for the current value, set them equal for a point-in-time lookup, or widen for the history.
```json title="🔎 get building's ADDRESS with its source"
{
"search": { "type": { "equals": ["BUILDING"] } },
"properties": { "precise": { "codes": ["ADDRESS"] } }
}
```
```json title="➡️ response with the current reference value and its source"
{
"assets": [
{
"uid": "1321987a-b94f-4180-ab93-94432be0855f",
"properties": {
"precise": {
"ADDRESS": [
{ "rawValue": "28 Cr Albert 1er, 75008 Paris", "source": "REVIT", "startDate": "2020-06-01", "isReference": true }
]
}
}
}
]
}
```
Same as `properties.simple` by default, `precise` returns the current reference value of each code, one entry per code. `source` is the name of the origin system (e.g. `REVIT`, `PIH`, `DATALAKE`). Open date bounds are omitted. A property that has no value in the requested window is not returned.
To get every source or the full history, set `onlyReference: false` and/or a wider window:
```json title="🔎 get every source of ADDRESS over 2010-2035"
{
"search": { "type": { "equals": ["BUILDING"] } },
"properties": {
"precise": { "codes": ["ADDRESS"], "onlyReference": false, "startDate": "2010-01-01", "endDate": "2035-01-01" }
}
}
```
### Differential update
You can search data that has been updated since a particular date.
```json title="🔎 differential update"
"search": {
"updatedAtAfter": "2025-09-12T00:00:00"
}
```
### Detect deleted assets
In search response, you can also include deleted assets matching specified filters.
```json title="🔎 detect deleted assets"
"search": {
"updatedAtAfter": "2025-09-12T00:00:00",
"includeDeleted": true
}
```
## Asset pictures
This mostly applies to `BUILDING_GROUP` and `BUILDING` assets.
If the asset has a `PHOTO_ID`, we can access it directly using this pattern of URL:
```
https://api.stonal.io/document-storage/v1/organizations/$org/documents/$photoId/content
```
We also provide a resizing and thumbnail generation for picture using [imagor](https://github.com/cshum/imagor) so that you can use it direclty in your frontend API:
```
https://cdn-api.stonal.io/imagor/unsafe/fit-in/200x/api.stonal.io/document-storage/v1/organizations/$org/documents/$photoId/content
```
:::info
The `unsafe` in the URL means you don't require to sign the URL but it _is_ safe to use.
:::
---
# Look up groups & permissions
URL: https://docs.stonal.io/fr/api/users/lookup-reference
# Look up groups & permissions
Creating, updating, and deleting users all start by looking up the UIDs you'll reference. This page is the single reference for those lookups.
See [Managing users](/api/users) for an overview of the core concepts (groups, profiles, application groups, and asset permissions).
---
## User groups
Group UIDs returned here are passed as `userGroupUids` when creating or updating a user.
```http
GET /v1/organizations/DEMO/groups?pageNumber=1&pageSize=20
```
```python
import requests
BASE_URL = "https://api.stonal.io/users"
TOKEN = ""
resp = requests.get(
f"{BASE_URL}/v1/organizations/DEMO/groups",
headers={"Authorization": f"Bearer {TOKEN}"},
params={"pageNumber": 1, "pageSize": 20},
)
print(resp.status_code, resp.json())
```
```php
";
$ch = curl_init("$baseUrl/v1/organizations/DEMO/groups?pageNumber=1&pageSize=20");
curl_setopt_array($ch, [
CURLOPT_RETURNTRANSFER => true,
CURLOPT_HTTPHEADER => ["Authorization: Bearer $token"],
]);
$response = curl_exec($ch);
echo curl_getinfo($ch, CURLINFO_HTTP_CODE) . PHP_EOL . $response;
curl_close($ch);
```
```javascript
const baseUrl = "https://api.stonal.io/users";
const token = "";
const res = await fetch(
`${baseUrl}/v1/organizations/DEMO/groups?pageNumber=1&pageSize=20`,
{ headers: { Authorization: `Bearer ${token}` } }
);
console.log(res.status, await res.json());
```
```java
String baseUrl = "https://api.stonal.io/users";
String token = "";
HttpRequest request = HttpRequest.newBuilder()
.uri(URI.create(baseUrl + "/v1/organizations/DEMO/groups?pageNumber=1&pageSize=20"))
.header("Authorization", "Bearer " + token)
.GET()
.build();
HttpResponse response = HttpClient.newHttpClient()
.send(request, HttpResponse.BodyHandlers.ofString());
System.out.println(response.statusCode() + " " + response.body());
```
```go
package main
import (
"fmt"
"io"
"net/http"
)
func main() {
baseURL := "https://api.stonal.io/users"
token := ""
req, _ := http.NewRequest("GET", baseURL+"/v1/organizations/DEMO/groups?pageNumber=1&pageSize=20", nil)
req.Header.Set("Authorization", "Bearer "+token)
resp, err := http.DefaultClient.Do(req)
if err != nil {
panic(err)
}
defer resp.Body.Close()
out, _ := io.ReadAll(resp.Body)
fmt.Println(resp.StatusCode, string(out))
}
```
```csharp
using System.Net.Http;
using System.Net.Http.Headers;
var baseUrl = "https://api.stonal.io/users";
var token = "";
using var client = new HttpClient();
client.DefaultRequestHeaders.Authorization = new AuthenticationHeaderValue("Bearer", token);
var response = await client.GetAsync($"{baseUrl}/v1/organizations/DEMO/groups?pageNumber=1&pageSize=20");
Console.WriteLine($"{(int)response.StatusCode} {await response.Content.ReadAsStringAsync()}");
```
See [Get groups](/api/reference/users/get-groups)
---
## Permissions
Permission UIDs returned here are passed as `permissions[].uid` when creating or updating a user.
```http
GET /v1/organizations/DEMO/users/permissions?pageNumber=1&pageSize=20&type=...
```
```python
import requests
BASE_URL = "https://api.stonal.io/users"
TOKEN = ""
resp = requests.get(
f"{BASE_URL}/v1/organizations/DEMO/users/permissions",
headers={"Authorization": f"Bearer {TOKEN}"},
params={"pageNumber": 1, "pageSize": 20, "type": "PROFILE"},
)
print(resp.status_code, resp.json())
```
```php
";
$ch = curl_init("$baseUrl/v1/organizations/DEMO/users/permissions?pageNumber=1&pageSize=20&type=PROFILE");
curl_setopt_array($ch, [
CURLOPT_RETURNTRANSFER => true,
CURLOPT_HTTPHEADER => ["Authorization: Bearer $token"],
]);
$response = curl_exec($ch);
echo curl_getinfo($ch, CURLINFO_HTTP_CODE) . PHP_EOL . $response;
curl_close($ch);
```
```javascript
const baseUrl = "https://api.stonal.io/users";
const token = "";
const res = await fetch(
`${baseUrl}/v1/organizations/DEMO/users/permissions?pageNumber=1&pageSize=20&type=PROFILE`,
{ headers: { Authorization: `Bearer ${token}` } }
);
console.log(res.status, await res.json());
```
```java
String baseUrl = "https://api.stonal.io/users";
String token = "";
HttpRequest request = HttpRequest.newBuilder()
.uri(URI.create(baseUrl + "/v1/organizations/DEMO/users/permissions?pageNumber=1&pageSize=20&type=PROFILE"))
.header("Authorization", "Bearer " + token)
.GET()
.build();
HttpResponse response = HttpClient.newHttpClient()
.send(request, HttpResponse.BodyHandlers.ofString());
System.out.println(response.statusCode() + " " + response.body());
```
```go
package main
import (
"fmt"
"io"
"net/http"
)
func main() {
baseURL := "https://api.stonal.io/users"
token := ""
req, _ := http.NewRequest("GET", baseURL+"/v1/organizations/DEMO/users/permissions?pageNumber=1&pageSize=20&type=PROFILE", nil)
req.Header.Set("Authorization", "Bearer "+token)
resp, err := http.DefaultClient.Do(req)
if err != nil {
panic(err)
}
defer resp.Body.Close()
out, _ := io.ReadAll(resp.Body)
fmt.Println(resp.StatusCode, string(out))
}
```
```csharp
using System.Net.Http;
using System.Net.Http.Headers;
var baseUrl = "https://api.stonal.io/users";
var token = "";
using var client = new HttpClient();
client.DefaultRequestHeaders.Authorization = new AuthenticationHeaderValue("Bearer", token);
var response = await client.GetAsync($"{baseUrl}/v1/organizations/DEMO/users/permissions?pageNumber=1&pageSize=20&type=PROFILE");
Console.WriteLine($"{(int)response.StatusCode} {await response.Content.ReadAsStringAsync()}");
```
Use the `type` (and optional `subType`) query parameters to filter what you need:
| To find… | Query filter |
| --- | --- |
| Profiles | `type=PROFILE` |
| Application groups | `type=SCOPE_GROUP&subType=APPLICATION` |
| Companies | `type=ASSET&subType=COMPANY` |
| Portfolios | `type=ASSET&subType=PORTFOLIO` |
| Facilities | `type=ASSET&subType=FACILITY` |
| Building groups | `type=ASSET&subType=BUILDING_GROUP` |
| Buildings | `type=ASSET&subType=BUILDING` |
| Report groups | `type=REPORT_GROUP` |
Additional filter notes:
- `type` accepts a comma-separated list (e.g. `type=ASSET,PROFILE`)
- `q` does free-text search on permission names
- `parentUids` combined with `level` lets you walk the permission hierarchy
- For assets, `level` counts the steps along the containment hierarchy: a building in a building
group is at `level=1` under the group.
- A portfolio reaches an asset it groups directly at `level=1`, unless the parent of that asset is
in the portfolio too. The asset then follows its parent: a building in a building group of the
portfolio is at `level=2` under the portfolio.
- `withUsers=true` includes user counts in the response
See [Get permissions](/api/reference/users/get-permissions)
---
## Find an existing user
Each user's `uid` in the results is the identifier you pass to create, update, or delete calls.
```http
GET /v2/organizations/DEMO/users?pageNumber=1&pageSize=20&q=john.doe@example.com
```
```python
import requests
BASE_URL = "https://api.stonal.io/users"
TOKEN = ""
resp = requests.get(
f"{BASE_URL}/v2/organizations/DEMO/users",
headers={"Authorization": f"Bearer {TOKEN}"},
params={"pageNumber": 1, "pageSize": 20, "q": "john.doe@example.com"},
)
print(resp.status_code, resp.json())
```
```php
";
$ch = curl_init("$baseUrl/v2/organizations/DEMO/users?pageNumber=1&pageSize=20&q=john.doe%40example.com");
curl_setopt_array($ch, [
CURLOPT_RETURNTRANSFER => true,
CURLOPT_HTTPHEADER => ["Authorization: Bearer $token"],
]);
$response = curl_exec($ch);
echo curl_getinfo($ch, CURLINFO_HTTP_CODE) . PHP_EOL . $response;
curl_close($ch);
```
```javascript
const baseUrl = "https://api.stonal.io/users";
const token = "";
const params = new URLSearchParams({ pageNumber: 1, pageSize: 20, q: "john.doe@example.com" });
const res = await fetch(
`${baseUrl}/v2/organizations/DEMO/users?${params}`,
{ headers: { Authorization: `Bearer ${token}` } }
);
console.log(res.status, await res.json());
```
```java
String baseUrl = "https://api.stonal.io/users";
String token = "";
HttpRequest request = HttpRequest.newBuilder()
.uri(URI.create(baseUrl + "/v2/organizations/DEMO/users?pageNumber=1&pageSize=20&q=john.doe%40example.com"))
.header("Authorization", "Bearer " + token)
.GET()
.build();
HttpResponse response = HttpClient.newHttpClient()
.send(request, HttpResponse.BodyHandlers.ofString());
System.out.println(response.statusCode() + " " + response.body());
```
```go
package main
import (
"fmt"
"io"
"net/http"
"net/url"
)
func main() {
baseURL := "https://api.stonal.io/users"
token := ""
params := url.Values{"pageNumber": {"1"}, "pageSize": {"20"}, "q": {"john.doe@example.com"}}
req, _ := http.NewRequest("GET", baseURL+"/v2/organizations/DEMO/users?"+params.Encode(), nil)
req.Header.Set("Authorization", "Bearer "+token)
resp, err := http.DefaultClient.Do(req)
if err != nil {
panic(err)
}
defer resp.Body.Close()
out, _ := io.ReadAll(resp.Body)
fmt.Println(resp.StatusCode, string(out))
}
```
```csharp
using System.Net.Http;
using System.Net.Http.Headers;
var baseUrl = "https://api.stonal.io/users";
var token = "";
using var client = new HttpClient();
client.DefaultRequestHeaders.Authorization = new AuthenticationHeaderValue("Bearer", token);
var response = await client.GetAsync(
$"{baseUrl}/v2/organizations/DEMO/users?pageNumber=1&pageSize=20&q=john.doe%40example.com"
);
Console.WriteLine($"{(int)response.StatusCode} {await response.Content.ReadAsStringAsync()}");
```
Additional filter parameters:
- `permissions` — filter by permission label, e.g. `permissions=PROFILE:Administrator,SCOPE_GROUP:All`
- `userGroups` — filter by group name, e.g. `userGroups=Administrators,Readers`
See [Get paginated users](/api/reference/users/get-users-paginated)
---
# Resynchronizing users
URL: https://docs.stonal.io/fr/api/users/legacy/resync-users
# Resynchronizing users
This guide explains how to resynchronize user data in the Stonal platform to ensure consistency between systems.
:::info Prerequisites
- A valid set of API credentials
- A valid access token (see: [**Get a token**](/api/reference/legacy/get-access-token))
- An organization code
:::
### Step 1: List existing users
First, retrieve the current list of users to determine which ones need resynchronization.
See: [**API Specification**](/api/reference/legacy/search-user-on-organization)
```http
POST /v1/organizations/{organizationCode}/users/search
```
Request body:
```json
{}
```
The response will include all current users in the system.
### Step 2: Take action for each user
#### Create - The user exists on your system but not in Stonal
See: [**User creation**](/api/users/legacy/create-a-user)
#### Update - The user exists in Stonal and on your system
See: [**User update**](/api/users/legacy/modify-a-user)
#### Delete - The user exists in Stonal but not on your system
See: [**User deletion**](/api/users/legacy/delete-a-user)
---
# Retrieve documentations for an asset
URL: https://docs.stonal.io/fr/api/documents/get-documentations
# Retrieve documentations for an asset
This guide explains how to retrieve documentations tree associated with a specific asset using the public API.
:::info Prerequisites
- A valid set of API credentials
- A valid access token
- A valid organization code
- A valid asset ID
:::
### Step 1: Identify the asset
You must provide **either** the `assetId` which can be either the asset uid or the external id of the asset you want to retrieve documentation for.
The asset uid format is `asset-123` and the external id format is `ERP:BAT001` (a composition of the type code and the asset code separated by a colon).
- If it is not provided, the API returns a `400 Bad Request`.
:::note
Ensure the user has the necessary access rights to the organization and asset to successfully retrieve the documentation.
:::
### Step 2: Call the API
See: [**API Specification**](/api/reference/documents/get-documentations-for-asset)
```http
GET /document-storage/v1/organizations/{organizationCode}/assets/{assetId}/documentations
```
Query Parameters:
Name Type Required Description
assetId string true Unique identifier of the asset or External identifier of the asset
:::info Important
At least one of assetUid or externalId must be provided.
:::
Example request using assetUid:
```bash
curl -X GET "https://api.stonal.io/document-storage/v1/organizations/STONAL/assets/asset-123/documentations" \
-H "Authorization: Bearer {token}"
```
Example request using externalId:
```bash
curl -X GET "https://api.stonal.io/document-storage/v1/organizations/STONAL/assets/ERP:BAT001/documentations" \
-H "Authorization: Bearer {token}"
```
## Possible Responses
- `200`: Successfully retrieved documentation entries
- `400`: Bad request (both assetUid and externalId are missing)
- `404`: No documentation found for the given asset
## Notes
- The API returns the documentation structure up to a default depth level (10 levels deep).
- If the asset has no associated documentation, a 404 Not Found is returned.
- Ensure you handle gracefully the cases where the asset does not yet have documentation.
## Error Handling
Common error scenarios:
- Both assetUid and externalId are null → `400 Bad Request`
- Invalid or unauthorized asset reference → `404 Not Found`
- Missing or expired access token → `401 Unauthorized`
Always verify the response status and handle error responses appropriately in your implementation.
---
# Synchronization best practices
URL: https://docs.stonal.io/fr/api/assets/best-practices
# Synchronization best practices
This guide answers the most common questions we get when a customer connects
their IT system to Stonal and starts keeping assets, data, and documents in
sync. It complements the [ingestion](/api/assets/ingest) and
[search](/api/assets/search) guides with practical recommendations drawn from
real integrations.
## Start with an initial load, then let Stonal enrich it
Before you can keep anything in sync, you need a one-time **initial load** that
seeds your patrimony into Stonal. It is worth understanding this first step on
its own, because the data only flows one way to begin with — and because you do
**not** send everything.
1. **You send your assets.** Using the [ingestion API](/api/assets/ingest), you
push the assets you already manage in your own system: the *top* of the
[asset hierarchy](/api/assets/hierarchy#overall-hierarchy), down to and
including the rented units — `BUILDING_GROUP`, `BUILDING`,
`BUILDING_SECTION` and `RENTED_UNIT`. You do **not** create the detailed
physical content of the buildings (rooms, equipment, plans) at this stage.
2. **Stonal enriches your patrimony.** Stonal digitizes the buildings and adds
the detailed physical assets *underneath* what you sent — `LEVEL`s, `SPACE`s
(rooms), `OPENING`s, `EQUIPMENT`, and the floor `PLAN`s. This is the value
Stonal adds on top of your structural data.
3. **You retrieve the enriched data.** Once the buildings are digitized, you
fetch those new assets — rooms, equipment, plans — with the
[search API](/api/assets/search) and store the ones you care about on your
side (keeping the Stonal [`uid`](#store-and-use-the-asset-uid)).
After this initial load, both systems hold the full picture and you move into
the ongoing, two-way synchronization
[described below](#should-i-send-everything-every-time-or-only-what-changed):
you keep your assets up to date through the ingestion API, and you pull Stonal's
changes back through the search API.
```mermaid
sequenceDiagram
participant You as Your system
participant Stonal
Note over You,Stonal: 1 · Initial load
You->>Stonal: Ingest your structural assets
(BUILDING_GROUP, BUILDING, BUILDING_SECTION, RENTED_UNIT)
Note over Stonal: 2 · Enrichment
Stonal digitizes the buildings and adds the
physical assets: levels, spaces, openings, equipment, plans
Stonal-->>You: 3 · Fetch the enriched assets (search API)
Note over You,Stonal: Ongoing differential sync
You->>Stonal: Upsert what changed (ingest)
Stonal-->>You: Fetch what changed (search · updatedAtAfter)
```
:::tip
Send only the structural assets you actually own in the initial load. Creating
rooms or equipment yourself duplicates what Stonal produces by digitizing the
buildings — let the enrichment step fill in the physical detail.
:::
## How often should I synchronize?
There is no hard rule — the right cadence depends on how quickly your source
data changes and how fresh it needs to be on Stonal.
- A **once-a-day** synchronization is a good default and is enough for most use
cases (asset structure, properties, contracts).
- Increase the frequency for data that changes often or that downstream users
expect to see quickly.
:::tip
Pick the lowest frequency that meets your freshness requirement. A nightly
batch is simpler to operate and easier to monitor than a near-real-time stream,
and it is sufficient for the vast majority of integrations.
:::
## Should I send everything every time, or only what changed?
Send **only what changed**. A full reload on every run is wasteful and slower as
your dataset grows.
1. **Initial load** — import your full dataset once (see
[Ingesting data](/api/assets/ingest)).
2. **Incremental sync** — on each subsequent run, fetch only the assets that
changed since your last run with the search API's
[differential update](/api/assets/search#differential-update) filter
(`updatedAtAfter`), then upsert them back.
```json title="🔎 fetch only assets updated since the last sync"
"search": {
"updatedAtAfter": "2025-09-12T00:00:00"
}
```
To also catch assets that were **deleted** since your last run, add
[`includeDeleted`](/api/assets/search#detect-deleted-assets):
```json title="🔎 include deletions in the differential sync"
"search": {
"updatedAtAfter": "2025-09-12T00:00:00",
"includeDeleted": true
}
```
:::tip
Store the timestamp of each successful sync and use it as the `updatedAtAfter`
value for the next run.
:::
## Recommended best practices
### Store and use the asset `uid`
Every asset created in Stonal has a stable, Stonal-generated unique identifier:
its **`uid`**. This is distinct from the **external IDs** you provide, which
link the asset to your own systems.
- Keep storing your own **external IDs** — they are how you recognize the asset
on your side, and you can attach several of them per asset.
- **Also store the `uid`** returned by the ingestion API alongside them. The
`uid` is the most reliable way to refer to an asset for updates, and it is
**required** for some operations — for example, [deleting an
asset](/api/assets/ingest#deleting-an-asset) and [changing an external
ID](/api/assets/ingest#adding-or-changing-assets-externalid) can only be done
by `uid`.
:::info
Most write operations let you reference an asset by either its `uid` or **one**
of its external IDs. Prefer the `uid` when you have it.
:::
## Lessons learned from other integrations
- **Tune your batch size.** The ingestion API accepts several assets per
request. We recommend keeping batches to **no more than ~500 items** and
running a few tests to find the size that performs best for *your* payload —
the optimal value depends on what you send (assets, properties/data,
relations) and how heavy each item is. Start smaller and increase gradually.
- **Ask us for example queries.** If you are unsure how to express a particular
import or search, contact API support — we are happy to provide a ready-made
request for your use case.
- **Tell us when the documentation is unclear.** Feedback on these guides helps
us improve them for you and for the next integrator.
:::tip
Need a hand getting started? Reach out to API support by email or Slack — see
[Getting started](/api/) for how to get an account and credentials.
:::
---
# Upload a file (Python)
URL: https://docs.stonal.io/fr/api/documents/upload-a-file-python
This guide shows how to upload a file to the Stonal platform using Python.
---
### Prerequisites
* A valid access token (see [Authentication](/api/auth))
* Your organization code (used in the endpoint path)
* Python environment with the `requests` library installed
---
## Upload example
Here's a simple Python example that uploads a file using streaming to minimize memory usage:
```python title="📄 upload.py"
#!/usr/bin/env python3
import json
import requests
from typing import Dict, Any
def upload_file(
organization_code: str,
access_token: str,
file_path: str,
file_mime_type: str,
manifest_data: Dict[str, Any],
env: str = "prod",
) -> Dict[str, Any]:
"""
Upload a file to Stonal platform using streaming to avoid loading entire file in memory.
Args:
organization_code: Your organization code
access_token: OAuth access token
file_path: Path to the file to upload
manifest_data: Manifest JSON data as Python dictionary
Returns:
Response JSON containing documentUid and duplicateDocumentIds
"""
domain: str = {
"prod": "stonal.io",
"staging": "stonal-staging.io",
"test": "stonal-test.io",
"dev": "stonal-dev.io",
}[env]
url = f"https://api.{domain}/document-storage/v1/organizations/{organization_code}/files/upload"
headers: Dict[str, str] = {"Authorization": f"Bearer {access_token}"}
# Create manifest JSON string
manifest_json: str = json.dumps(manifest_data)
# Open file in binary mode for streaming
with open(file_path, "rb") as file:
files = {
"manifest": ("manifest.json", manifest_json, "application/json"),
"file": (file_path.split("/")[-1], file, file_mime_type),
}
response: requests.Response = requests.post(url, headers=headers, files=files)
response.raise_for_status()
return response.json()
# Example usage
def main():
# Example manifest for asset + documentation strategy
manifest: Dict[str, Any] = {
"asset": {"uid": "ac6d8be3-5036-47be-a010-eb3bbe0d7ae8"},
"documentation": {"uid": "dbce00ca-3540-4d1c-a11c-5474400d2b19"},
}
try:
result: Dict[str, Any] = upload_file(
organization_code="DEMO",
access_token="33286103-9b5b-43c8-9183-89b869f88861",
file_path="document.pdf",
file_mime_type="application/pdf",
manifest_data=manifest,
)
print(f"Upload successful! Document UID: {result['documentId']}")
if result.get("duplicateDocumentIds"):
print(f"Duplicate documents found: {result['duplicateDocumentIds']}")
except requests.exceptions.HTTPError as e:
print(f"Upload failed: {e}")
print(f"Response: {e.response.reason}")
if __name__ == "__main__":
main()
```
---
## Notes
* **Memory efficient**: Uses file streaming to avoid loading the entire file into memory
* **Error handling**: Proper HTTP error handling with detailed responses
---
For complete manifest options, refer to the [Upload a file](/api/documents/upload-a-file) documentation.
---
# Create or update a user
URL: https://docs.stonal.io/fr/api/users/create-or-update-a-user
# Create or update a user
Creating and updating a user are the same operation and share the same `UpsertUserRequest` body. `POST …/users` creates the user — or updates them if the email already exists. `PUT …/users/{uid}` updates a known user by UID. Both return `200`.
Before you start, make sure you have a valid access token — see the [Overview](/api/users) for authentication details.
## Step 1 — Check whether the user exists
Use the [lookup reference](/api/users/lookup-reference#find-an-existing-user) to search for the user by email or name. A hit means you will be updating an existing user; a miss means you will be creating a new one.
## Step 2 — Gather the UIDs to assign
Collect the group and permission UIDs you want to assign to the user. See the [lookup reference](/api/users/lookup-reference) for how to retrieve them from the groups and permissions endpoints.
## Step 3 — Send the request
### Create or upsert by email
```http
POST /v2/organizations/DEMO/users
```
```python
import requests
BASE_URL = "https://api.stonal.io/users"
TOKEN = ""
resp = requests.post(
f"{BASE_URL}/v2/organizations/DEMO/users",
headers={"Authorization": f"Bearer {TOKEN}"},
json={
"email": "john.doe@example.com",
"firstName": "John",
"lastName": "Doe",
"userGroupUids": ["019619df-4768-76b7-81e3-2c56d374df46"],
"permissions": [{"uid": "019619df-4767-730f-8d31-143712a08141"}],
},
)
print(resp.status_code, resp.json())
```
```php
";
$ch = curl_init("$baseUrl/v2/organizations/DEMO/users");
curl_setopt_array($ch, [
CURLOPT_RETURNTRANSFER => true,
CURLOPT_POST => true,
CURLOPT_HTTPHEADER => ["Authorization: Bearer $token", "Content-Type: application/json"],
CURLOPT_POSTFIELDS => json_encode([
"email" => "john.doe@example.com",
"firstName" => "John",
"lastName" => "Doe",
"userGroupUids" => ["019619df-4768-76b7-81e3-2c56d374df46"],
"permissions" => [["uid" => "019619df-4767-730f-8d31-143712a08141"]],
]),
]);
$response = curl_exec($ch);
echo curl_getinfo($ch, CURLINFO_HTTP_CODE) . PHP_EOL . $response;
curl_close($ch);
```
```javascript
const baseUrl = "https://api.stonal.io/users";
const token = "";
const res = await fetch(`${baseUrl}/v2/organizations/DEMO/users`, {
method: "POST",
headers: { Authorization: `Bearer ${token}`, "Content-Type": "application/json" },
body: JSON.stringify({
email: "john.doe@example.com",
firstName: "John",
lastName: "Doe",
userGroupUids: ["019619df-4768-76b7-81e3-2c56d374df46"],
permissions: [{ uid: "019619df-4767-730f-8d31-143712a08141" }],
}),
});
console.log(res.status, await res.json());
```
```java
String baseUrl = "https://api.stonal.io/users";
String token = "";
String body = """
{"email":"john.doe@example.com","firstName":"John","lastName":"Doe",
"userGroupUids":["019619df-4768-76b7-81e3-2c56d374df46"],
"permissions":[{"uid":"019619df-4767-730f-8d31-143712a08141"}]}""";
HttpRequest request = HttpRequest.newBuilder()
.uri(URI.create(baseUrl + "/v2/organizations/DEMO/users"))
.header("Authorization", "Bearer " + token)
.header("Content-Type", "application/json")
.POST(HttpRequest.BodyPublishers.ofString(body))
.build();
HttpResponse response = HttpClient.newHttpClient()
.send(request, HttpResponse.BodyHandlers.ofString());
System.out.println(response.statusCode() + " " + response.body());
```
```go
package main
import (
"bytes"
"fmt"
"io"
"net/http"
)
func main() {
baseURL := "https://api.stonal.io/users"
token := ""
body := []byte(`{"email":"john.doe@example.com","firstName":"John","lastName":"Doe","userGroupUids":["019619df-4768-76b7-81e3-2c56d374df46"],"permissions":[{"uid":"019619df-4767-730f-8d31-143712a08141"}]}`)
req, _ := http.NewRequest("POST", baseURL+"/v2/organizations/DEMO/users", bytes.NewReader(body))
req.Header.Set("Authorization", "Bearer "+token)
req.Header.Set("Content-Type", "application/json")
resp, err := http.DefaultClient.Do(req)
if err != nil {
panic(err)
}
defer resp.Body.Close()
out, _ := io.ReadAll(resp.Body)
fmt.Println(resp.StatusCode, string(out))
}
```
```csharp
using System.Net.Http;
using System.Net.Http.Headers;
using System.Text;
var baseUrl = "https://api.stonal.io/users";
var token = "";
using var client = new HttpClient();
client.DefaultRequestHeaders.Authorization = new AuthenticationHeaderValue("Bearer", token);
var json = """
{"email":"john.doe@example.com","firstName":"John","lastName":"Doe",
"userGroupUids":["019619df-4768-76b7-81e3-2c56d374df46"],
"permissions":[{"uid":"019619df-4767-730f-8d31-143712a08141"}]}
""";
var content = new StringContent(json, Encoding.UTF8, "application/json");
var response = await client.PostAsync($"{baseUrl}/v2/organizations/DEMO/users", content);
Console.WriteLine($"{(int)response.StatusCode} {await response.Content.ReadAsStringAsync()}");
```
### Update by UID
```http
PUT /v2/organizations/DEMO/users/019619df-4768-76b7-81e3-2c56d374df46
```
```python
import requests
BASE_URL = "https://api.stonal.io/users"
TOKEN = ""
resp = requests.put(
f"{BASE_URL}/v2/organizations/DEMO/users/019619df-4768-76b7-81e3-2c56d374df46",
headers={"Authorization": f"Bearer {TOKEN}"},
json={
"email": "john.doe@example.com",
"firstName": "John",
"lastName": "Doe",
"userGroupUids": ["019619df-4768-76b7-81e3-2c56d374df46"],
"permissions": [{"uid": "019619df-4767-730f-8d31-143712a08141"}],
},
)
print(resp.status_code, resp.json())
```
```php
";
$ch = curl_init("$baseUrl/v2/organizations/DEMO/users/019619df-4768-76b7-81e3-2c56d374df46");
curl_setopt_array($ch, [
CURLOPT_RETURNTRANSFER => true,
CURLOPT_CUSTOMREQUEST => "PUT",
CURLOPT_HTTPHEADER => ["Authorization: Bearer $token", "Content-Type: application/json"],
CURLOPT_POSTFIELDS => json_encode([
"email" => "john.doe@example.com",
"firstName" => "John",
"lastName" => "Doe",
"userGroupUids" => ["019619df-4768-76b7-81e3-2c56d374df46"],
"permissions" => [["uid" => "019619df-4767-730f-8d31-143712a08141"]],
]),
]);
$response = curl_exec($ch);
echo curl_getinfo($ch, CURLINFO_HTTP_CODE) . PHP_EOL . $response;
curl_close($ch);
```
```javascript
const baseUrl = "https://api.stonal.io/users";
const token = "";
const res = await fetch(`${baseUrl}/v2/organizations/DEMO/users/019619df-4768-76b7-81e3-2c56d374df46`, {
method: "PUT",
headers: { Authorization: `Bearer ${token}`, "Content-Type": "application/json" },
body: JSON.stringify({
email: "john.doe@example.com",
firstName: "John",
lastName: "Doe",
userGroupUids: ["019619df-4768-76b7-81e3-2c56d374df46"],
permissions: [{ uid: "019619df-4767-730f-8d31-143712a08141" }],
}),
});
console.log(res.status, await res.json());
```
```java
String baseUrl = "https://api.stonal.io/users";
String token = "";
String body = """
{"email":"john.doe@example.com","firstName":"John","lastName":"Doe",
"userGroupUids":["019619df-4768-76b7-81e3-2c56d374df46"],
"permissions":[{"uid":"019619df-4767-730f-8d31-143712a08141"}]}""";
HttpRequest request = HttpRequest.newBuilder()
.uri(URI.create(baseUrl + "/v2/organizations/DEMO/users/019619df-4768-76b7-81e3-2c56d374df46"))
.header("Authorization", "Bearer " + token)
.header("Content-Type", "application/json")
.PUT(HttpRequest.BodyPublishers.ofString(body))
.build();
HttpResponse response = HttpClient.newHttpClient()
.send(request, HttpResponse.BodyHandlers.ofString());
System.out.println(response.statusCode() + " " + response.body());
```
```go
package main
import (
"bytes"
"fmt"
"io"
"net/http"
)
func main() {
baseURL := "https://api.stonal.io/users"
token := ""
body := []byte(`{"email":"john.doe@example.com","firstName":"John","lastName":"Doe","userGroupUids":["019619df-4768-76b7-81e3-2c56d374df46"],"permissions":[{"uid":"019619df-4767-730f-8d31-143712a08141"}]}`)
req, _ := http.NewRequest("PUT", baseURL+"/v2/organizations/DEMO/users/019619df-4768-76b7-81e3-2c56d374df46", bytes.NewReader(body))
req.Header.Set("Authorization", "Bearer "+token)
req.Header.Set("Content-Type", "application/json")
resp, err := http.DefaultClient.Do(req)
if err != nil {
panic(err)
}
defer resp.Body.Close()
out, _ := io.ReadAll(resp.Body)
fmt.Println(resp.StatusCode, string(out))
}
```
```csharp
using System.Net.Http;
using System.Net.Http.Headers;
using System.Text;
var baseUrl = "https://api.stonal.io/users";
var token = "";
using var client = new HttpClient();
client.DefaultRequestHeaders.Authorization = new AuthenticationHeaderValue("Bearer", token);
var json = """
{"email":"john.doe@example.com","firstName":"John","lastName":"Doe",
"userGroupUids":["019619df-4768-76b7-81e3-2c56d374df46"],
"permissions":[{"uid":"019619df-4767-730f-8d31-143712a08141"}]}
""";
var content = new StringContent(json, Encoding.UTF8, "application/json");
var response = await client.PutAsync($"{baseUrl}/v2/organizations/DEMO/users/019619df-4768-76b7-81e3-2c56d374df46", content);
Console.WriteLine($"{(int)response.StatusCode} {await response.Content.ReadAsStringAsync()}");
```
## Request body
```json
{
"email": "john.doe@example.com",
"firstName": "John",
"lastName": "Doe",
"fromExternalIdp": false,
"allAssets": false,
"expiresAt": "2026-12-31T23:59:59Z",
"userGroupUids": ["019619df-4768-76b7-81e3-2c56d374df46"],
"permissions": [
{ "uid": "019619df-4767-730f-8d31-143712a08141" },
{ "uid": "019619df-4768-76b3-8ab3-4414dcf29ff1" }
]
}
```
## Field reference
| Field | Required | Type | Notes |
| --- | --- | --- | --- |
| `email` | ✅ | string | Unique; immutable on update |
| `firstName` | ✅ | string | |
| `lastName` | ✅ | string | |
| `uid` | — | string | Identifies the user on update |
| `password` | — | string | ≥ 8 chars; upper + lower + digit + special |
| `fromExternalIdp` | — | boolean | Controls the activation email (see warning) |
| `allAssets` | — | boolean | Grant all assets instead of listing `ASSET` permissions |
| `userGroupUids` | — | string[] | Group UIDs |
| `permissions` | — | `{ uid }[]` | Permission UIDs |
| `expiresAt` | — | string (date-time) | ISO 8601 date-time after which the user's access to this organization is automatically disabled. Must be in the future; omit or send `null` for access that never expires. See [Set an access expiry date](#set-an-access-expiry-date) |
:::warning Account-activation emails and `fromExternalIdp`
The `fromExternalIdp` flag is what controls whether Stonal sends the new user an **account-activation email** (the *"Set your STONAL password"* message). It is the **only** setting that governs this behaviour for the API — the organization's front-end SSO toggle has **no** effect on it.
- **`fromExternalIdp: false`** (the default) — the account is created with a local password and the user receives the activation email so they can set or confirm their password. If you omit the field, it defaults to `false`, so the email **is** sent.
- **`fromExternalIdp: true`** — the account is treated as federated: **no activation email is sent** and the user must authenticate through their external identity provider (SSO).
If your users sign in through SSO and you do **not** want them to receive the *"Set your STONAL password"* email, you must explicitly pass `"fromExternalIdp": true` in the create call. Leaving it at `false` (or omitting it) for SSO users is the most common cause of unexpected activation emails.
:::
## Set an access expiry date
Set `expiresAt` to grant **time-limited access**. It is an ISO 8601 date-time (for example `2026-12-31T23:59:59Z`) after which the user's access to this organization is **automatically disabled**. Omit the field — or send `null` — for access that never expires.
```json
{
"email": "john.doe@example.com",
"firstName": "John",
"lastName": "Doe",
"userGroupUids": ["019619df-4768-76b7-81e3-2c56d374df46"],
"permissions": [{ "uid": "019619df-4767-730f-8d31-143712a08141" }],
"expiresAt": "2026-12-31T23:59:59Z"
}
```
**`expiresAt` must be in the future.** A value in the past (or the current moment) is rejected with `422`:
```json
{
"type": "tag:ValidationError",
"title": "Invalid request",
"errors": [
{ "field": "expiresAt", "detail": "The expiry date must be greater than the current Date & Time" }
]
}
```
**When `expiresAt` passes, the access is disabled.** This is identical to a [manual disable](/api/users/delete-a-user#disabling-a-user): the user keeps their record, groups, and permissions but loses access to the organization, and the `disabled` flag flips to `true`. If this was the user's **last active** access, their Stonal sign-in is disabled too. Access to a user's master (home) organization is never expired automatically.
**Re-saving with a future `expiresAt` re-enables a disabled access.** An upsert whose `expiresAt` is in the future clears `disabled` and restores access. A re-save that omits `expiresAt` (or sends one already in the past) leaves `disabled` untouched — so a routine sync never silently re-enables an access you suspended on purpose. Enabling a user manually clears `expiresAt`, so their access won't be disabled again.
`expiresAt` is also returned when you read a user, and is omitted for access that never expires.
## Updating vs creating
- `PUT` requires the user's `uid` in the URL path.
- `email` cannot be changed on an existing user.
- There are **no partial updates** — send the full set of fields you want on the user.
- The provided `permissions` and `userGroupUids` **replace** the existing ones; any previously assigned groups or permissions not included in the new request will be removed.
## Worked end-to-end example
This example walks through three lookups to collect UIDs, then creates a user.
**1. Find the group to assign**
```http
GET /v1/organizations/DEMO/groups
```
Abbreviated response:
```json
{
"content": [
{ "uid": "019619df-4768-76b7-81e3-2c56d374df46", "name": "Analysts" }
]
}
```
Group UID to use: `019619df-4768-76b7-81e3-2c56d374df46`
**2. Find the profile permission**
```http
GET /v1/organizations/DEMO/users/permissions?type=PROFILE
```
Abbreviated response:
```json
{
"content": [
{ "uid": "019619df-4767-730f-8d31-143712a08141", "name": "Standard profile" }
]
}
```
Profile permission UID: `019619df-4767-730f-8d31-143712a08141`
**3. Find the portfolio permission**
```http
GET /v1/organizations/DEMO/users/permissions?type=ASSET&subType=PORTFOLIO
```
Abbreviated response:
```json
{
"content": [
{ "uid": "019619df-4768-76b3-8ab3-4414dcf29ff1", "name": "All portfolios" }
]
}
```
Portfolio permission UID: `019619df-4768-76b3-8ab3-4414dcf29ff1`
**4. Create the user**
The three UIDs from the lookups feed directly into the request body:
```http
POST /v2/organizations/DEMO/users
```
```json
{
"email": "john.doe@example.com",
"firstName": "John",
"lastName": "Doe",
"fromExternalIdp": false,
"allAssets": false,
"userGroupUids": ["019619df-4768-76b7-81e3-2c56d374df46"],
"permissions": [
{ "uid": "019619df-4767-730f-8d31-143712a08141" },
{ "uid": "019619df-4768-76b3-8ab3-4414dcf29ff1" }
]
}
```
**5. Response**
```
200 OK
```
The user is created (or updated if the email already existed) and assigned to the Analysts group with the standard profile and all-portfolios permissions.
## Responses
- `200` — user created or updated successfully.
---
# Retrieve documentation templates
URL: https://docs.stonal.io/fr/api/documents/get-templates
# Retrieve documentation templates
This guide explains how to retrieve documentation templates and their detailed structure using the public API.
:::info Prerequisites
- A valid set of API credentials
- A valid access token
- A valid organization code
- The scope permission `stonal.document.template.read`
:::
## Overview
The documentation templates API provides two main endpoints:
1. **List templates** - Get all available documentation templates for an organization
2. **Get template details** - Retrieve the complete folder tree structure for a specific template
---
## List documentation templates
### Step 1: Call the API
See: [**API Specification**](/api/reference/documents/get-templates)
```http
GET /document-storage/v1/organizations/{organizationCode}/templates
```
### Parameters
| Name | Type | Required | Description |
|------|------|----------|-------------|
| organizationCode | string | true | Organization code (path parameter) |
| language | string | false | Preferred language (query parameter, e.g., "fr-FR") |
### Example request
```bash
curl -X GET "https://api.stonal.io/document-storage/v1/organizations/STONAL/templates?language=fr-FR" \
-H "Authorization: Bearer {token}"
```
### Response
```json
{
"templates": [
{
"id": "f90ee77d-b6cc-41fa-8d1f-bea649e6d93d",
"name": "DOE Template",
"organizationCode": "STONAL",
"attachmentType": "BUILDING_GROUP"
}
]
}
```
### Possible responses
- `200`: Successfully retrieved templates list
- `403`: Forbidden (insufficient permissions)
---
## Get documentation template details
### Step 1: Identify the template
You must provide the `templateId` which is the unique identifier of the template you want to retrieve details for.
The template ID format is typically a UUID: `f90ee77d-b6cc-41fa-8d1f-bea649e6d93d`
:::note
Ensure the user has the necessary access rights to the organization and template to successfully retrieve the template details.
:::
### Step 2: Call the API
See: [**API Specification**](/api/reference/documents/get-template)
```http
GET /document-storage/v1/organizations/{organizationCode}/templates/{templateId}
```
### Parameters
| Name | Type | Required | Description |
|------|------|----------|-------------|
| organizationCode | string | true | Organization code (path parameter) |
| templateId | string | true | Template unique identifier (path parameter) |
| language | string | false | Preferred language (query parameter, e.g., "fr-FR") |
### Example request
```bash
curl -X GET "https://api.stonal.io/document-storage/v1/organizations/STONAL/templates/f90ee77d-b6cc-41fa-8d1f-bea649e6d93d?language=fr-FR" \
-H "Authorization: Bearer {token}"
```
### Response
```json
{
"template": {
"id": "f90ee77d-b6cc-41fa-8d1f-bea649e6d93d",
"name": {
"fr-FR": "Modèle DOE"
},
"organizationCode": "STONAL",
"attachmentType": "BUILDING_GROUP",
"folders": [
{
"id": "folder-123",
"name": {
"fr-FR": "Documentation technique"
},
"parentId": null,
"documentClass": {
"identifier": "documentClassIdentifier",
"code": "DPE"
}
}
]
}
}
```
### Possible responses
- `200`: Successfully retrieved template details
- `404`: Template not found
- `403`: Forbidden (insufficient permissions)
## Notes
- **Language parameter**: When provided, the API returns localized names in the specified language. If not provided or invalid, defaults to the system default language.
- **Folder hierarchy**: The folders array contains all folders with their parent-child relationships defined by the `parentId` field.
- **Root folders**: Folders with `parentId: null` are root-level folders.
- **Document classes**: Some folders may have associated document classes that define the type of documents that can be stored.
## Error Handling
### Common error scenarios:
- **Missing or expired access token** → `401 Unauthorized`
- **Insufficient scope permissions** → `403 Forbidden`
- **Invalid organization code** → `403 Forbidden`
- **Template not found or no access** → `404 Not Found`
### Best practices:
- Always verify the response status code before processing the response
- Handle error responses gracefully in your implementation
- Cache template lists when appropriate to reduce API calls
- Use the language parameter to provide localized user experiences
:::tip Performance
The template details endpoint is optimized to avoid construction-then-flattening patterns for better performance when retrieving large folder structures.
:::
## Security
Both endpoints require:
- Valid authentication token
- The `stonal.document.template.read` scope permission
- Appropriate access rights to the organization and templates
The API automatically filters results based on the user's permissions, ensuring users only see templates they have access to.
---
# Disabling or deleting a user
URL: https://docs.stonal.io/fr/api/users/delete-a-user
# Disabling or deleting a user
This guide covers the two ways to end a user's access to an organization with the API:
- **Disabling** — reversibly suspends access. The user record is kept and can be re-enabled at any time.
- **Deleting** — permanently removes the user and their access.
:::info Prerequisites
- A valid set of API credentials
- A valid access token (see: [**Get a token**](/api/auth)) with the `stonal.user.write` scope
- An organization code
:::
## Choosing between disabling and deleting
| | Disabling | Deleting |
| --- | --- | --- |
| Reversible? | **Yes** — re-enable at any time | **No** — permanent |
| User record | Kept (surfaced as `disabled`) | Removed |
| Scope | The organization in the request path | The organization in the request path |
| Typical use | Temporary suspension (leave, offboarding in progress, lost device) | Permanent removal |
### Step 1: Retrieving the user UID
Both operations need the user's UID. Search for the user to get it.
See: [**Find an existing user**](/api/users/lookup-reference#find-an-existing-user)
```http
GET /v2/organizations/DEMO/users?pageNumber=1&pageSize=10&q=john.doe@example.com
```
If the user exists, you'll receive a 200 response with the user's details including their UID and current `disabled` state.
## Disabling a user {#disabling-a-user}
### How disabling works
Disabling is **scoped to a single organization**. The operation sets a flag on the user's access *in the organization in the request path*; the user immediately loses access to that organization's assets, applications, and reports. Their access in any other organization is untouched.
Because a Stonal identity is a **single sign-in account shared across every organization** the person belongs to, the underlying account is only disabled — preventing sign-in entirely — once the user has been disabled in **all** of their organizations. As soon as they are re-enabled in any one organization, sign-in is restored.
A few things to keep in mind:
- **Still discoverable** — disabled users keep appearing in [user listings](/api/users/lookup-reference#find-an-existing-user) with `disabled: true`, so you can find and re-enable them.
- **Eventual revocation** — permission checks are cached for up to ~1 minute, so access is fully revoked within ~60 seconds (the same behaviour as deletion).
- **No self-disable** — you cannot disable the account you are authenticated as (returns `409`).
- **v2 only** — the disable and enable endpoints are available on the v2 API.
### Disable the user
See: [**API Specification**](/api/reference/users/disable-user)
```http
POST /v2/organizations/DEMO/users/5dbbc53c-1a22-4f6f-883c-74c04fe905f5/disable
```
```python
import requests
BASE_URL = "https://api.stonal.io/users"
TOKEN = ""
resp = requests.post(
f"{BASE_URL}/v2/organizations/DEMO/users/5dbbc53c-1a22-4f6f-883c-74c04fe905f5/disable",
headers={"Authorization": f"Bearer {TOKEN}"},
)
print(resp.status_code)
```
```php
";
$ch = curl_init("$baseUrl/v2/organizations/DEMO/users/5dbbc53c-1a22-4f6f-883c-74c04fe905f5/disable");
curl_setopt_array($ch, [
CURLOPT_RETURNTRANSFER => true,
CURLOPT_CUSTOMREQUEST => "POST",
CURLOPT_HTTPHEADER => ["Authorization: Bearer $token"],
]);
$response = curl_exec($ch);
echo curl_getinfo($ch, CURLINFO_HTTP_CODE) . PHP_EOL;
curl_close($ch);
```
```javascript
const baseUrl = "https://api.stonal.io/users";
const token = "";
const res = await fetch(
`${baseUrl}/v2/organizations/DEMO/users/5dbbc53c-1a22-4f6f-883c-74c04fe905f5/disable`,
{
method: "POST",
headers: { Authorization: `Bearer ${token}` },
}
);
console.log(res.status);
```
```java
String baseUrl = "https://api.stonal.io/users";
String token = "";
HttpRequest request = HttpRequest.newBuilder()
.uri(URI.create(baseUrl + "/v2/organizations/DEMO/users/5dbbc53c-1a22-4f6f-883c-74c04fe905f5/disable"))
.header("Authorization", "Bearer " + token)
.POST(HttpRequest.BodyPublishers.noBody())
.build();
HttpResponse response = HttpClient.newHttpClient()
.send(request, HttpResponse.BodyHandlers.ofString());
System.out.println(response.statusCode());
```
```go
package main
import (
"fmt"
"net/http"
)
func main() {
baseURL := "https://api.stonal.io/users"
token := ""
req, _ := http.NewRequest("POST", baseURL+"/v2/organizations/DEMO/users/5dbbc53c-1a22-4f6f-883c-74c04fe905f5/disable", nil)
req.Header.Set("Authorization", "Bearer "+token)
resp, err := http.DefaultClient.Do(req)
if err != nil {
panic(err)
}
defer resp.Body.Close()
fmt.Println(resp.StatusCode)
}
```
```csharp
using System.Net.Http;
using System.Net.Http.Headers;
var baseUrl = "https://api.stonal.io/users";
var token = "";
using var client = new HttpClient();
client.DefaultRequestHeaders.Authorization = new AuthenticationHeaderValue("Bearer", token);
var response = await client.PostAsync($"{baseUrl}/v2/organizations/DEMO/users/5dbbc53c-1a22-4f6f-883c-74c04fe905f5/disable", null);
Console.WriteLine((int)response.StatusCode);
```
Path parameters:
- `organizationCode`: Your client code (e.g., "DEMO")
- `uid`: UID of the user to disable (e.g., "5dbbc53c-1a22-4f6f-883c-74c04fe905f5")
Possible responses:
- 204: User has been successfully disabled
- 404: User to disable does not exist
- 409: The user cannot be disabled (for example, you cannot disable your own account)
### Re-enable the user
To restore access, call the `enable` endpoint with the same UID. This clears the disabled flag in the organization and, if the user's sign-in account was disabled, restores it so they can authenticate again.
See: [**API Specification**](/api/reference/users/enable-user)
```http
POST /v2/organizations/DEMO/users/5dbbc53c-1a22-4f6f-883c-74c04fe905f5/enable
```
```python
import requests
BASE_URL = "https://api.stonal.io/users"
TOKEN = ""
resp = requests.post(
f"{BASE_URL}/v2/organizations/DEMO/users/5dbbc53c-1a22-4f6f-883c-74c04fe905f5/enable",
headers={"Authorization": f"Bearer {TOKEN}"},
)
print(resp.status_code)
```
```php
";
$ch = curl_init("$baseUrl/v2/organizations/DEMO/users/5dbbc53c-1a22-4f6f-883c-74c04fe905f5/enable");
curl_setopt_array($ch, [
CURLOPT_RETURNTRANSFER => true,
CURLOPT_CUSTOMREQUEST => "POST",
CURLOPT_HTTPHEADER => ["Authorization: Bearer $token"],
]);
$response = curl_exec($ch);
echo curl_getinfo($ch, CURLINFO_HTTP_CODE) . PHP_EOL;
curl_close($ch);
```
```javascript
const baseUrl = "https://api.stonal.io/users";
const token = "";
const res = await fetch(
`${baseUrl}/v2/organizations/DEMO/users/5dbbc53c-1a22-4f6f-883c-74c04fe905f5/enable`,
{
method: "POST",
headers: { Authorization: `Bearer ${token}` },
}
);
console.log(res.status);
```
```java
String baseUrl = "https://api.stonal.io/users";
String token = "";
HttpRequest request = HttpRequest.newBuilder()
.uri(URI.create(baseUrl + "/v2/organizations/DEMO/users/5dbbc53c-1a22-4f6f-883c-74c04fe905f5/enable"))
.header("Authorization", "Bearer " + token)
.POST(HttpRequest.BodyPublishers.noBody())
.build();
HttpResponse response = HttpClient.newHttpClient()
.send(request, HttpResponse.BodyHandlers.ofString());
System.out.println(response.statusCode());
```
```go
package main
import (
"fmt"
"net/http"
)
func main() {
baseURL := "https://api.stonal.io/users"
token := ""
req, _ := http.NewRequest("POST", baseURL+"/v2/organizations/DEMO/users/5dbbc53c-1a22-4f6f-883c-74c04fe905f5/enable", nil)
req.Header.Set("Authorization", "Bearer "+token)
resp, err := http.DefaultClient.Do(req)
if err != nil {
panic(err)
}
defer resp.Body.Close()
fmt.Println(resp.StatusCode)
}
```
```csharp
using System.Net.Http;
using System.Net.Http.Headers;
var baseUrl = "https://api.stonal.io/users";
var token = "";
using var client = new HttpClient();
client.DefaultRequestHeaders.Authorization = new AuthenticationHeaderValue("Bearer", token);
var response = await client.PostAsync($"{baseUrl}/v2/organizations/DEMO/users/5dbbc53c-1a22-4f6f-883c-74c04fe905f5/enable", null);
Console.WriteLine((int)response.StatusCode);
```
Path parameters:
- `organizationCode`: Your client code (e.g., "DEMO")
- `uid`: UID of the user to re-enable (e.g., "5dbbc53c-1a22-4f6f-883c-74c04fe905f5")
Possible responses:
- 204: User has been successfully enabled
- 404: User to enable does not exist
## Deleting a user
:::warning
Deletion is **permanent and cannot be undone**. To revoke access in a way you can reverse, [disable the user](#disabling-a-user) instead.
:::
See: [**API Specification**](/api/reference/users/delete-user)
```http
DELETE /v2/organizations/DEMO/users/019619df-4768-76b7-81e3-2c56d374df46
```
```python
import requests
BASE_URL = "https://api.stonal.io/users"
TOKEN = ""
resp = requests.delete(
f"{BASE_URL}/v2/organizations/DEMO/users/019619df-4768-76b7-81e3-2c56d374df46",
headers={"Authorization": f"Bearer {TOKEN}"},
)
print(resp.status_code)
```
```php
";
$ch = curl_init("$baseUrl/v2/organizations/DEMO/users/019619df-4768-76b7-81e3-2c56d374df46");
curl_setopt_array($ch, [
CURLOPT_RETURNTRANSFER => true,
CURLOPT_CUSTOMREQUEST => "DELETE",
CURLOPT_HTTPHEADER => ["Authorization: Bearer $token"],
]);
$response = curl_exec($ch);
echo curl_getinfo($ch, CURLINFO_HTTP_CODE) . PHP_EOL;
curl_close($ch);
```
```javascript
const baseUrl = "https://api.stonal.io/users";
const token = "";
const res = await fetch(
`${baseUrl}/v2/organizations/DEMO/users/019619df-4768-76b7-81e3-2c56d374df46`,
{
method: "DELETE",
headers: { Authorization: `Bearer ${token}` },
}
);
console.log(res.status);
```
```java
String baseUrl = "https://api.stonal.io/users";
String token = "";
HttpRequest request = HttpRequest.newBuilder()
.uri(URI.create(baseUrl + "/v2/organizations/DEMO/users/019619df-4768-76b7-81e3-2c56d374df46"))
.header("Authorization", "Bearer " + token)
.DELETE()
.build();
HttpResponse response = HttpClient.newHttpClient()
.send(request, HttpResponse.BodyHandlers.ofString());
System.out.println(response.statusCode());
```
```go
package main
import (
"fmt"
"net/http"
)
func main() {
baseURL := "https://api.stonal.io/users"
token := ""
req, _ := http.NewRequest("DELETE", baseURL+"/v2/organizations/DEMO/users/019619df-4768-76b7-81e3-2c56d374df46", nil)
req.Header.Set("Authorization", "Bearer "+token)
resp, err := http.DefaultClient.Do(req)
if err != nil {
panic(err)
}
defer resp.Body.Close()
fmt.Println(resp.StatusCode)
}
```
```csharp
using System.Net.Http;
using System.Net.Http.Headers;
var baseUrl = "https://api.stonal.io/users";
var token = "";
using var client = new HttpClient();
client.DefaultRequestHeaders.Authorization = new AuthenticationHeaderValue("Bearer", token);
var response = await client.DeleteAsync($"{baseUrl}/v2/organizations/DEMO/users/019619df-4768-76b7-81e3-2c56d374df46");
Console.WriteLine((int)response.StatusCode);
```
Path parameters:
- `organizationCode`: Your client code (e.g., "DEMO")
- `uid`: UID of the user to delete (e.g., "019619df-4768-76b7-81e3-2c56d374df46")
Possible responses:
- 204: User has been successfully deleted
- 404: User to delete does not exist
- 409: The user cannot be deleted due to a conflict (for example, a referential constraint)
### Notes
- All operations are organization-scoped and only affect access within the organization in the request path.
- The user UID must be obtained from a previous search or stored as an external id on your side.
- Disabling and re-enabling are idempotent — disabling an already-disabled user, or enabling an already-enabled user, succeeds and leaves the state unchanged.
- Deletion is permanent and cannot be undone; use disabling when you may need to restore access later.
### Error Handling
---
# Resynchronizing users
URL: https://docs.stonal.io/fr/api/users/resync-users
# Resynchronizing users
Resync compares your source of truth against Stonal and applies create/update/delete per user.
This guide explains how to resynchronize user data in the Stonal platform to ensure consistency between systems.
:::info Prerequisites
- A valid set of API credentials
- A valid access token (see: [**Get a token**](/api/auth))
- An organization code
:::
### Step 1: List existing users
First, retrieve the current list of users to determine which ones need resynchronization.
See: [**Find an existing user**](/api/users/lookup-reference#find-an-existing-user)
### Step 2: Take action for each user
#### Create - The user exists on your system but not in Stonal
See: [**Create or update a user**](/api/users/create-or-update-a-user)
#### Update - The user exists in Stonal and on your system
See: [**Create or update a user**](/api/users/create-or-update-a-user)
#### Delete - The user exists in Stonal but not on your system
See: [**Delete a user**](/api/users/delete-a-user)
---
# Create a Contract
URL: https://docs.stonal.io/fr/api/contracts/creation
## Create a Contract — `POST`
When creating a contract, you can provide:
- A list of asset stonal UIDs
- A list of stakeholder UIDs
- A list of equipment types (holdertype codes)
> This translates to: *"I am creating a contract for this equipment type,
> within these assets, with these contacts as stakeholders."*
```bash
curl --location 'https://api.stonal.io/datalake/v1/organizations/$organization/contracts' \
--header 'Authorization: Bearer $token' \
--header 'Content-Type: application/json' \
--data '{
"assets": ["uid1", "uid2"],
"stakeholders": ["uid1", "uid2"],
"equipments": ["EQUIPMENT|K|KG|KG08|KG0811"],
"effectiveDate": "2025-12-10",
"endDate": "2026-12-10"
}'
```
### Response
A successful creation returns a **HTTP 201** status.
---
# Create a Stakeholder
URL: https://docs.stonal.io/fr/api/stakeholders/creation
## Create a Stakeholder — `POST`
### Physical person (`type = PERSON`)
**Required fields:** `email` (unique constraint)
```bash
curl --location 'https://api.stonal.io/datalake/v1/organizations/$organization/stakeholders' \
--header 'Authorization: Bearer $token' \
--header 'Content-Type: application/json' \
--data-raw '{
"type": "person",
"firstName": "John",
"lastName": "Doe",
"address": "string",
"postalCode": "string",
"city": "string",
"externalCode": "string",
"contactsDetails": [
{
"email": "john.doe@example.com",
"phoneNumber": "0123456789",
"additionalInfos": "string"
}
],
"isActive": true,
"fax": "string",
"function": "string"
}'
```
### Legal entity (`type = COMPANY`)
**Required fields:** `siren` and `companyName` (unique constraint)
```bash
curl --location 'https://api.stonal.io/datalake/v1/organizations/$organization/stakeholders' \
--header 'Authorization: Bearer $token' \
--header 'Content-Type: application/json' \
--data-raw '{
"type": "company",
"companyName": "Acme Corporation",
"siren": 123456789,
"address": "string",
"postalCode": "string",
"city": "string",
"externalCode": "string",
"contactsDetails": [
{
"email": "john.doe@example.com",
"phoneNumber": "0123456789",
"additionalInfos": "string"
}
],
"isActive": true,
"fax": "string",
"function": "string"
}'
```
### Response
A successful creation returns a **HTTP 201** status with the `uid` of the created stakeholder.
---
# Delete a Stakeholder
URL: https://docs.stonal.io/fr/api/stakeholders/delete
## Delete a Stakeholder — `DELETE`
```bash
curl --location --request DELETE 'https://api.stonal.io/datalake/v1/organizations/$organization/stakeholders/f2f6dbe5-8bb6-46a9-9684-41ca61c8b9db' \
--header 'Authorization: Bearer $token'
```
---
# Managing assets
URL: https://docs.stonal.io/fr/api/assets
# Managing assets
## Goals
The core goals of these APIs are to make it simple to:
- Import, synchronize, and link assets from and to your IT systems
- Link assets to different third party systems
- Create links between assets
- Store data around assets from different sources
- Search for assets
They do not expose all the capabilities of the underlying asset management systems, but they are designed to be simple to use and to be extended.
## Core data model
### Assets and properties
The core data model is the following:
- **Asset**: A physical or logical description of a real-estate world object
- **Property**: A characteristic of an asset
- **Data**: Some property values around an asset
### Relation between assets
To get a better understanding of how the asset hierarchy works at stonal, you
should read [this page](hierarchy/index.md).
---
# Managing Contracts
URL: https://docs.stonal.io/fr/api/contracts
# Managing Contracts
This documentation will help you use the public Contracts API:
creation, retrieval, and update.
## Concept
A **contract** can be linked to:
- One or more **assets**
- One or more **equipments** (identified by holdertype codes)
- One or more **stakeholders**
Contracts can represent various use cases, such as rental leases or equipment
maintenance contracts within assets.
| Parameter | Format |
|-----------|--------|
| `assets` | `["uid1", "uid2", ...]` |
| `stakeholders` | `["uid1", "uid2", ...]` |
| `equipments` | `["holdertype_code1", "holdertype_code2", ...]` |
---
## Authentication
All requests require a Bearer token and an organization code:
```bash
organization=your_organization
token=your_token
```
---
# Managing Stakeholders
URL: https://docs.stonal.io/fr/api/stakeholders
# Managing Stakeholders
This documentation will help you use the public Stakeholders API:
creation, retrieval, update, and deletion.
## Concept
A **stakeholder** represents a contact linked to contracts in Stonal.
A stakeholder has several properties, the most important being the **type**:
| Type | Description |
|------|-------------|
| `PERSON` | A physical person (individual) |
| `COMPANY` | A legal entity (company) |
A stakeholder can be linked to multiple contracts.
---
## Authentication
All requests require a Bearer token and an organization code:
```bash
organization=your_organization
token=your_token
```
---
# Managing users
URL: https://docs.stonal.io/fr/api/users
# Managing users
The Users API lets you manage users and control their access to assets, applications, and reports within a Stonal organization. It is aimed at developers who need to provision users programmatically — creating accounts, assigning permissions, and keeping user records in sync with an external directory.
## How access works
Access is governed by two complementary mechanisms: **user groups**, which bundle a set of permissions and can be assigned to many users at once, and **permissions**, which attach profiles, application scopes, and asset rights directly to individual users. Both are described in detail on the [Understanding access](/api/users/understanding-access) page.
## The typical journey
1. [Authenticating users](/api/users/authenticating-users) — obtain and manage access tokens for API calls on behalf of a user.
2. [Understanding access](/api/users/understanding-access) — learn how groups, profiles, application groups, and asset permissions interact.
3. [Look up groups & permissions](/api/users/lookup-reference) — query the available groups and permission values in your organization.
4. [Create or update a user](/api/users/create-or-update-a-user) — provision a new user or update an existing one.
5. [Disable or delete a user](/api/users/delete-a-user) — temporarily suspend a user's access (reversible) or permanently remove them.
6. [Resynchronize users](/api/users/resync-users) — keep user records in sync after bulk changes.
## Prerequisites
:::info
Before using the Users API you need:
- A valid set of API credentials (client ID and client secret).
- A valid access token — see [Get a token](/api/auth).
- Your organization code.
:::
```mdx-code-block
```
---
# Managing users
URL: https://docs.stonal.io/fr/api/users/legacy
# Managing users
This document explains the core concepts of user management in the Stonal platform. Understanding these concepts is crucial for effectively managing user access and permissions.
## Concepts
### Companies
Companies in Stonal represent organizational units that users belong to and play a role in asset access control.
A given company grants the user access to every asset it owns.
:::info
They are assigned to users via the `company` field.
:::
### Profiles
Profiles represent a functional scope within the system. They are primarily used for informational purposes and provide a high-level categorization of users.
Some applications will use profiles to control access rights, like Keep and Model for example.
:::info
They are assigned to users via the `authorization.profile` field.
:::
### Authorization Models (Application Groups)
Authorization models are the primary mechanism for defining the set of applications that a user can access.
:::info
They are assigned to users via the `authorization.modelId` field.
:::
:::note Regarding document storage
The document storage application access is granted via the `PLATFORM` application.
If a given application group contains the `PLATFORM` application and document storage is enabled on your organization, users assigned to this application group will be able to access the document storage application.
:::
### Permissions
Permissions provide fine-grained control over what specific resources and actions a user can access within the system.
List of currently available permission types:
- `ASSET`
List of currently available permission `ASSET` subtypes:
- `PORTFOLIO`
- `FACILITY`
- `BUILDING_GROUP`
- `BUILDING`
:::info
They are assigned to users via the `permissionUids` field.
:::
## Authorization schema
```mermaid
graph TD;
User-->Profile;
Profile-->keepModel[Keep/Model rights]
User-->Company;
Company-->asset[Assets access];
User-->AuthorizationModel;
AuthorizationModel-->app[Application access];
User-->Permissions;
Permissions-->asset[Asset access];
```
## Guides
```mdx-code-block
```
---
# Receiving live updates
URL: https://docs.stonal.io/fr/api/webhooks
# Receiving live updates
## How webhooks work
- Webhooks are a way to notify you when certain events happen in the Stonal platform.
- It works by calling an HTTP endpoint of your choice on your end when an event occurs.
- They are currently only available for events related to **documents**.
- They cover all changes to documents, including creation, update and deletion, and are
triggered for manual changes as well as automated ones (e.g. OCR, AI classification, etc).
## How to use webhooks
1. You register a webhook endpoint
2. When a document changes in your organization, Stonal sends an HTTP `POST` request with a JSON payload
to your endpoint
3. Your endpoint processes the notification and responds with a `200 OK` status code
## Registering a webhook
Webhooks are registered per organization by contacting the Stonal support team.
:::info We will do better
We will allow to register webhooks directly from the platform in the future.
:::
## Events
The only events currently supported are around the documents lifecycle: creation, update and deletion of documents.
### Document Created / Updated
This event is triggered when a document is created or updated. The two
operations have exactly the same `document` payload.
#### Payload
```json
{
"organizationCode": "SAMPLE_ORG",
"type": "document_change",
"operation": "create",
"document": {
"id": "efb614e6-f1b9-4829-acc4-2c8e26ab909a",
"name": "test.pdf",
"type": "application/pdf",
"metadata": {
"KEY_1": "VALUE_1",
"KEY_2": "VALUE_2"
}
}
}
```
#### Field Description
| Field | Description |
|-------|-------------|
| `organizationCode` | The unique identifier for your organization in Stonal |
| `type` | The type of event, in this case `document_change` |
| `operation` | The operation performed, in this case `create` or `update` |
| `document.id` | The unique identifier of the created document |
| `document.name` | The filename of the document |
| `document.type` | The MIME type of the document |
| `document.metadata` | Custom metadata key-value pairs associated with the document |
### Document Deleted
This event is triggered when a document is deleted.
#### Payload
```json
{
"organizationCode": "SAMPLE_ORG",
"type": "document_change",
"operation": "delete",
"document": {
"id": "efb614e6-f1b9-4829-acc4-2c8e26ab909a"
}
}
```
## Server implementation
Your endpoint should respond with a `200 OK` status code to the webhook request. If it does not,
the webhook will be retried up to 3 times.
## Notes
### Number of queued payloads
There is no limit on the number of queued payloads that can be transmitted to you. They are
currently sent sequentially per organization, but this might change in the future.
---
# Search Contracts
URL: https://docs.stonal.io/fr/api/contracts/search
## Search Contracts — `GET`
Contracts are searched using **asset UIDs** and/or **stakeholder UIDs** and/or **contract code**.
> **Important:** You must provide the **exhaustive list** of assets and
> stakeholders to retrieve the correct contract.
```bash
curl --location 'https://api.stonal.io/datalake/v1/organizations/$organization/contracts?assetUids=eef91258-3c70-49c8-8a67-586e5cb7eeee%2Caaf91258-3c70-49c8-8a67-586e5cb7eeee&stakeholderUids=eef91258-3c70-49c8-8a67-586e5cb7ee02&contractCode=test/2026' \
--header 'Authorization: Bearer $token'
```
Returns a list of contracts matching the provided criteria.
---
# Search Stakeholders
URL: https://docs.stonal.io/fr/api/stakeholders/search
## Search Stakeholders — `GET`
Two search modes are available:
### Full-text search
Uses the `q` parameter. **Cannot be combined with other parameters** only mustHave, include, size, direction and sort can be used.
```bash
curl --location 'https://api.stonal.io/datalake/v1/organizations/$organization/stakeholders?size=10&q=123231124&direction=asc&sort=name&include=CONTRACTS&mustHave=SIREN' \
--header 'Authorization: Bearer $token'
```
### Targeted search
Uses specific parameters. **Can be combined.**
```bash
curl --location 'https://api.stonal.io/datalake/v1/organizations/$organization/stakeholders?name=john' \
--header 'Authorization: Bearer $token'
```
Returns a list of stakeholders matching the search criteria.
---
# Server implementation
URL: https://docs.stonal.io/fr/api/webhooks/server
# Server implementation
These are sample server implementations of webhook endpoints in different programming languages.
:::info
We will gladly provide you with sample code in other languages/frameworks if you need it.
:::
## Node.js Example
```javascript
const express = require('express');
const app = express();
app.use(express.json());
app.post('/webhook', (req, res) => {
const event = req.body;
console.log('Received webhook event:', JSON.stringify(event, null, 2));
// Validate the event
if (!event.organizationCode || !event.type || !event.operation || !event.doc) {
return res.status(400).send('Invalid event payload');
}
// Process based on operation type
switch(event.operation) {
case 'create':
handleDocumentCreated(event.doc);
break;
case 'update':
handleDocumentUpdated(event.doc);
break;
case 'delete':
handleDocumentDeleted(event.doc);
break;
default:
console.log('Unknown operation:', event.operation);
}
// Return a 200 OK to acknowledge receipt
res.status(200).send('Event received');
});
function handleDocumentCreated(doc) {
console.log(`Document created: ${doc.id} - ${doc.name}`);
// Your business logic here
}
function handleDocumentUpdated(doc) {
console.log(`Document updated: ${doc.id} - ${doc.name}`);
// Your business logic here
}
function handleDocumentDeleted(doc) {
console.log(`Document deleted: ${doc.id} - ${doc.name}`);
// Your business logic here
}
const PORT = process.env.PORT || 3000;
app.listen(PORT, () => {
console.log(`Webhook server listening on port ${PORT}`);
});
```
## Python Example
```python
from flask import Flask, request, jsonify
app = Flask(__name__)
@app.route('/webhook', methods=['POST'])
def webhook():
event = request.json
print(f"Received webhook event: {event}")
# Validate the event
if not all(k in event for k in ['organizationCode', 'type', 'operation', 'doc']):
return jsonify({'error': 'Invalid event payload'}), 400
# Process based on operation type
if event['operation'] == 'create':
handle_document_created(event['doc'])
elif event['operation'] == 'update':
handle_document_updated(event['doc'])
elif event['operation'] == 'delete':
handle_document_deleted(event['doc'])
else:
print(f"Unknown operation: {event['operation']}")
# Return a 200 OK to acknowledge receipt
return jsonify({'status': 'success'}), 200
def handle_document_created(doc):
print(f"Document created: {doc['id']} - {doc['name']}")
# Your business logic here
def handle_document_updated(doc):
print(f"Document updated: {doc['id']} - {doc['name']}")
# Your business logic here
def handle_document_deleted(doc):
print(f"Document deleted: {doc['id']} - {doc['name']}")
# Your business logic here
if __name__ == '__main__':
app.run(host='0.0.0.0', port=3000)
```
## Best Practices
1. **Always respond quickly**: Webhooks expect a fast response (within a few seconds). For long-running processes, acknowledge the webhook immediately and process the event asynchronously.
2. **Implement retry logic**: Stonal may retry failed webhook deliveries. Implement idempotency in your handlers to avoid duplicate processing.
3. **Secure your endpoint**: Consider using HTTPS.
4. **Set up monitoring**: Monitor your webhook endpoint for availability and response times.
5. **Handle errors gracefully**: Log errors for debugging, but ensure your webhook endpoint still returns a `200 OK` response when you've successfully received the event, even if your processing has errors.
---
# Testing webhooks
URL: https://docs.stonal.io/fr/api/webhooks/sample
# Testing webhooks
## Sending a standalone document
The Stonal plateform is centered arround assets. For the smartdoc product, we also require a documentation.
We recently started to offer a "disconnected" mode where you can skip these requirements to simply send documents,
retrieve some core information around them and do the linking to assets and documentations later.
This is how you can do it:
1. You declare a `STONAL_TOKEN` environment variable fetched from the [Personal Access Tokens management page](/api/auth/pat#using-your-personal-access-token).
```shell title="Declaring a token"
export STONAL_TOKEN=""
```
2. You create a manifest file declare the file you want to send as "disconnected":
```shell title="Creating a manifest"
echo '{"disconnected": true}' > manifest.json
```
3. You send the file to the `/upload` endpoint:
```shell title="Sending the file"
curl https://api.stonal-dev.io/document-storage/public/organizations/DEMO/files/upload \
-H "Authorization: Bearer $STONAL_PAT" \
-F 'manifest=@manifest.json;type=application/json' \
-F 'file=@sample.pdf'
```
4. You get a response similar to this:
```json title="Server response"
{"documentId":"efb614e6-f1b9-4829-acc4-2c8e26ab909a","duplicateDocumentIds":["434f3154-3c55-4c6f-a759-6de762251ab0"]}
```
If you have some values within the `duplicateDocumentIds` array, it means that another document with the same content
already exists within the organization. This is not of any concern, you can safely ignore this.
---
# Update a Contract (partial)
URL: https://docs.stonal.io/fr/api/contracts/update
## Partial Update — `PATCH`
Partially updates a contract.
> **Important:** This API works with lists. The update replaces the entire
> field value:
> - To **add** an item: send the current list **plus** the new item
> - To **remove** an item: send the current list **minus** the targeted item
>
> Pay special attention to the fields: `assetUids`, `stakeholderUids` and `equipments`.
```bash
curl --location --globoff --request PATCH 'https://api.stonal.io/datalake/v1/organizations/$organization/contracts' \
--header 'Authorization: Bearer $token' \
--header 'Content-Type: application/json' \
--data '{
"contractCode": "TEST/2026",
"equipments": ["EQUIPMENT|K|KG|KG08|KG0811"]
}'
```
---
# Update a Stakeholder (full resource)
URL: https://docs.stonal.io/fr/api/stakeholders/updatePut
## Update a Stakeholder — `PUT`
Replaces the entire stakeholder resource.
```bash
curl --location --request PUT 'https://api.stonal.io/datalake/v1/organizations/$organization/stakeholders/123e4567-e89b-12d3-a456-426614174000' \
--header 'Authorization: Bearer $token' \
--header 'Content-Type: application/json' \
--data-raw '{
"uid": "123e4567-e89b-12d3-a456-426614174000",
"type": "person",
"firstName": "John",
"lastName": "Doe",
"address": "string",
"postalCode": "string",
"city": "string",
"externalCode": "string",
"contactsDetails": [
{
"email": "john.doe@example.com",
"phoneNumber": "0123456789",
"additionalInfos": "string"
}
],
"isActive": true,
"fax": "string",
"function": "string"
}'
```
---
# Update a Stakeholder (partial)
URL: https://docs.stonal.io/fr/api/stakeholders/updatePatch
## Partial Update — `PATCH`
Partially updates a stakeholder.
> **Important:** When updating a list (e.g. `contactsDetails`), you must send
> the **full updated list** including existing items.
> This is a replace operation on the field, not an append.
In the example below, 3 existing contacts are preserved and 1 new contact is added:
```bash
curl --location --request PATCH 'https://api.stonal.io/datalake/v1/organizations/$organization/stakeholders/f2f6dbe5-8bb6-46a9-9684-41ca61c8b9db' \
--header 'Authorization: Bearer $token' \
--header 'Content-Type: application/json' \
--data-raw '{
"contactsDetails": [
{
"email": "laurent@stonal.com",
"creationDate": "2025-11-26"
},
{
"email": "lolo@stonal.com",
"creationDate": "2025-11-26"
},
{
"email": "lo@stonal.com",
"creationDate": "2025-11-27"
},
{
"email": "zae@stonal.com"
}
]
}'
```
---
# Document Storage API - Public Endpoints
URL: https://docs.stonal.io/fr/api/reference/documents/document-storage-api-public-endpoints
Public API endpoints for document storage service
---
# Delete a document
URL: https://docs.stonal.io/fr/api/reference/documents/delete-document
Deletes a document by its identifier. This endpoint is available for public use.
---
# Download a file
URL: https://docs.stonal.io/fr/api/reference/documents/download-file
Downloads a file by document identifier for a specific organization. The file will be returned as a binary stream.
---
# Get a document by identifier
URL: https://docs.stonal.io/fr/api/reference/documents/get-document
Returns a document's metadata by identifier. The response always includes `identity` and `file`; every other section (`classification`, `tags`, `metadata`, `linkedAssets`, `stakeholders`, `lifecycle`, `references`) is included only when named in the `include` parameter. Pass `include=all` to get every section at once.
---
# Get documentations for an asset
URL: https://docs.stonal.io/fr/api/reference/documents/get-documentations-for-asset
Retrieves all documentation entries associated with a specific asset identified by either assetUid or externalId
---
# Get documentation template tree
URL: https://docs.stonal.io/fr/api/reference/documents/get-template
Returns the complete folder tree for a documentation template.
---
# List documentation templates
URL: https://docs.stonal.io/fr/api/reference/documents/get-templates
Returns the documentation templates available for an organization. A language parameter lets clients select the preferred locale for the name field.
---
# Rename a document
URL: https://docs.stonal.io/fr/api/reference/documents/rename-document
Changes the name of a document. Requires write authority on the asset. This endpoint is available for public use.
---
# Search for documents
URL: https://docs.stonal.io/fr/api/reference/documents/search
Searches for documents based on provided filters with pagination and sorting options. This endpoint is available for public use.
---
# showFileContentDefault
URL: https://docs.stonal.io/fr/api/reference/documents/show-file-content-default
showFileContentDefault
---
# Show file content
URL: https://docs.stonal.io/fr/api/reference/documents/show-file-content
Show a file by its identifier. The file is identified by the document identifier.
---
# Add or remove documentation tags on documents
URL: https://docs.stonal.io/fr/api/reference/documents/update-document-documentation-tags
Updates documentation tags on documents. Each item carries its asset scope in the request body, missing tags are created before assignment and the whole request is processed in one transaction.
---
# Upload a file
URL: https://docs.stonal.io/fr/api/reference/documents/upload-file
Uploads a file with a JSON manifest. The manifest provides context for the upload, such as asset, documentation, linked assets, tags, properties, and destination folder.
---
# Users Service API
URL: https://docs.stonal.io/fr/api/reference/users/users-service-api
Public API endpoints for the users service
---
# Create a group
URL: https://docs.stonal.io/fr/api/reference/users/create-group
> [!important]
---
# Create or update permission
URL: https://docs.stonal.io/fr/api/reference/users/create-permission
> [!important]
---
# Create user
URL: https://docs.stonal.io/fr/api/reference/users/create-user
> [!important]
---
# Delete a group
URL: https://docs.stonal.io/fr/api/reference/users/delete-group
> [!important]
---
# Delete a permission
URL: https://docs.stonal.io/fr/api/reference/users/delete-permission
> [!important]
---
# Delete user
URL: https://docs.stonal.io/fr/api/reference/users/delete-user
> [!important]
---
# Disable user
URL: https://docs.stonal.io/fr/api/reference/users/disable-user
> [!important]
---
# Enable user
URL: https://docs.stonal.io/fr/api/reference/users/enable-user
> [!important]
---
# Get groups
URL: https://docs.stonal.io/fr/api/reference/users/get-groups
> [!important]
---
# Get permissions
URL: https://docs.stonal.io/fr/api/reference/users/get-permissions
> [!important]
---
# Get user by UID
URL: https://docs.stonal.io/fr/api/reference/users/get-user-by-uid
> [!important]
---
# Get paginated users
URL: https://docs.stonal.io/fr/api/reference/users/get-users-paginated
> [!important]
---
# Update a group
URL: https://docs.stonal.io/fr/api/reference/users/update-group
> [!important]
---
# Update user
URL: https://docs.stonal.io/fr/api/reference/users/update-user
> [!important]
---
# Datalake API - Public Endpoints
URL: https://docs.stonal.io/fr/api/reference/assets/datalake-api-public-endpoints
Public API endpoints for the datalake service
---
# Create contracts
URL: https://docs.stonal.io/fr/api/reference/assets/create-contract
Create new contracts for an organization with his stakeholders and assets linked. Requires `stonal.asset.write` permission
---
# Create a selection session
URL: https://docs.stonal.io/fr/api/reference/assets/create-selection-session
Creates a new selection session with selection data and context for the specified organization. Requires `stonal.asset.read` permission
---
# Create stakeholder
URL: https://docs.stonal.io/fr/api/reference/assets/create-stakeholder
Creates a new stakeholder (person or company) for an organization. Requires `stonal.contact.write` permission
---
# Delete a contract
URL: https://docs.stonal.io/fr/api/reference/assets/delete-contract
Delete a contract for an organization. Requires `stonal.asset.delete` permission. If the contract code contains URL-unsafe characters (e.g. `/` in `2021/Z5059`), it MUST be **double percent-encoded** in the path — `2021/Z5059` is sent as `2021%252FZ5059`.
---
# Delete a selection session
URL: https://docs.stonal.io/fr/api/reference/assets/delete-selection-session
Delete a selection session and all its data. Requires `stonal.asset.read` permission
---
# Delete stakeholder
URL: https://docs.stonal.io/fr/api/reference/assets/delete-stakeholder
Deletes a stakeholder by its unique identifier. Requires `stonal.contact.delete` permission
---
# Get all asset types
URL: https://docs.stonal.io/fr/api/reference/assets/get-all-asset-types
Get all asset types by organization
---
# Get all asset properties
URL: https://docs.stonal.io/fr/api/reference/assets/get-all-properties
Get all asset properties by organization
---
# List amendments
URL: https://docs.stonal.io/fr/api/reference/assets/get-amendments
Return amendments for an organization, paginated by ascending internal id via opaque cursor. Requires `stonal.asset.read` permission.
---
# Get billing events
URL: https://docs.stonal.io/fr/api/reference/assets/get-billing-events
List billing events for an organization, paginated with an opaque cursor ordered by ascending id. Without `requestedDate` nor `validFrom`/`validUntil`, only the events valid today are returned. Requires `stonal.asset.read` permission.
---
# Get certificates
URL: https://docs.stonal.io/fr/api/reference/assets/get-certificates
List certificates for an organization, paginated with an opaque cursor ordered by ascending id. Optionally filtered by asset stonal identifiers. Requires `stonal.asset.read` permission.
---
# List a company's contact cards
URL: https://docs.stonal.io/fr/api/reference/assets/get-contacts
The persons attached to the company (parentUid), one card each with its primary phone number and email, primary contact first, then in the order of the last PUT, then the persons it did not save by lastName and firstName (case- and accent-insensitive), then by uid. Requires `stonal.contacts.read` permission
---
# Get contracts
URL: https://docs.stonal.io/fr/api/reference/assets/get-contracts
List contracts for an organization with cursor pagination, optional filters, and opt-in property data. Requires `stonal.asset.read` permission
---
# Get deposits
URL: https://docs.stonal.io/fr/api/reference/assets/get-deposits
List deposits for an organization, paginated with an opaque cursor ordered by ascending id. Requires `stonal.asset.read` permission.
---
# Get selected asset details for a selection session
URL: https://docs.stonal.io/fr/api/reference/assets/get-selection-session-assets
Returns the name and level of each selected asset in the session.
---
# Get the plan of the assets base view in selection session
URL: https://docs.stonal.io/fr/api/reference/assets/get-selection-session-plan
Get the plan of the assets base view in selection session.
---
# Get a structure in function of the selection session
URL: https://docs.stonal.io/fr/api/reference/assets/get-selection-session-structure
Get a structure of the unique selection session.
---
# Get a selection session
URL: https://docs.stonal.io/fr/api/reference/assets/get-selection-session
Get a unique selection session with its selection data and context.
---
# Get stakeholder by ID
URL: https://docs.stonal.io/fr/api/reference/assets/get-stakeholder-by-uid
Retrieves a single stakeholder by its unique identifier. Requires `stonal.contacts.read` permission
---
# Update a contract
URL: https://docs.stonal.io/fr/api/reference/assets/patch-contract
Update a contracts for an organization with his stakeholders and assets linked. Requires `stonal.asset.write` permission
---
# Replace a company's contact cards
URL: https://docs.stonal.io/fr/api/reference/assets/replace-contacts
Makes the persons attached to the company match the list, in one transaction: a card without uid creates a person, a card with uid updates it (a changed name becomes its lastName and clears its firstName; the card's phone number and email replace the ones it showed and become primary, the person's other ones are kept), and an attached person absent from the list is deleted, like DELETE /stakeholders/{uid}, unless it is linked to a contract (409, nothing changed). Each card needs a name and a phone number or an email; at most one card is the primary contact (an omitted isPrimaryContact means false), and no two cards nor another person share an email. Clearing or replacing a card's phone number or email also removes every copy of it from the person's legacy contactsDetails, keeping the entries' other values. Any invalid card rejects the whole list, with every error in one response (errors on `contacts[].`). The list order is stored and returned by the next reads. Returns the saved list. Requires `stonal.contact.write` permission, and also `stonal.contact.delete` when the list leaves out an attached person (403 otherwise, nothing changed)
---
# Save stakeholder
URL: https://docs.stonal.io/fr/api/reference/assets/save-stakeholder
Creates or updates a stakeholder with a specific UID. Requires `stonal.contact.write` permission
---
# Search assets
URL: https://docs.stonal.io/fr/api/reference/assets/search-assets
Search assets by organization. Requires `stonal.asset.read` permission
---
# Search stakeholders
URL: https://docs.stonal.io/fr/api/reference/assets/search-stakeholder
Search for stakeholders with various filtering options and pagination. Requires `stonal.contacts.read` permission
---
# Update stakeholder
URL: https://docs.stonal.io/fr/api/reference/assets/update-stakeholder
Partially updates an existing stakeholder. Requires `stonal.contact.write` permission
---
# Ingest assets
URL: https://docs.stonal.io/fr/api/reference/assets/upsert-assets
Create and update assets by organization. Requires `stonal.asset.write` permission
---
# API Consumption
URL: https://docs.stonal.io/fr/api/reference/legacy/api-consumption
Welcome to Stonal® API. We provide real estate data for housing and tertiary business. The document below covers how to use our API. Let us know if you any questions.
---
# 1. Get token for Swagger
URL: https://docs.stonal.io/fr/api/reference/legacy/1-get-token-for-swagger
1. Get token for Swagger
---
# 2. API Version 1
URL: https://docs.stonal.io/fr/api/reference/legacy/2-api-version-1
2. API Version 1
---
# 6. API Version 5
URL: https://docs.stonal.io/fr/api/reference/legacy/6-api-version-5
6. API Version 5
---
# Create a new user
URL: https://docs.stonal.io/fr/api/reference/legacy/create
Create a new user.
---
# This is a soft delete of a document, the document will be marked as deleted but not removed from the storage.
URL: https://docs.stonal.io/fr/api/reference/legacy/delete-document
This is a soft delete of a document, the document will be marked as deleted but not removed from the storage.
---
# Delete an existing user
URL: https://docs.stonal.io/fr/api/reference/legacy/delete
Delete an existing user.
---
# Get a file from a document
URL: https://docs.stonal.io/fr/api/reference/legacy/download-file
Get a file from a document
---
# List all authorizations available for users
URL: https://docs.stonal.io/fr/api/reference/legacy/find-all-authorizations-by
List all authorizations available for users
---
# List all companies available for users
URL: https://docs.stonal.io/fr/api/reference/legacy/find-all-companies-by
List all companies available for users
---
# List all groups available for users
URL: https://docs.stonal.io/fr/api/reference/legacy/find-all-groups-by
List all groups available for users
---
# List all permissions available for users
URL: https://docs.stonal.io/fr/api/reference/legacy/find-all-permissions-by
List all permissions available for users
---
# List all profiles available for users
URL: https://docs.stonal.io/fr/api/reference/legacy/find-all-profiles-by
List all profiles available for users
---
# Get a user by its id
URL: https://docs.stonal.io/fr/api/reference/legacy/find-by-organization-code-and-id
Get a user by its id
---
# Search for documents
URL: https://docs.stonal.io/fr/api/reference/legacy/find-by
Search for documents
---
# Get an access token to use for Swagger UI
URL: https://docs.stonal.io/fr/api/reference/legacy/get-access-token
Get an access token to use for Swagger UI
---
# Search users
URL: https://docs.stonal.io/fr/api/reference/legacy/search-user-on-organization
Search users by various filters.
---
# Update an existing user
URL: https://docs.stonal.io/fr/api/reference/legacy/update
Update an existing user.
---
# Upload documents
URL: https://docs.stonal.io/fr/api/reference/legacy/upload-file
Upload documents
---
# Validate documents classification
URL: https://docs.stonal.io/fr/api/reference/legacy/validate-documents-classification
Validate documents classification
---
# Change Events Webhooks format
URL: https://docs.stonal.io/fr/api/reference/webhooks/change-events-webhooks-format
Webhooks format for change events in the stonal stack
---
# Receive document change events
URL: https://docs.stonal.io/fr/api/reference/webhooks/receive-document-change-event
Endpoint for receiving document change events from the stonal platform